|
|
 |
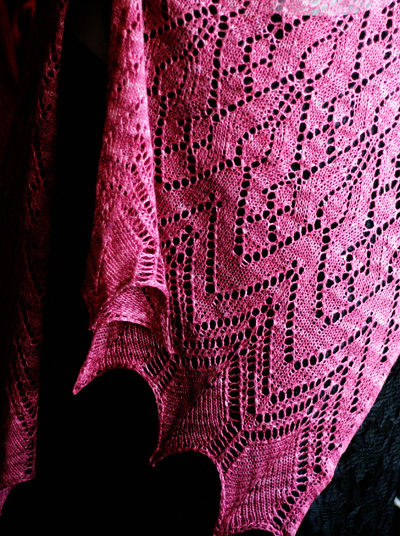
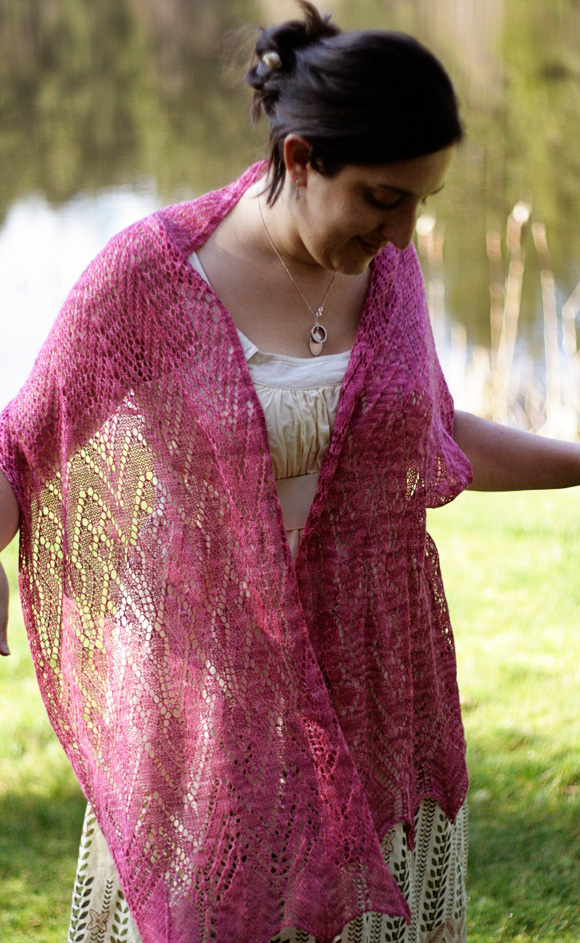
Anthemion (An-THEE-me-un) is a term for a collection of palmette motifs common to Egyptian, Assyrian, Phoenician, Cypriote and Greek Art, universal in its beauty. Whether this design element evolved from the shape of the lotus blossom, palm fronds, acanthus leaves, or even the palm of the human hand is a matter for speculation. The beautiful stitch motif that borders this silken wrap echoes the form that anthemia take in trimming vases, stone carvings, and columns throughout history. The repeating chevron pattern in the center of the wrap flows naturally from the peaks and valleys created by the anthemion motif. This wrap is worked from one short edge to the other in one piece. The border patterns are designed to be similar enough to match, but not exactly the same. This wrap can be easily adjusted for length and width to accommodate a variety of yarn choices (see notes). |
|
|
|
SIZE |
 
|
|
FINISHED MEASUREMENTS |
|
MATERIALS Notions |
|
GAUGE |
|
PATTERN NOTES |
|
 K3tog: Knit next 3 sts together. Sssk: Slip next 3 sts knitwise, one at a time, to right needle. Insert left needle into fronts of these 3 sts and knit them together. sk2p: Sl 1, k2tog, pass slipped st over. 2 sts decreased. S2KP: Slip next 2 sts together, knitwise, as if to work a k2tog. Knit next st, then pass both slipped sts together over st just knit. This forms a centered double decrease. Stitch Markers: Blue lines in charts indicate stitch marker placement, dividing garter st edging from main body of shawl. If desired, stitch markers may also be placed between repeats of lace pattern to help keep track of pattern. If using markers in this way, place them at edges of outlined pattern repeat, corresponding to vertical red lines within chart. Important note: There are places within the charts where a double decrease (sk2p or S2KP) is worked directly after a red line. When this happens, work as follows: Sl st before marker to right needle, remove marker, return st to left needle, place marker on right needle, then work decrease.
Instructions for the Long-Tail Cast On can be found here. |
|
|
DIRECTIONS 
P 3 rows. BO all sts with WS facing as follows: P2, [insert left needle, from left to right, into backs of 2 sts on right needle; p2tog from this position, p1] until last 2 sts remain on right needle; p2tog. |

|
|
FINISHING |
| ABOUT THE DESIGNER |
|
Miriam has had designs published in Interweave Press magazines and books, the on-line magazines Knitty, and Twist Collective, the book Sensual Knits, as well as self-publishing patterns via her website. Miriam is currently writing her first book. She blogs here. When not knitting, Miriam can be found frequenting various Salt Lake City coffee shops and bookstores while wearing her tiara. |
|
Pattern & images © 2010 Miriam L. Felton. Contact Miriam |


 Changing Length and Width:
