Nomia, a free knitting pattern from Knitty.com. Free knitting pattern for a lace and cable medallion sock with a non-traditional design.
INTRODUCTION
Nomia
![]()
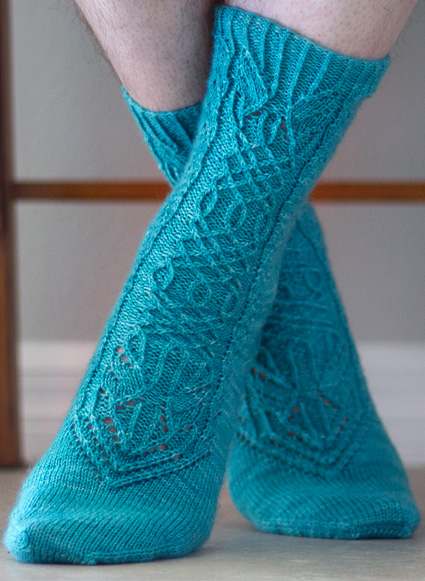
Nomia was a mountain nymph, one of those creatures that helped ancient Greeks avoid getting lost. She fell in love with Daphnis, a shepherd. Daphnis was a bit more than just your average shepherd. His father was Hermes, so he had some divine blood in his veins. Nomia was dedicated to Daphnis and would do anything for him. Daphnis had a bit too much wine and was unfaithful. Rather than appeal to the gods or wail about, Nomia decided to take matters into her own hands. She blinded Daphnis and turned him into a rock.
Moral of the story: Don’t mess with Nomia.
These socks won’t blind you or turn you into a rock, but they do make me think of nymphs. Theres something about the combination of a bit of lace with those 2 stitch cables that brings to mind woodland fairies, sprites, and nymphs.
 photos: Rich Ensor
SIZE
Adult S[M, L]
FINISHED MEASUREMENTS
Foot Circumference: 8[8.75, 9.5] inches/20[22, 24]cm
Foot Length: adjustable to fit
Leg Length: 8.5 inches/21.5 cm
Choose a size with approx. 1 inch/2.5cm negative ease in the foot circumference.
MATERIALS
Yarn
![]() SweetGeorgia Tough Love Sock [80% Superwash Merino Wool, 20% Nylon; 425 yds/388 m per 4 oz/115 g skein]; color: Glacier; 1 skein
SweetGeorgia Tough Love Sock [80% Superwash Merino Wool, 20% Nylon; 425 yds/388 m per 4 oz/115 g skein]; color: Glacier; 1 skein
Recommended needle size
[always use a needle size that gives you the gauge listed below - every knitter's gauge is unique]
![]() US #1.5/2.5mm needles for working in the round
US #1.5/2.5mm needles for working in the round
Notions
![]() cable needle
cable needle
![]() yarn needle
yarn needle
GAUGE AFTER BLOCKING
28 sts/48 rounds = 4 inches/10cm in stockinette stitch
30 sts/48 rounds = 4 inches/10cm in pattern stitch
PATTERN NOTES
[Knitty's list of standard abbreviations and techniques can be found here.]
Working the Cables with a cable needle
T2L: Sl next st to cn and hold in front of work; k1 tbl, then k1 tbl from cn.
T2R: Sl next st to cn and hold in back of work; k1 tbl, then k1 tbl from cn.
TP2L: Sl next st to cn and hold in front of work; p1, then k1 tbl from cn.
TP2R: Sl next st to cn and hold in back of work; k1 tbl, then p1 from cn.
Working the Cables without a cable needle:
T2L: With the right-hand needle in back of the work, skip the first stitch on the left-hand needle and insert the tip of the needle into the back leg of the second stitch. Drop both of the stitches off of the left-hand needle. The first stitch will fall free. Insert the left needle into the dropped knit stitch, then slide the other stitch back onto the left needle. Knit the first stitch through the back loop, then knit the second stitch through the back loop.
TP2L: With the right-hand needle in back of the work, skip the first stitch on the left-hand needle and insert the tip of the needle into the back leg of the second stitch. Drop both of the stitches off of the left-hand needle. The first stitch will fall free. Insert the left needle into the dropped knit stitch, then slide the other stitch back onto the left needle. Purl the first stitch, then knit the second stitch through the back loop.
T2R: With the right-hand needle in front of the work, skip the first stitch on the left-hand needle and insert the tip of the needle into the second stitch purlwise. Drop both of the stitches off of the left needle. The first stitch will fall free. Insert the left needle into the dropped stitch, then slide the other stitch back onto the left needle. Knit the first stitch through the back loop, then knit the second stitch through the back loop.
TP2R: With the right-hand needle in front of the work, skip the first stitch on the left-hand needle and insert the tip of the needle into the second stitch purlwise. Drop both of the stitches off of the left needle. The first stitch will fall free. Insert the left needle into the dropped stitch, then slide the other stitch back onto the left needle. Knit the first stitch through the back loop, then purl the second stitch.
Grafting:
Instructions for grafting can be found here.
CHARTS
Charts A+B | Charts C+D (updated 5/26/17)DIRECTIONS
Cuff
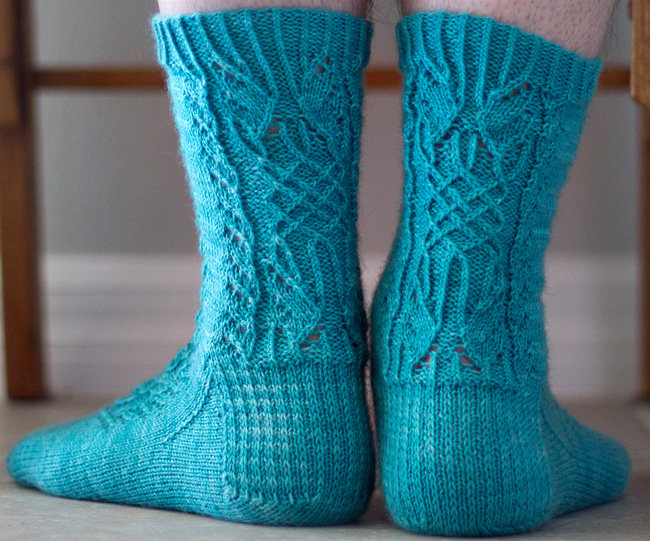
Using the long-tail method, CO 60[66, 72] sts. Distribute sts across needles as you prefer and join for working in the round being careful not to twist.
Cuff Round: [P1, k1 tbl, p1] 20[22, 24] times.
Repeat the Cuff Round as set for 1 inch/2.5cm (approximately 12 rounds).
Leg
Set Up: K0[1, 0]. This is the new beginning of the round.
Next round: K 1[3, 4] ; Work Chart A beginning at R1; k 2[5, 8] ; Work Chart A beginning at R1; k 1[2, 4] .
Work as set until Chart A is complete.
Next round: K 1[3, 4] ; Work Chart B beginning at R1; k 2[5, 8] ; Work Chart B beginning at R1; k 1[2, 4] .
Work as set until Chart B is complete.
Next round: K 1[3, 4] ; work Chart B beginning at R1; k 2[5, 8] ; Work Chart C beginning at R1; k 1[2, 4] .
Work as set until you have completed Row 22 of this repeat of Chart B.
Heel Flap
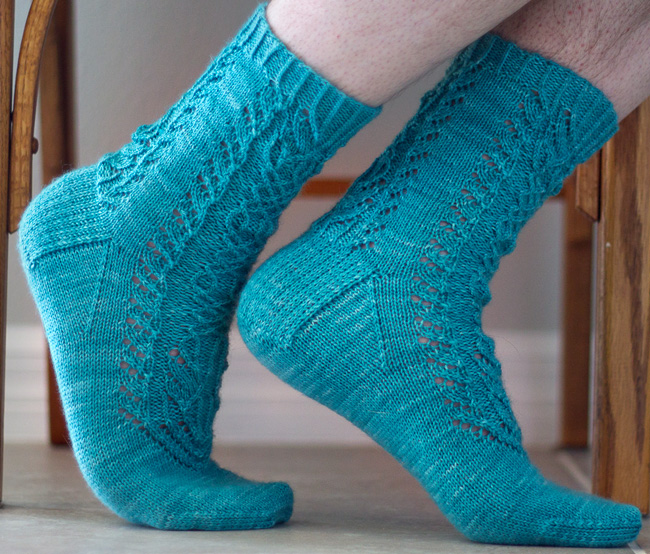
The heel flap is knit back and forth on a total of 30[32, 36] stitches. Rem 30[34, 36] stitches will be held for instep.
Turn work so that wrong side is facing.
Row 1 [WS]: Sl 1 wyif, p 29[31, 35] , turn.
Row 2 [RS]: [Sl 1 wyib, k1] 15[16, 18] times, turn.
Repeat these 2 rows 14[15, 17] more times for a total of 30[32, 36] rows in the heel flap.
Turn the Heel
Row 1 [WS]: Sl 1 wyif, p 16[18, 20] , p2tog, p1, turn.
Row 2 [RS]: Sl 1 wyib, k 5[7, 7] , ssk, k1, turn.
Row 3 [WS]: Sl 1 wyif, p 6[8, 8] , p2tog, p1, turn.
Row 4 [RS]: Sl 1 wyib, k 7[9, 9] , ssk, k1, turn.
Row 5 [WS]: Sl 1 wyif, p 8[10, 10] , p2tog, p1, turn.
Row 6 [RS]: Sl 1 wyib, k 9[11, 11] , ssk, k1, turn.
Row 7 [WS]: Sl 1 wyif, p 10[12, 12] , p2tog, p1, turn.
Row 8 [RS]: Sl 1 wyib, k 11[13, 13] , ssk, k1, turn.
Row 9 [WS]: Sl 1 wyif, p 12[14, 14] , p2tog, p1, turn.
Row 10 [RS]: Sl 1 wyib, k 13[15, 15] , ssk, k1, turn.
Row 11 [RS]: Sl 1 wyib, k 14[16, 16] , ssk, k1, turn.
Row 12 [RS]: Sl 1 wyib, k 15[17, 17] , ssk, k1, turn.
Small and Medium sizes only: 18[20, -] sts rem. Proceed to Gusset.
Row 13 [WS]: Sl 1 wyif, p18, p2tog, p1, turn.
Row 14 [RS]: Sl 1 wyib, k19, ssk, k1, turn. 22 sts rem.
Gusset
Note: Before starting the gusset, take note of the desired length of the foot. If the desired foot length is less than 9 inches/23 cm (measured from heel to toe), work Chart C on Gusset Round 3. If the desired foot length is 9 inches/23 cm or longer, work Chart B on Gusset Round 3. The sample shown is 10 inches/25.5 cm long.
Gusset round 1, set up: With RS facing, pick up and knit 15[16, 18] sts along the first side of the heel flap; work across instep in pattern as set; pick up and knit 15[16, 18] sts along the second side of the heel flap, knit across heel sts and first set of gusset sts. This is the new start of round. 78[86, 94] sts.
Gusset round 2: Work across instep in pattern as set.
Gusset round 3: K 1[3, 4] ; work row 1 of Chart B or Chart C (see note); k 1[3, 4] ; k to end of round.
Gusset round 4: Work instep sts in pattern as established; k1, ssk, k to 3 sts before end of round, k2tog, k1. 2 sts decreased.
Gusset round 5: Work instep sts in pattern as established; k to end of round.
Rep Gusset rounds 4-5 7[8, 9] times more, until 30[32, 36] sts rem on the sole. 60[66, 72] sts.
Foot
Long Length Only:
Continue working pattern as set until all rows of Chart B are worked. Begin working Chart C on instep as set.
All Lengths:
Continue working until Chart C is complete.
Begin working Chart D, and continue until Chart D is complete.
Work even in stockinette stitch until foot is 1.5[1.5, 1.75] inches/ 4[4, 4.5] cm short of full foot length.
Toe
Small and Large Sizes Only Toe Round 1: K1, ssk, k to 3 sts before end of instep, k2tog, k1; k1, ssk, k 24[-, 30] , k2tog, k1. 56[-, 68] sts.
Medium Size Only Toe Round 1: K1, ssk, k -[28, -] , k2tog, k1; k to end of round. -[64, -] sts.
Toe Round 2: Knit all sts.
Toe Round 3: K1, ssk, k to 3 stitches before end of instep, k2tog, k1; k1, ssk, k until 3 stitches before end of round, k2tog, k1. 4 sts decreased.
Repeat Toe Rounds 2-3 6[7, 7] more times until 28[32, 36] total sts remain. Repeat Toe Round 3 (decreasing every round) 3 times; 16[20, 24] total sts remain.
FINISHING
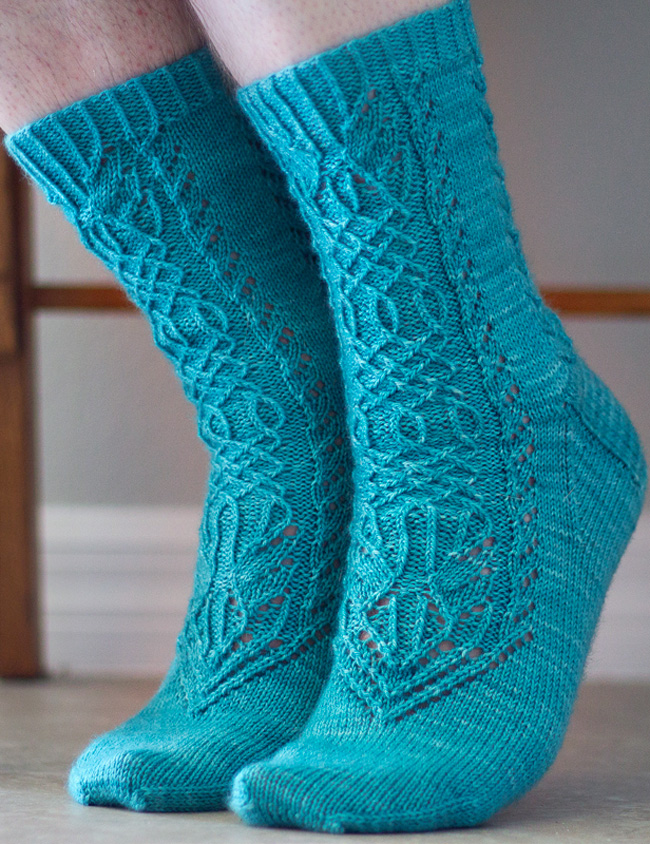
Cut the yarn leaving a 12-inch tail and graft the rem sts together. Weave in all ends.
ABOUT THE DESIGNER
 Rich started knitting as a way to relieve stress. His first two projects were sweaters, since there was no one to tell him that perhaps a scarf would be a better starting point. At some point, Rich got it into his shiny, bald head that knitting socks might be a good idea.
Rich lives in Tampa, Florida with four cats who think that stitch markers solely exist to entertain them. He can be found online here and on Ravelry.
Pattern & images © 2017 Rich Ensor. Contact Rich


