Plays Well Together : Knitty.com - Winter 2016

Plays Well Together

Feature: PWT

PWT

Plays Well Together: Three Beginnings and an Ending

One of the reasons knitting and crochet play so well together is that one can pick up where the other leaves off—you can crochet a beginning and knit an ending. You can crochet into your knitting or knit into your crochet. A crochet hook is a great way to begin small rounds, and in “Fiddlers Three,” you get to try three different ways to do that. As a bonus, we’ll try a fun two-color edging in crochet; it’s an easy introduction to crochet color-work.

Crochet Chain Edging
Used for the cuff cast-on.

You may have used a crochet chain to create a provisional cast-on. This is a similar idea, except we’re using the chain as a design feature of the mitt—to tie it to the crochet at the top—so we won’t remove it.

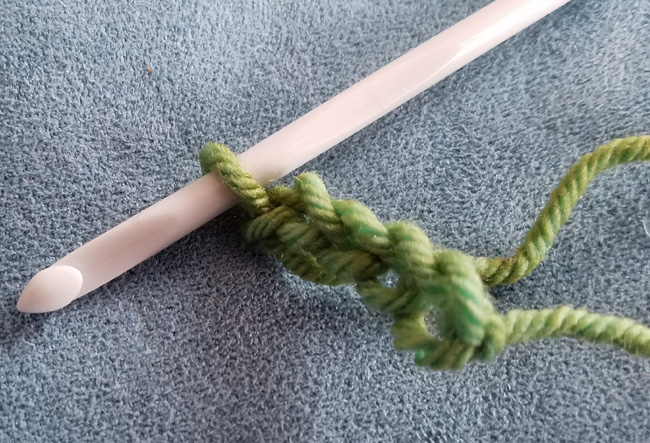
Make a chain the specified length.
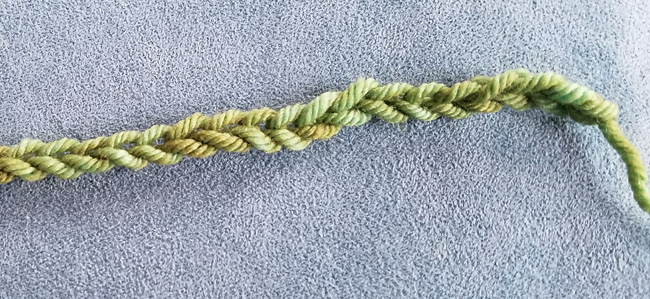
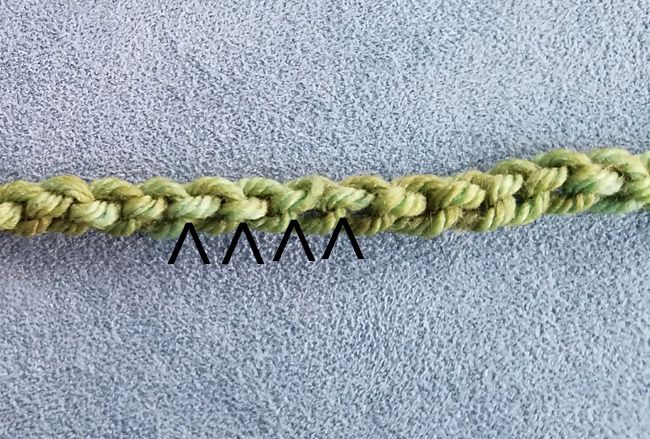
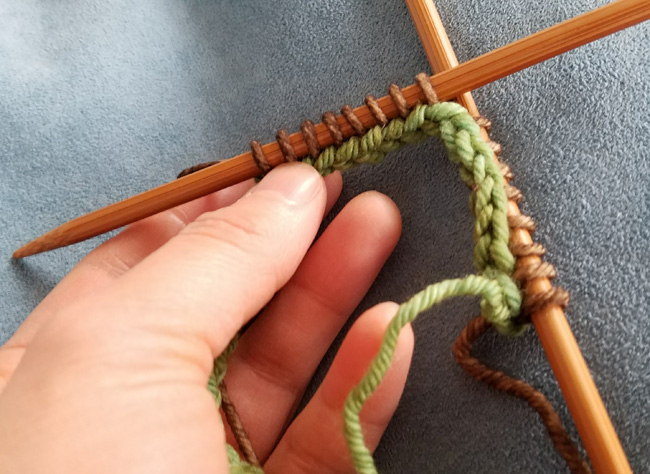
Turn the chain over so you can see the bumps at the back.

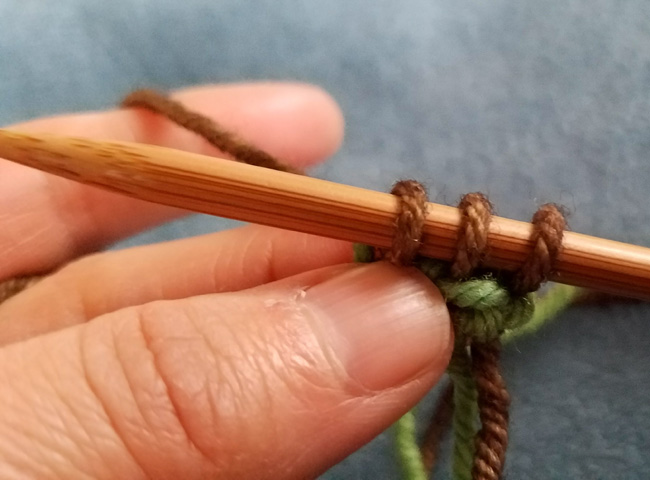
Inserting your needle into the back bumps (indicated by the black arrowheads), pick up and knit the number of stitches indicated for your cast on.

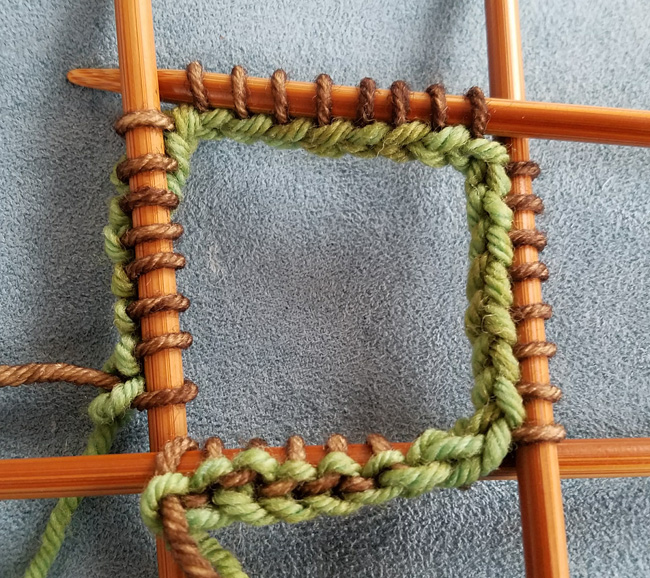
Begin knitting in the round.

As you secure your ends, us the end of the chain to connect to the beginning of the chain.

Oval in the Round
This technique is used to start the mitten cap. It would be equally useful for crocheting a whole mitten from the fingertips down, and it’s great for making a sock from the toe-up.


Make a chain the specified length.

Single crochet, only into the top loop of the chain.
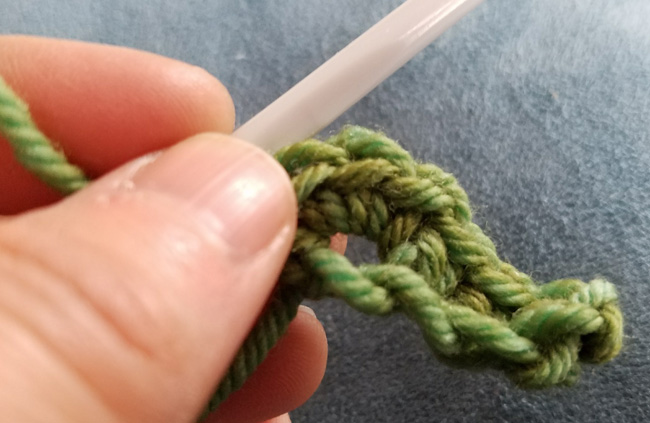

Single crochet across in each top loop, then work 3 single crochet into the top loop of the last chain.
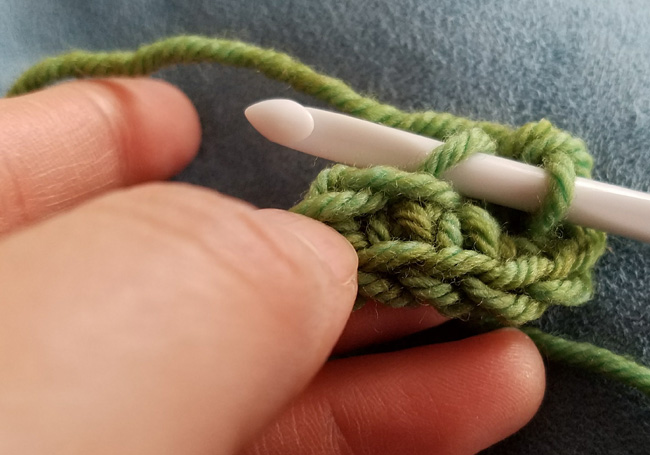

Turn the chain over, so you can crochet into the bottom loops of the chain.
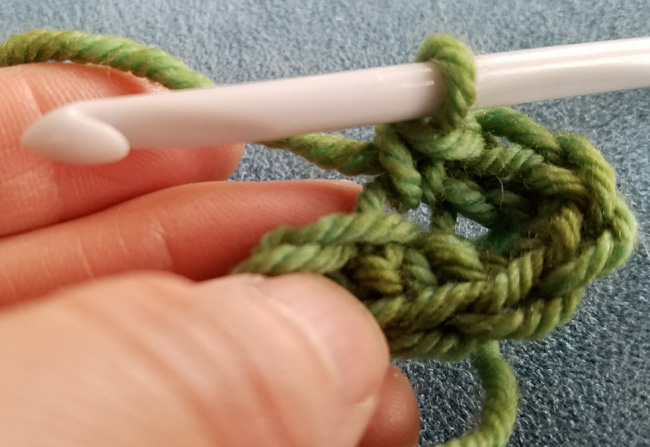

Single crochet in each bottom loop across until the last loop.
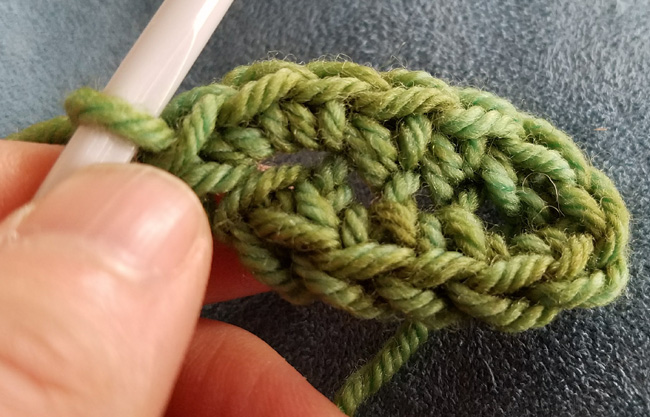

Work 3 single crochet into the last loop of the chain.
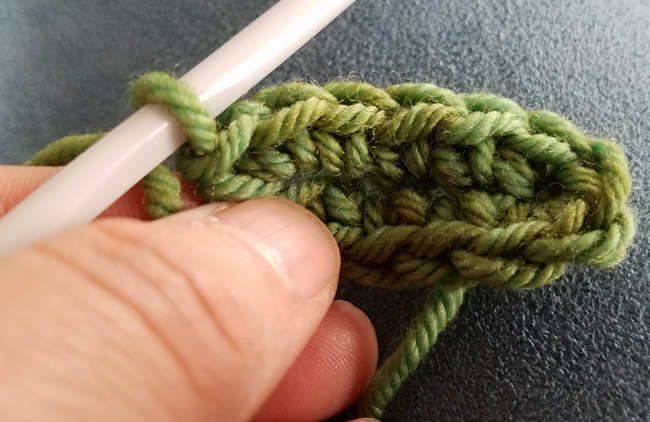

You can now continue to work in oval rounds, increasing as specified in your pattern.


Magic Loop
Used to start the thumb cap.
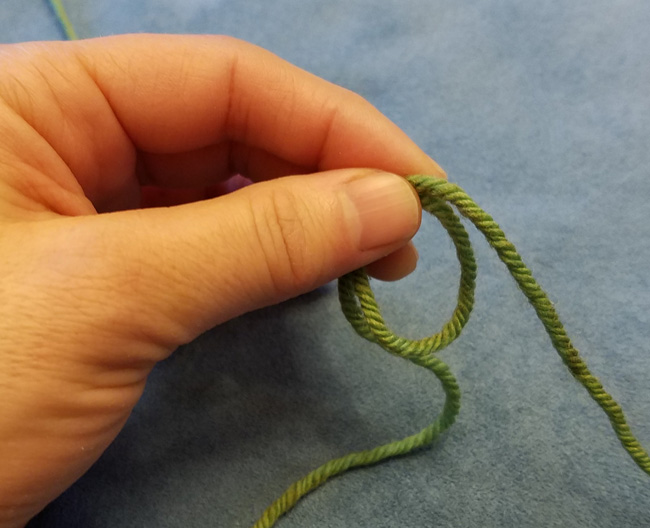
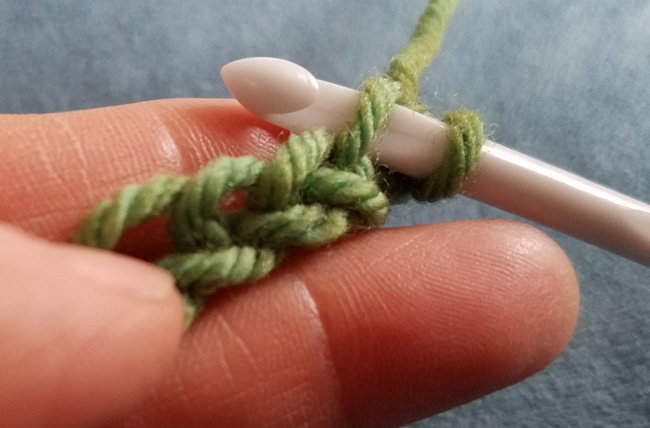
Make a loop of yarn, and let the tail hang to the right (or hook side of the loop).
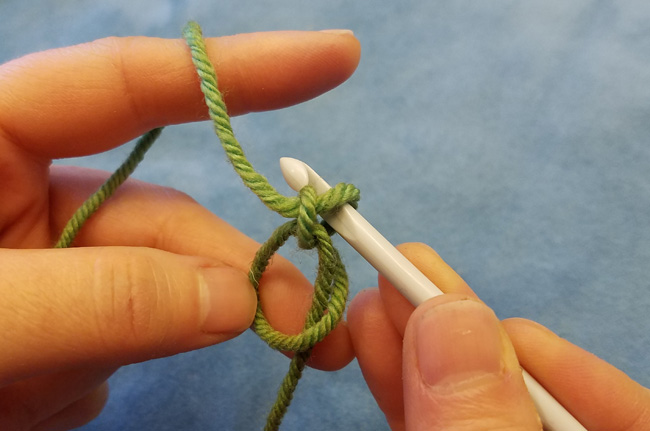
Insert the hook into the loop, and make a slipstitch.
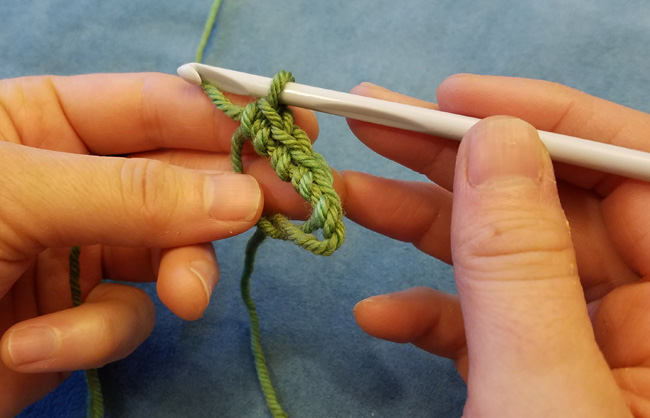
 

Work the required single crochet into the center of the loop.
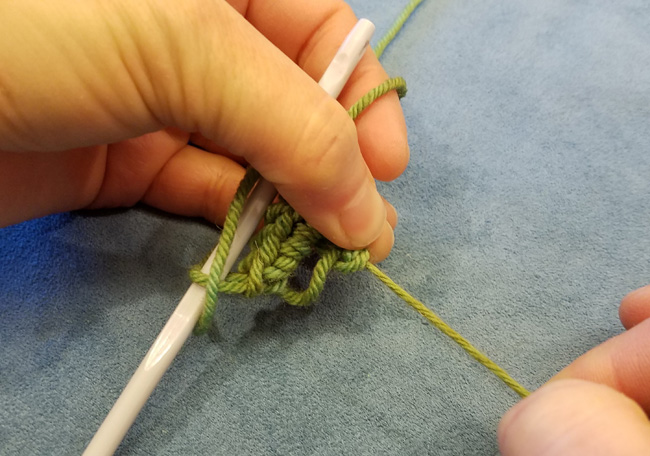
 

Use the tail to close the circle, and continue to crochet according to the instructions.

Two-Color Crochet Edging
You might not notice when you’re just working along in single crochet, but the final loop that you pull through in your stitch becomes the top of the following stitch. This means that if you want to change colors, and have the following stitch be completely in the new color, that final loop needs to get pulled through with the new color. We take this color changing trick and use it to make a pretty two-color edging for the mittens.
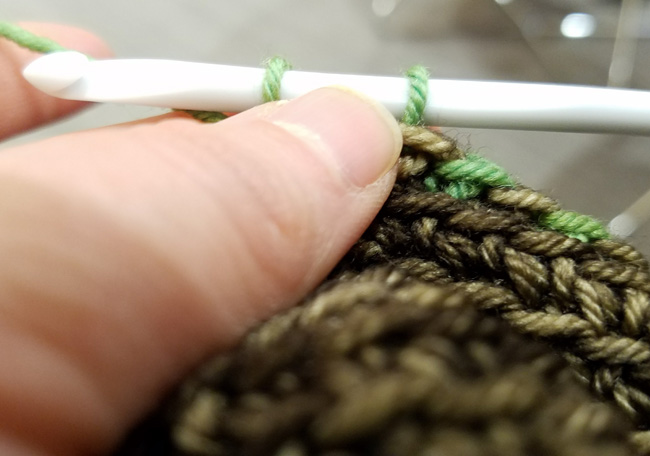
Step 1: With MC, Insert your hook into the next stitch, yarn over, pull up a loop, Pick up CC1, yo, pull through both loops.
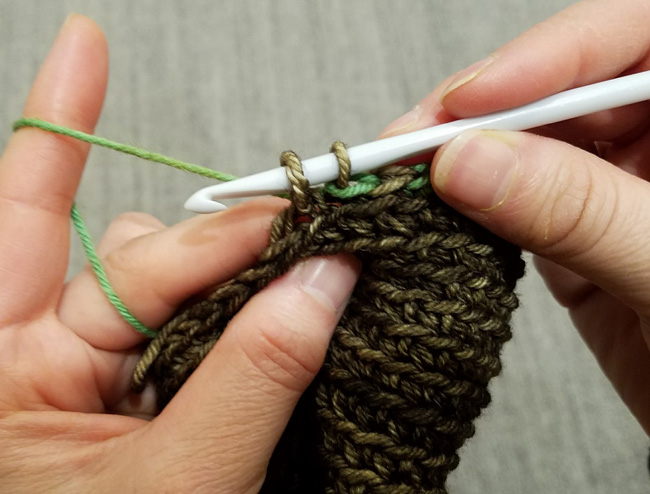
Step 2: With CC1, insert hook in next stitch...
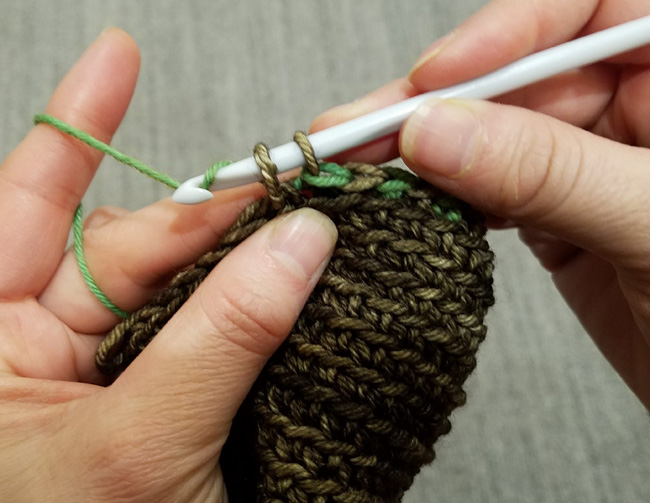
 

...yo, pull up a loop...
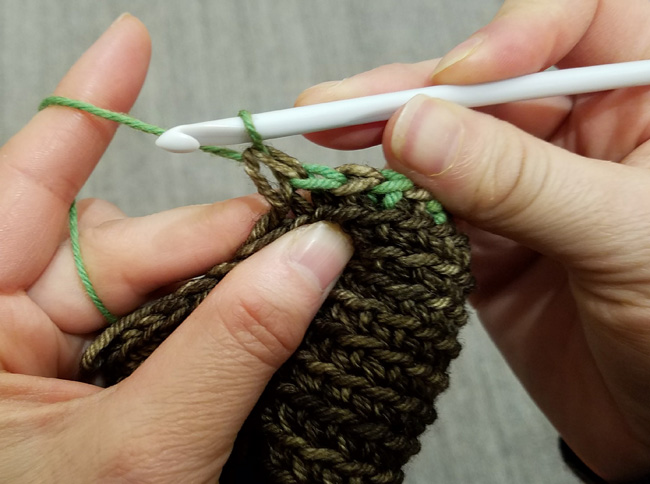
 

...pick up MC, yo, pull through both loops.

Repeat Steps 1 and 2 around. Be sure to slip stitch to join with the same color you used to begin.

Pattern: Bias Button Cowl

INTRODUCTION

Fiddlers Three

beauty shot

Piquant

“He called for his pipe,
And he called for his bowl,
And he called for his fiddler’s three.”

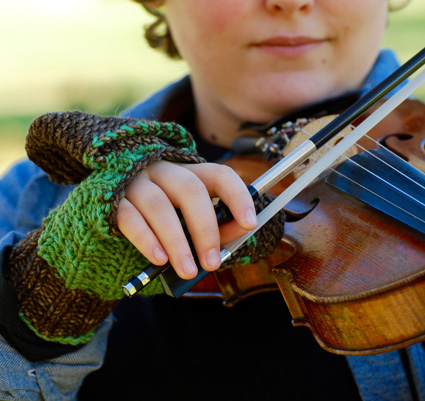
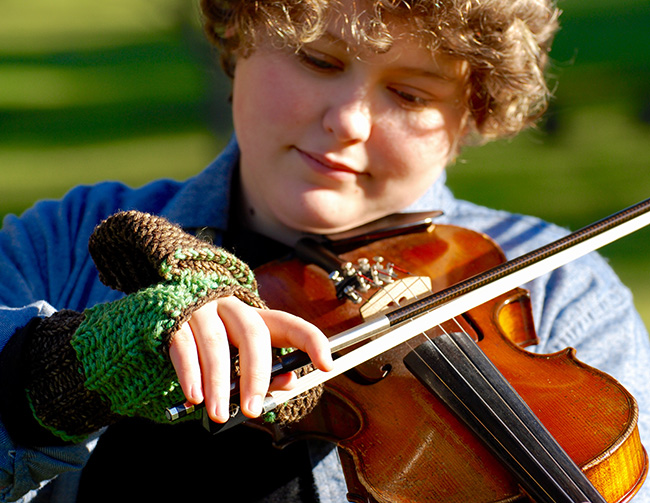
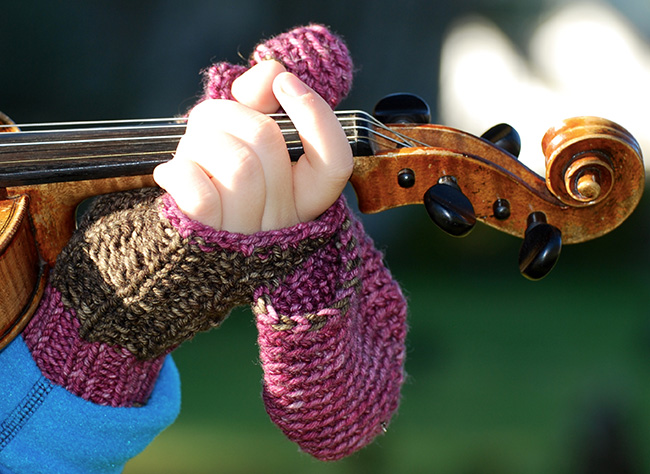
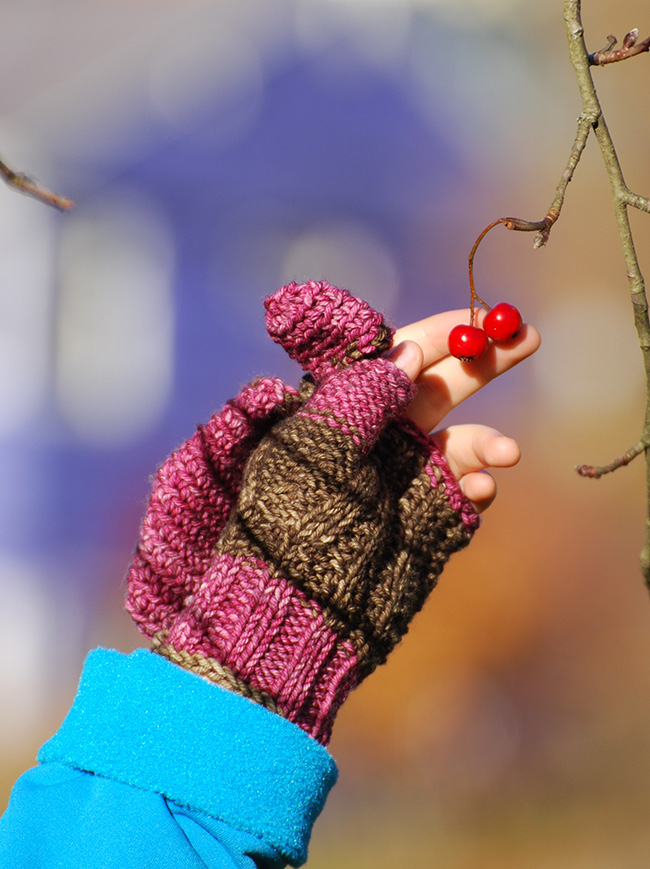
In Alaska, we like to make music in the wild when we can, regardless of weather. And fiddling can make your fingers pretty chilly! Mittens keep the hands toasty, when you’re not playing, and flip back cap and thumb when the song kicks off. Or, use the mitts to access your phone or your snack on a hike.

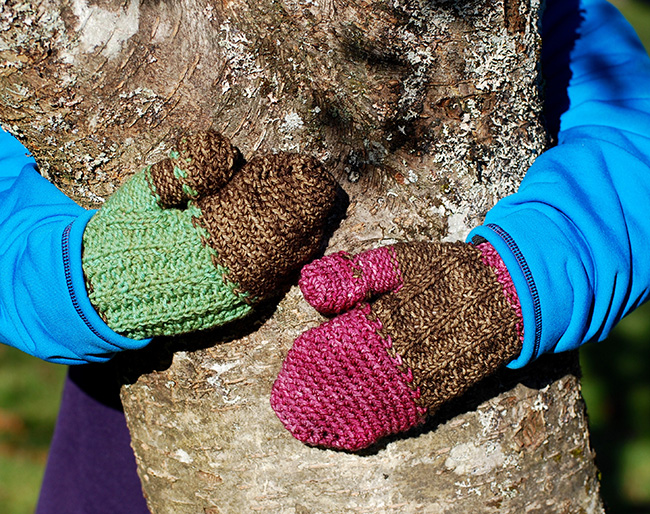
That rhyme was going through my head as I was knitting these mittens and playing with the various fun bits that are knitted and crocheted. The mittens take a little bit of fiddling—but the fun kind. Just enough variety to keep you interested. If you like playing with color, you can mix them up like I did and forgo matching, or keep things simpler. Knitter’s choice!

spacer model: Theo Houck

spacer photos: Amy O’Neill Houck

Print Essentials Print Everything

SIZE

Youth[Adult S, M, L]
To fit hand circumference: 6.5[] inches/ 16.5[] cm

FINISHED MEASUREMENTS

Hand circumference:  5.5[6, 6.75, 7.5] inches/14[15, 17, 19] cm
Cuff circumference:  4.5[] inches/ 11[] cm
Mitt Length (w/o mitten cap):  5[] inches/ 12.5[] cm

MATERIALS

Yarn
A Tree Hugger’s Wife, Best of the Worsted [100% Superwash Merino wool; 175 yd/160 m per 3.5 oz/100 g skein]
spacer [MC] Bark, 1 skein
spacer [CC1] The Madam’s Velvet Couch, 1 skein
spacer [CC2] Beach glass, 1 skein

Recommended needle size
[always use a needle size that gives you the gauge listed below - every knitter's gauge is unique]
spacer 1 set(s) US #8/5mm needles for small circumference in the round
spacer 1 US H-8/5mm crochet hook

Notions
spacer stitch markers (both round and split ring markers or coil-less safety pins to mark crochet).
spacer yarn needle

GAUGE

18 sts/26 rounds = 4 inches/10 cm in stockinette stitch
21 sts/27 rounds = 4 inches/10 cm in broken rib stitch

PATTERN NOTES

[Knitty's list of standard abbreviations and techniques can be found here.]

Tip: As noted, this pattern is a little fiddly—it’s easy, fun, and keeps your attention, and moves fast because no section is longer than your finger. But because you’re changing yarns and attaching yarns here and there, I recommend weaving in ends as you go. You’ll be happier to have less to do when you’re all done!

LLIP [Left Lifted Purl Increase]: With tip of left needle lift the left leg of stitch below the stitch just worked, and purl it. 1 stitch increased.
RLIP [Right Lifted Purl Increase]: With right needle lift right leg of the stitch below the next stitch, and purl it. 1 stitch increased.

Special Crochet Stitch
Shell: 3 sc in stitch indicated

DIRECTIONS

For the first mitten, use MC as ColA and CC1 as ColB; for the second mitten use CC2 as ColA and MC as ColB.

Ribbing
With US H-8/5mm hook, and ColA ch 28[] and fasten off.
With needles for small circumference, and ColB pick up and knit 32 stitches in the “back bump” of each ch. Divide sts evenly across needles and join for working in the round. [See tutorial.]

Round 1: [K2, p2] around.
Work ribbing as set for a total of 11[] rounds.

Setup Broken Rib Pattern
Fasten off ColB. Change to ColA.
Round 1: [K2, p2] around
Round 2: P1, [k2, p2] to last three sts, k2, p1.
Repeat Rounds 1-2 1[2, 2, 2] more time(s).

Setup For Thumb Gusset
Gusset round 1: Work in broken rib pattern as set to last 8 sts, k2, pm, LLIP, p2, RLIP, pm, k2, p2.
Gusset round 2: Work in pattern as set to marker, p to second marker, p1, k2, p1.
Gusset round 3: Work in pattern as set to marker, sm, LLIP, p to marker, RLIP, sm, k2, p2.

Repeat Gusset rounds 2-3 2[] more times, until there are 10[] sts between markers. 36[] sts.

Next round, separate for thumb: Work in pattern as set to first marker, remove marker, slip all 10[] sts to next marker to scrap yarn. Using backwards loop method, CO 2 sts, work in patt as set to end of round. 28[] sts.

Continue Hand
Continue in Broken Rib pattern as set until mitt measures 4.75[] inches/ 12[] cm in length from CO edge. Change to ColB, work 1 more round in pattern.
BO in pattern.
Weave in Ends.

Thumb
Return 10[] held sts of thumb to needles. Rejoin ColB at crook of thumb and with RS facing, pick up and purl 2 sts over the CO sts of the hand. Purl to end of held sts.

Distribute sts across your needles and join for working in the round.
Purl all sts until thumb measures 1[] inches/ 2.5[] cm.
Bind off.

Flip Top Mitten Top
With US H-8/5mm hook and ColB, ch 5, turn.

Setup Oval: Work shell in next top loop only of next ch (pm in center st of shell), sc in top loop of ea of next 3 chs. Work around to bottom loops of ch, shell in next ch loop, (pm in center st of shell) sc in ea of next 3 chs. Do not turn. 12 sts. [See tutorial.]

Round 1: Work in sc-blo to marked st, shell in marked st, move marker to center of shell just made, continue in sc-blo to 2nd marker, shell in marked st, move marker to center of shell just made, sc-blo to end of round. 16 sts

Continue as for round 1 until you have 28[] sts.

Work even in sc-blo until cap measures 3.5[] / 9[]
cm.

Two-color Edging: With ColB, sc in the first st, change to ColA, *sc in next st with ColA, sc with ColB, repeat from * around, sl st to join. Fasten off. [See Tutorial.]

Weave in ends.

Thumb Cap
With ColB, make a magic ring, ch 1 , work 6[7, 7, 8] sc into ring. [See Tutorial.]
2 sc into each st of the round. 12[14, 14, 16] sts.
Work even in sc-blo until thumb cap measures 1.25[] inches/ 3[] cm, making final round two-colored edging if desired as for mitten top. Sl st in next st to finish final round. Bind off.

FINISHING

Wash all pieces to block.

Sew on Mitten Cap
Hold mitten cap opening pointed up (tip towards the floor) and mitt right side up. Determine the back of the hand side of the mitt. This will determine whether you’re making a right or left mitten. Align the mitten cap .75 inch/2 cm down from the bind off edge of the mitt, and centered with respect to the mitt on the back of the hand side. Whipstitch one side the inner edge of the cap, below the 2-color edging, so that when you flip the mitten over, the edging still shows. The mitten cap is wider than the mitt when not being worn. That’s ok. Just whip stitch where they align. Weave in ends.

Sew on Thumb Cap
Using the same method as the mitten cap, whipstitch thumb cap just 2-3 rounds down from the edge of the mitt.

Weave in all ends.

ABOUT THE DESIGNER

designernameAmy O'Neill Houck blogs at thehookandi.com and tweets @plainsight. Miriam can be found on on the web at miriamfelton.com, and on Twitter @mimknits.

Amy and Miriam both have patterns on ravelry.com.

Pattern & images © 2016 Amy O'Neill Houck. Contact Amy