


Crochet Crusader, a free knitting pattern from Knitty.com. Free crochet pattern for a cowl add-on to a sweatshirt.
INTRODUCTION
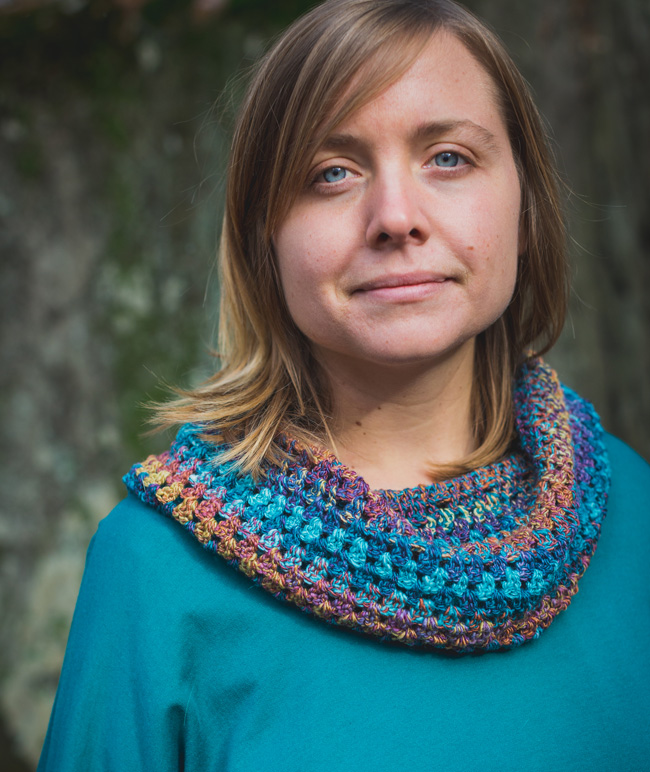
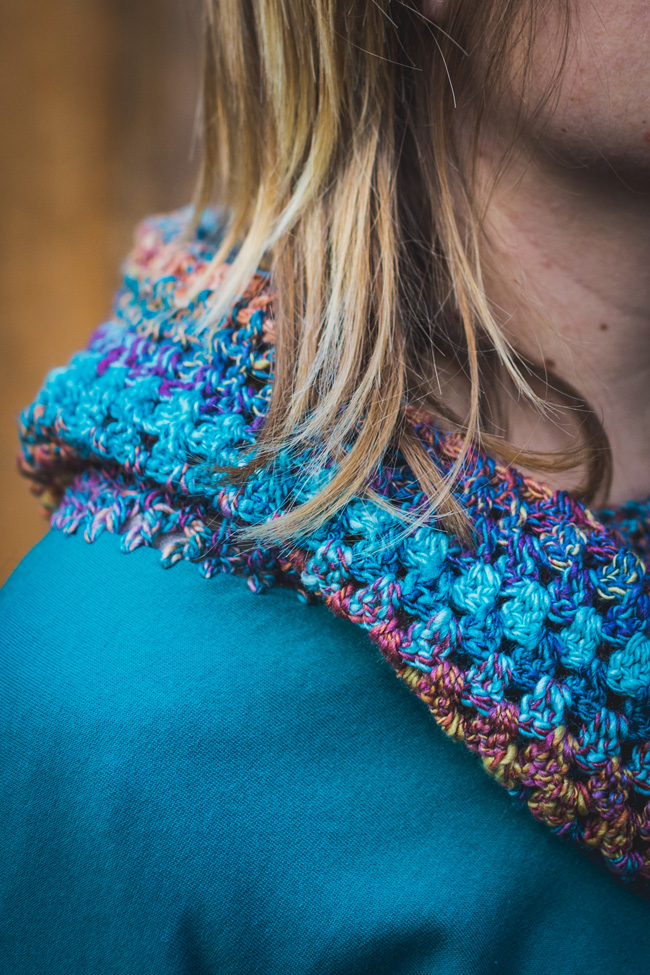
Crochet Crusader
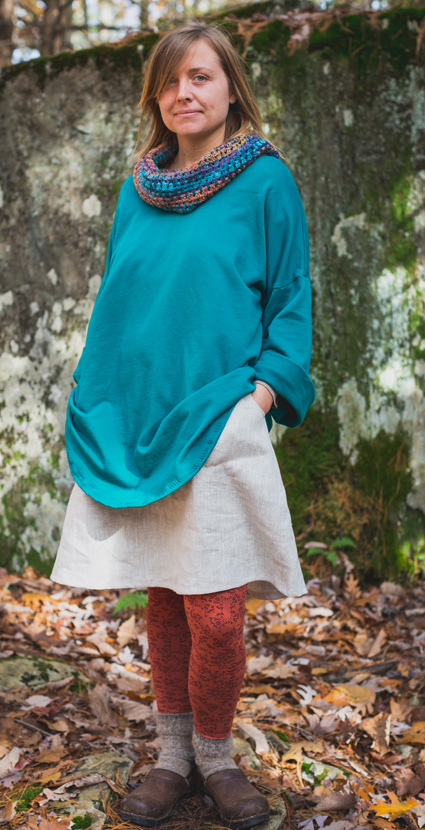

As a long-time advocate for the Slow Fashion movement, I make nearly all of my clothes. And though my natural tendency is to make every single step as slow and complicated as possible (for example I'd really prefer to start by raising the sheep and growing the dye plants), I equally love coming up with ways to reduce the work and maximize the impact. I'm also a life-long Crochet Crusader, and adding a little hookery to the neckline of a garment is one of my favorite ways to add drama to a handmade or upcycled piece!
I'm very devoted to my Louet S10, which is the wheel I learned to spin on nearly 15 years ago. Spinning might just be my favorite of all the fiber arts I do, and I like to keep it my happy place, which translates to: not a lot of planning or rules. The result is that I have a lot of gorgeous single skeins piling up that need projects! This idea is a fantastic way to show off one special skein of handspun, or a medley of those odd balls of leftovers we'd love to use up.
This pattern is forgiving of imperfect gauge and varying yarn size. I spun a 2-ply worsted yarn, approximately worsted weight or 9 wpi, and got about 240 yards. I use the simple lazy kate that's built into my wheel, and a Kromski 2-yard niddy-noddy, for those who are interested in these sorts of things!
 model: Mo Walrath
photos: Richard A. Smith


SIZE
One – worked to fit
FINISHED MEASUREMENTS
Depth: 9 inches/23cm
Length: worked to fit
MATERIALS
Fiber
![]() Into the Whirled 40/40/20 Superwash Merino/Merino/Silk (blended top); Color: Herding Cats; 4oz
Into the Whirled 40/40/20 Superwash Merino/Merino/Silk (blended top); Color: Herding Cats; 4oz
Finished Yarn:
![]() Wraps Per Inch: 9
Wraps Per Inch: 9
![]() Ply: 2-ply, 240 yards
Ply: 2-ply, 240 yards
![]() Draft: Worsted, short forward
Draft: Worsted, short forward
![]() Commercial yarn alternative:
Commercial yarn alternative:
Schoppel Wolle Edition 3 [100% extrafine superwash Merino wool; 164yd/150m per 50g ball]; color: Waschtag; 2 balls
Recommended needle size
[always use a needle size that gives you the gauge listed below - every knitter's gauge is unique]
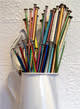
![]() Steel crochet hook approximately size 6/1.8mm, or any small-size hook with a sharp-ish point
Steel crochet hook approximately size 6/1.8mm, or any small-size hook with a sharp-ish point
![]() E-4/3.5mm Crochet hook
E-4/3.5mm Crochet hook
Notions
![]() crew-neck sweatshirt, ready-made (check your local thrift store) or self-made.
crew-neck sweatshirt, ready-made (check your local thrift store) or self-made.
![]() tailor's chalk or other marking tool
tailor's chalk or other marking tool
![]() sharp fabric scissors
sharp fabric scissors
![]() darning needle for weaving in ends
darning needle for weaving in ends
GAUGE
10 repeats of dc, ch 1/9 rounds = 4 inches/10 cm
PATTERN NOTES
[Knitty's list of standard abbreviations and techniques can be found here.]
Ch = chain
Dc = double crochet
Sl st = slip stitch
Sp = space
St = stitch
Tool tips:
Smaller, old-school steel hooks come in much smaller sizes than current crochet hooks, and have sharper tips, making them ideal for poking into the neckline of a T-shirt or sweatshirt (check thrift stores, flea markets or ebay to find one if you don't have it already). I use a steel hook for the first round, to attach the yarn to the garment and create the foundation round of crochet stitches. After joining the last stitch of that round to the first, I switch to the larger hook I'll use for the remainder of the project.
Techniques:
Try on the sweatshirt you're going to embellish, and mark your desired neckline for the base of the cowl. You can make it lower and wider than the original, or simply cut the neckband off close to the seam. To cut, open the sweatshirt so that the shoulder seams lie stacked on top of each other, and the front neck is on one side and the back neck on the other. This way your cut line will automatically be symmetrical, and the front and back will not be the same (the back is usually higher). Cut on your marked line.
In the setup round, working into the neck edge, it will be up to you to determine the correct spacing for your yarn and fabric combo. Poking holes in the fabric can't be undone, which is why I suggest you do a test. You want the stitches to lie flat with even tension to the fabric, not pulling it in (caused by spacing too far apart) or ruffling (too close together). Once you have determined the best spacing for your stitches on a test scrap, you may wish to mark the neckline with tailor's chalk to indicate where to place your stitches.
All stitches, except for the joining slip stitch at the end of each round, are worked into the chain-spaces, not a stitch, so the double crochets are staggered, not stacked.
Because this pattern can be worked on any size neckline, there is no set number of stitches for the first (and thus all succeeding) rounds. Therefore, the pattern may not always end with one full repeat of the stitch pattern at the end of the round. This won't be a problem, or visible, when the cowl is draped on the neck, so just end each round with a ch 1 and slip stitch into the 3rd chain of the starting chain. Likewise the start of your next round may be slightly different than the pattern indicates, so as a general rule, slip stitch over to the first space and work your starting chain there.
This technique works equally well on a regular crew-neck sweatshirt (it's a great way to update an old one) you already have, or one you sew yourself. With a ready-made sweatshirt, I always like to remove the original neckband before crocheting onto it (directions for doing so are the first step of the instructions). If making your own shirt, leave the neckline unfinished and proceed from there.
DIRECTIONS
If working with a pre-existing sweatshirt, try it on and mark your desired neckline for the base of the cowl. You can make it lower and wider than the original, or simply cut the neckband off close to the seam. To cut, open the sweatshirt so that the shoulder seams lie stacked on top of each other, and the front neck is on one side and the back neck on the other. This way your cut line will automatically be symmetrical, and the front and back will not be the same (the back is usually higher). Cut on your marked line.
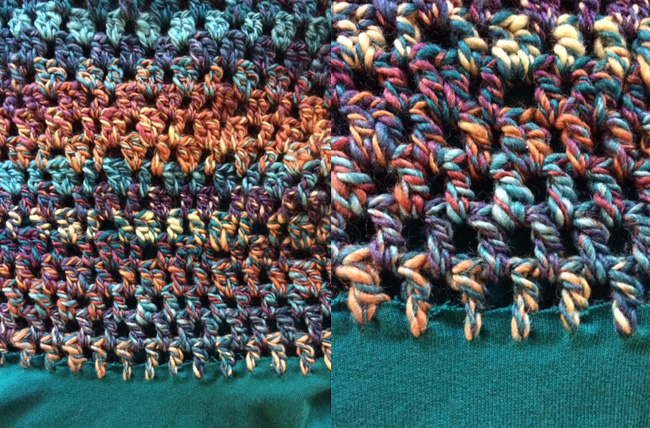
Round 1 (setup): With steel hook, poke into the neck edge (see Pattern Notes) just next to the right shoulder seam, and join on with a slip stitch. Ch 4 (always counts as 1 dc and 1 ch), dc into neck edge 3/8 inch/1cm over from first st (or spacing as determined by test swatch). Continue to work (ch 1 and dc) around neckline to first st and join to 3rd ch of starting chain with a sl st. Do not turn (on this or any following Rounds).
Rounds 2-3: Sl st into first sp to move position, ch 4, *dc into next sp, ch 1, repeat from * around. Join to 3rd ch of starting chain with a sl st.
Note: Since you're not working with a particular stitch count, in the following rounds you might not end up with a tidy repeat. If so, work the repeat until you hit the end of the round – don't worry about where you end.
Round 4: Sl st into first sp, ch 3, dc into same sp, ch 1, *dc into next sp, ch 1, dc into next sp, ch 1, 2dc into next sp, ch 1. Repeat from * around. Join to 3rd ch of starting chain with a sl st.
Rounds 5-6: Sl st into first dc and first sp, ch 3, dc into same sp, ch 1, *dc into next sp, ch 1, dc into next sp, ch 1, 2dc into next sp, ch 1. Repeat from * around. Join to 3rd ch of starting chain with a sl st.
Rounds 7-9: Sl st to first sp, ch 4, *2 dc in next sp, ch 1, dc in next sp, ch 1. Repeat from * around. Join to 3rd ch of starting chain with a sl st.
Rounds 10-12: Sl st to first sp, ch 3, dc into same sp, ch 1, 2 dc in next sp, ch 1, dc in next sp, ch 1, *2 dc in next sp, ch 1, 2 dc in next sp, ch 1, dc in next sp, ch 1. Repeat from * around. Join to 3rd ch of starting chain with a sl st.
Rounds 13-21: Sl st to first sp, ch 3, dc into same sp, ch 1, *2 dc in next sp, ch 1. Repeat from * around. Join to 3rd ch of starting chain with a sl st.
Fasten off.
FINISHING
Wash to block and weave in ends.
ABOUT THE DESIGNER
 Cal Patch has been a maker since she was a Girl Scout in the seventies. She sews, crochets, spins, embroiders, knits, prints, makes patterns, dyes… hence the name of her clothing label: *hodge podge*. Cal has been teaching the textile arts since 2000, at shops and retreats across North America, and now offers online workshops in Pattern Drafting, Sewing and Crochet via Creativebug.
After seventeen years of being a New York City dweller, Cal now resides in the Catskills where she is becoming a crafty farmer and growing her handmade wardrobe. Her first book, Design-It-Yourself Clothes, Patternmaking Simplified, was published by Potter Craft.
You can see what she's up to here.
Pattern & images © 2017 Cal Patch.