|

  by Wendy Wonnacott by Wendy Wonnacott

I'd
stalked (get it, stalked?) bamboo for months before
finally having it sent to me [I live in Italy].
Once here I marveled at the
sheen, the texture, the subtle color variations, so
smooth, so precious. Promptly it was put back in its
bag and secreted off to the hiding spot for my Special
Yarns. For almost a year it lived, there, in the dark,
next to others. We would visit and every time that
it came that time to put it away I would again wonder,
what it was meant to be, my little hank with great
potential. I wanted it out, where I could appreciate
its beauty, something of use but not completely utilitarian,
mind you.
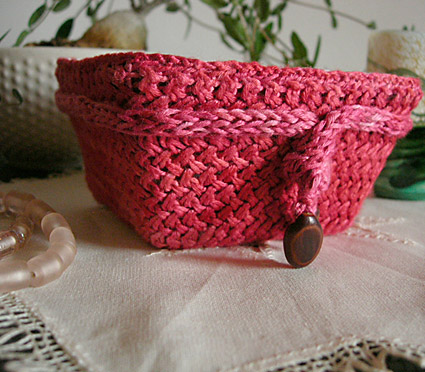
A basket it is, perfect for
holding other precious things. Worked flat, top down,
the shaping achieved by the changing needle sizes
as to not to disrupt the pattern stitch. One seam,
a touch of I-cord and a bit of persuasion.
|
|
 photos: Wendy
Wonnacott
|
|
| One |
| |
Width at top: 4 inches
Width at base: 3 inches
Height: 3 inches
|
| |
| |
|
 Alchemy Bamboo [100% Bamboo;
138yd/126m per 50g skein]; color: #14f Breath of Fire;
1 skein
 1 set US #6/4mm double point needles
 1 set US #6/4mm straight needles
 1 set US #5/3.75mm straight needles
 1 set US #4/3.5mm straight needles
 1 set US #3/3mm straight needles
 Tapestry needle for weaving in ends
 Sewing needle for attaching lining
 Lining fabric, approx. 17 inches by 6 inches
 Stiff interfacing or canvas for shaping, approx.
17 inches by 6 inches
 Sewing thread
 Large beads for embellishment (optional)
|
| |
| 24 sts/40 rows = 4 inches
in stockinette stitch on US 6/4mm needles. |
|
|
| [Knitty's
list of standard abbreviations can be found
here] |
|
  Basketweave
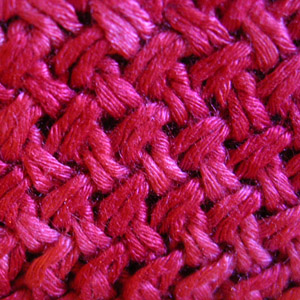
Pattern -> Basketweave
Pattern ->
(Worked over an even number of sts)
Row 1
[WS]: P1, sl1, [p into second st on left needle, p
into first st on left needle, slide both stitches
off needle together] to last 2 sts, p2.
Row 2 [RS]:
K1, [k into back of second st on left needle,
k into back of first st on left needle, slide
both stitches off needle together] to last st,
k1.
I-Cord
Using a double-pointed needle, CO 4 sts. K all sts.
Next Row: Instead of turning the work around
to work back on the WS, slide all sts to the other
end of the needle, switch the needle back to your
left hand, bring the yarn around the back of the work,
and start knitting the sts again.
Repeat this row to form I-cord.
After a few rows, the work will begin to form a tube.
|
  Using
US 6/4mm straight needles, CO 114 sts. Using
US 6/4mm straight needles, CO 114 sts.
Work in Basketweave Pattern until work measures
1.5 inches.
Using US 5/3.75mm needles, cont in Basketweave
Pattern until work measures 2 inches.
Using US 4/3.5mm needles, cont in Basketweave
Pattern until work measures 2.5 inches.
Using 3mm needles, cont in Basketweave Pattern
until work measures 3 inches, ending with a WS row.
Shape Bottom:
Row 1 [RS]: K6, [(k1, k2tog) six times, k10]
three times, [k1, k2tog] six times, k6. 90 sts rem.
Row
2 [WS]: K all sts.
Row 3 [RS]: K6, [(k2tog) six times, k10]
three times, [k2tog] six times, k6. 66 sts rem.
Even-Numbered Rows 4-10 [WS]: P all sts.
Row 5 [RS]: K all sts.
Row 7 [RS]: K3, k2tog, k1, [(k2tog) three
times, (k1, k2tog) three times, k1] three times,
[k2tog] three times, [k1, k2tog] twice. 42 sts rem.
Row 9 [RS]: [K1, k2tog] to end. 28 sts rem.
Row 11 [RS]: [K2tog] to end. 14 sts rem.
Row 12 [WS]: [P2tog] to end. 7 sts rem.
Row 13 [RS]: [K2tog] three times, k1. 4 sts
rem.
Break yarn, leaving a long tail. Draw tail through
rem 4 sts and pull tight. Use tail to sew up side
seam of basket.
|
| |
|
 Weave
in ends. Weave
in ends.
Block basket. Though label
does say "Dry Clean Only," I dunked the
bowl in cold water to loft the fibers. Block to shape
using plastic grocery bags.
Shaping
(this would be the "persuasion"
part)
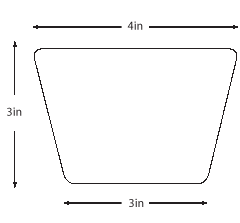
Cut four pieces of interfacing (or canvas or cork, whichever
you are using) with a top width of 4 inches, bottom
width of 3 inches and a height of 2 inches. (These pieces
will be trapezoidal in shape.) Cut one square bottom
piece measuring 3 inches by 3 inches.
Join
the 4 side pieces at the side (slanted) edges, then
attach the bottom piece. (I used tape; nobody will
see the joins, really.) This is the inner structure
of the basket. Place it inside the basket; if any
trimming needs to be done to the interfacing, do it
at this point.
Cut
a piece of fabric 17 inches by 6 inches. Fold in half,
so the 6-inch sides are together. Sew a seam from
top to bottom at each end, at an angle, so you have
a top opening of 8 inches across and a bottom opening
of 6 inches across. (The fold will be in one of the
seam allowances, which will be cut off.) Trim excess
fabric from seam allowances.
Run
a thread around the lower edge of the lining and pull
tight to gather. Tie tightly to secure.
Place
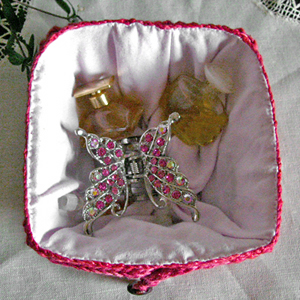
lining inside basket (with interfacing already in
place), with the bottom gather facing the interfacing.
Fold upper edge of lining, so folded edge reaches
just below top edge of basket. Pin into place. Sew
lining and basket together.
Using
double-point needles, work 20 inches of I-cord as
described above. Bind off. Attach beads to each end
of I-cord if desired. Sew I-cord to bowl, 0.5 inch
from upper edge (see photo).
|
|   Wendy
can't stop with the i-cord and can not explain
why. Wendy
can't stop with the i-cord and can not explain
why.
She documents it all here.
More of her designs can be found at
The Garter Belt.
|
| Pattern & images
© 2005 Wendy Wonnacott. Contact Wendy |
|

