
|
|
|
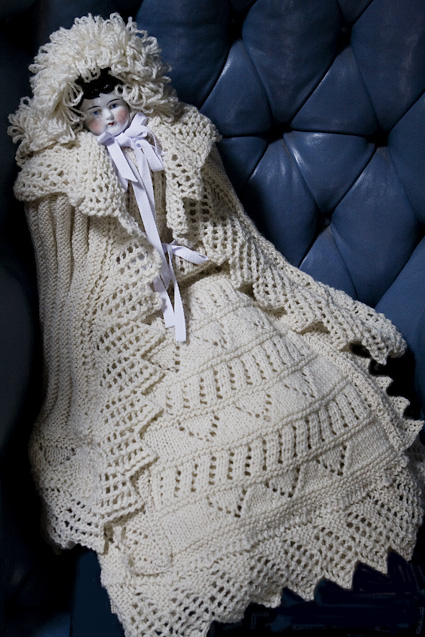
Perhaps the work may be too difficult for a child to manage, but there are many mothers and aunts or kind friends, good knitters, who will take delight in dressing such a doll for a present… “Perhaps the work may be too difficult for a child to manage.” Having now experienced this pattern in its entirety, I wish to ally myself with those sentiments. Actually, I wish to rip the editor from his tomb and scream, “No sh-t, Sherlock!” into whatever remains of his ear. But Knitty is a genteel publication and wouldn’t appreciate that sort of behavior. It is not, dear reader, that the knitting itself is particularly complicated. Take the lace edgings, for example. There are two of them, one large and one small. The small edging is a variation of the large edging. The large edging is designed with such a logical progression of rows that after one repeat I had it committed to memory. Simple. Learn one, and you've learned both. No, it’s not that the edging is complicated, it’s just that there’s eight @#$!* feet of it. Eight. Feet. That’s 2.4384 meters, for metric types. However you measure, that’s a whole lot of lace to wrap around a doll that doesn’t reach my knee, and my knee isn’t that far off the ground, even when it’s Giselle night and I’m en pointe. It seems to have daunted the publishers of Weldon’s, and they were a tough bunch. About halfway down the pattern, errors–an uncommon sight in this trustworthy publication–began to pop up. I could almost hear the faint echo of the Victorian tech editor throwing the manuscript across her office, screaming, “Forget it! Nobody’s ever going to knit the whole bloody thing anyway!” So, listen. If it so happens that you are a mother, aunt or kind friend who would delight in dressing such a doll for a present, and you would like to deliver that present on (to pluck a date from the air) 25 December 2011, stop reading and cast on now. NOW! Because these wee widdle baby clothes are not of the kwik-n-kute variety. The robe is 36 inches around at the hem, and that hem must be edged with three of the eight feet (2.4384 meters) of lace. They’re pretty, I’ll give you that, in a why-dress-the-baby-when-we-can-upholster-it kind of way. And it takes a sturdy doll to wear them. They’d crush an American Girl like a grape. Poor, tiny Ethel ultimately proved unequal to the task,* and handed the wardrobe over to her bigger sister, Clarissa. The project was in its final stages when I spotted Clarissa in an antiques mall in Seattle, shamefully attired in a thrift-shop Steampunk déshabille consisting of a flimsy black tulle tutu and a strand of fake seed pearls. No self-respecting man would leave a noble, ancient doll to suffer like that, especially as she was going cheap. (Although it turns out the fake seed pearls were sold separately. They’re still there, if you want ’em.) Of course, winter’s coming and now I’m going to have to knit something for Ethel. Sh-t. * If you want a smaller ensemble, use smaller yarn and/or smaller needles. Change the gauge, change the size. Weldon’s wouldn’t mind, seeing as they didn’t bother to specify a gauge in the first place. |
|
 |
translated by
Franklin Habit from Weldon’s Practical Knitter,
Twenty Sixth Series |
| SIZE |
| Fits doll 14-16 inches high |
|
FINISHED MEASUREMENTS |
Top Petticoat: 16 1/2 inches long including
edging |
|
MATERIALS Notions |
| GAUGE |
24 sts/48 rows = 4 inches in garter stitch with larger needles. |
|
PATTERN NOTES |
Instructions for single
crochet and crochet chains can
be found here. Looped Knitting: With working yarn in right hand, wrap yarn around the tips of the first two fingers of the left hand and the tip of the right needle, held together; then wrap the yarn once more over the tip of the right needle only. With the tip of the right needle, pull all four wraps through the stitch on the left needle, and slide that stitch off the needle. Lace Edging A Lace Edging B |
|
DIRECTIONS |
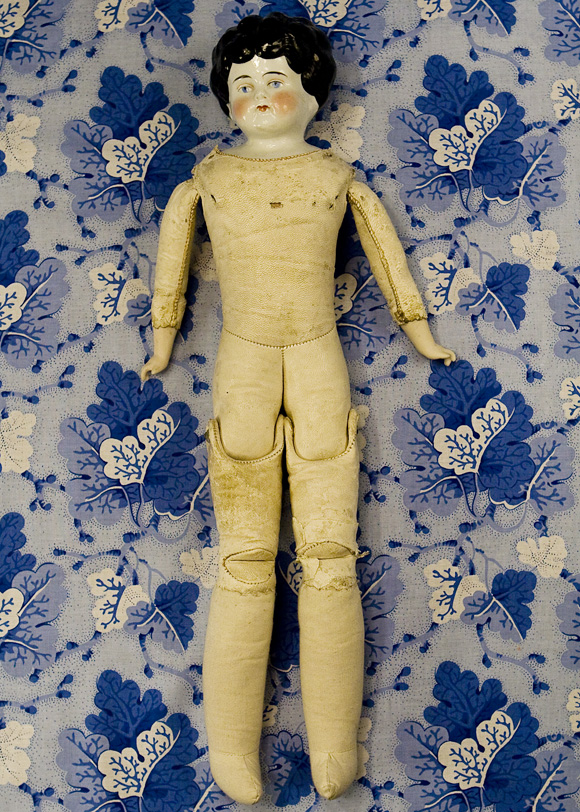
With larger circular needle, CO 80 sts. Join for working in the round, being careful not to twist. Place a marker for start of round. Neckline and armholes
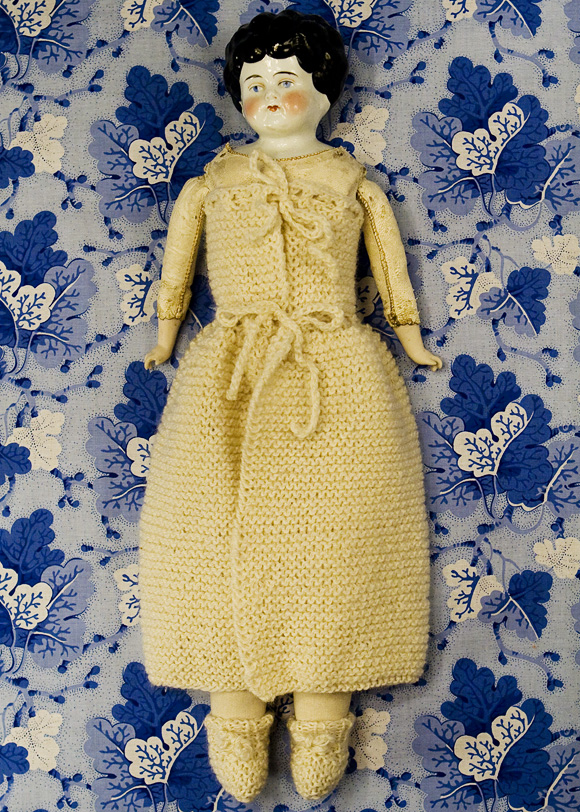 The pattern for these two pieces of the ensemble can be found in the first part of this feature, here. Bodice Eyelet round for waist tie, and increase for skirt: [K1, yo] around. 160 sts.
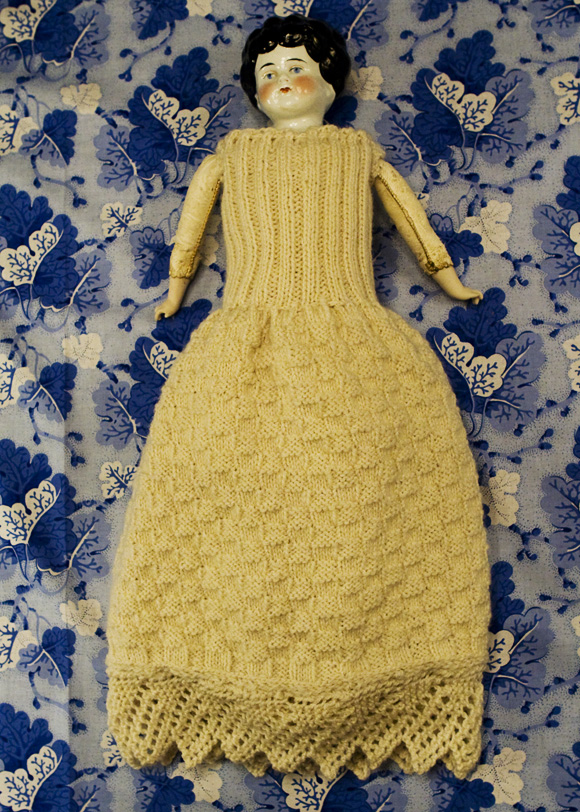
Skirt Repeat Rounds 1–8 until skirt measures 9 inches (approximately 88 rounds) from eyelet round. BO. Optional (but historically accurate): Work one round of single crochet around each armhole. Lace Trim FINISHING
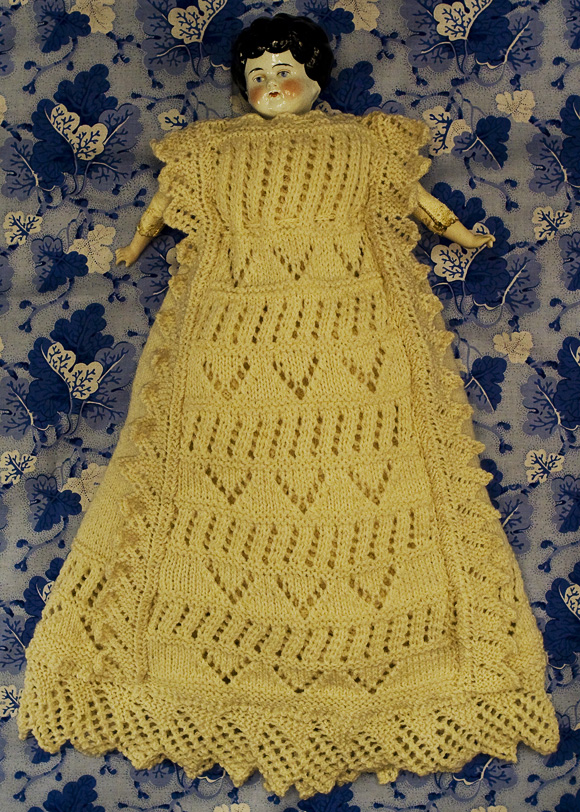
Front Using larger needle, CO 50 sts. K 5 rows. Row 25 [RS]: K10, [SKP, yo, k2tog, k7] twice, SKP,
yo, k2tog, k10. 43 sts. Row 49 [RS]: K8, [SKP, yo, k2tog, k7] twice, SKP,
yo, k2tog, k8. 39 sts. Row 73 [RS]: K6, [SKP, yo, k2tog, k7] twice, SKP,
yo, k2tog, k6. 35 sts. Row 97 [RS]: K4, [SKP, yo, k2tog, k7] twice, SKP,
yo, k2tog, k4. 31 sts. K 4 rows. Shape shoulders Next row [RS]: Join yarn where you left off and BO
until 4 sts rem total. K to end of row. Back Work in plain stockinette (k all RS rows, p all WS rows) for 10 inches, or until length of work is equal to length of robe front from hem to about three-quarters of the length of body of the front. Next row [RS]: [K2tog] across. 63 sts. Work in stockinette (K all RS rows, p all WS rows) until piece is equal to length of front from hem to safety pin. K 4 rows. Work shoulder shaping as for front. FINISHING Knit a length of Edging A sufficient to trim the lower edge of the robe. Knit two lengths of Edging B sufficient to reach from the lower edge of front seams of the robe, over the shoulder, to the lower edge of the back of the armhole. Sew Edging A to the hem of the robe. Sew one strip of Edging B to each seam line from the hem, along the shoulder strap, and down to the lower edge of the armhole. Crochet two 20-inch lengths of chain. Run these through the holes at the neckline and the waist; tie in back.
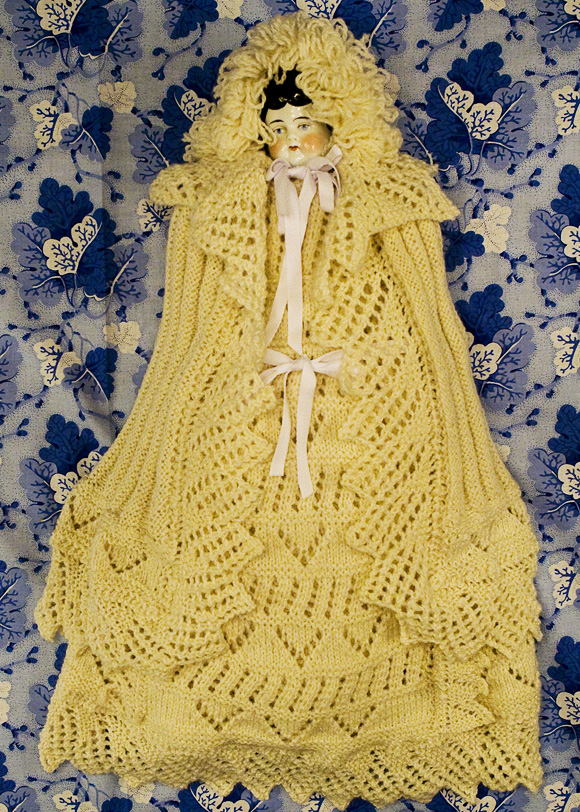
BONNET Back/Sides FINISHING Looped Edging Row 1: Knit. Repeat these two rows until you have worked a strip that will run completely around the outer edges of the assembled bonnet–front, sides and back. Beginning at center back, sew looped edging to outer edge of RS of bonnet. See photos as a guide. At lower corners of front opening, sew two lengths of ribbons to serve as ties.
CLOAK Row 1: Knit. Repeat Rows 1–5 44 times – there will be 23 raised and 22 depressed stripes. Though the fabric is reversible, the RS will be that which begins and ends with a raised stripe. BO. Lower Edge FINISHING Sew lower edge to center, spreading out the center ridges as you work to create a smooth seam. Lace Edging Run a length of yarn through the upper edge of the cloak and gently gather the ridges together. Weave in gathering yarn on each edge to secure. Knit a second length of Edging A sufficient to trim the gathered upper edge of the cloak center. Sew short strip of edging along RS of upper edge of cloak. Sew equal lengths of ribbon to upper corners of robe to serve as neck ties. Sew two more lengths to right and left edges of robe, approximately at position of doll’s waist, to serve as front closures, using photos as a guide. |
|
|
| ABOUT THE DESIGNER |
|
He teaches and lectures on a variety of knitting topics, across the United States and internationally. His dolls are home-schooled, so that they run no risk of mixing with Barbies and picking up horrid accents. |
| Pattern & images © 2011. Franklin Habit. |