Weave in ends.
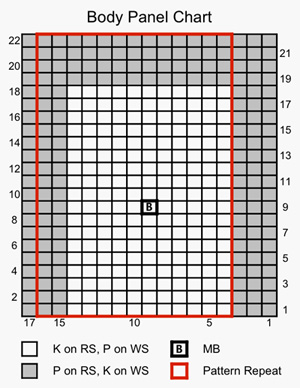
Carefully block all pieces, pinning Body panels
to measure approx. 12.5 inches square. Once
body panels are pinned out, pin Gusset so that
each section (between RS purl rows) will fit
along one edge of the Body Panel.
Lining
Cut two pieces of lining fabric, each 1 inch
wider than a Body Panel, and 2.5 inches longer.
Cut 1 piece of lining fabric that is 1 inch
wider than the Gusset, and 4 inches longer.
With right sides together and leaving 0.5-inch
seam allowances, sew Gusset lining piece around
3 sides of 1 Body Panel lining piece, clipping
corners.
Sew remaining Body Panel lining piece to Gusset
piece in the same way.
Fold upper 2 inches of lining to the outside,
and press firmly.
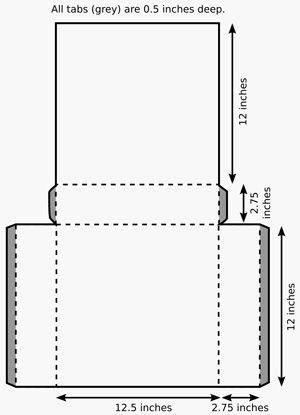
Card Insert
Note: Ensure that the white side of the
card is on the outside of the box insert!
Following the diagram, draw pattern for box-shaped
insert on white card. Cut out insert and score
dotted fold lines.
Fold to form a box, and apply glue or double-sided
tape to tabs to hold box together.
Bag
With wrong sides together so that seams are
visible on outside of bag, sew gusset along
edges of Body Panels.
Assembly
Place card insert into bag. Line up seam lines
and box edges.
You may wish to add batting between the layers
of the bag at this point. Secure the batting
to the card insert using double sided tape.
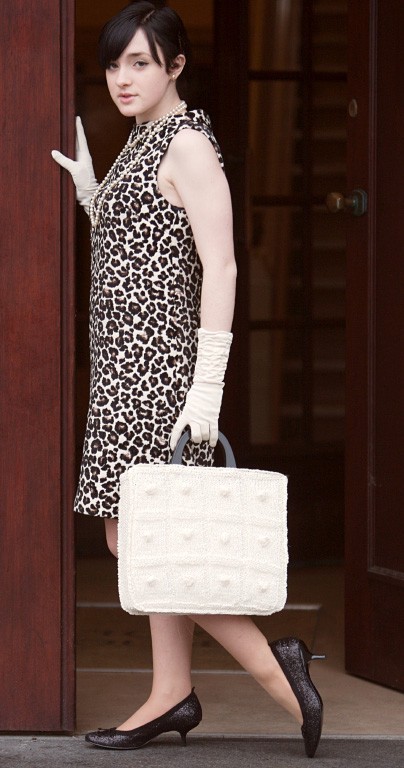
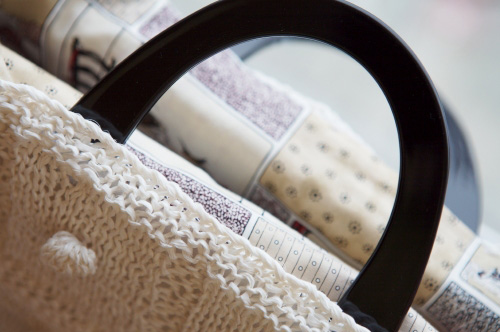
Mark handle positions and sew securely in place,
using photos as a guide.
Insert lining into bag (inside box insert),
ensuring that the seam allowances and hem are
facing the box.
Slip stitch folded upper edge of lining just
below upper edge of bag. |