| House of Cardigans

When staring at my pile of sweaters, I am
faced with a certain truth. I don’t
wear pullovers very often. In my climate,
and indeed in any climate with the innovation
of indoor heating, at least part of the day
is just too warm to be comfortable in a heavy
pullover. To remedy the situation, I’ve
turned my attentions in this issue of Frankenknits
to cardiganizing. The first two projects fall
into the “quick and dirty” school
of refashioning. They’re fun and
fast and great ways to get creative with
a pullover that’s lost its lease on life. The
third project is perhaps a bit more painstaking,
but well worth the effort. By following
the steps outlined below you’ll be able
to turn even a cherished sweater into something
once again wearable.
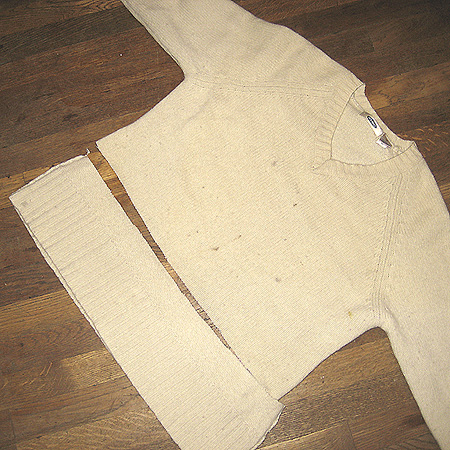
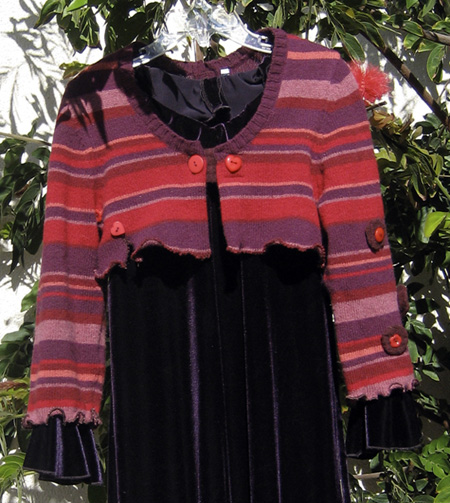
First up on the chopping block, a sweater
that either needs to be buried or reincarnated...a
rather boring off-white V-neck pullover. Furthermore
it’s got some lingering stains, and even
after a last ditch trip through the washing
machine it didn’t get truly spotless,
did felt it slightly. What to do?
First I cut off the ribbing on the bottom
along with about 4 inches of the body, bringing
the sweater to a cropped length. Because
the trip through the machine had made the fabric
a bit denser, I didn’t worry about just
cutting it and it all stayed put just
fine. The truth is that sweaters don’t
really unravel instantly on you, and with a
bit of care, you can work your Franken-magic
without much worry. I cut off the V-neck
collar to open up the neck a bit and sliced
up the front. Remember that once you
cut off the collar, the opening will grow,
so err on the side of cutting off less than
you think you need to.
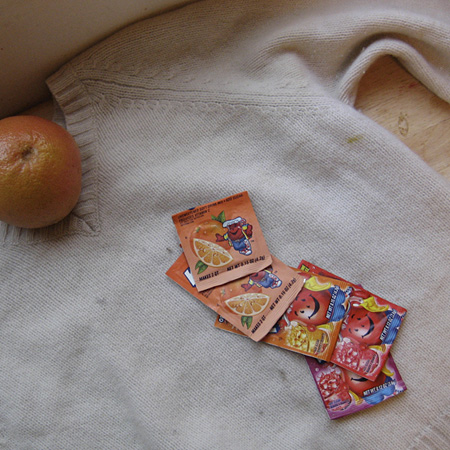
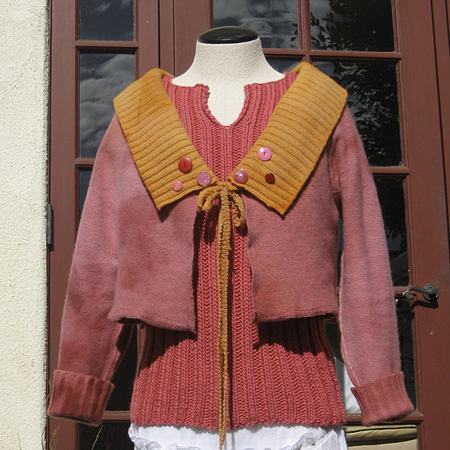
From there the sweater went into the dye pot
with some Kool-Aid. Four packets of Black
Cherry for the body and 2 packets of Orange
for the bottom of the sweater that will be
used as the collar. I simply submerged
the pieces in a pot of simmering water with
the drink mix and allowed them to stay there
until the water turned clear. It took
about 30 minutes. You can learn more
about Kool-Aid dyeing in an earlier Knitty
article I wrote. If your sweater
is made of cotton rather than an animal fiber,
you can dye it using a tie-dye kit readily
available at your local craft emporium, usually
in both primary and bright colorway options. Use
a single color or mix the color of your choice,
if you’re not channeling Jerry Garcia. Follow
the directions in the dye kit to get the result
you’re after, whether it’s a solid
color, a gradation of colors or a shibori technique.

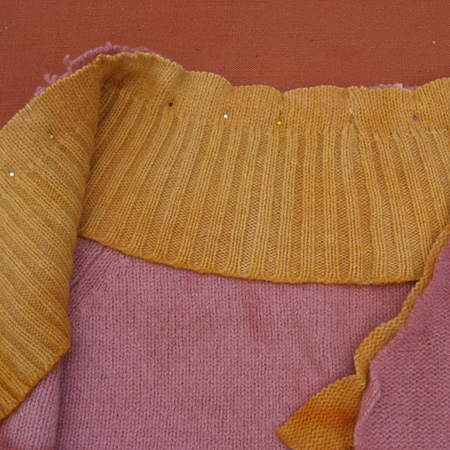
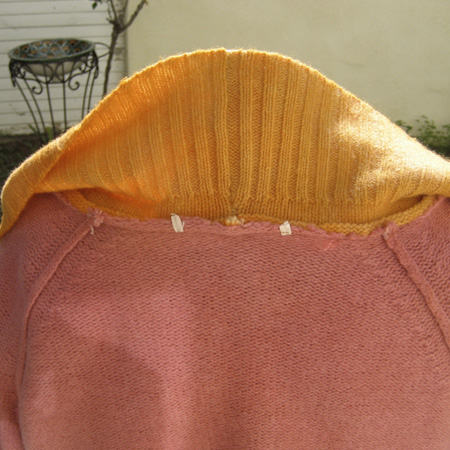
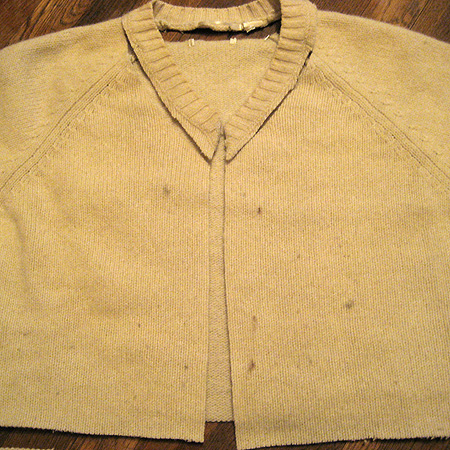
After the pieces were dyed, rinsed and dried,
I pinned the ribbing to the neckline to create
the collar. Because I knew my seams
and edges would be visible and unfinished on
this sweater, I chose to use the reverse stockinette
side as the outside of the sweater, yielding
a more deconstructed look. Because the collar
will fold over, pin the right side of the collar
to the wrong side of the sweater, then sew
close to the edge. Trim the seam and
then fold the collar over to the right side.
To finish the edges, I simply used the sewing
machine to sew around the open edges of the
sweater ¼-inch and ½ -inch from
the edges. You might also use close zig-zag
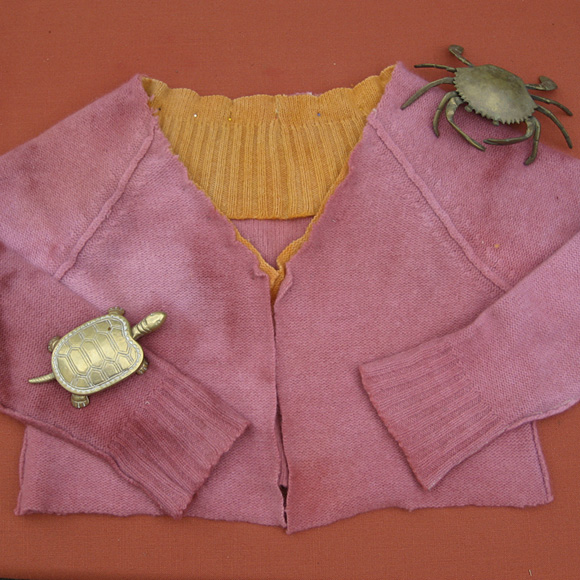
stitching to create lettuce edging as in the
child’s shrug shown below.
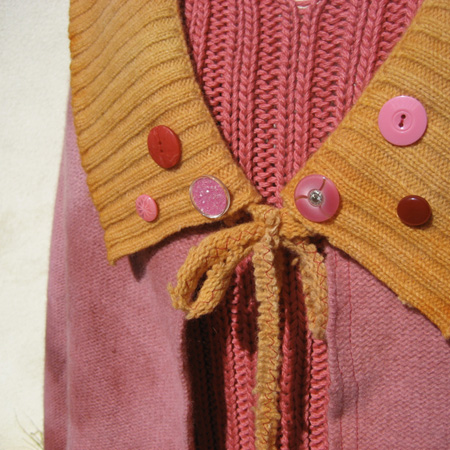
Vintage buttons and ties created from the
collar trimmings (with a line of zig-zag stitching
down the centers of the ties to prevent fraying)
finish the sweater.

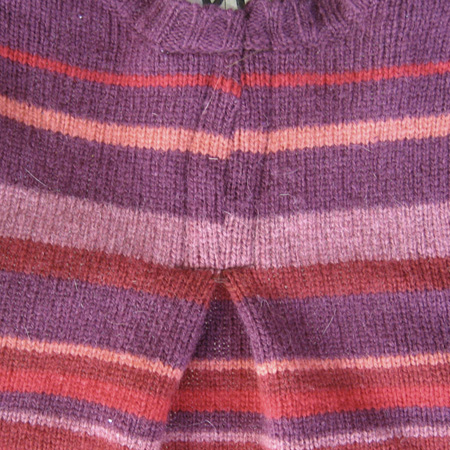
I used similar techniques to turn a small
women’s pullover into a shrug for a little
girl. I cut the sweater off to shrug
length and made a vertical incision to
open the front. I trimmed the sleeves
down to the right length, comparing them to
an appropriately sized garment. I turned each
side of the front under about an inch and sewed
them in place. To mirror the new width
on the front, I made a single box pleat at
the center of the back, stitching it in place
by machine. A sweet detail that improved
the fit.
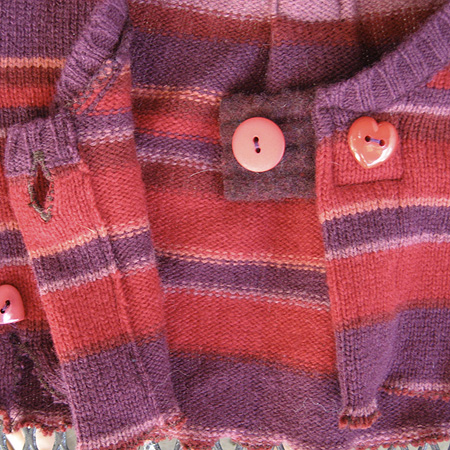
To close the shrug, I didn’t want to
overlap the already bulky buttonbands, so instead
I made a single buttonhole with the sewing
machine. From a spare piece of wool felt
from a previous project, I cut a rectangular
tab and stitched it down opposite the buttonhole. Buttons
on either side make a functional and whimsical
closure.
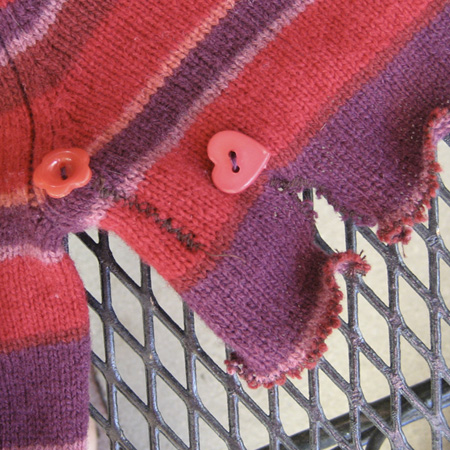
All unfinished edges along the bottom and
sleeves were given a lettuce edging by simply
zigzagging around them with a very short stitch. Stretching
the fabric as you go will make your edges curlier
still. Because there were a couple of rips
in the sweater, I zigzagged them too and highlighted
them by sewing buttons at the tops. In
this way, what were accidents seem like intentional
details.
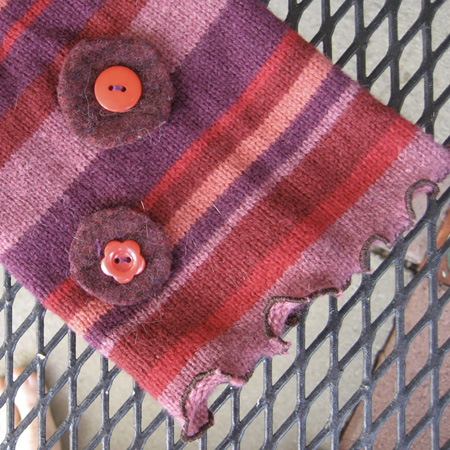
On one sleeve I added some simple flowers
but cutting circles out of contrasting felt
and tacking them in place with more buttons. The
result is fun and sweet, and a great way to
hand down a sweater that’s not being
worn.
While these two cardigans were largely sewing
projects and done, frankly, without a lot of
finessing on small details, the final project
of this cardigan triptych, features many skills
that you might be willing to try on a more
cherished sweater and indeed is standard operating
procedure on sweaters with complex colorwork
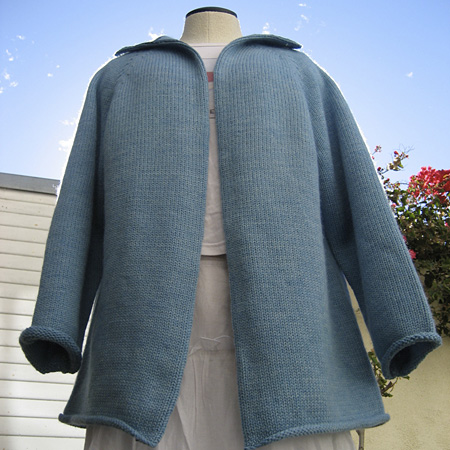
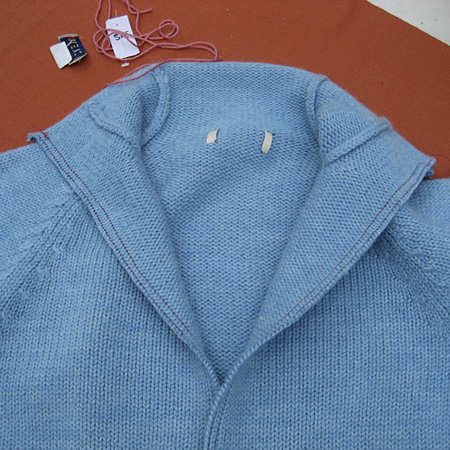
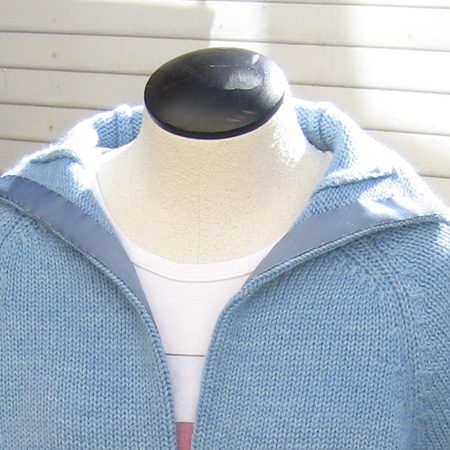
like Fairisles. The sky blue funnelneck
was well made with high quality wool. But
it was too big and heavy to be anything other
than a coat for me.
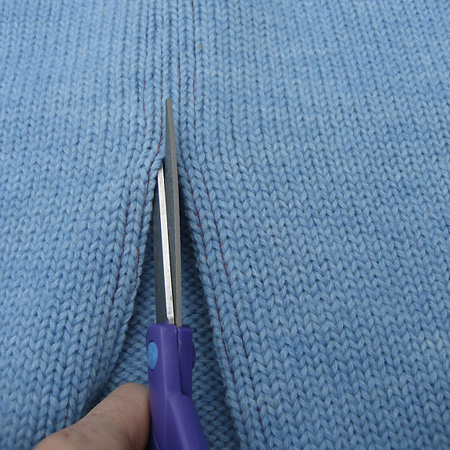
The first step was to find its center. Counting
the stitches, I found the middle and marked
it with a contrasting thread. After checking
to see that I’d gotten it right, I used
the sewing machine to sew in the ladder between
stitches on either side of my marked line. I
made a second seam one stitch out on either
side. You’ll make a total of four
lines of stitches, two on either side of the
marked line, one stitch apart. Uttering
a few words to the knitting deities, I snipped
up the center, exactly where my contrasting
thread ran.


Now you have a cardigan and all that remains
is finishing the edges. First, verify that
your sewing has done its job. If it doesn’t
seem firm enough, you might wish to go over
the seams again or to bind the edges with zigzag
stitches or a serger if you have the technology.
With the right kinds of yarn, over time the
loose ends more or less felt together and the
edges are quite sturdy, but now is a good time
to add an ounce of prevention if you are worried.
This technique is called “steeking” and
is commonly used on complex colorwork sweaters
worked in the round. You can find more information
on the technique by following these links,
including information lots of options for those
who want to work without a sewing machine:
There are a number of ways to
go from here to finish the front of your cardigan. If
you have yarn to spare from shortening the
body or sleeves of the sweater or from altering
the neckline, or if you want to use a contrasting
yarn, you can knit on buttonbands. Just
as you would with a sweater you knit with two
front panels, pick up stitches along the front
edges and knit the buttonbands as desired. If
you are working at the same gauge as the sweater,
you’ll want to pick up about three stitches
for every four rows. Pick up your stitches
in the ladder between the second and third
stitches, so that your lines of stitching will
fold under to the wrong side of the cardigan. If
you are changing yarns, check your gauge over
the stitch pattern you plan on using (for example
2 x 2 rib) and pick up the appropriate number
of stitches per inch.
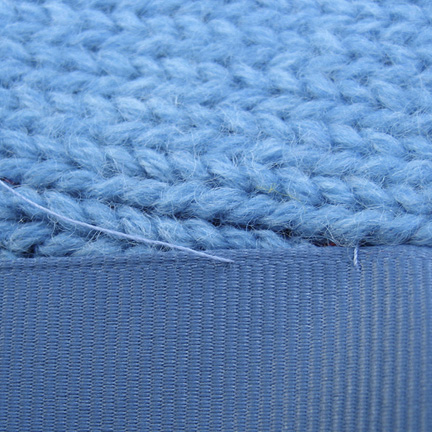
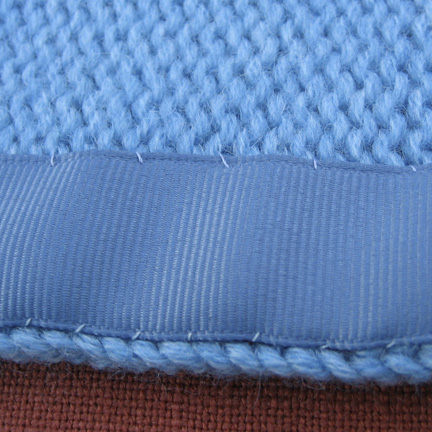
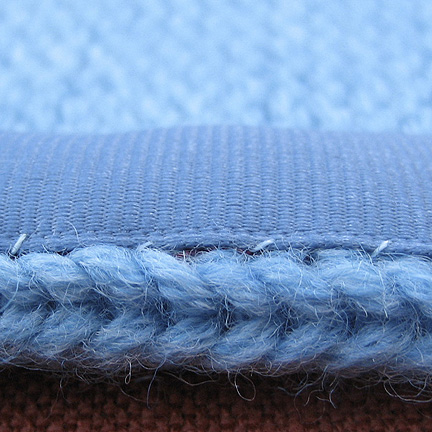
Rather than knitting on buttonbands, I just
wanted to have cleanly finished edges, and
to my mind, nothing does that better than grosgrain
ribbon. To attach the ribbon, align one
edge with the second line of stitching on the
right-side of the cardigan with the other edge
of the ribbon overhanging the cut edge of the
sweater. Sew it in place using blind stitch
as you would to hem a skirt. When that’s
complete, fold the ribbon under to the wrong-side
of the cardigan, making your fold one stitch
(or one half stitch for bulkier knits) in from
where you attached the ribbon. Finally,
use the same sort of stitches to tack the second
edge of the ribbon to the wrong-side of the
sweater, being sure to keep the ribbon flat
and unpuckered. The result will be a tidy and
sturdy edge that resists rolling. Later, you
might add a zipper, a large button and crocheted
button-loop, or a knitted frog closure made
with a long length of i-cord.
|


