


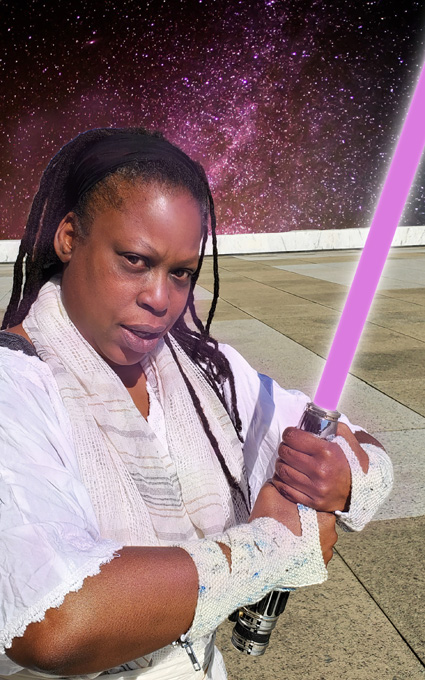
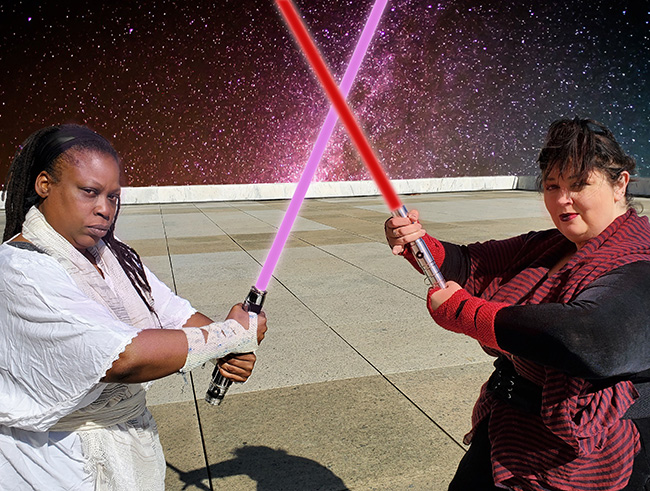
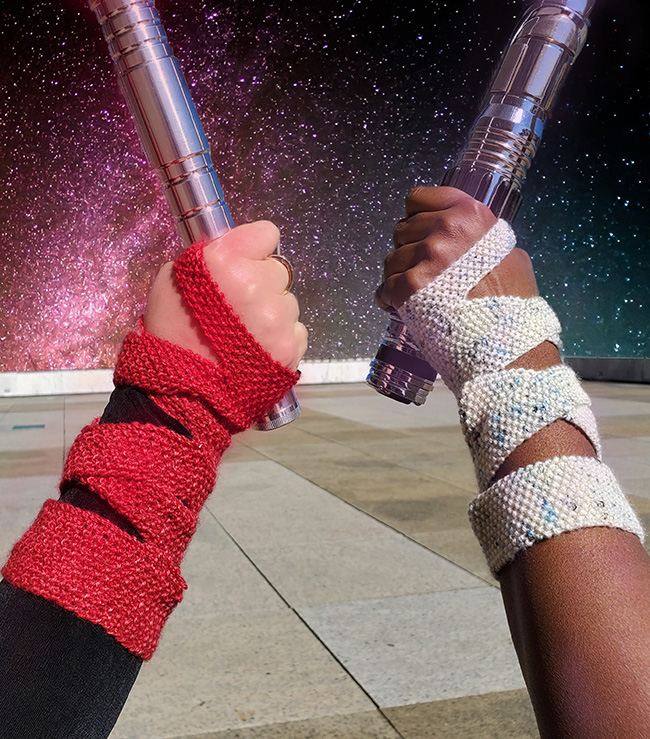
Bacta, a free knitting pattern from Knitty.com. Free knitting pattern for a pair of Star Wars' Rey-inspired cosplay mitts.
INTRODUCTION
Bacta
 by Allison Sarnoff


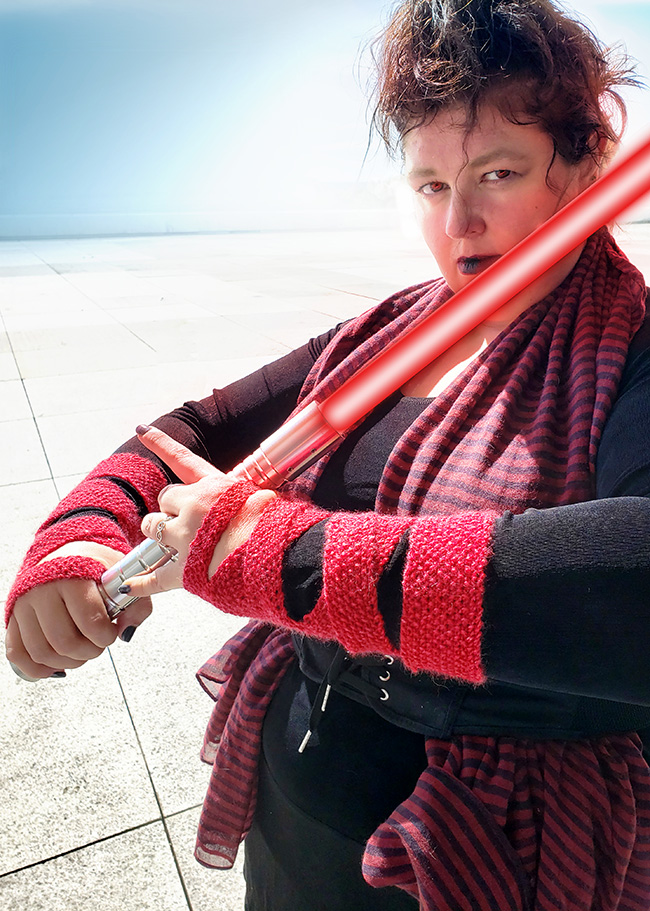
Not so long ago, in a galaxy closer to us, I had a crazy idea to make a set of knitted mitts. What inspiration could I possibly have though, I thought to myself, while watching The Empire Strikes Back? A ha! Surely Luke Skywalker would have needed something before being stuffed inside a Tauntaun by Han Solo. I mean, it was really cold looking on Hoth. They must have been wearing lots of knitted layers.
And so, Bacta was born. It's named after the stuff that Luke was floating in to heal up after being attacked by that Wampa. You can make them in Jedi Knight or Sith Lord, whichever side of the Force you're on or goes best with your winter coat.
Unlike following the Force, there is no one right way to wrap the straps of the mitts and they do not have to be symmetrical. I've given an example, but just thread the straps over and under each other until you have a pattern you like and work the straps in that order. You can also increase or decrease the lengths of the straps as needed to give you a snug fit. You'll need less than half the skein to make a pair of mitts, so you'll have a lot left over to make mitts for your friends. Get a couple of lightsabers and have at it. Just be on the lookout for Wampas!
The knitting is entirely straightforward. There are two different finishes: a very simple seam, or a slightly more challenging but fantastic-looking zipper.
 model: Rebecca Foster-Damour, Lakia Green and Allison Sarnoff
photos: Jessica Litwin, Allison Sarnoff


SIZE
One Size, Adjustable.
See Pattern Notes for guidance on adjusting.
FINISHED MEASUREMENTS
Circumference: As shown, 6.5 inches/16.5 cm at the wrist, adjustable to fit
Length: 8 inches/20 cm
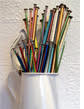
MATERIALS
Yarn
![]() Madtosh Pashmina [75% superwash merino wool, 15% silk, 10% cashmere; 360 yd/329 m per skein]; color: Stormborn (Jedi Knight) or Blood Runs Cold (Sith Lord); 1 skein
Madtosh Pashmina [75% superwash merino wool, 15% silk, 10% cashmere; 360 yd/329 m per skein]; color: Stormborn (Jedi Knight) or Blood Runs Cold (Sith Lord); 1 skein
Recommended needle size
[always use a needle size that gives you the gauge listed below - every knitter's gauge is unique]
![]() US #3/3.25mm needles for working flat
US #3/3.25mm needles for working flat
Note: the mitts can be worked on straight needles, but because of how they're constructed, you might find it easier to use a short circular needle.
Notions
![]() five stitch holders
five stitch holders
![]() yarn needle
yarn needle
![]() sewing needle
sewing needle
![]() small amount of sewing thread to match the yarn
small amount of sewing thread to match the yarn
![]() sewing pins
sewing pins
Optional: Two 8 inch/20cm non-separating zippers to either match the yarn (as in the Jedi Knight sample) or be an accent color (as in the Sith Lord sample)
GAUGE
24 sts/40 rows = 4 inches/10 cm in seed stitch
28 sts/32 rows – 4 inches/10 cm in stockinette stitch
PATTERN NOTES
[Knitty's list of standard abbreviations and techniques can be found here.]
Long Tail CO
The Long-Tail Cast On was used for both samples, however any firm cast on will work.
Instructions for the Long-Tail Cast On can be found here and here.
On Closure
You have two options for closing the mitt. You can either seam the cast on edge to the bind off edge or you can add a zipper. Either way is fairly straightforward. You can even experiment a bit and add a series of buttons or hook and eye closures!
On Fit and Adjustment
The mitts should fit snugly to the forearm. For smaller sizes, decrease the lengths of the knitted straps. For larger sizes, increase the lengths of the knitted straps.
As you work, measure your wrist and forearm to determine the length of each strap:
The first strap should be worked to the actual measurement of your wrist. The starting and ending straps are each 1.75 inches/4cm long, so subtract 3.5 inches/8 cm from your actual measurement. This is the length you work for Strap 1.
For the next straps, measure your forearm 1 inch/2.5 cm up from the previous measurement. For all the rest of the straps, the finished length (including the 3.5 inches/8 cm for the base straps) should measure approximately 1 inch (2.5 cm) less than your actual measurement, so that they stretch to fit and stay in place. Keep measuring and moving up the forearm until you've measured for all six straps.
DIRECTIONS
Mitts (Make Two)
Using the Long-Tail method, CO 50 stitches.
Row 1 [RS]: (K1, p1) to end.
Row 2 [WS]: (P1, k1) to end
Repeat the last 2 rows until work measures 1.75 inches/4.5 cm, ending with a WS row. If you're using the seamed version, work 2 more rows.
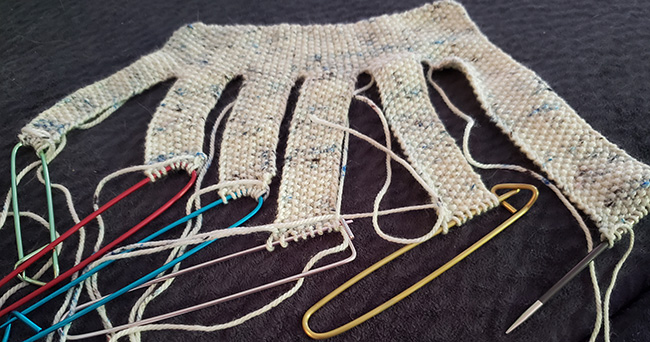
Strap 1 – Worked across the first 6 sts of the row:
Row 1 [RS]: (K1, p1) three times, turn.
Row 2: (P1, k1) three times, turn.
Repeat the last 2 rows until this first strap measures 4.75 inches/12 cm from the cast on edge, or desired length, ending with a WS row. Cut yarn leaving a 6 inch/15 cm tail and transfer stitches to a stitch holder.
Strap 2 – Worked across the next 8 sts of the row:
Row 1 [RS]: (K1, p1) four times, turn.
Row 2: (P1, k1) four times, turn.
Repeat the last 2 rows until this first strap measures 4.75 inches/12 cm from the cast on edge, or desired length, ending with a WS row. Cut yarn leaving a 6 inch/15 cm tail and transfer stitches to a stitch holder.
Straps 3, 4, and 5:
Work as for Strap 2, working the next set of 8 sts. Strap 3 should measure 5.25 inch/13.5 cm from cast on edge (or desired length), Strap 4 should measure 5.75 inches/14.5 cm from cast on edge (or desired length), Strap 5 should measure 6.25 inches/16 cm from cast on edge (or desired length).
Strap 6 – Worked across the last 12 sts of the row:
Row 1 [RS]: (K1, p1) six times, turn.
Row 2: (P1, k1) six times, turn.
Repeat the last 2 rows until this first strap measures 7.25 inches/18.5 cm, or desired length, from the cast on edge, ending with a RS row. Turn work.
Joining row [WS]: Work in patt across the 12 stitches of strap 6, then work the 8 stitches of strap 4. Thread strap 5 over strap 4 and work the 8 stitches of strap 5. Work the 8 stitches of strap 2. Thread strap 3 over strap 2. Work the 8 stitches of strap 3. Work the 6 stitches of strap 1. 50 sts.
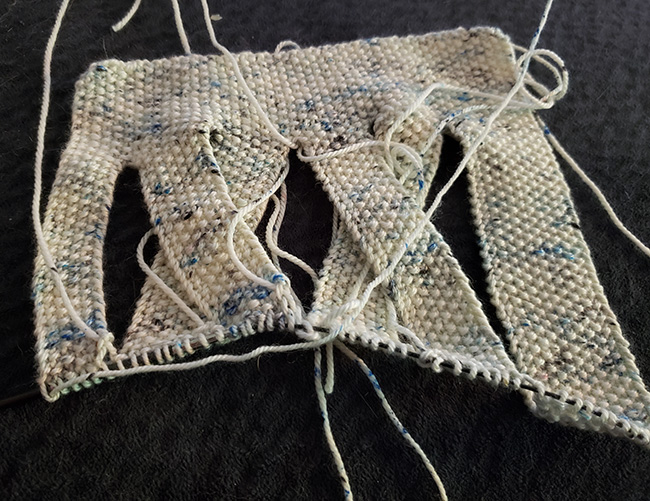
Beg with RS, work Seed St as set for 1.75 inches/4.5 cm. If you're seaming, work two more rows.
Bind off knitwise.
FINISHING
Weave in all ends and wet the mitt. Squeeze out the water and gently stretch the piece so the cast on and bind off edges are 8 inches/20 cm long.
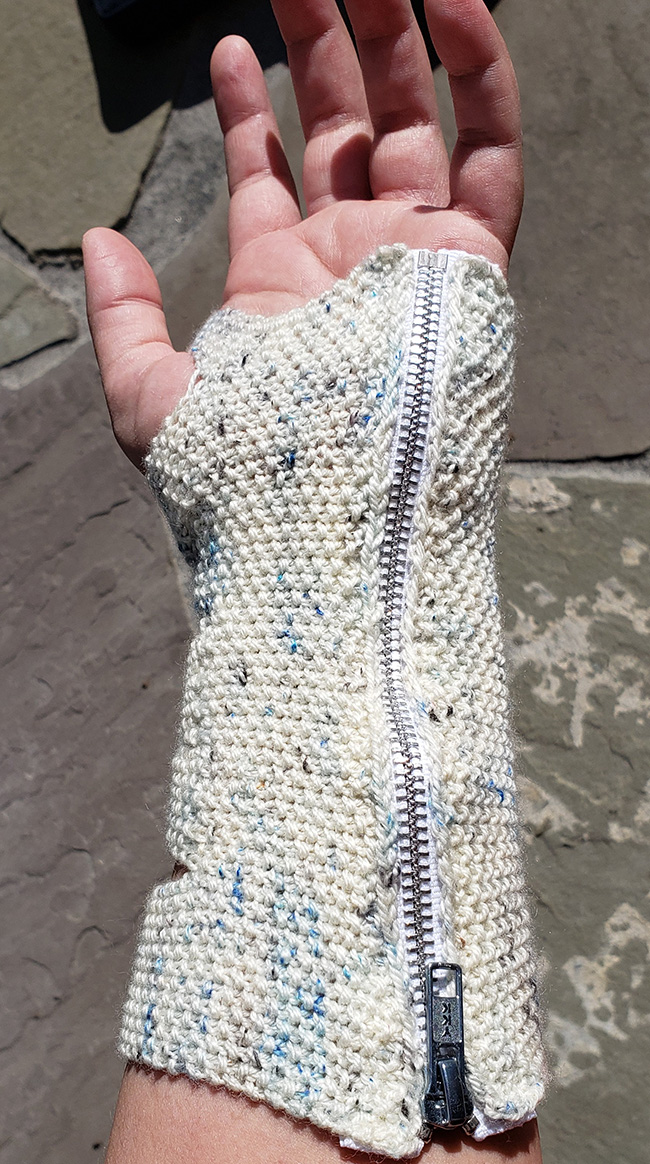
Version 1: Zipper
With the right side facing and with sewing pins, pin the cast on edge to the closed zipper with the zipper pull closest to strap 6. Fold the ends of the zipper over as you pin to keep the ends underneath the work. Sew the zipper to the edge of the work. Knot off and trim the thread.
Pin the bind off edge to the other side of the zipper so the mitt wraps around the forearm and sew in zipper, being sure to fold in the ends of the zipper. Knot off and trim the thread.
Version 2: Seamed
With RS facing, seam the cast on edge to the bind off edge.
ABOUT THE DESIGNER
 Allison Sarnoff was the long-time writer of the Knit Princess web comic. She is the co-author of Unobtainables: Fake Elements, Real Knits, a book of patterns inspired by fictional chemical elements. Because that isn't quite nerdy enough, she also studies and teaches the history of knitting and reads any articles and books she can get her hands on to get more information on that topic.
She lives in Troy, NY with a roommate, five cats, a lot of books, and a really irresponsible amount of yarn. In addition to her yarn obsession, she is hard at work on her first novel.
Find her on Ravelry.
Pattern & images © 2019 Allison Sarnoff.