|
|
 |
Mr. Popper’s Penguins was one of our favorite books last winter, its quaint and old fashioned charm infused our chilly days. Simultaneously, our hot water bottle was resurrected as a necessary bedtime ritual to keep my girl from shivering herself to sleep! A solution, and a knit one at that, was needed to cover the offensive red rubber water bottle. And so, Mr. Popper was born. He’s snuggly, he’s wooly, he’s whimsical and he’s warm...turn down your heat, fill up that bottle and climb in bed with Mr. Popper! |
|
SIZE |
 
|
|
FINISHED MEASUREMENTS |
|
MATERIALS Notions |
|
GAUGE |
|
PATTERN NOTES |
|
Work with yarn held double throughout project. I wound my yarn into center pull balls and used both ends. When switching between yarn colors make sure you catch the yarn you are done using with the first st of the new color. This will ensure there are no holes in between color changes. Chart: Click for the chart; it will print on one letter-sized page. Intarsia-in-the-Round Yarnover Method: Working stitches together with their wraps: |
|
DIRECTIONS 
With two strands of MC and dpns/long circular/single short circular CO 16 sts. Do not join. Row 1 [WS]: Purl. Row 2 [RS]: Knit. Row 3 [WS]: Purl. Row 4 [RS]: K1, m1, k to last st, m1, k1. (18 sts) Row 5 [WS]: Purl. Row 6 [RS]: Knit Row 7 [WS]: Purl Repeat these last 4 rows 3 more times. (24 sts) Knit 1 row, then CO 22 more sts at the end of this row. Join for working in the round, being careful not to twist sts and k35 sts, pm (end of round, center back of penguin). (46 sts total) Knit 1 round. BODY Follow the written instructions and refer to the chart as a guide. Round 1 [RS]: With MC k8, switch to CC1,
k30, attach another set of MC, k8, slip marker, turn, yo on
right-hand needle, slip marker. 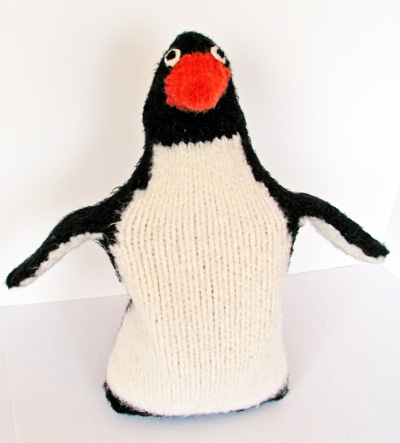 Round 4 [WS]: With MC p8, switch to CC1, p30, switch to MC, p7, p2tog, slip marker, turn, yo on right-hand needle, slip marker. Repeat Rounds 3 and 4 three times more. Round 11 [RS]: With MC k9 , switch to CC1, k28, switch to MC, k8, k2tog tbl, slip marker, turn, yo on right-hand needle, slip marker. Round 12 [WS]: With MC p9, switch to CC1, p28, switch to MC, p8, p2tog, slip marker, turn, yo on right-hand needle, slip marker. Repeat Rounds 11 and 12 twice more. Round 17 [RS]: With MC k10, switch to CC1, k26, switch to MC, k9, k2tog tbl, slip marker, turn, yo on right-hand needle, slip marker. Round 18 [WS]: With MC p10, switch to CC1, p26, switch to MC, p9, p2tog, slip marker, turn, yo on right-hand needle, slip marker. Round 19 [RS]: With MC k11, switch to CC1, k24, switch to MC, k10, k2tog tbl, slip marker, turn, yo on right-hand needle, slip marker. Round 20 [WS]: With MC p11, switch to CC1, p24, switch to MC, p10, p2tog, slip marker, turn, yo on right-hand needle, slip marker. Round 21 [RS]: With MC k12 , switch to CC1, k22, switch to MC, k11, k2tog tbl, slip marker, turn, yo on right-hand needle, slip marker. Round 22 [WS]: With MC p12, switch to CC1, p22, switch to MC, p11, p2tog, slip marker, turn, yo on right-hand needle, slip marker. 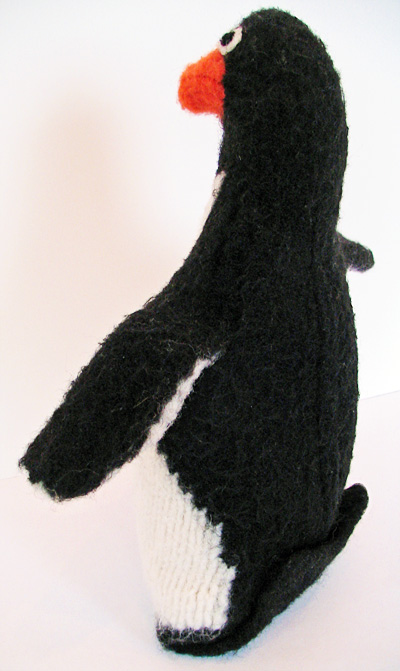 Round 24 [WS]: With MC p13, switch to CC1, p20, switch to MC, p12, p2tog, slip marker, turn, yo on right-hand needle, slip marker. Round 25 [RS]: With MC k14 , switch to CC1, k18, switch to MC, k13, k2tog tbl, slip marker, turn, yo on right-hand needle, slip marker. Round 26 [WS]: With MC p14, switch to CC1, p18, switch to MC, p13, p2tog, slip marker, turn, yo on right-hand needle, slip marker. Repeat Rounds 25 and 26 twice more. Round 31 [RS]: With MC k15 , switch to CC1, k16, switch to MC, k14, k2tog tbl, slip marker, turn, yo on right-hand needle, slip marker. Round 32 [WS]: With MC p15, switch to CC1, p16, switch to MC, p14, p2tog, slip marker, turn, yo on right-hand needle, slip marker. Repeat Rounds 31 and 32 twice more. Round 37 [RS]: With MC k16 , switch to CC1, k14, switch to MC, k15, k2tog tbl, slip marker, turn, yo on right-hand needle, slip marker. Round 38 [WS]: With MC p16, switch to CC1, p14, switch to MC, p15, p2tog, slip marker, turn, yo on right-hand needle, slip marker. Note: On Rounds 39 and 40, you will be binding off and casting on 6 sts at each side of the penguin. You will be inserting flippers here later. Round 39 [RS]: With MC k9, BO6, switch to CC1, k14, switch to MC, k1, BO6, k7, k2tog tbl, slip marker, turn, yo on right-hand needle, slip marker. Round 40 [WS]: With MC p9, CO6, p1, switch to CC1, p14, switch to MC, p1, CO6, p8, p2tog, slip marker, turn, yo on right-hand needle, slip marker. Round 41 [RS]: Same as Round 37. Round 42 [WS]: With MC, p9, p2tog, p2tog tbl, p3, switch to CC1, p14, switch to MC, p3, p2tog, p2tog tbl, p8, p2tog, slip marker, turn, yo on right-hand needle, slip marker. Round 43 [RS]: With MC k14 , switch to CC1, k14, switch to MC, k13, k2tog tbl, slip marker, turn, yo on right-hand needle, slip marker. Round 44 [WS]: With MC p14, switch to CC1, p14, switch to MC, p13, p2tog, slip marker, turn, yo on right-hand needle, slip marker. Repeat Rounds 43 and 44 once more. Round 47 [RS]: With MC k8, ssk, k2tog, k3, switch to CC1, k12, switch to MC, k3, ssk, k2tog, k7, k2tog tbl, slip marker, turn, yo on right-hand needle, slip marker. Round 48 [WS]: With MC p13, switch to CC1, p12, switch to MC, p12, p2tog, slip marker, turn, yo on right-hand needle, slip marker. Round 49 [RS]: With MC k13, switch to CC1, k12, switch to MC, k12, k2tog tbl, slip marker, turn, yo on right-hand needle, slip marker. Round 50 [WS]: With MC, p7, p2tog, p2tog tbl, p2, switch to CC1, p12, switch to MC, p2, p2tog, p2tog tbl, p6, p2tog, slip marker, turn, yo on right-hand needle, slip marker. Switch to DPNs when it becomes uncomfortable to work on the circular needle. Round 51 [RS]: With MC k11, switch to CC1, k12, switch to MC, k10, k2tog tbl, slip marker, turn, yo on right-hand needle, slip marker. Round 52 [WS]: With MC p11, switch to CC1, p12, switch to MC, p10, p2tog, slip marker, turn, yo on right-hand needle, slip marker. Round 53 [RS]: With MC k6, ssk, k2tog, k1, switch to CC1, k12, switch to MC, k1, ssk, k2tog, k5, k2tog tbl, slip marker, turn, yo on right-hand needle, slip marker. Round 54 [WS]: With MC p9, switch to CC1, p12, switch to MC, p8, p2tog, slip marker, turn, yo on right-hand needle, slip marker. (30 sts rem) Cut CC1 yarn and non-working MC yarn, leaving 6 inch tails. K1 round in MC, stopping at end of round, remembering to knit together last yarn-over with final stitch. 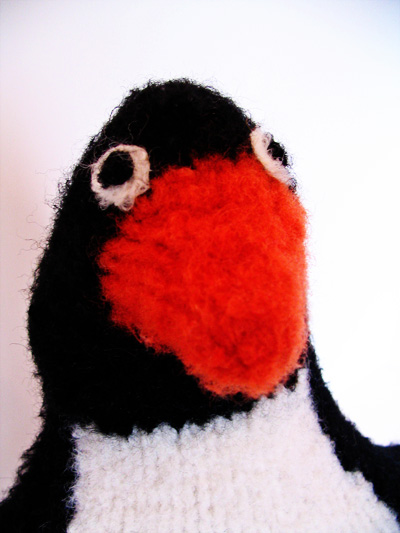 With MC only: Row 1 [RS]: K9, wrap and turn. Row 2 [WS]: P18, wrap and turn. Row 3 [RS]: K17, wrap and turn. Row 4 [WS]: P16, wrap and turn. Row 5 [RS]:K15, wrap and turn. Row 6 [WS]: P14, wrap and turn. Row 7 [RS]: K13, wrap and turn. Row 8 [WS]: P12, wrap and turn. Row 9 [RS]: K11, wrap and turn. Row 10 [WS]: P10, wrap and turn. Row 11 [RS]: Knit to end of round. Next round: Knit 10 sts, picking up wraps and knitting them together with wrapped st (see Pattern Notes above), k2tog, k6, k2tog, k to end picking up wraps and knitting them together with wrapped st. (28 sts rem) Row 1 [RS]: K6, wrap and turn. From here, you’ll work in full rounds. Next round: K10 picking up wraps and knitting them together with wrapped st, k2tog, k6, k2tog, k to end picking up wraps and knitting them together with wrapped st. (26 sts rem) Round 1: K9, k2tog, k4, k2tog, k to end. (24
sts rem) Switch to CC2 yarn for beak: FLIPPERS You will now begin working intarsia in the round for the
flipper. Round 1 [RS]: K5, switch to MC, k2tog, k6,
k3tog tbl, turn, yo on right-hand needle
(2
CC1 sts decreased; 12 sts remain.) Make second flipper the same. |
|
FINISHING 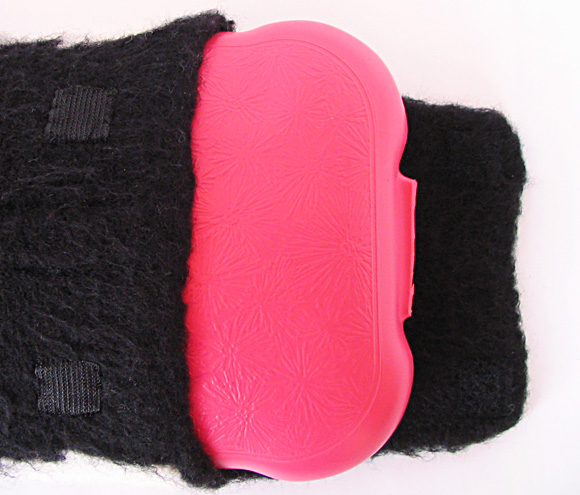
|
| ABOUT THE DESIGNER |
|
|
|
Pattern & images © 2009 Laura Nelkin. Contact Laura |


