 |
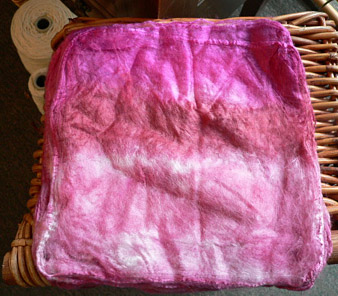
| Dyed silk hankies in Rosepetals
from Chasing Rainbows Dyeworks |
In my opinion, there
is no easier fiber to spin on a drop spindle
than silk hankies. Why?
- You do all the drafting
before you pick up the spindle.
- The fiber has just enough tooth to not slip through
your fingers uncontrollably.
- The finished yarn can, depending on how you spin
it, be quite shimmery
- It's great fun and rarely frustrating. Really
encouraging for a new spinner.
Both silk hankies and
silk caps are piles of individual lighter-than-air
silk cocoons, spread on a form to dry -- this
gives them their shape. For hankies, it's a
square, flat form. For caps, it's a bell-shaped
form. I prefer hankies, because I find it easier
to separate the layers.
You can buy silk hankies undyed
from many shops on the internet. You can dye the hankies
[en masse, rather than individually, cause that would
just drive you mental] using any
dye that works with silk, including Kool Aid. Watch
Knittyspin for an article on dyeing silk hankies in
a future issue.
You can also buy dyed hankies.
The ones shown in this article were bought from
via Crown Mountain Farms, a very friendly online
retailer.
In all cases, my spindles
are in the 1.2oz range. Use whatever spindle suits
you and the kind of yarn you want to spin.
How
to spin silk hankies:

| Tip:
Use an exfoliant [like a scrub you'd
use for your face or body, or make
a batch of one of these
recipes] on your hands before
you spin. Any little bit of dry
skin will catch the silk as you
spin and be annoying to you. |
|
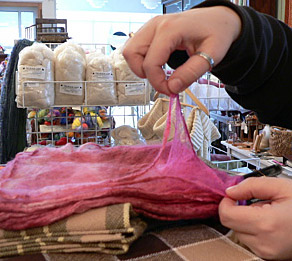
| Remove
the thinnest layer possible from the stack.
If you can't see through it, you've got
more than one hanky. You'll notice a big
hole in the hanky above. No worries. It
all works out in the drafting and spinning.
There is no such thing as a perfect hanky.
You will see thick spots and thin spots
and sometimes...holes. [If it were a perfect
cocoon, it would have been reeled into yarn
instead. But that's another article.] |
 |
Poke
a hole in the center of the hanky. |
|
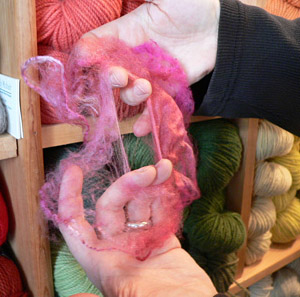
| Insert
two fingers of each hand in the hole, and pull
out to widen it. You're drafting the roving into
a big oval. You can tug quite firmly. Don't be
shy. |
|
| Keep
your hands about 12" apart as you draft,
because the silk fibers are quite long.
If you find you can't pull apart any further,
but the roving is still too thick for your
liking, move your hands further apart. You
may find solid bits in your hanky that refuse
to be drafted once in a while. They will
not take the spin well and act as slubs
in your yarn. You can leave them in if you
like that texture or remove them if you
want a more refined yarn. |
|
| Remember
that the thinner you draft the roving, the
thinner your yarn will be. If you want to
use the hankies as singles, you'll get more
shimmer if you draft less before spinning.
You can use the natural distance from one
knee to the other [however you sit] as a
gauge to help you keep the roving thickness
roughly consistent from hanky to hanky. |
|
| Break
the circle of roving somewhere. If you want
to keep your color transitions relatively
consistent, try to pick the same spot each
time [for example, the place where the pale
pink turns into deep burgundy]. You can
knit with the roving just as it is if you
like the rustic look, or give it some twist
with a spindle. Personally, I like this
stuff best once it's spun, so let's continue
on. |
| |
| Decide
which color to begin with [in this case,
either the pale pink or the deep burgundy].
Twist a little bit of the starting end between
your fingers, and then tie it around the
shaft of your spindle. You're ready to spin! |
| |
| Tip:
How do you
actually get the spindle spinning?
I use my left hand [though I am right
handed] and roll the shaft quickly
between my thumb and the rest of my
fingers. My friend Emma runs her spindle
along the outside of her right thigh
while she's seated, which -- she tells
me -- gives her greater speed and
less wobble. Whatever works for you
is fine. |
[The following
assumes you've never handled a spindle before.]
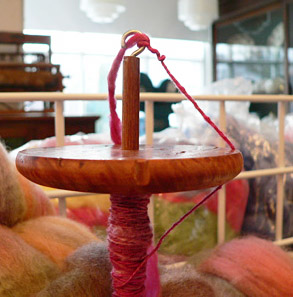
Take the roving over the whorl of the spindle
and settle it in a notch, then loop it through
the hook. Get the rest of the unused roving
out of the way of the spindle, so it doesn't
catch as the spindle is doing its twirly
thing. I throw mine over my right shoulder.
Firmly grasp the roving about 12" above
the hook [we'll call the hand you're doing
this with your top hand], and spin
the spindle with your other hand. Remember
that it doesn't really matter which way
you spin the spindle, as long as you always
spin one batch of roving the same way every
time. You'll also need to remember which
way you turned the spindle when it's time
to ply that batch -- because then you're
going to go in the opposite direction. |
|
When you feel the
twist reach your top hand, you're probably ready
to wind most of the yarn you've just spun onto
your spindle. Keeping tension between the spindle
and your top hand, wrap the yarn around the shaft
of the spindle a few times, until it catches.
Then you can twist the spindle with your other
hand and the yarn will neatly wind on. Stop winding
on, leaving a few inches of spun yarn to go over
the whorl and through the hook. What sits immediately
above the hook should be very lightly spun roving
that you'd still like to put more twist into.
|
| Tip:
Stop and knit with a little of your hanky
roving or yarn as you plan to use it before
you make up a whole bunch. Do you like
how it looks? Maybe you drafted it too
thin or too thick. If you're a new spinner
like I am, actually knitting the stuff
may help guide you better to creating
roving that's the diameter you want it
to be. [Drafting was so much fun that
some spots in my spun hankies are thin
enough to be dental floss. It's easy to
get carried away.] |

|
| Continue spinning
and winding until you've got about 4" of
unspun roving left. Wrap the unspun roving around
the hook of your spindle a few times and set it
aside. |
|
| Draft another hanky's worth of
roving. Now overlap the two ends of the hanky
roving -- and if they're too thick, you can thin
them down a little so they will equal the same
width as the rest of the roving once they're spun
together. |
|
|
| The tooth of the silk hanky will
help keep the roving joint from sliding apart,
but you will want to keep your fingers on the
top of the overlap until there is a little twist
in the joint. The joint firms up really quickly
once you add a little twist, and a gentle tug
on the roving will show you if it's secure or
needs more twist. This is one of my favorite aspects
of spinning silk hankies...and something that
doesn't happen when you're spinning slippery silk
top or soy silk. |
Now you're spinning!
Just keep going until you run out of hankies
or need a break.
Further reading:
|

