Last
issue, I talked about the cabling basics.
This issue, I’ll be attempting to delve
a little deeper into some miscellaneous cable
knowledge – hints for reading charted
cable symbols, making a decorative mini-cable
and correcting a mis-crossed cable a few rows
down.
Deciphering cable symbols:
The symbols in charted cable patterns vary
widely. In fact there seem to be nearly as
many ways to chart a cable as there are cables
to chart. Always, always check the symbol
key for detailed instructions on how to work
the cable in question.
Thankfully it is not too
terribly uncommon to have some variation
that shows which direction the cable leans.
For example, this is a symbol for a simple
four stitch, front cross cable:
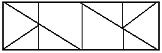
You can see that the column in the middle
of the symbol leans towards the left:
Last
issue we learned that to make a LEFT leaning
cable, you hold the stitches in FRONT of the
work.
See how that works?
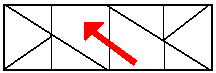
The same is true for the right leaning, back
cross cable:
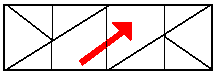
You can see how it resembles the cable it
represents…
…which can make it a bit easier to
read the charts at a glance. Of course,
this depends on having firmly embedded in your
brain that for right-leaning cables, you hold
the stitches in the back, and for left-leaning
cables you hold the stitches in the front.
Perhaps you can think “be RIGHT BACK” and … well,
both leFt and Front have the letter “f” in
them. (Okay, that last one was lame.)
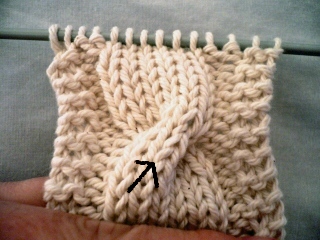
Mini-cables
These very cute, very simple mock cables are
excellent borders to larger cables and are
quite easy to do, once you learn their secrets.
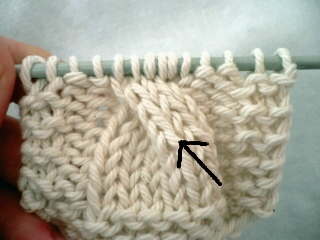
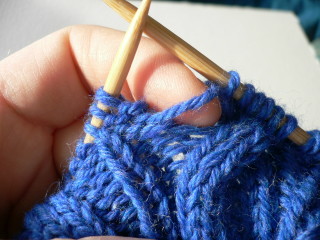
To start you will need to have two knitted
stitches on a purl background, like this:
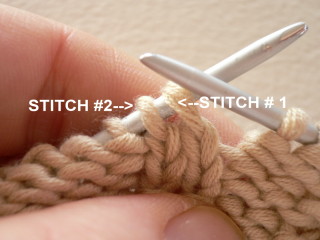
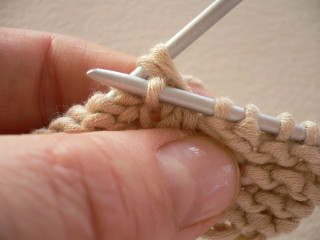
Insert your right-hand (working) needle into
the second stitch on the left-hand needle – labeled
STITCH #2 in the picture above:
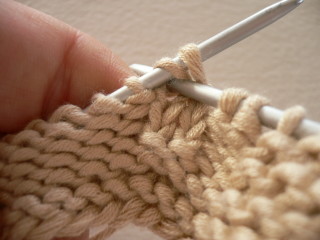
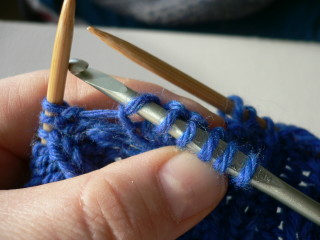
… and knit it first. Do not slip it
off. Leave it in its position on the left hand
needle. (I know this is weird. Press on.)
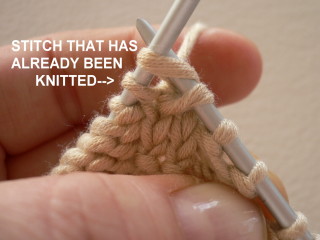
Now insert the right hand (working) needle
into STITCH #1:
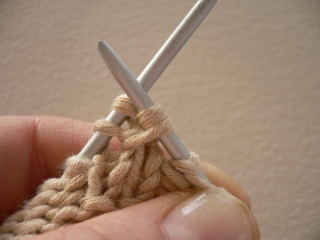
and
knit it. Then slip the two worked stitches
off the left hand needle at the same time.
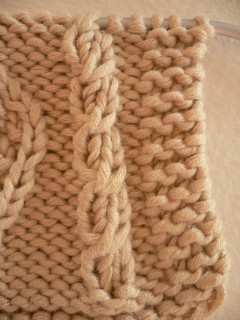
Do this every 4th row for a miniature
cable that looks like this:
You can also make three- and four-stitch mock
cables. Simply knit the stitch farthest to
the left first then work your way back towards
the right hand needle, slipping them together
after they are all knitted.
On the other rows, just “knit the knit
stitches and purl the purl stitches”.
Knit the knit stitches and purl the
purl stitches
You’re going to see this quite a bit
in cable patterns. Every other row - wrong
side rows or every second row when you’re
knitting in the round - will instruct you to
knit the knit stitches and purl the purl stitches.
Or in other words work the stitches as you
come to them. Just in case anyone has waded
through mock cables and happens to be wondering
how to tell the difference between a knit and
a purl stitch by sight, here you go:
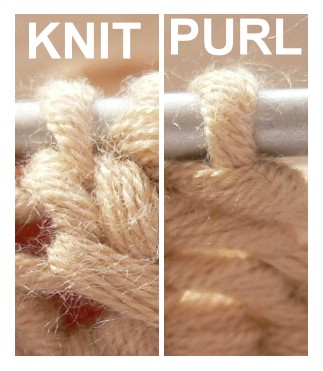
When you’re looking at a knit stitch,
it will appear as though the yarn across the
needle is wearing a scarf. When you’re
looking at a purl stitch, it will appear as
if it’s got a noose around its neck.
Correcting mis-crossed cables found
a few rows later:
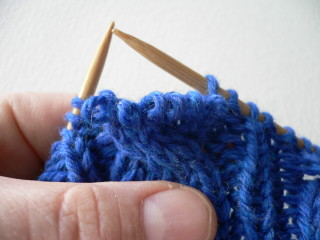
If you discover that you have crossed a cable
the wrong way a few rows back, you can try
this procedure.
Remove the cabled stitches (not the surrounding
purl stitches, only the stitches that are crossed
while cabling) from the needles.
This
can be scary, but the alternative is ripping
the entire work back those few rows. What do
you have to lose? If you’re new to this
or are cabling with a slippery yarn (like cotton
or silk) you might want to insert a “safety
line” below the mis-crossed cable
so that your yarn doesn’t go slithering
too far down.
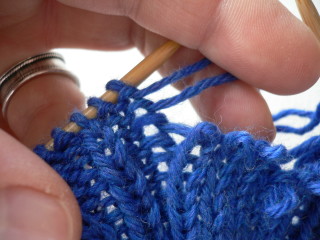
Pull the yarn out of these stitches, row by
row, until the mis-crossed cable suddenly goes
from looking like this:
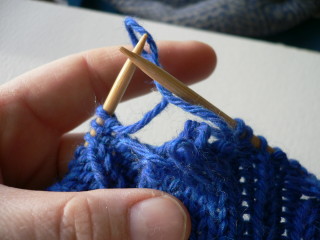
to this:
As you can see, you are back to beyond the
point when you mis-crossed the cable.
Notice how the threads that you’re pulling
out of the stitches are coming from the surrounding
stitches. You’re going to be working
with the lowest thread first, then working
your way up.
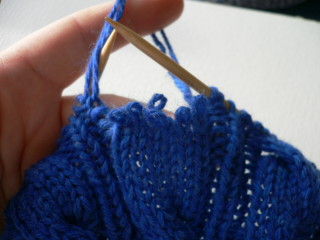
Slip the stitches back onto the left hand
needle and then slip the appropriate stitches
onto a cable needle.

If you knit holding the yarn in your left
hand, you have an advantage here.
Just slip your left index finger under the
yarn you want to work with, and reknit the
cable, crossing it properly this time.
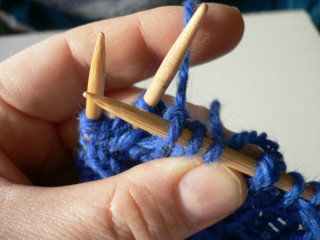
However, because of the space your finger
takes, you may wind up with extra yarn between
the last stitch in the cable and the stitch
after the cable.
One solution to this is to slip the stitches
you’ve just worked back and forth from
the left hand needle to the right hand needle
a few times to redistribute the tension in
the yarn.
If you knit with the yarn in your right hand
you might find it difficult to “flick” the
yarn properly. In this case, a crochet needle
may very well be your best friend. Just use
the crochet hook in your right hand instead
of the knitting needle to pull the yarn through,
and then slip the stitches back onto the knitting
needle.
This is pretty much all I can think of to
tell you about cables! There are ways to correct
mis-crossed cables further down in your work
with duplicate stitching, but – alas – I
have not managed to do it and make it come
out looking good. (If I ever manage to do it
well, you will be the first to know!) Now,
get out there and knit something cabled!
References:
Stitch
n Bitch by Debbie Stoller:
A
Treasury of Knitting Patterns by Barbara
G. Walker
|