|
You've worked long and hard on a
beautiful garment. What worse nightmare than to discover
that it's been damaged? Not to mention any names,
but I know a couple of cats that enjoy playing with
wool, and a few dogs that like chewing on soft things.
This article outlines techniques for common repairs
to knitwear.
Several things can happen,
which require different types of fixes: seams coming
undone, pulls, tears and holes.
Before the Damage is Done
There's a few things a knitter
can do when creating the garment to make future repairs
easier.
Save a few meters of
the yarn and the ball band for any garment you
create, and store them together. The ball band
is invaluable, of course, for washing instructions,
but it can also provide hints for repair. And
the spare yarn can be used for darning. Include
them with any garment you give as a gift, or
keep them filed away with the photos of the
completed garment in your portfolio. (What,
you're not keeping pictures of your finished
objects in a "knitter's brag book"?
Highly recommended both for the show-off value,
and also as a good place to keep all your washing
instructions, and design and construction notes
in case you decide to make it again.)
Several wise knitters have
recommended sewing some spare yarn into the seams
of the garment so that it gets washed and worn in
the same way as the garment itself, ensuring less
visible repairs. In my inevitable rush to finish and
wear whatever I'm working on, I rarely manage this.
I'm also skeptical about my own ability to remember
where I sewed the extra yarn in, and to extract it
neatly. Another solution is to attach the bobbin of
spare yarn to the garment when you launder it.
I'm of the mind, however,
that this is rather like making your own stock
for soup, or freezing the home-made pesto you
put together in August to use up all that extra
basil from your garden... an excellent idea,
but not something most of us have the forethought
or inclination to do.
Other sources for yarn
for repairs
Check the ball band, and choose
a yarn as similar in composition and weight as possible,
so it looks the same, and behaves the same way under
wear. That is, don't mend a superwash wool sweater
with a non-washable wool.
Needlepoint yarn comes in
a very broad variety of colors, and can be used in
a pinch. Use multiple threads to match a heavier yarn.
This is best for areas not very visible.
You can retrieve yarn for
repairs from the garment itself. If it has a turned-in
hem or waistband, unravel a row or two and replace
the yarn with something else, or just re-sew it into
place. If you've got extra length in the garment or
the sleeves, you can cut a row or two above the ribbing
or border, take a few rows out of the main body, and
graft the border back onto the main section.
Before you begin
All of these techniques require
you to sit under a strong light, with your bag of
knitter's tools at your side: crochet hooks of various
sizes, safety pins and darning (a.k.a yarn) needles.
And after any repair, a good blocking or laundering
can help tidy things up.
Assume that wherever
a verb appears in the text, the word "carefully"
belongs beside it. This is surgeon's work.

Seams coming undone
Generally the easiest
to fix. If you made the garment yourself, you
should have a good idea of how it was put together.
Examine the seams in the garment carefully to
get a sense of how they were sewn. If the seam
was created with mattress stitch or another
invisible seaming technique, this can be an
opportunity to retrieve some of the original
yarn for use in later repairs.
Pulls
Another relatively benign
form of damage in a knit fabric, a pull is when
a strand of the yarn has caught on something,
pulled out and distorted the fabric -- but is
not actually broken.
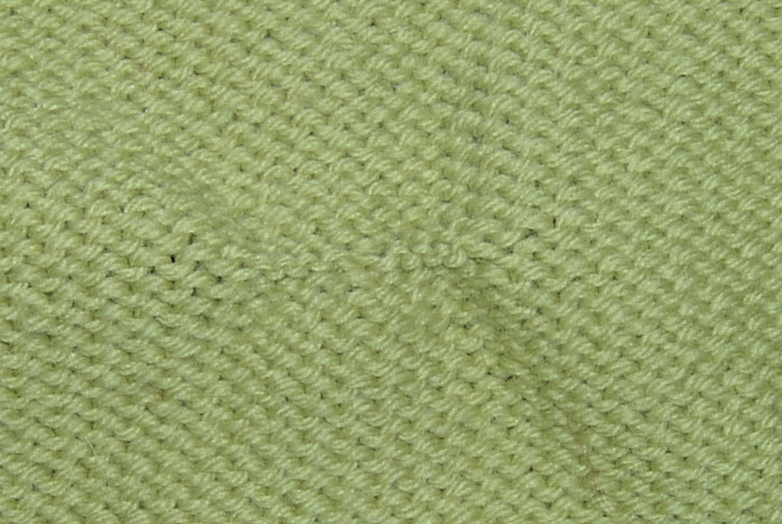
Tug gently at the piece
in all directions, and examine it closely to
identify where the pulled yarn comes from. A
pull causes the stitches in a row to contract.
This is easily spotted on the wrong side of
stockinette stitch, as two rows of garter bumps
are tightly compressed together. Working on
the wrong side and starting with the stitches
closest to the pull, use a crochet hook to distribute
the yarn back through the "squished"
stitches.
You may need to go over the
row a few times until you get the tension of the stitches
right.
If the yarn has broken,
deal with the pull first, and then repair the
resulting hole.
Tears and Holes --
Weaving Method
(This is not my technique.
I learned about it from Rena Crockett -- see
Reference below for more info.)
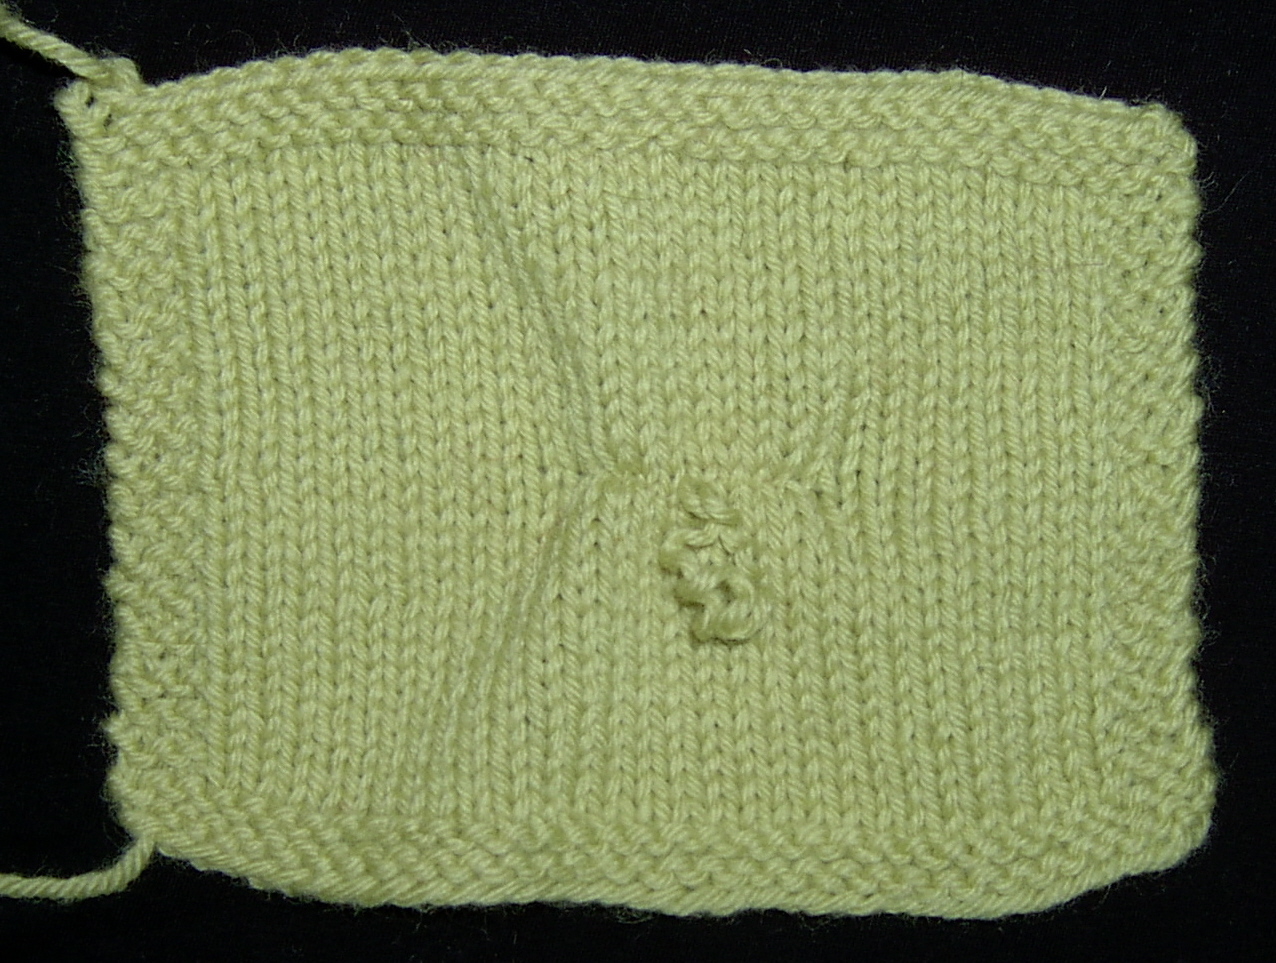
I highly recommend practicing on a swatch before you
start working on the actual garment.
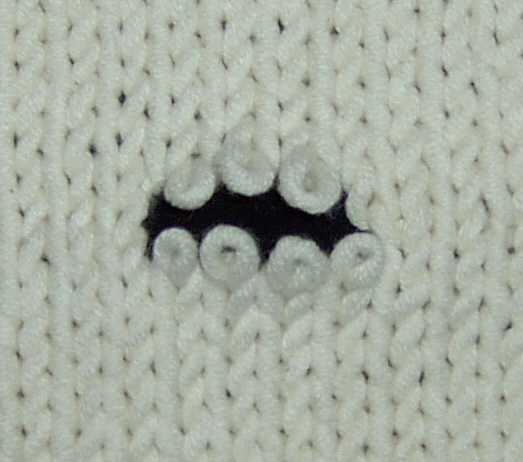
Examine the hole carefully,
and unravel it just enough to get a clear view
of stitches that are now "open". Pin
the piece you're repairing to a stable surface,
and tuck the yarn ends underneath and out of
the way.
If the hole is only one row
deep, a simple graft should do the job. Remember that
the trick is in the alignment of the stitches. It's
straightforward, as long as you get the stitches lined
up correctly.

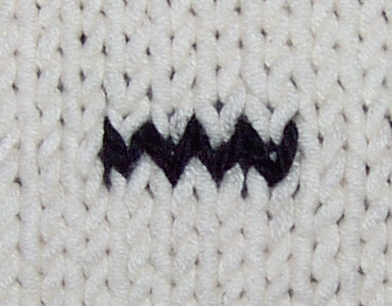
See pictures and your favorite
reference book for more details. Use the ends of the
grafting yarn to close up the opening on either side
of the repair. Weave in the ends of the broken garment
yarn, too.
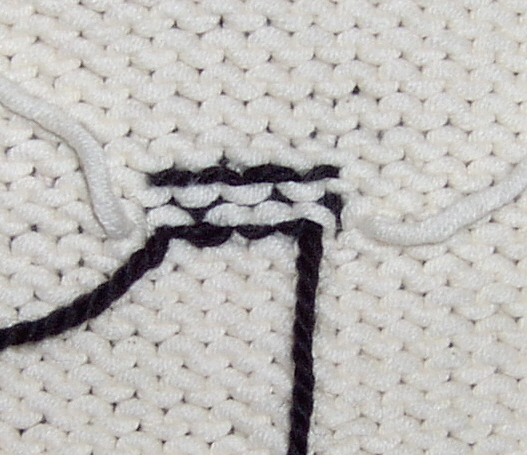
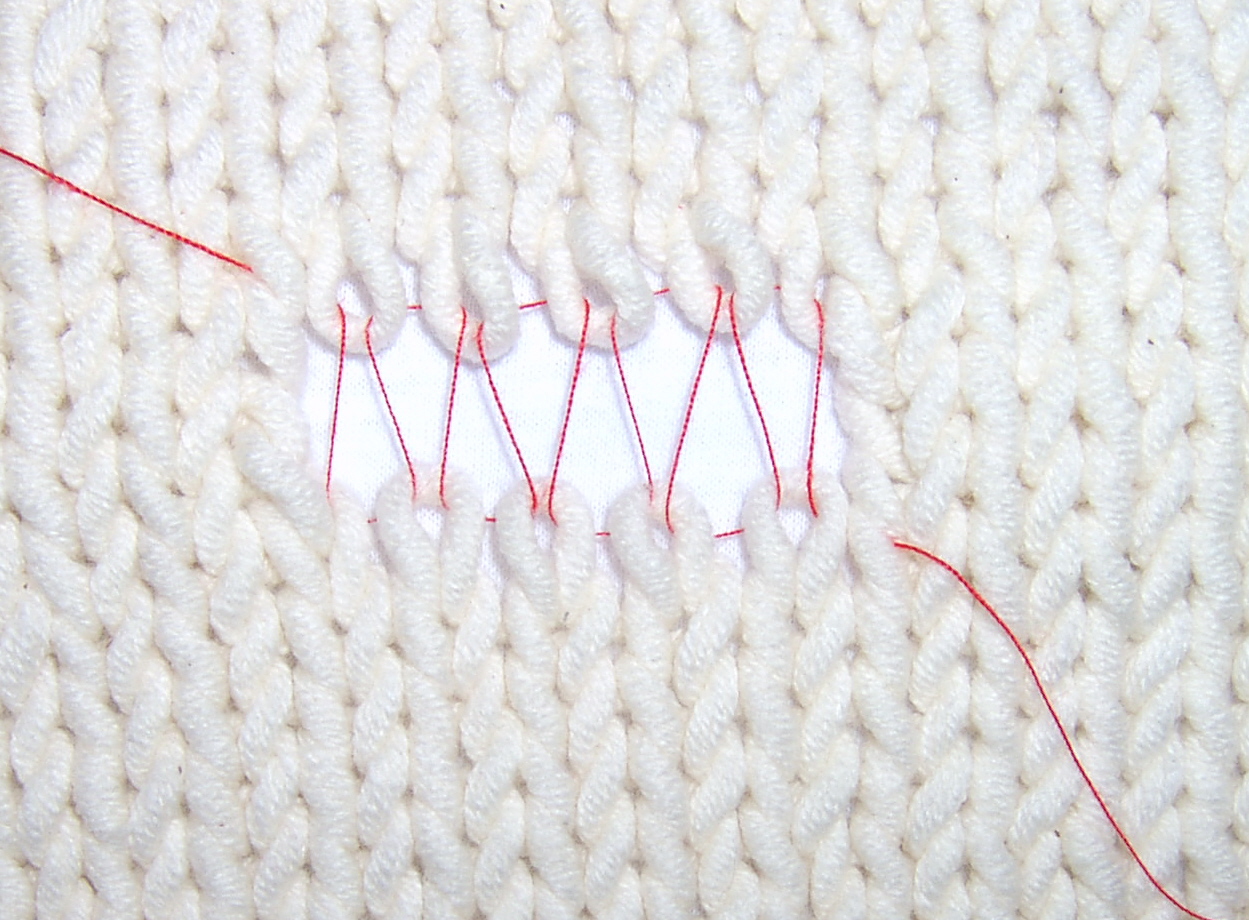
If the hole is deeper than
a single row, it's a two-step job. To anchor the stitches
and for a guide, loosely graft the stitches at the
top and bottom of the hole together with a contrasting
color sewing thread.
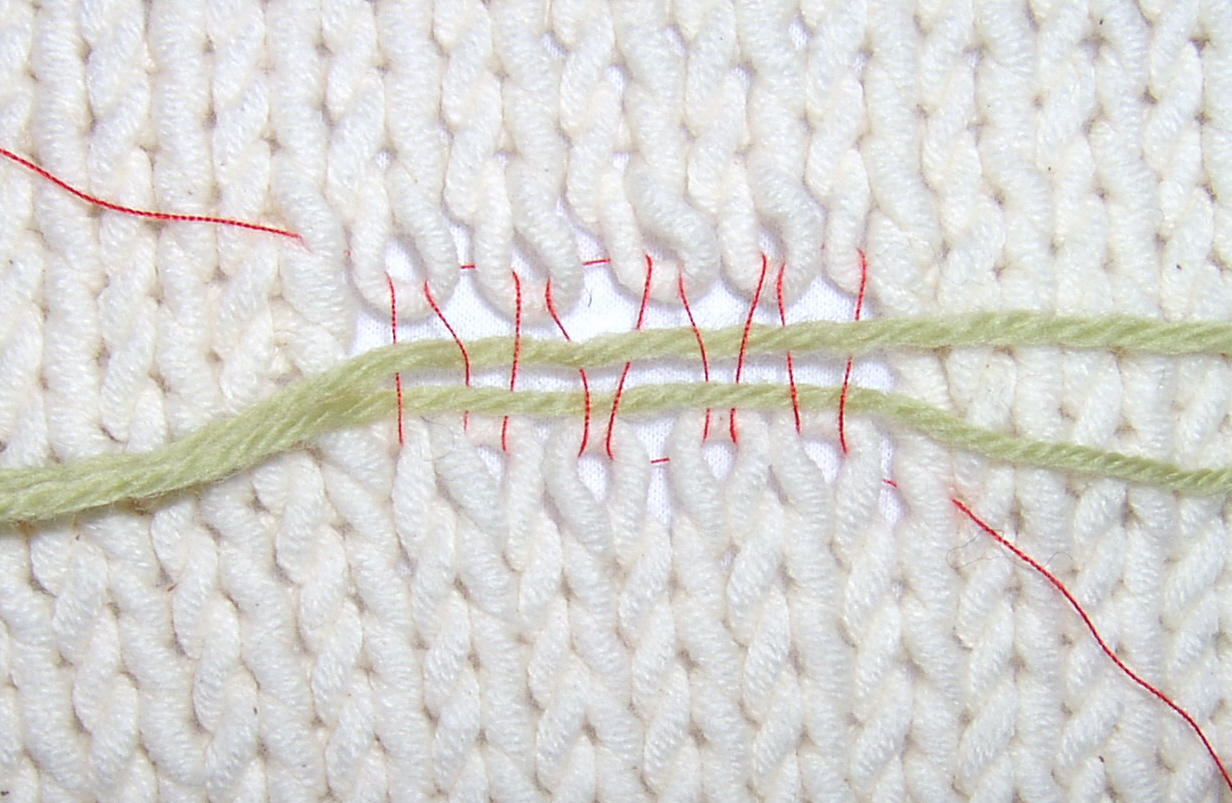
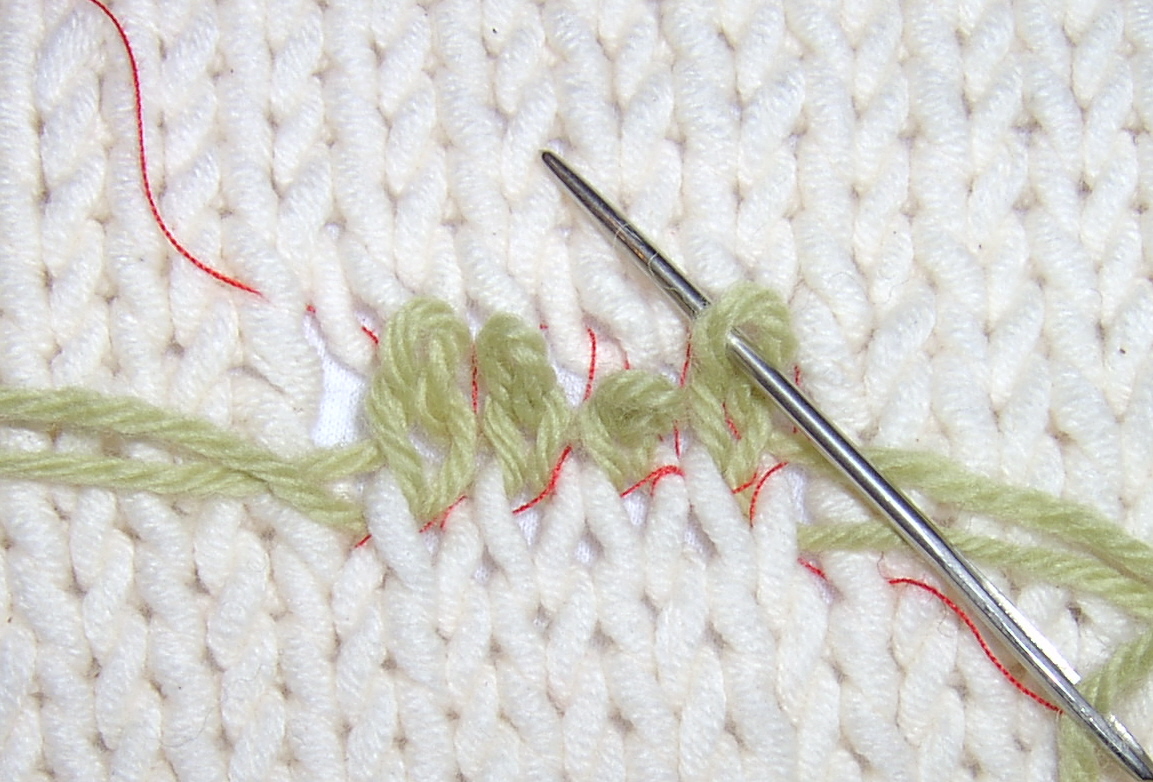
You then need as many
lengths of yarn as there are rows to be repaired
-- each should be at least 3 inches/8cm longer
than the gap you're filling. You're going to
rebuild the stitches using those lengths of
yarn -- one for each row.
Thread the first length of
repair yarn onto your darning needle, and weave it
through the stabilizing thread, under and over a whole
stitch each time Æ that is, under two threads at a
time. Repeat this for each row but the last, alternating
the weaves. That is, on the first row, the repair
yarn will be run under the first stitch, on the second
row, the repair yarn should run over, and so forth.
You'll then be able to take
the crochet hook and chain stitch each column of stitches
up to the top. Keep the crochet hook above and to
the left of the anchor thread.
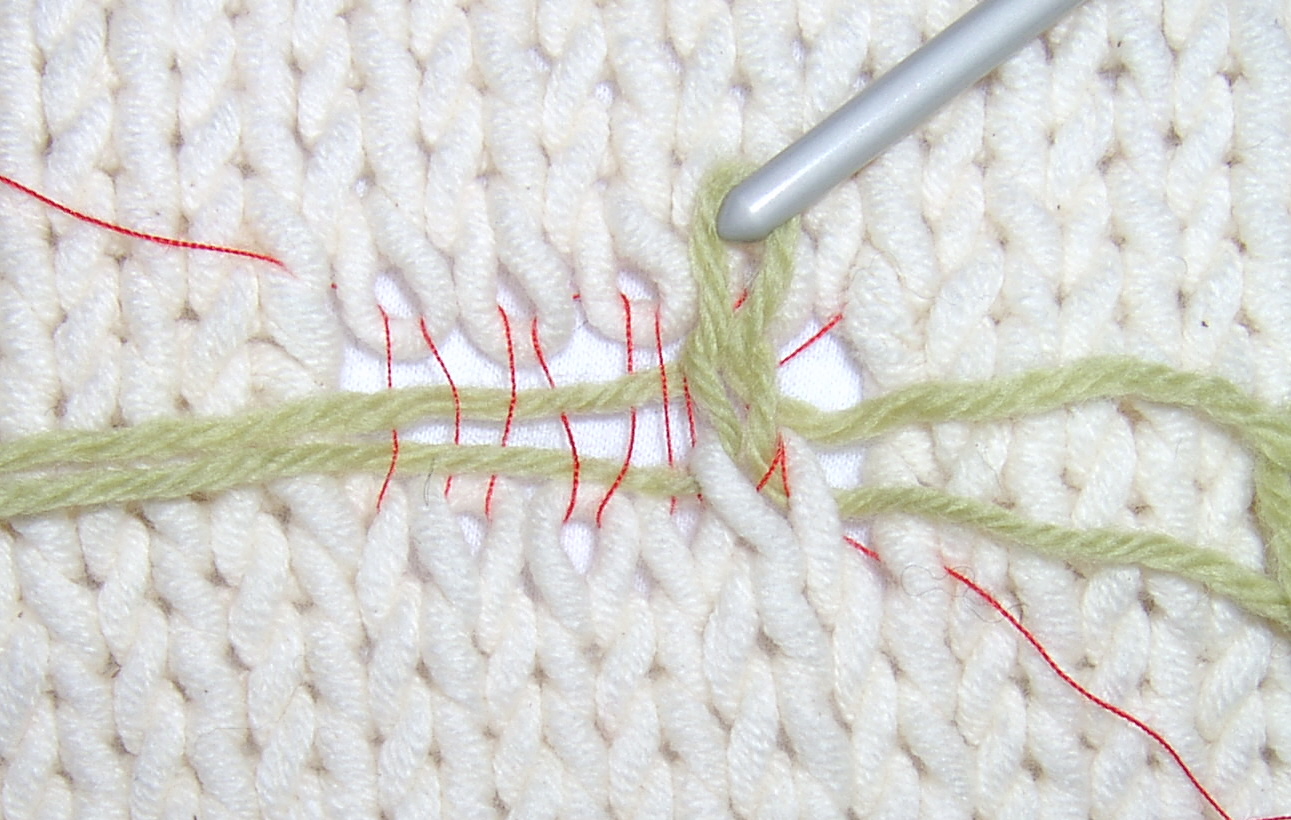
Once you've done that for
all stitches, graft the final row closed with the
last length of yarn.
Working from the wrong
side, remove the anchoring thread.
Tear and Holes --
Duplicate Stitch Method
This is a little simpler to
do, but the mend covers a larger area, and is therefore
more visible. It does have the side effect of reinforcing
the area around the hole, which is of benefit if this
is something like a sock that's got a hole due to
wear, rather than a rip or a moth hole.
Don't do any unraveling;
you want as much of the existing fabric in place
as possible. Again, use sewing thread to anchor
the open stitches. The idea is to duplicate
stitch over the region surrounding the hole
-- a couple of rows above and below, and a couple
of stitches either side -- and over the hole
itself. The "shards" of yarn and knit
fabric provide a good guideline for the stitches.
See any of your favorite knitting reference
books for instructions on duplicate stitch.
Again, when you're done,
remove the anchoring thread.
Socks
Socks are a special case.
Socks wear out, particularly the soles and heels.
(Refer to my Socks
101 article for hints on choosing a hardwearing
sock yarn.)
Preventative maintenance is
helpful. If an area of the sock is wearing thin but
doesn't yet have holes, duplicate stitch over the
area to reinforce it. Use a specific sock yarn for
its resilience. Since sock yarns are of similar weights,
and the area being reinforced is typically hidden
in your shoe, it's not such a problem if you can't
get a precise match with the reinforcing yarn. Even
if the sock is knit from heavier or non-sock yarn,
use sock yarn doubled or tripled for the reinforcement,
to prolong wear.
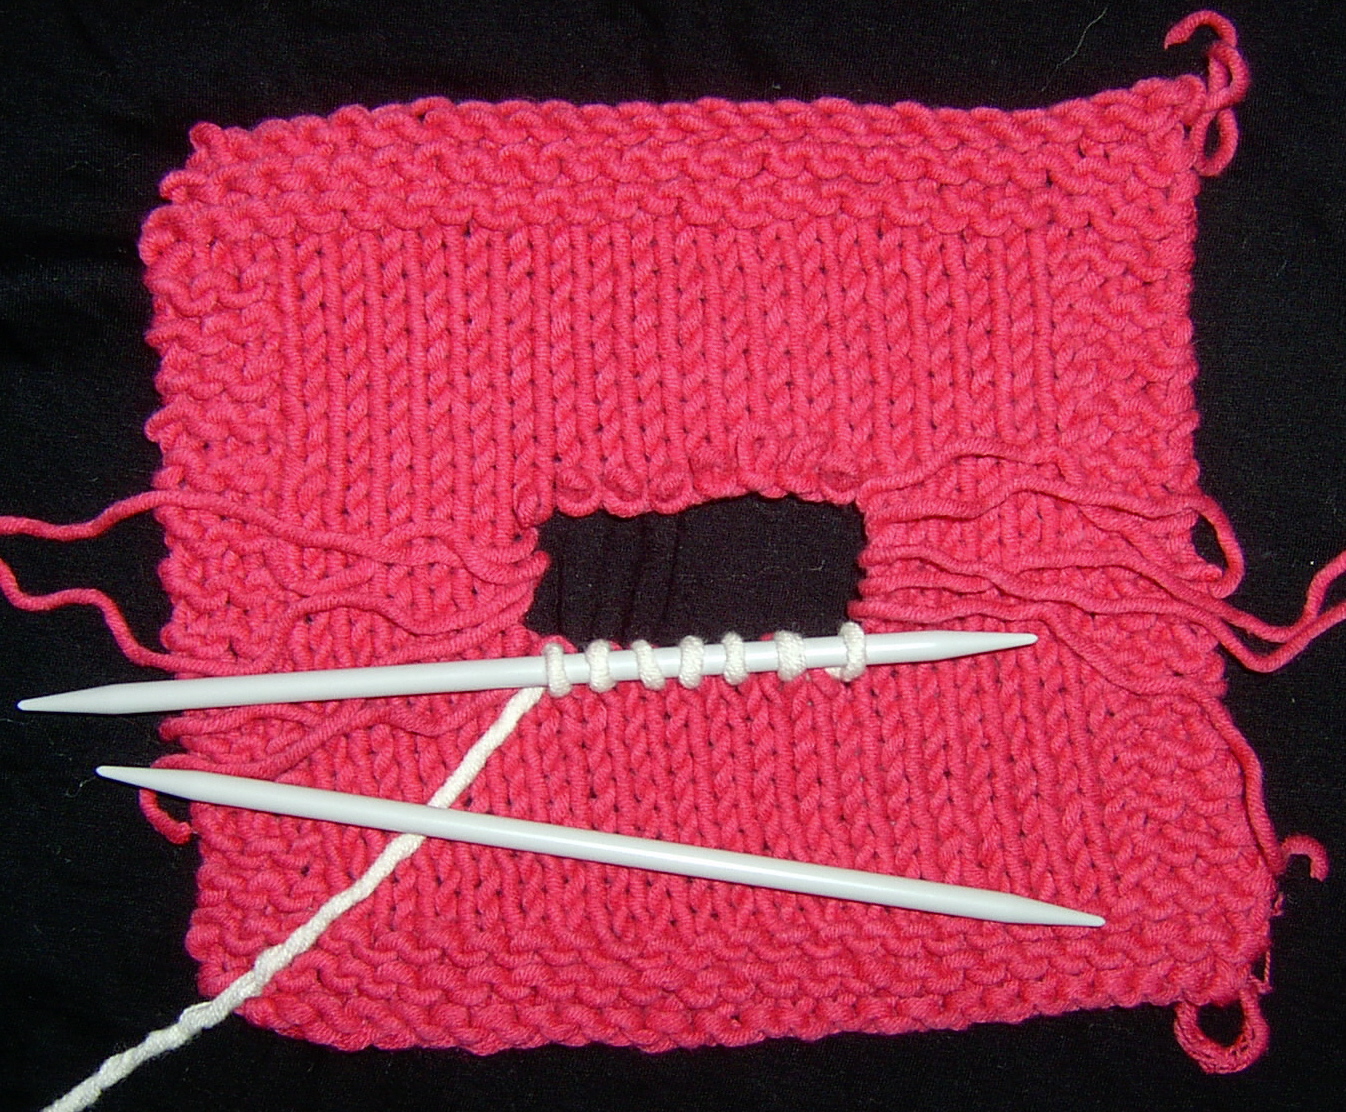
Sock holes get big quickly,
so you're often dealing with a large area to mend.
Anything larger than a few rows high and a few stitches
wide gets difficult to weave or darn, and therefore
the recommended approach is to reknit the section.
Square off the hole with judicious unraveling. Pick
up the stitches at the bottom of the hole and using
spare yarn, knit a patch large enough to fill the
hole. (Make sure to consult your design notebook on
what size needles you used originally, or refer to
the ball band.)
To close it up, graft
the last row to the open stitches at the top
of the hole, and seam the sides of the patch
to the sides of the hole.
If you're designing
your own socks, you may want to investigate
the "afterthought heel", which, by
virtue of its construction, can be removed when
it wears out and replaced. See Jill
L. Schaefer's lesson from the Socknitters
list.
More Drastic Measures
If the damaged area is too
visible or too large to mend; if you can't find a
matching yarn, or if your skills just aren't up to
the repair, there are other techniques to disguise
the damage. It may not be quite the same as it was
before, but it's better than throwing it away. These
techniques also work for covering up stains.
For damage on the body of
a sweater, mend the area as well as you can and then
apply a patch or pocket over it.
Damaged cuffs or ribbing can
be entirely removed and replaced. Undo any seams,
and carefully cut a row or two above the ribbing.
Pick up the live stitches and work a new ribbing or
cuff. You can reuse as much yarn as salvageable and
simply have a smaller border, or use a different yarn
entirely; after all, it's not unusual to see a garment
with borders in a different yarn.
Fur cuffs and collars are
enormously fashionable at the moment, so consider
applying a novelty yarn to both the cuffs and the
collar of the garment, either covering up a repair,
or entirely replacing a damaged area. In the same
vein, cover up damaged ribbing or borders with ribbon
or fabric.
More radical surgery
is also possible -- shortening the body or the
sleeves of the garment, cutting a pullover into
a cardigan, and so forth.
And of course you could
always felt the damaged garment and make it
into a pillow or bag.
Reference
The self-published Flawless
Knit Repair, by Rena Crockett, is an absolute
marvel. It provides, with painstakingly detailed
diagrams, clear instructions for unraveling
and reworking knits using the weaving method.
Order from your favorite online knitting book
specialist.
|