|
Bind off: Part Deux
Last
issue, I covered several (lots!) of the
more common ways to bind off... and promised
that this issue I'd cover the 3-needle and
some decorative bind offs, so let's just get
right to it, shall we?
3-Needle bind off
For the 3-needle
bind off, you'll need -- surprise! -- 3 needles.
The bind off joins two sets of live stitches
that are still on the needle. It's an excellent
way to bind off and join shoulder seams simultaneously.
It provides a strong, stable seam that is
nearly always less bulky than casting off
and then sewing. It can be used to join any
two sets of live stitches, but should be avoided
for sock toes as it does leave a bit of a
ridge on the inside of the knitting. But be
careful -- it's quite easy, just like regular
binding off, for this bind off to be done
too tightly which will result in the seam
puckering. A good way to avoid this is to
use a needle a couple of sizes larger as your
third needle, the one held in your right hand.
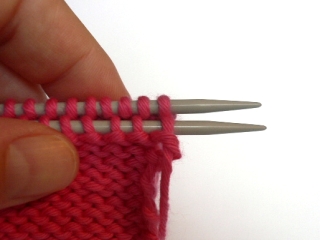
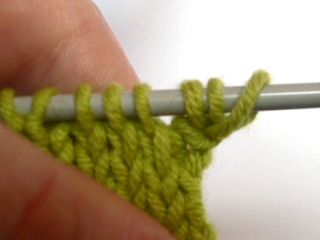
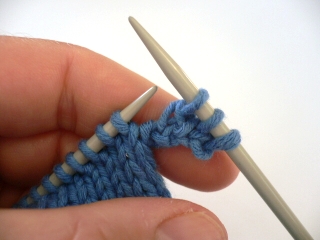
You must have an equal
number of stitches on 2 needles. For an invisible
seam, have the right sides facing inwards,
towards each other.
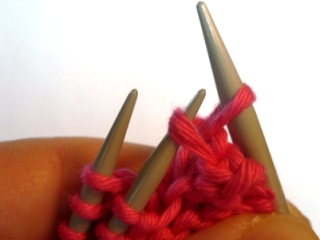
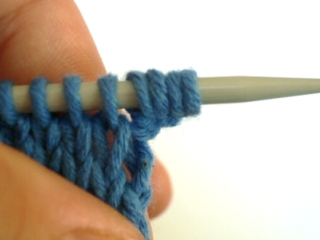
Hold the third, larger
needle in your right hand. *Insert it knitwise
into the first stitch on the needle closest
to you and at the same time knitwise
into the first stitch on the back needle.
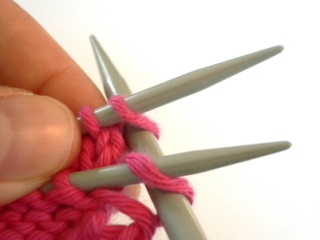
Wrap as for a knit stitch
and draw the working yarn through both stitches
to make one stitch which is now on the larger,
right hand needle.*
Repeat from * to * so that
there are now two stitches on the right hand
needle.
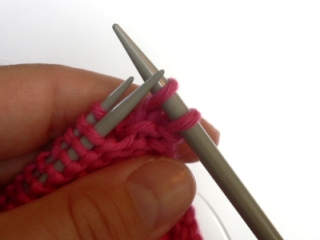
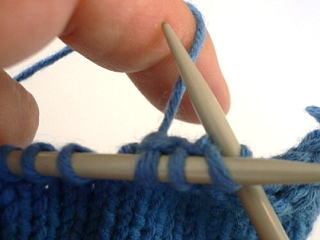
**Using the tip of one
of the needles in your left hand (here shown
using the needle closest to you)
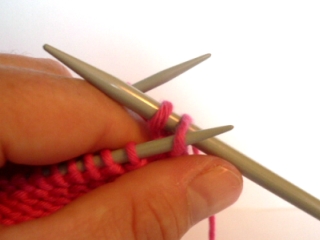
...lift the first stitch
worked over the second stitch worked...
...just like regular
binding off! **
Work one more stitch, then
repeat from ** to **.
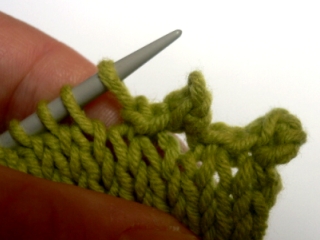
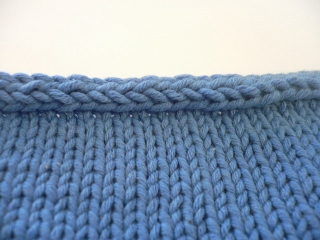
On the inside of the work,
the 3 needle bind off looks like this:
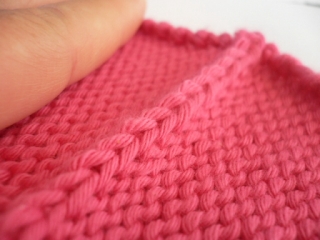
And thus can be used for
a decorative chain on the outside of the work
- just hold the WRONG sides together while
working the bind off instead!
Double crochet bind
off
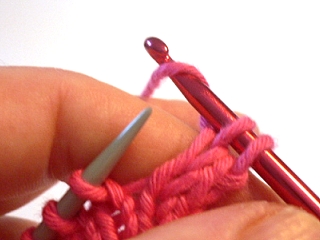
The double crochet
bind off uses a crochet hook of approximately
the same size as the knitting needles held
in the right hand. Use the crochet hook to
knit two stitches.

*Wrap the yarn once around
the crochet hook...
And pull it through both
loops.
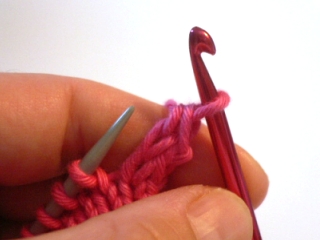
Knit one more stitch with
the crochet hook* and repeat from * to *.
The result is a decorative
edging that looks like this:

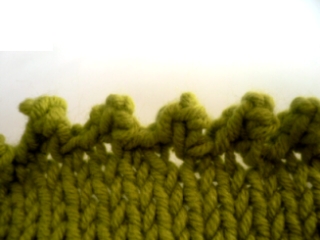
Picot bind off
The picot (a French
word meaning "small points") bind off forms
an ornamental edging that looks like this...
The points can be made
larger or smaller, depending on the effect
you want. The bind off makes a very flexible
edging, as you are adding more stitches while
making the picot points and thus the bind off row has more stitches than the knitting
itself.
To make a 2-stitch picot:
*Cast on 2 stitches using
the cable
cast on.
Then immediately bind off
4 stitches using the usual
method.

Slip the single stitch
on the right hand needle back onto the left
hand needle.*
Repeat from * to * until
end.
The picot points can also
be made with only one stitch (for a very subtle
effect) or indeed with any number of stitches
you choose. Just be sure to bind off
at least twice the number of stitches that
you cast on. And this is one bind off
where it's okay to work rather tightly --
the picot points will be neater that way.
A picot edging -- being
very flexible -- is a good choice for baby
things and the tops of toe-up socks. It can
also lends a delicate decorative touch to
blanket edges, wrist warmers and tops.
I-cord bind off
I-cord, worked on
the bind off row, makes a decorative edging
that is firm and has a nicely finished appearance.
Applied i-cord is lovely for neck or front
edges where a simple, clean look is wanted
rather than a garter stitch or ribbed edge.
However, it can be a bit tricky to do well...
if you've never made plain I-cord before,
you might want to practice a bit at that first.
Cast on 3 stitches, using
the cable cast on.
*Knit 2 stitches, then
k2tog
through the back loop.
Slip the three worked stitches
back onto the left hand needle. Then pull
the working yarn tightly across the back of
those 3 stitches* and repeat from * to *.
The result is a raised,
I-cord edging running perpendicular to the
body of knitting -- thus "applied I-cord".
If you're going to be working this technique
over a large area and it seems to be puckering
the knitting below, try substituting a k3tog
tbl (instead of k2tog tbl) every 3-4 rows
of I-cord to help keep the knitting laying
flat.
References: Vogue
Knitting and
Knitter's Book of Finishing Techniques
|