Why knitters need
a (crochet) hook, part
II.
Hi everybody! This issue
is a continuation of last
issue’s Why
knitters need a (crochet)
hook and
I’m going to be using some of the techniques described
(slip stitch crochet and
single crochet) in the following
techniques, so if you’re
not familiar with crochet
terms and wonder what I’m
talking about, check that
out first.

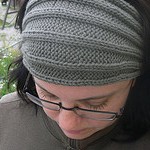
This issue we’ll be looking at adding a couple of
decorative crocheted edgings and crocheted button loops
to your knitted items.
Crochet picot edging
I love picot edges! I think they’re wonderful and
charming and particularly
adorable on knits for little
girls. There are several
methods of knitting picot
edgings - I’ve
written about one
of them before,
but the crocheted picot
edging has a couple of
advantages: you might find
it a bit quicker and easier
and it can be added on – or
removed for that matter
- later!
The size and spacing of the points on your picot edging
are entirely up to you. For larger points, simply add more
chain stitches and for more widely space points, do more
single crochet between points.
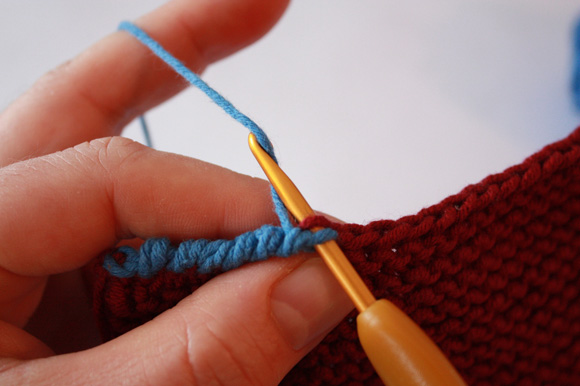
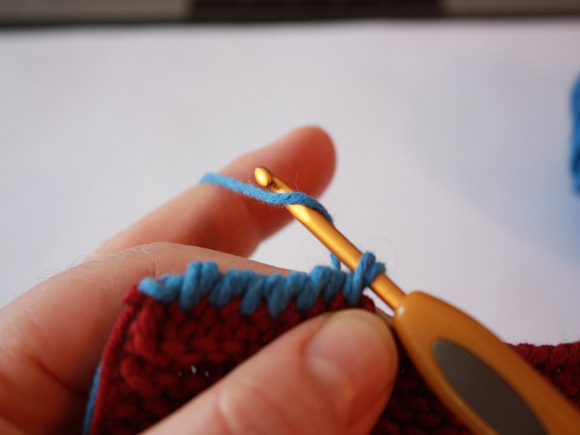
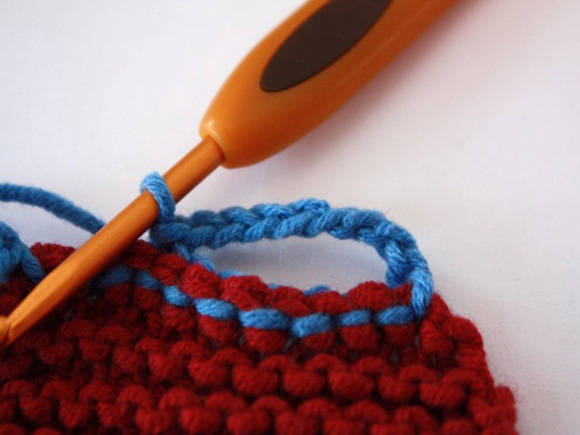
Attach the yarn to the edge of your knitting with a slip
stitch and chain X stitches. (Here I have chained 3 stitches
after joining.)
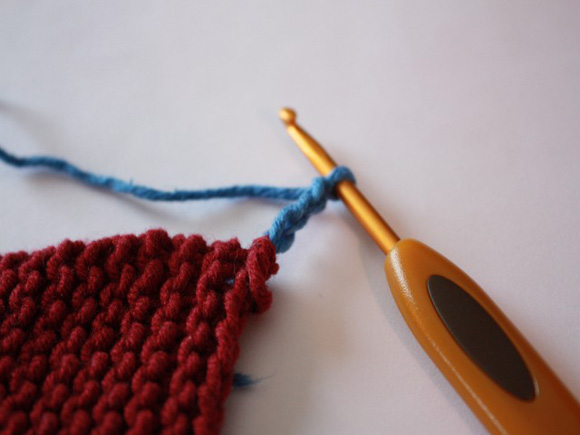
*Then stick the hook through the first of the chain stitches
you just made...

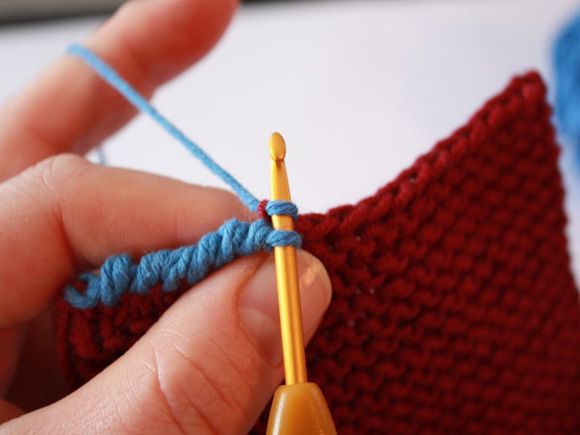
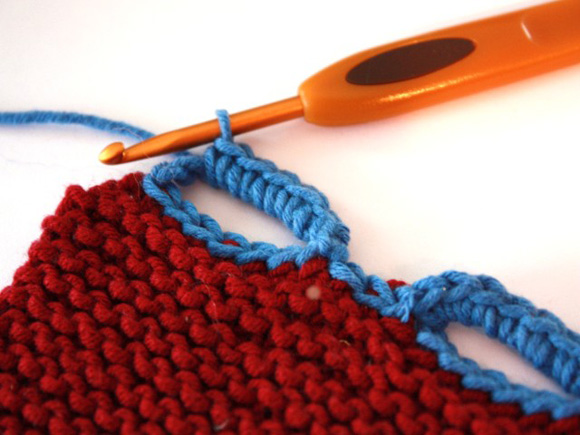
...and single crochet (grab the yarn with the hook and
pull through the chain stitch,
grab the yarn again and
pull through both loops
on the hook).
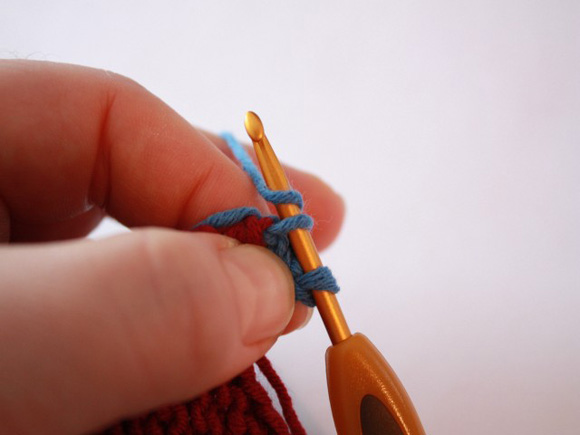
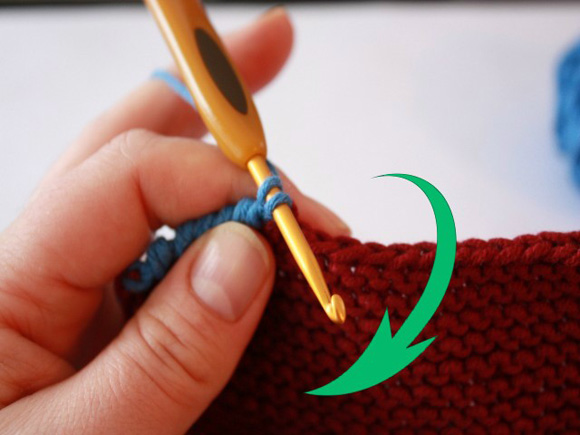
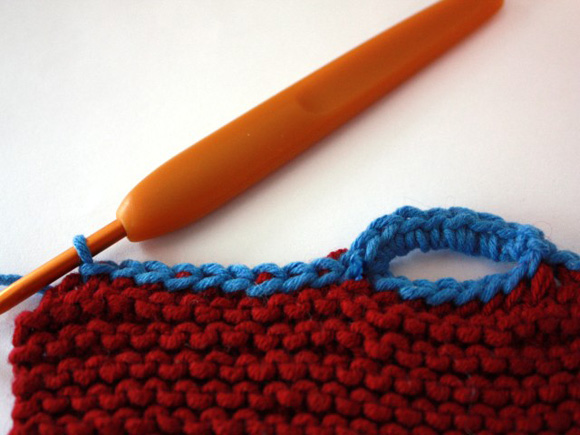
Then single crochet X times in the edge of the knitting;
the more single crochets
you do here, the further
apart the points on your
picot edging will be. Now
chain the same number of stitches as for the first point...

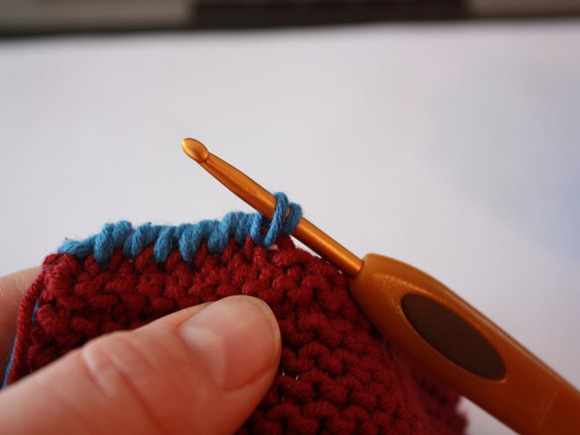
...and repeat from * until
you’re completed the edging.
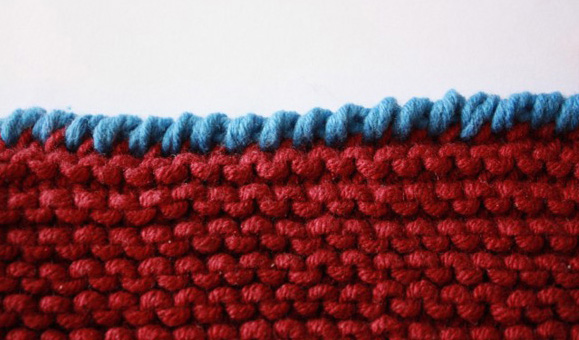
The result looks like this:

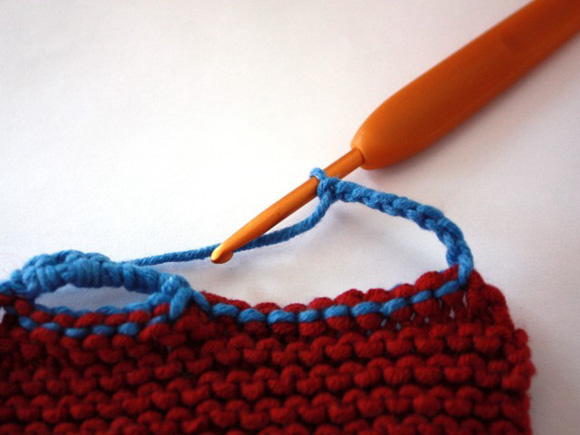
Crab stitch
The first time I came across directions for a crab stitch
edging for a knitted
cap (in Norwegian, no
less!) I understood absolutely
nothing. Crab stitch
is worked in the opposite
direction of normal crochet and involves a motion that
is stubbornly difficult to describe in words. Hopefully
a few pictures will help.
Crab stitch creates a sturdy
and stylish corded edging that looks like this:
Attach your yarn (or continue using the yarn you have
used to cast off) to the edge
with a slip stitch and *insert
the hook into the outermost edge of the knitting to
the RIGHT, grab the yarn with the crochet hook...
...and pull it through.
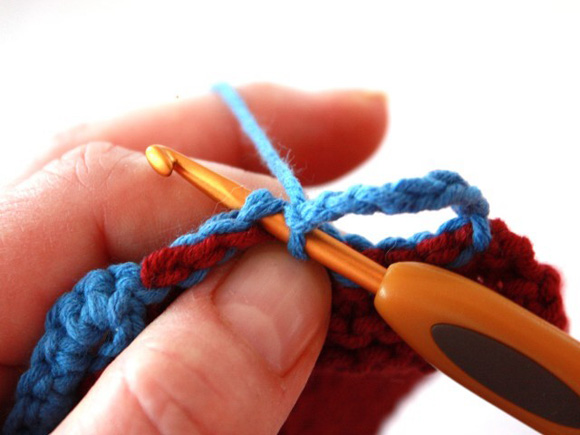
Now rotate the crochet hook 360 degrees clockwise...
s...o that the loop you JUST made is sitting furthest to
the left on the crochet
hook. (In other words,
when you rotate the crochet hook, you’re changing
the order of the loops on the crochet
hook.)
Then grab the yarn once again, and pull it through both
loops on the needle.
Repeat from *.
Crocheted button loops
Ever finished a cardigan and realized you forgot all about
making the button holes? Well, here’s your solution!
You may want to first mark your desired button loop placement
with a safety pin so that the loops are evenly spaced.
Attach the yarn to the edge of your knitting with a slip
stitch. *Slip stitch (or single crochet) to the far end
of where you want the crocheted button loop to be.
Turn the work and crochet a chain large enough for the
button to slip through.
Insert the hook into both loops of the slip stitch/single
crochet edging...
...and slip stitch to attach the chain.
Turn the work again and single crochet along the loop you
just made.
(Single crocheting over the chained loop stabilizes the
button loop and keeps it from becoming looser with time.)
Repeat from * until you have enough .
Crocheted button loops can be easily removed and expanded
later if you wish to change
the size of the buttons. The loops themselves can also be
made longer so that a favorite sweater fits a growing child
a little bit longer! Loops are also particularly suitable
for use with buttons with shanks.
References:
The
Knitter’s Book of Finishing Techniques by Nancie
M. Wiseman
The
Crochet Stitch Bible by Betty Barnden
Special thanks to woollywonder.com for
explaining the crab stitch
"swoop"!
|