Knitty�: little purls of wisdomKnitty�: little purls of wisdom
sponsor
Potter Craft

Find exactly what you're looking for

spacer

The answer to your question about Knitty is probably here!

spacer

Take home something Knitty today

spacer

Advertise with Knitty

spacer

Get your cool stuff reviewed in Knitty

spacer

Full information about how to get published in Knitty

spacer

Read exactly what FREE PATTERNS really means...respect our designers and authors rights [and thank you]

spacer

Read exactly what FREE PATTERNS really means...respect our designers and authors rights [and thank you]

sidebarwhiterule

Knitty is produced in a pro-rabbit environment

spacer

© Knitty 2002-2008. All rights reserved. Unauthorized reproduction prohibited. This means you.spacer
 

Patterns<click for more!
Print With Images Print Without Images
upperLeft upperRight
lowerLeft lowerRight
Pink Needles
ul
ml
Yarnzilla
ur
b
Title
spacer model: Rush spacer photos: Champagne Maker

Tangy

As my dog Rush took over the pricey club chair in our master bedroom as his own, it became very clear to me that a towel on the floor was no longer good enough for his nightly snooze.

Now, 13 years later, he still owns the club chair but has started to fall or need two tries to leap to his pillow top. It’s time for a dog bed and time to reupholster his chair for human use again. The Bark-A-Lounger is born!

A Fair Isle of circles and stripes, this bed is knit in the round in one piece. Finishing requires light felting and a tiny bit of sewing, but nothing fancy. Pets of all kinds love sleeping on cozy wool.  No encouragement needed.

Don’t have a dog? The Bark-A-Lounger makes a great Euro-sized bed or floor pillow as well!

SIZE

One

 
FINISHED MEASUREMENTS

Approx. 32 inches square, after felting
Note; Dimensions may vary with felting technique.

 
MATERIALS
spacer [MC] Cascade - Ecological Wool [100% Wool; 478yd/437m per 250g skein]; color: #8018; 2 skeins

spacer [CC] Noro Kureyon [100% Wool; 110yd/100m per 50g skein]; color: #150; 6 skeins

Swatches Shown in Alternate Colorways
Lighter Colorway [top right]:
spacer [MC] #8016
spacer [CC] #213

Darker Colorway [bottom right]:
spacer [MC] #8085
spacer [CC] #215

Recommended needle size:
spacer 1 set of five US#9/5.5mm double-point needles
spacer 1 24 inch circular US#9/5.5mm
spacer 1 32 inch circular US#9/5.5mm
[always use a needle size that gives you the gauge listed below -- every knitter's gauge is unique]

spacer Safety pin or split ring marker
spacer 4 stitch markers; ensure that one is different from the others
spacer 16 buttons
spacer 1 piece of heavy fabric (upholstery fabric works well) approx. 25 inches square
spacer 30-inch purchased or handmade pillow form
Note: It is best to purchase your pillow form and fabric after you have completed the felting process, to ensure a good fit. I pulled some of the filler out of the one I purchased and saved it for a future pillow; this made the bed softer and flatter.

GAUGE

16 sts/20 rows = 4 inches in stockinette st, before felting

 
PATTERN NOTES
[Knitty's list of standard abbreviations and techniques can be found here.]

When working stranded colorwork patterns, be sure to trap long yarn floats at back of work.

Information about felting by hand can be found here and here.

ssp: Slip next 2 sts knitwise, one at a time, to right needle. Slip them both, purlwise, back to left needle. Purl them together through their back loops.

Charts: Click here to download Chart A and Chart B.


DIRECTIONS

Using double-point needle and MC, CO 8 sts. Place 2 sts on each of 4 needles and join to begin working in the round, being careful not to twist.

After the first few rounds have been worked, place safety pin or split ring marker in work to indicate beginning of round.

Work Rounds 1-66 of Chart A, increasing as shown, repeating chart four times in each round. When there are enough sts on the needles to comfortably fit, switch to shorter circular needle, placing a stitch marker after quarter of round (each repeat of chart) and using unique stitch marker to indicate beginning of round. Switch to longer circular needle when necessary. 272 sts when Round 66 is complete: 68 sts in each quarter.

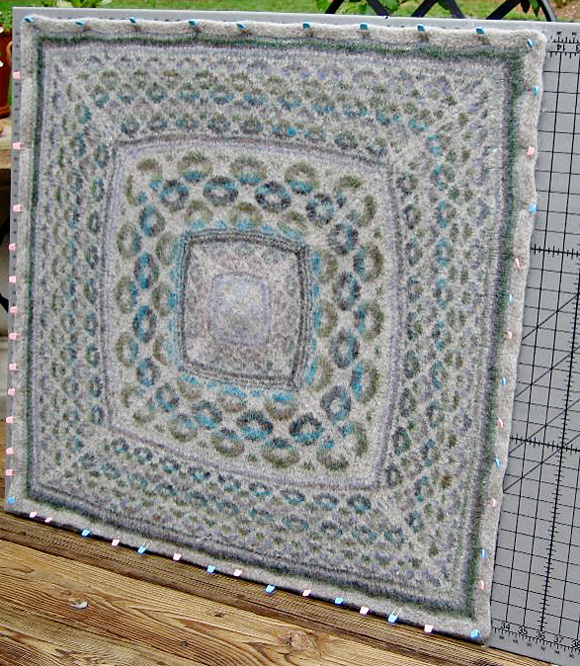
Work Rounds 1-42 of Chart B; outlined pattern repeat is worked 8 times in each quarter of round. 440 sts when Round 42 is complete: 110 sts in each quarter.
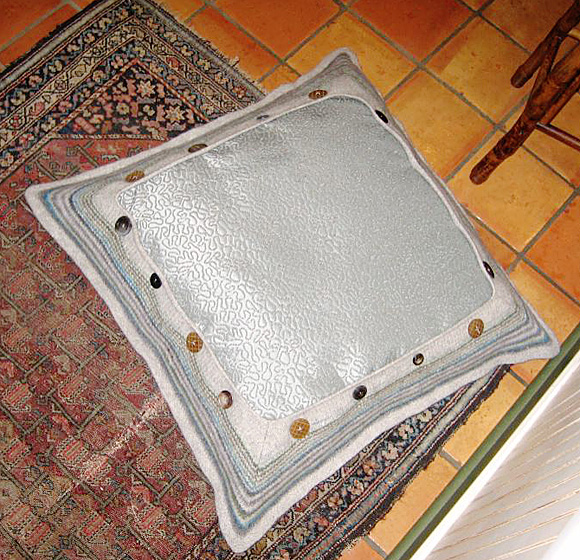
Faux Piping:
This 'faux piping' will create a ridge around the cushion with a look similar to a thick piping, giving structure and definition to the cushion edge.

Using MC, work as follows:
Round 1: P all sts.

Round 2: [Pfb, p to 1 st before next marker, pfb, slip marker] 4 times. 448 sts.

Rounds 3-6: Work as for Rounds 1-2. 464 sts when Round 6 is complete.

Round 7: P all sts.

Round 8: [P2tog, p to 2 sts before marker, ssp, slip marker] 4 times. 456 sts.

Rounds 9-12: Work as for Rounds 7-8. 440 sts when Round 12 is complete.
In next round, sts on needle will be joined to sts of last round worked before faux piping. This round will be easy to spot on WS of work; it is the last round of purl 'bumps'. To knit a stitch together with a stitch from this round, reach left needle down WS of work and insert it downward into purl bump directly below next st on needle; knit stitch on needle together with picked-up stitch.

Round 13: [Pick up st from last round of chart pattern, k this st together with next st on needle] to end of round. 440 sts. Faux piping is complete.


Back of Pillow:

Note: Read ahead! Stripe pattern is worked at the same time as pillow shaping.

Using CC and beginning on Round 1 of Stripe Pattern, continue as follows:
Decrease Round: [Ssk, k to 2 sts before marker, k2tog, slip marker] 4 times. 8 sts decreased.
Work 1 round in pattern.
Repeat these 2 rounds 20 times more, then work Decrease Round once more. 264 sts.

AT THE SAME TIME, work Stripe Pattern using colors as follows, carrying color not in use loosely along WS of work:
Rounds 1-5: CC
Rounds 6-7: MC
Rounds 8-10: CC
Rounds 11-12: MC
Rounds 13-14: CC
Rounds 15-16: MC
Rounds 17-18: CC
Odd-Numbered Rounds 19-29: MC
Even-Numbered Rounds 20-30: CC; break CC at end of Round 30
Rounds 31-43: MC

BO Round: K1, [slip last st on right needle back to left needle, k2tog] to end. Break yarn and draw through last st.


FINISHING

Weave in ends.

Felting:
Note: See Pattern Notes for links to articles about felting.
Lightly felt piece. Because this piece was done using the stranded colorwork technique, I chose to begin with hand-felting on a washboard, in order to have more control over the felting process. To finish and even out felting, I machine felted for the last few minutes (approx. 3-5 minutes in the agitator).

When piece is felted to desired size and density, rinse with cold water and mold shape. Center of piece will be slightly cone-shaped, but by stretching and shaping, it can be made to lay flat. Don’t be afraid to pull strongly on the stranded colorwork sections of the piece, as they will shrink slightly more than striped sections. Pin piece to blocking surface or lay flat, and allow to dry completely.

Measure size of square opening in back of pillow. Cut a piece of linig fabric approx. 4 inches larger than opening in both height and width. Sew buttons to lining, evenly spaced along sides, approx. 1 inch from edge. Cut buttonholes in pillow back to correspond to button size and placement.

Insert pillow form and button lining in place.

 
ABOUT THE DESIGNER
designernameBlank
Champagne Maker (not her real name, of course) -- Sharon Payne Maker (say it quickly 10 times) -- is the wife of 1, mother of 2, and daughter of many!  She’s the designer of Stitch Poet Designs which includes a line of hand-knitting patterns, handcrafted jewelry, clothing and accessories.  She can also be found with a paintbrush in her hand.

To see what she’s up to, check out her blog and watch her projects unwind on Ravelry (StitchPoet).  


Grandma Knitty Home