Knitty�: little purls of wisdomKnitty�: little purls of wisdom
sponsor
Elann

Find exactly what you're looking for

spacer

The answer to your question about Knitty is probably here!

spacer

Take home something Knitty today

spacer

Advertise with Knitty

spacer

Get your cool stuff reviewed in Knitty

spacer

Full information about how to get published in Knitty

spacer

Read exactly what FREE PATTERNS really means...respect our designers and authors rights [and thank you]

spacer

Read exactly what FREE PATTERNS really means...respect our designers and authors rights [and thank you]

sidebarwhiterule

Knitty is produced in a pro-rabbit environment

spacer

© Knitty 2002-2008. All rights reserved. Unauthorized reproduction prohibited. This means you.spacer
 

Patterns<click for more!
Print With Images Print Without Images
upperLeft upperRight
lowerLeft lowerRight
Pink Needles
ul
ml
SWTC
ur
b
Title
spacer model: Stefanie Japel spacer photos: Nathan Japel

Tangy

If you follow my blog, you know that the last few years have been a rather bumpy ride for me! 

I finished my PhD, moved to Germany to follow a research position, came back to the US, had a baby, left my career in science behind, and am now a full time WAHM (Work At Home Mom.)

So, when I saw this yarn at TNNA in June, it appealed to me on many levels. 

First, the NAME.  Therapi.  Some days, I feel like I could use some serious therapy! 

And then I looked at the content:  30% Jadeite fiber, 50% fine wool, 20% silk. Jadeite fiber? This is THE yarn for mineralogists (and scientists in general!) You get the relaxing benefits of knitting with the added bonus of actually working with minerals! It combines my interests so perfectly that I knew I had to use it to make something really special!

This sweater is a long, relaxing knit with the only shaping being due to the transition in the stitch patterns. I added a large, snuggly collar that can be worn folded back over the shoulders, snuggled up next to the neck, or just casually floppy-drapey. You could easily add buttons for a closure and use the yarn-overs as buttonholes. I wanted my version to hang open and loose. It transitions easily from dressy to casual, and is my all-around “go-to” knit for these crisp fall days.
SIZE

XS[S, M, L, 1X, 2X, 3X]  (shown in size M)
To fit bust circumference of 30[34, 38, 42, 46, 50, 54] inches

 
FINISHED MEASUREMENTS

Back Width: 15.5[17.25, 19, 21, 23.5, 25.25, 27] inches
Length: 28.5[29.5, 31.5, 33, 33.5, 33.5, 33.5] inches

 
MATERIALS
spacer South West Trading Company Therapi [30% Jadeite fiber, 50% fine wool, 20% silk;  109yd/100m per 50g ball]; color: #555; 8[9, 10, 12, 14, 15, 16] balls
Editor's note: The yarn requirements for this pattern are incorrect. Reports from Ravelry indicate a size S requires at least 1500 yards and a L requires 2100. To be safe, double the amount of yarn noted above. We apologize for the error.

Recommended needle size:
spacer 1 US #7/4.5mm circular needle, 24 inches or longer (longer needle recommended for larger sizes)
spacer 1 set US #7/4.5mm double-point needles
spacer 1 set US #7/4.5mm straight needles (optional)
[always use a needle size that gives you the gauge listed below -- every knitter's gauge is unique]

spacer 4 stitch markers
spacer Waste yarn
spacer Yarn needle
 
GAUGE

22 sts/28 rows = 4 inches in Body Pattern

 
PATTERN NOTES
[Knitty's list of standard abbreviations and techniques can be found here.]

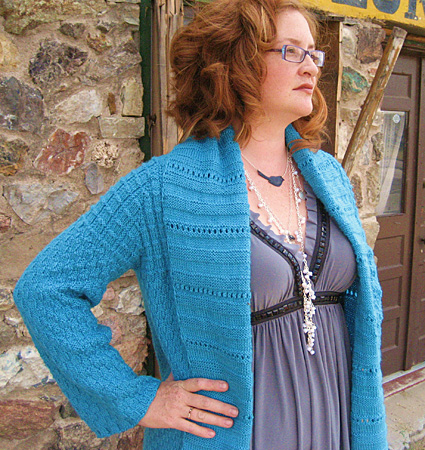
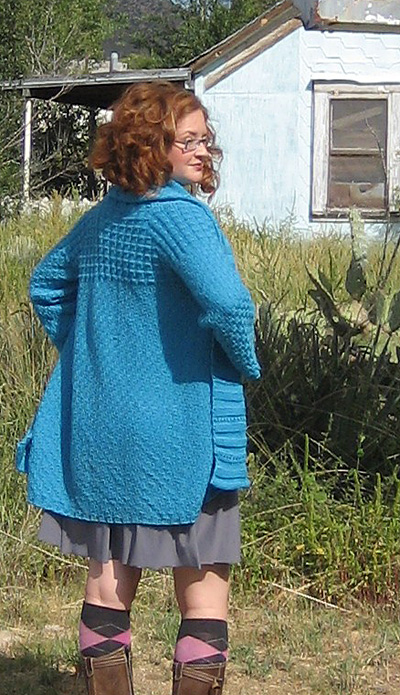
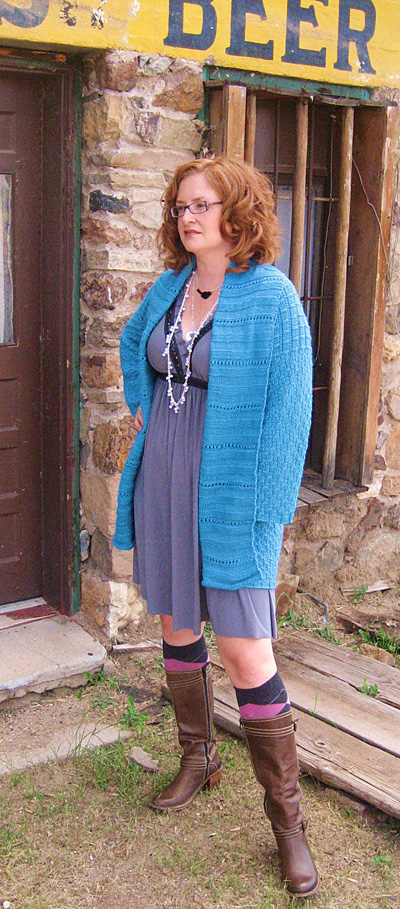
This sweater is knit flat on circular needles from the neckline to the hem.  The collar is worked separately in two pieces and seamed.  It incorporates two six-stitch texture patterns, each with a very different impact.

RLI (Right Lifted Increase): Use the right needle to pick up the stitch below the next stitch on the left needle. Place it on the left needle, then knit into it. 1 stitch has been increased.

LLI (Left Lifted Increase): Use the left needle to pick up the stitch 2 rows below the last stitch on the right needle. Knit into this stitch. 1 stitch has been increased.

RLPI (Right Lifted Purl Increase): Use the right needle to pick up the stitch below the next stitch on the left needle. Place it on the left needle, then purl into it. 1 stitch has been increased.

LLPI (Left Lifted Purl Increase): Use the left needle to pick up the stitch 2 rows below the last stitch on the right needle. Purl into this stitch. 1 stitch has been increased.

Yoke Pattern (Worked over a multiple of 6 sts + 3):
Rows 1, 3, 5 [RS]: [K3, p1, sl 1 with yarn held to back of work, p1] to last 3 sts, k3.
Row 2, 4 [WS]: [P3, k3] to last 3 sts, p3.
Row 6 [WS]: K all sts.
Row 7 [RS]: P4, sl 1 with yarn held to back of work, [p5, sl 1 with yarn held to back of work] to last 4 sts, p4.
Row 8 [WS]: Work as for Row 2.
Repeat Rows 1-8 for Yoke Pattern.

Body Pattern (Worked over a multiple of 6 sts + 3):
Row 1 [RS]: [K3, p3] to last 3 sts, k3.
Row 2 [WS]: [P3, k3] to last 3 sts, p3.
Rows 3-4: Work as for Rows 1-2.
Row 5 [RS]: Work as for Row 2.
Row 6 [WS]: Work as for Row 1.
Rows 7-8: Work as for Rows 5-6.
Repeat Rows 1-8 for Body Pattern.

Sleeve Pattern (Worked in the round over a multiple of 6 sts):
Rounds 1-4: [K3, p3] to end.
Rounds 5-8: [P3, k3] to end.
Repeat Rounds 1-8 for Sleeve Pattern.
Note: Sleeve pattern is the same as Body Pattern, but adapted for working in the round.

Stockinette Stitch: K all RS rows, p all WS rows.
Reverse Stockinette Stitch: P all RS rows, k all WS rows.

Instructions for the Backward Loop Cast On can be found here.


DIRECTIONS
blank
Using circular needle, CO 71[77, 77, 77, 107, 107, 107] sts.
Set-up Row [WS]: P1, place marker, p15[15, 15, 15, 21, 21, 21], place marker, p39[45, 45, 45, 63, 63, 63], place marker, p15[15, 15, 15, 21, 21, 21], place marker, p1.

Yoke is worked in Yoke Pattern. When shaping yoke, work increases in pattern, knitting or purling the increased stitch so that the new stitch will fit into the stitch pattern. For larger sizes, the increases worked at the front edge are always worked as kfb.

See Increase Chart for your size; it will show how the pattern should develop, beginning with the following row. (Note that the charts only show the first 24 rows of yoke shaping.)

Next Row [RS]: Kfb, slip marker, [RLI, work in pattern to marker, LLI, slip marker ] three times, kfb. 79[85, 85, 85, 115, 115, 115] sts.

In the directions that follow, increases are written as RLI and LLI; work RLPI and LLPI instead when necessary for stitch pattern.

Sizes XS, S, M, L Only:
Work 1 row in pattern.
Increase Row [RS]: [Work in pattern to marker, LLI, slip marker, RLI] four times, work in pattern to end. 8 sts increased.

Repeat these 2 rows 21[23, 28, 31, -, -, -] times more. 255[277, 317, 341, -, -, -] sts.

Sizes 1X, 2X, 3X Only:
Work 1 row in pattern.
Increase Row 1 [RS]: Kfb, [work in pattern to marker, LLI, slip marker, RLI] four times, work in pattern to last st, kfb. 10 sts increased.
Work 1 row in pattern.
Increase Row 2 [RS]: [Work in pattern to marker, LLI, slip marker, RLI] four times, work in pattern to end. 8 sts increased.
Repeat these 4 rows 15 times more. 403 sts.

All Sizes:
Each front has 24[26, 31, 34, 50, 50, 50] sts, each sleeve has 61[65, 75, 81, 87, 87, 87] sts, back has 85[95, 105, 111, 129, 129, 129] sts.

blank
Divide Sleeves From Body:
Remove markers when working next row. If casting on sts at underarm, use backward loop method.

Next Row [WS]: Work in pattern to first marker, place all sts between first and second markers on hold on waste yarn, CO 0[0, 0, 4, 0, 10, 20] sts; work in pattern to third marker, place all sts between third and fourth markers on hold on waste yarn, CO 0[0, 0, 4, 0, 10, 20] sts; work in pattern to end. 133[147, 167, 187, 229, 249, 269] sts.

LOWER BODY
Begin working in Body Pattern, increasing 2[0, 4, 2, 2, 0, 4] sts evenly in first row. 135[147, 171, 189, 231, 249, 273] sts.

Work in Body Pattern until work measures approx. 22[22.5, 23, 23.5, 24, 24, 24] inches from underarm or desired length, ending with Row 4 or 8 of pattern.
BO all sts.

SLEEVES
Note: When picking up sts at underarm, pick up and k 1 st in each CO st, and 1 st in work at each end of held sts. If no sts were cast on at underarm for your size, a total of 2 sts will be picked up at underarm.

Place 61[65, 75, 81, 87, 87, 87] held sts of one sleeve on double-point needles.

Beginning at center of underarm, pick up and k 1[1, 1, 3, 1, 6, 11] sts, work all sts of sleeve in Yoke Pattern as set, pick up and k 1[1, 1, 3, 1, 6, 11] sts to center of underarm. 63[67, 77, 87, 89, 99, 109] sts.

Sizes XS, M, L, 1X, 2X Only:
Work Round 1 of Sleeve Pattern, evenly increasing 3[-, 1, 3, 1, 3, -] sts. 66[-, 78, 90, 90, 102, -] sts.

Sizes S, 3X Only:
Work Round 1 of Sleeve Pattern, decreasing 1 st at beginning of round. -[66, -, -, -, -, 108] sts.

All Sizes:
Work in Sleeve Pattern until sleeve measures 16[16.5, 16.5, 17, 17, 17, 17] inches from underarm or desired length. BO all sts.

Work other sleeve in the same way.

blank
COLLAR (Make 2)
Collar is reversible. Mark RS of work using safety pin or waste yarn. Stitch patterns listed below refer to work when viewed from RS. Even-numbered rows are RS rows; odd-numbered rows are WS rows.

Using circular needle (or straight needles if desired), CO 60[60, 60, 70, 70, 70, 70] sts

Rows 1-6: Work in stockinette st.
Row 7 [WS]: K all sts.
Row 8 [RS]: P all sts.
Row 9 [WS]: [K2tog, yo] to last 2 sts, k2tog. 1 st decreased.
Row 10 [RS]: P all sts.
Row 11 [WS]: K all sts.
Rows 12-16: Work in stockinette st.
Rows 17-21: Work in reverse stockinette st.
Rows 22-26: Work in stockinette st.
Rows 27-31: Work in reverse stockinette st.
Row 32 [RS]: K all sts.
Row 33 [WS]: P all sts.
Row 34 [RS]: [K2tog, yo] to last 3 sts, k3tog. 2 st decreased.
Row 35 [WS]: P all sts.
Row 36 [RS]: K all sts.
Rows 37-41: Work in reverse stockinette st.
Rows 42-46: Work in stockinette st.
Rows 47-51: Work in reverse stockinette st.
Rows 52-56: Work in stockinette st.
Row 57 [WS]: K all sts.
Row 58 [RS]: P all sts.
Row 59 [WS]: [K2tog, yo] to last 2 sts, k2tog. 1 st decreased.
Row 60 [RS]: P all sts.
Row 61 [WS]: K all sts.

Repeat Rows 12-61 for front band pattern. Continue in pattern until work measures approx. 35[36.5, 38.5, 40, 43, 43, 43] inches when slightly stretched. If you have changed the length of the jacket, this panel should be long enough to reach from center back of neckline, along front edge of sweater to lower front corner.
BO all sts.

Make another panel in the same way.

FINISHING

Sew collar panels to front and neckline edges of jacket, so that wider (CO) edges of panels meet at center back. Sew edges of collar panels together at center back.

Weave in ends and block as desired.

ABOUT THE DESIGNER
designernameBlank
Stefanie Japel likes to design top down sweaters. A lot. She does so in Las Cruces, New Mexico, where it is sunny 360 days of the year.

Read about her sunny-weather knitting adventures at glampyre.com.


Grandma Knitty Home