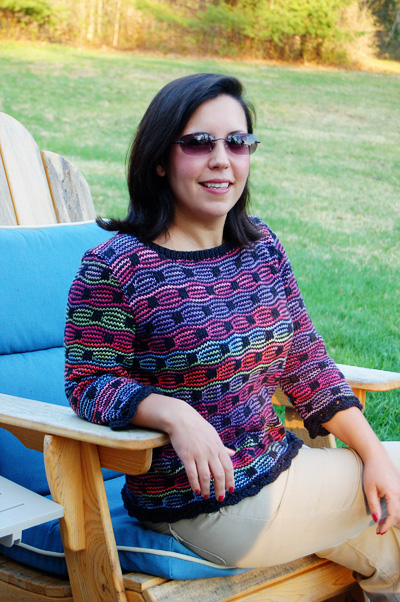
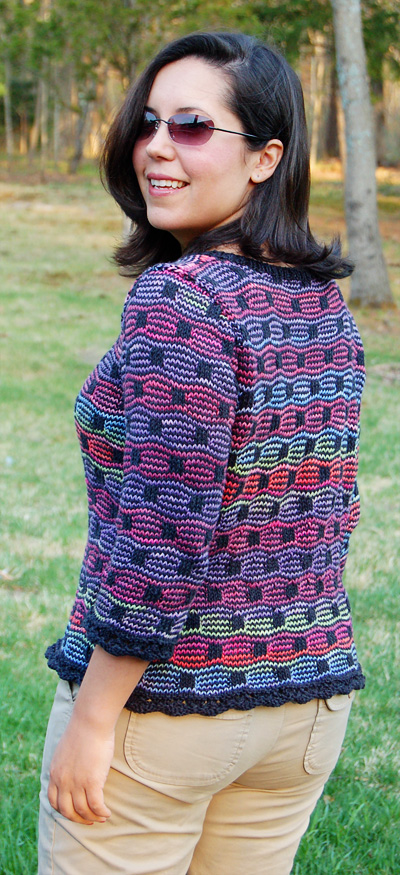
  BODY
BODY
Using circular needle
and MC, CO 156[180, 198,
216, 240, 258, 276] sts.
P 1 row (a RS row), then
place marker and join to begin working in the round,
being careful not to twist.
Scalloped Edge:
Round 1: P all sts.
Round 2: [K1, yo, k1, sk2p,
k1, yo] to end.
Round 3: K all sts.
Round 4: [K2, yo, sk2p,
yo, k1] to end.
Round 5: K all sts.
Set up Cubix Pattern:
P 1 round, evenly increasing
4[0, 2, 4, 0, 2, 4] sts. 160[180, 200, 220, 240, 260,
280] sts.
Important Note: When slipping sts, always slip with
yarn held to WS of work.
Carry unused colors loosely along inside of work. When
beginning each round, pick up the new color from underneath
old color. This will twist the strands, preventing holes
from forming at color change points.
As written, lower body will measure 14.5 inches long
to underarm after blocking. If you wish to add or subtract
approx. 1.25 inches of length, begin with Row 11 of pattern;
this will allow you to work 10 rounds more or fewer of
pattern before beginning waist shaping.
Cubix Pattern:
Rounds 1, 3, 5, 7, 9: Using MC,
k all sts.
Round 2: Using CC1, k all
sts.
Rounds 4, 6, 8: Using CC1,
[k1, sl 3 sts, k6] to end.
Round 10: Using CC1, k
all sts.
Rounds 11, 13, 15, 17, 19: Using MC, k all sts.
Round 12: Using CC2, k
all sts.
Rounds 14, 16, 18: Using
CC2, [k6, sl 3 sts, k1] to end.
Round 20: Using CC2, k
all sts.
Rounds 21-30: Work as for Rounds 1-10.
Shape Waist:
Round 31: Using MC, k all
sts.
Round 32: Using CC2, k
all sts.
Round 33: Using MC, [k2tog,
k8] to end. 144[162, 180, 198, 216, 234, 252] sts.
Rounds 34, 36, 38: Using
CC2, [k5, sl 3 sts, k1] to end.
Rounds 35, 37, 39: Using
MC, k all sts.
Round 40: Using CC2, [RLI,
k9] to end. 160[180, 200, 220, 240, 260, 280] sts.
Round 41: Using MC, k all sts.
Round 42: Using CC1, k
all sts.
Round 43: Using MC, [k6,
k2 tog, k2] to end. 144[162, 180, 198, 216, 234, 252]
sts.
Rounds 44, 46, 48: Using
CC1, [k1, sl 3 sts, k5] to end.
Rounds 45, 47, 49: Using
MC, k all sts.
Round 50: Using CC1, [k6,
RLI, k3] to end. 160[180, 200, 220, 240, 260, 280] sts.
Round 51-59: Work as for Rounds 31-39.
Round
60: Using CC2, [RLI, k9] 8[9, 10, 11, 12, 13, 14] times, place marker,
[RLI, k9] to end.
Rounds 61-100: Work as for Rounds
1-20. End last round
(Round 100) 2[3, 4, 5, 6, 7, 8] sts before end-of-round
marker.
Divide for Armholes:
Remove markers when working
next round. You may wish to break the yarn and rejoin
it before beginning next round. Break CC1 and CC2.
Round 101: Using MC, BO
9[11, 13, 15, 17, 19, 21] sts (2[3, 4, 5, 6, 7, 8] sts
before marker and 7[8, 9, 10, 11, 12, 13] sts after marker);
k to 2[3, 4, 5, 6, 7, 8] sts before next marker, place
all sts just worked on hold for back; BO 9[11, 13, 15,
17, 19, 21] sts, k to end. 71[79, 87, 95, 103, 111, 119]
sts.
UPPER FRONT
Notes:
- The upper front and back
are worked back and forth
in rows, in Cubix pattern as set. You will be working
rows in pairs: 2 WS rows (1 CC row, then 1 MC row)
followed by 2 RS rows. Rejoin CC2 when needed.
- Shaping will encroach on slipped-st blocks near edges
of work. When working CC rows, work first and last sts
of row in CC, then work remaining sts in pattern as set.
- When decreasing on RS rows, work [ssk] at beginning
of row and [k2tog] at end of row. When decreasing on
WS rows, work [p2tog] at beginning of row and [ssp] at
end of row.
Next Row [WS]: Join CC1 with WS facing and p all sts
(counts as Row 2 of pattern).
Continuing in pattern as set, decrease 1 st at each
end of next 4[6, 8, 10, 12, 14, 16] MC rows. 63[67, 71,
75, 79, 83, 87] sts.
Continue in pattern until work measures 4[4.5, 5, 5.5,
6. 6.5, 7] inches from underarm, ending with both yarns
at same edge of work.
Shape Neckline:
Next Row: Work 21[22, 23,
24, 25, 26, 27] sts in pattern; place remaining sts
on st holder.
Decrease 1 st at neckline
edge of next 9 rows. 12[13, 14, 15, 16, 17, 18] sts.
Continue in pattern until
work measures 7[7.5, 8, 8.5, 9, 9.5, 10] inches from
underarm. BO all sts.
Leaving center 21[23, 25, 27, 29, 31, 33] sts on st
holder, place 21[22, 23, 24, 25, 26, 27] sts on needle
for other shoulder. If first shoulder began with a WS
row, join yarn with WS facing; if it began with a RS
row, join yarn with RS facing.
Work as for first shoulder.
 
UPPER BACK
Place held sts of upper back on needle and
rejoin MC and CC1 with WS facing.
Shape armholes as for upper
front.
Continue in pattern until work measures 6[6.5, 7, 7.5,
8, 8.5, 9] inches from underarm, ending with both yarns
at same edge of work.
Shape Neckline:
Next Row: Work 17[18, 19,
20, 21, 22, 23] sts in pattern; place remaining sts
on st holder.
Decrease 1 st at neckline
edge of next 5 rows. 12[13, 14, 15, 16, 17, 18] sts.
Continue in pattern until
work measures 7[7.5, 8, 8.5, 9, 9.5, 10] inches from
underarm. BO all sts.
Leaving center 29[31, 33, 35, 37, 39, 41] sts on st
holder, place 17[18, 19, 20, 21, 22, 23] sts on needle
for other shoulder. If first shoulder began with a WS
row, join yarn with WS facing; if it began with a RS
row, join yarn with RS facing.
Work as for first shoulder.
SLEEVES (Make 2)
Using double-point needles and MC, CO
51[51, 53, 53, 55, 55, 57] sts. Divide sts evenly between
needles.
P 1 row (a RS row), then
place marker and join to begin working in the round,
being careful not to twist.
Scalloped Edge:
Round 1: P all sts.
Round 2: K1[1, 2, 2, 0,
0, 1], [k1, yo, k1, sk2p, k1, yo] 8[8, 8, 8, 9, 9, 9]
times, k2[2, 3, 3, 1, 1, 2].
Round 3: K all sts.
Round 4: K1[1, 2, 2, 0,
0, 1], [k2, yo, sk2p, yo, k1] 8[8, 8, 8, 9, 9, 9] times,
k2[2, 3, 3, 1, 1, 2].
Round 5: K all sts.
Set up Cubix Pattern:
P 1 round, evenly increasing
0[2, 2, 4, 4, 6, 6] sts. 51[53, 55, 57, 59, 61, 63]
sts.
Note: Read ahead! Shaping directions and stitch pattern
directions are worked at the same time, beginning on
the next round.
Shape Sleeve:
Work 11[9, 7, 7, 5, 5,
5] rounds in pattern
as directed below.
Increase Round: K1, m1,
work in pattern to last st, m1, k1.
Repeat these 12[10, 8,
8, 6, 6, 6] rounds 4[5, 7, 8, 10, 11, 13] times more.
61[65, 71, 75, 81, 85, 91] sts.
Work increased sts into
Cubix pattern, working
additional slipped-st blocks as you have enough sts to
complete them. Do not work first or last st of round
into slipped-st block; these sts should always be worked
using CC.
Note: If you prefer, increased
sts may be worked in single-row stripes, instead of incorporating
them into st pattern. This will be less challenging,
though the stripes will not undulate over these increased
sts as they do over the rest of the sleeve.
AT THE SAME TIME: Work
st pattern as follows. The markers
placed in Rounds 2 and 14 below are used to help set
up st pattern.
Rounds 1, 3, 5, 7, 9: Using
MC, k all sts.
Round 2: Using CC1, k4[5,
1, 2, 3, 4, 5], place marker, k to last 4[5, 1, 2, 3,
4, 5] sts, place marker, k to end.
Rounds 4, 6, 8: Using CC1,
k to marker, [sl 3 sts, k7] to 3 sts before marker, sl
3 sts, k to end.
Round 10: Using CC1, k
all sts, removing markers.
Rounds 11, 13, 15, 17, 19: Using MC, k all sts.
Round 12: Using CC2, k
all sts. You will now have worked 1[1, 1, 1, 2, 2,
2] increase rounds. 53[55, 57, 59, 63, 65, 67] sts.
Rounds 14: Using CC2, k10[1,
7, 8, 10, 1, 2], place marker, [sl 3, k7] 3[5, 4, 4,
4, 6, 6] times, sl 3, place marker, k10[1, 7, 8, 10,
1, 2].
Rounds 16, 18: Using CC2,
k to marker, [sl 3, k7] to 3 sts before marker, sl 3,
k to end.
Round 20: Using CC2, k
all sts, removing markers.
Continue in pattern until work measures 11.5[11.5, 12,
12, 12.5, 12.5, 13] inches or desired length to underarm,
ending last CC round 5[6, 7, 8, 9, 10, 11] sts before
marker. Using same color, BO 10[12, 14, 16, 18, 20, 22]
sts. Break other 2 colors. 51[53, 57, 59, 63, 65, 69]
sts.
Shape Sleeve Cap:
Sleeve cap will be worked
back and forth in rows. See Notes for Upper Front.
Join other colors as needed.
Work 2 rows in pattern (a MC row and a CC row).
Decrease 1 st at each end of next 14[15, 17, 18, 20,
21, 23] MC rows. 23 sts remain.
Decrease 2 sts at each end of next 3 MC rows as follows:
If the row is a RS row:
K3tog tbl, k to last 3 sts, k3tog.
If the row is a WS row:
P3tog, p to last 3 sts, p3tog tbl.
BO remaining sts using CC currently in use. |

