


Wiseknit™: A column that teaches you how to do things you'll find in knitting instructions
INTRODUCTION
Wiseknit™: Practical Knitting Wisdom
by Kate Atherley
One of the wonderful things about knitting is that there are so many different solutions to every problem, so many possible answers to every question. This column aims to expand your knitting knowledge and toolkit with practical solutions and answers to your technical knitting questions and conundrums.
Fully Fashioned Shaping: Increases
See my previous column for a bit of history and insight into what this “Fully-fashioned shaping” thing is all about, and an explanation of how to work decreases in a pattern for ease of finishing and tidiness. The same thing applies with increases, too, of course.
This column is all about the different ways we can handle that pesky “Increase at the beginning and end of the row” instruction, and the pros and cons of each option.
I remember being utterly flummoxed the first time I encountered it. My increase of choice couldn’t actually be worked at the beginning and end of the row: the common M1R and M1L increases require working into the strand between the stitch on the right needle and the stitch on the left needle – but at the start of the row there isn’t a stitch on the right needle, and at the end of the row there isn’t a stitch on the left needle.
It seemed like there were two possible solutions: either use a different increase, or change the position of the increases.
KFB
Kfb can be worked in the first and last stitch of a row, so that was the one I immediately tried:
Kfb, k to last stitch, kfb.
But I discovered it has a couple of drawbacks:
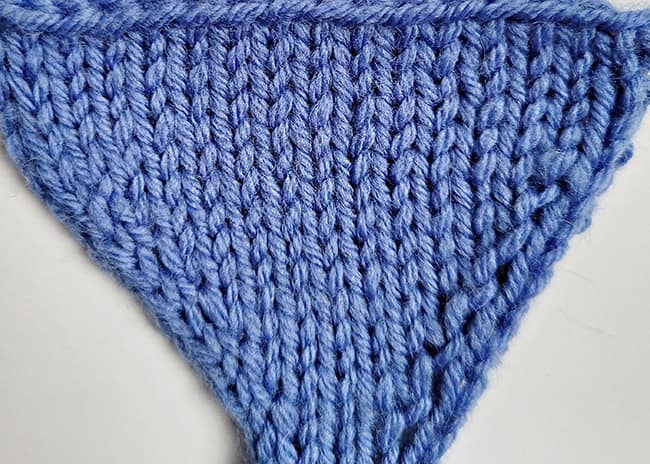
The first is that Kfb creates a pretty darn visible bump that sits to the left of the original stitch. It’s functional, but not necessarily beautiful. The second is that because the bump is always to the left, your increases are, effectively asymmetrical.
If you work kfb in the first and last stitch, on the right-hand side of the fabric the bump is one stitch in from the edge, on the left-hand side of your fabric, it’s on the very edge of the work.

Kfb, k to last st, kfb.
It doesn’t look even, and on the right-hand side, you’ve got a ladder issue. That is, the column of ladders that we need for seaming or picking up stitches gets a bit untidy. On the row where you worked the kfb, there’s a bigger gap than on the following WS row. You can see in the image above that there’s two horizontal ladders close together, followed by a big gap.
Inconsistent spacing of the ladders when you use the kfb. The actual ladder on the actual kfb stitch is a bit different, too.
On the left-hand side, the ladders are fine, but there’s a different challenge: as the row grows wider, you have to move out by one ladder, to compensate for each increase. This is straightforward, but ups the difficultly level a bit, and it’s a harder to keep tidy.
You can solve this problem by working the first increase in the first stitch, and the second one in the second-last stitch, as follows:
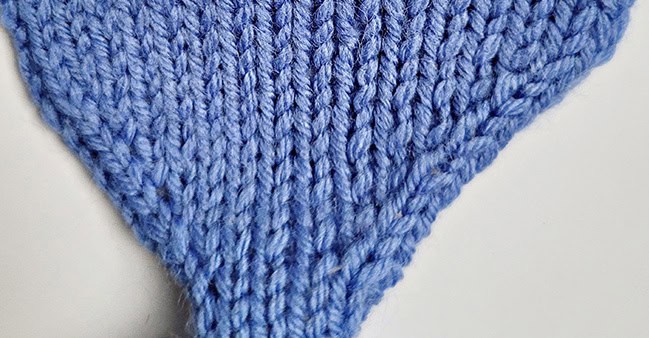
Kfb, k to last 2 sts, kfb, k1.
This is what it looks like if you work the kfb in the first and the second-last stitch, as above.
Much tidier!
Doing it this way means that the bumps will be visible in your fabric, even if you’re picking up stitches or working a seam, as the bump sits on the inside of the ladder.
When you seam these edges together, the bumps of the kfb stitches are still visible.
You may or may not like how this looks; and as mentioned above, the inconsistent gaps at the ladders can result in somewhat untidy seams and picked-up edges.
This method also adds a slightly weird asymmetry in the instructions.
The symmetry of the instruction might seem like a minor issue – for a lot of knitters, it is. If you’re following written instructions, it’s probably neither here nor there; but that inconsistency can make it a little bit harder to memorize an instruction, and can make it a little bit harder to figure out what you need to do where.
So we look for alternatives.
The Make One Family
The “make 1” family of increases – M1R, M1L, M1PR, M1PL – are smoother-looking, and allow a more symmetrical instruction.
My favourite for “increase 1 stitch at each end of the row" is this:
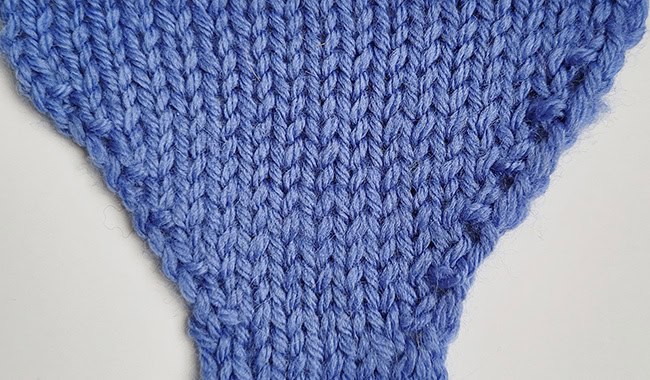
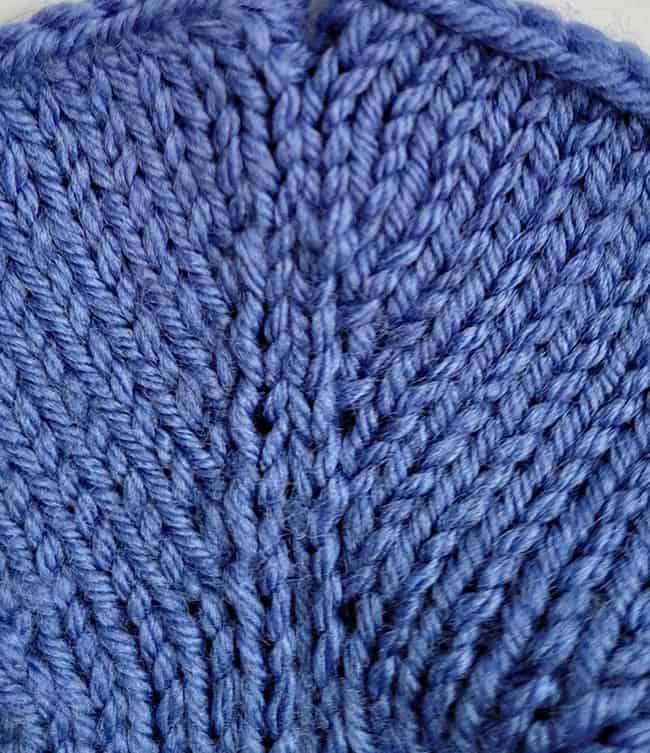
K2, m1r, k to last 2 sts, m1l, k2.
M1r at the start of the row, m1l at the end of the row.
It’s common, too, to see the increases reversed, as follows:
K2, m1l, k to last 2 sts, m1r, k2.
M1l at the start of the row, m1r at the end of the row.
It’s not a huge difference in how they look, but to my eye the second one is slightly neater. Use the one you prefer!
Seaming
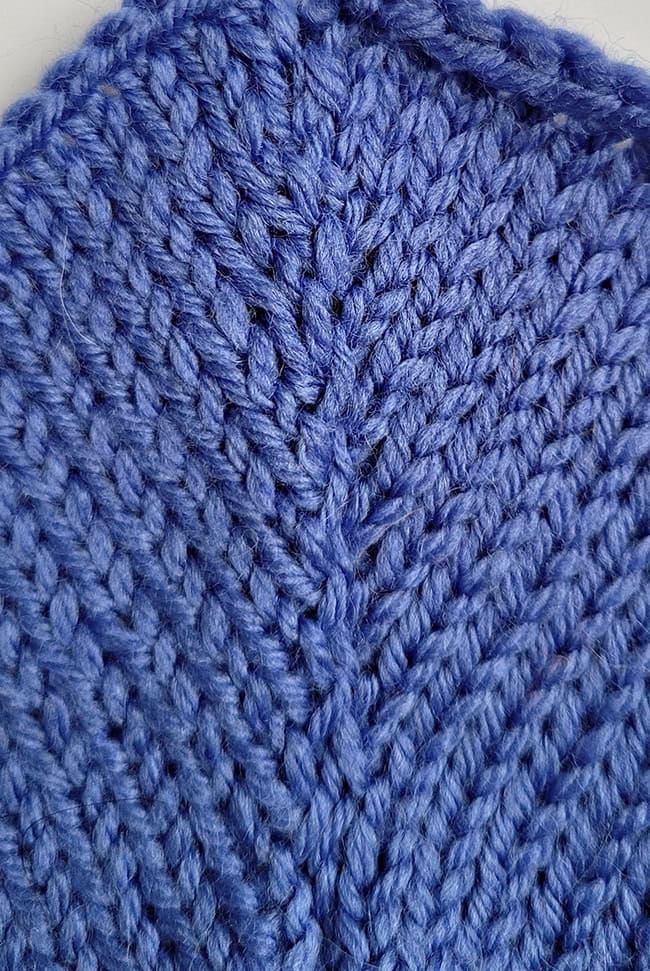
Because the m1r/m1l increases require you to work into the ladder that sits between the two stitches, bringing it in two stitches means again that the all-important seaming-up ladder is pristine and undisturbed. Seaming up two pieces that are worked like this is exactly the same as working a seam on two straight pieces of fabric.However, It does create small ridges in the finished piece, just either side of the seam.
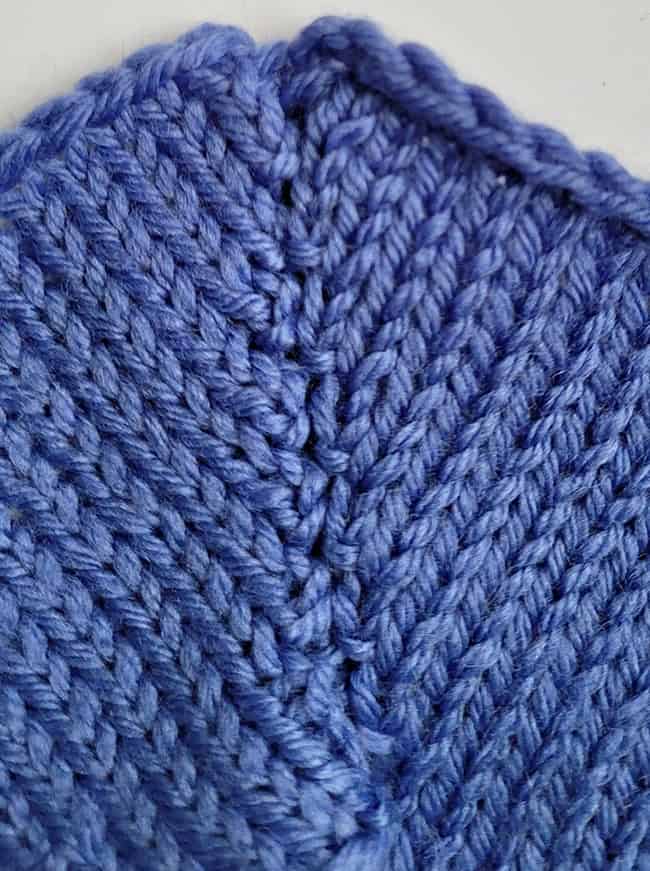
Seaming together two pieces worked as: K2, m1l, k to last 2 sts, m1r, k2.
Seaming together two pieces worked as: K2, m1r, k to last 2 sts, m1l, k2.
Closer to the Edge
To reduce that ridge, you can put the increases one stitch in from the edge.
And again, you can decide how to place them, whether you like the m1r at the start and m1l at the end, or the other way around.
e.g.
K1, m1r, k to last st, m1l, k1.
K1, m1l, k to last st, m1r, k1.
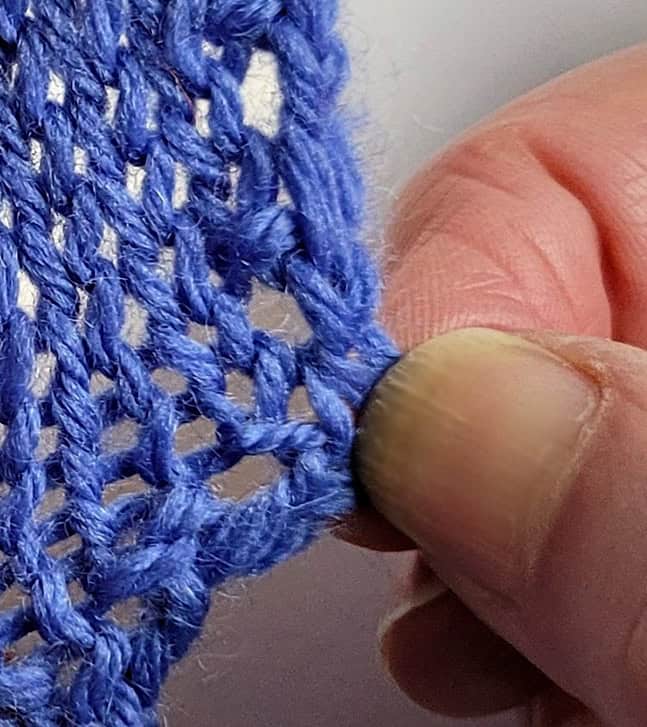
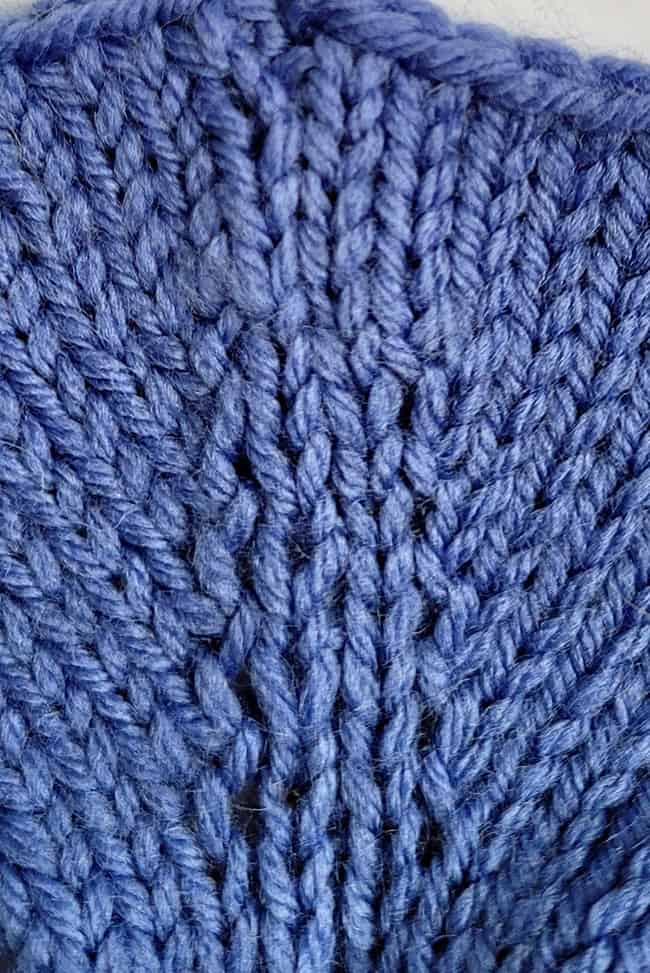
Doing this does affect the look and the spacing of the ladders. As you can see in the image below, pulling up and knitting into the ladder tightens it, so instead of consistent gaps every row, you get two close together, with a larger gap between the pairs.
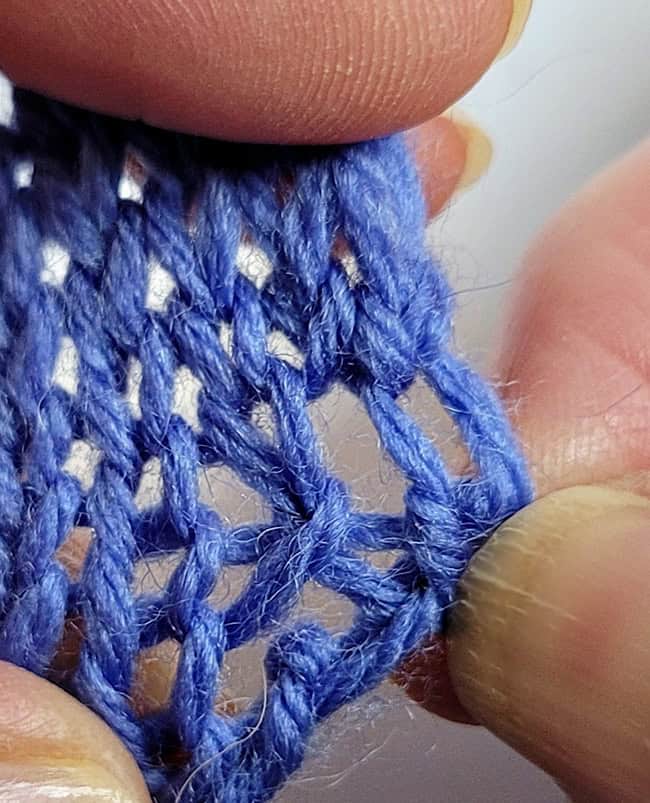
The “lift up and work into the strand” increases, m1r and m1l, tighten up the ladders and make the spacing inconsistent.
If you’re picking up stitches in that edge, the inconsistent spacing can lead to a slightly less tidy edge – a larger gap is easier to work into, but well, it’s a gap.
The resulting seamed edges don’t have the pronounced ridge, but they’re perhaps a little untider?
Seaming together two pieces worked as: K1, m1r, k to last st, m1l, k1.
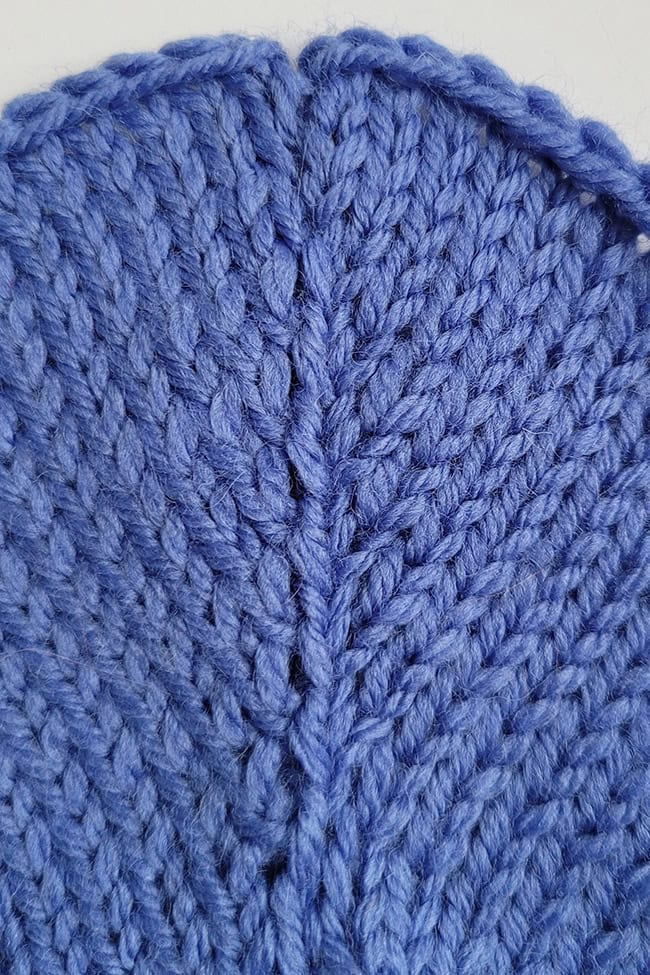
Seaming together two pieces worked as: K1, m1l, k to last st, m1r, k1.
It’s Your Choice
As with decreases – and so many other things in knitting! – which version is correct is entirely your choice, based on what you find easiest to do, what makes the most sense to you, and which look you prefer. It’s all about knowing what your options are!ABOUT THE AUTHOR
 Kate Atherley is Knitty's Managing Technical Editor and a knitting author and teacher. The combination of her university degree in mathematics, professional experience in software development and usability, and training in garment and fashion design give her a unique perspective. She’s currently working on a book about Math for Knitters, due out in 2025.
You can see more of her work at kateatherley.com, and on Ravelry.
Text & images © 2025 Kate Atherley.