


Hello Sunshine, a free knitting pattern from Knitty.com.
INTRODUCTION
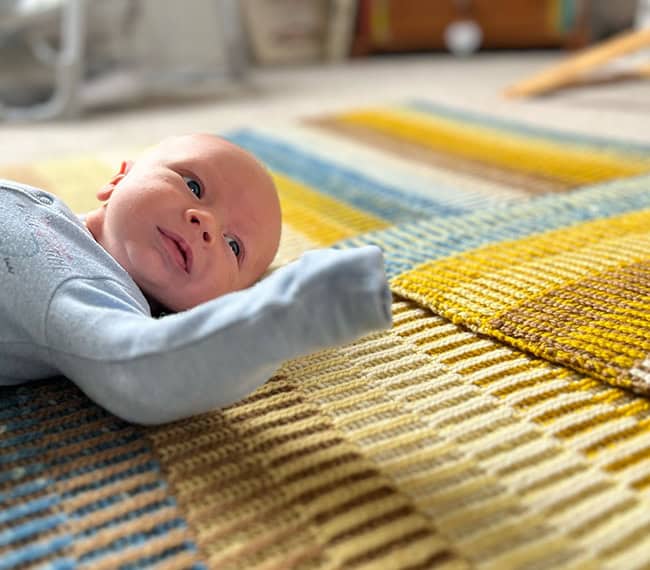
Hello Sunshine
by Kate Harvie

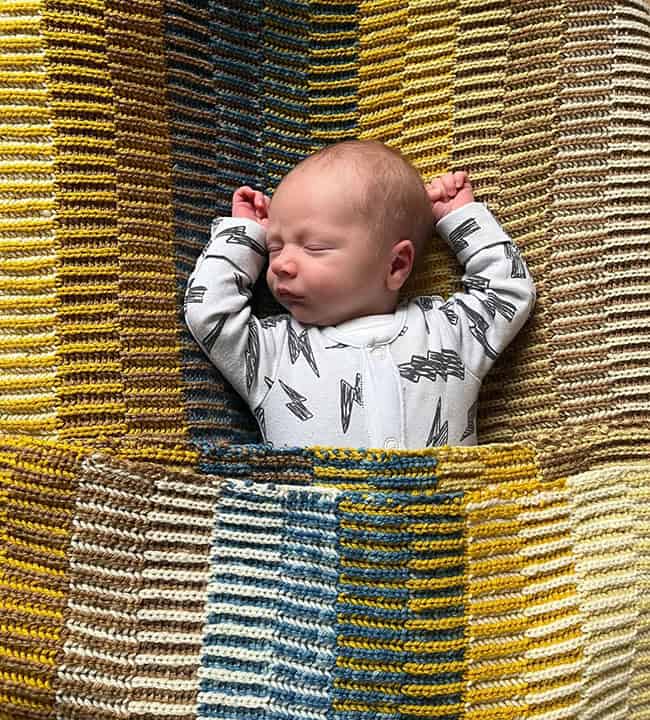
Two things inspired me to design this blanket. The first, and most important, was the birth of my first grandchild. The colors I have picked are as close as I could get to the colors of the baby's bedroom. The second was an attempt to demystify Brioche or Fisherman's Rib. It was a revelation to me to discover that Brioche and what my granny would have called Full Fisherman's Rib are exactly the same fabric. (I'm going to use the term brioche from here on because it is quicker to type and to say.)
There seems to be an abiding belief in the knitting community that brioche is a completely different kind of knitting to "ordinary" knitting and requires special training and terminology. I think this is unhelpful. Admittedly it is harder to read than stockinette and more difficult to correct mistakes, but it's basically just knits and purls.
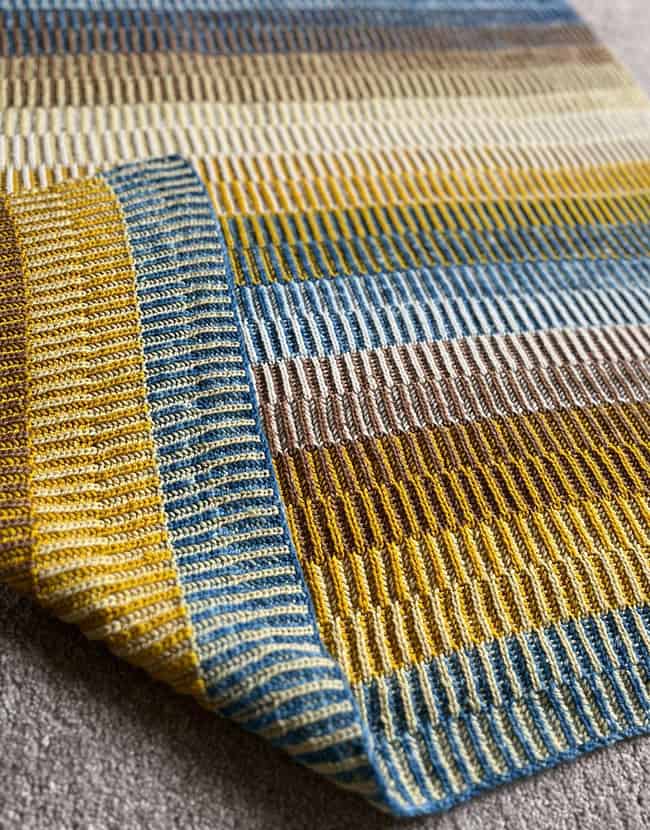
Brioche is an example of a "tuck stitch" which is essentially when a stitch is worked through more than one loop. In this blanket, we are working two color brioche with pairs of colors, which results in vertical stripes with one color dominant on one side and the other color on the opposite side. Using a palette of five colors, and swapping the dominance and the order of the colors, leads to twenty different "looks" which is very exciting!
The blanket is knitted as a plain rectangle. Because I am a show-off and I want it to be useful for many years, not just for baby months, I have made it big! You can, however, make a rectangle in any size you wish. Just cast on an odd number of stitches, work the number of sections that suits you, then cast off again. I think that this would be a good project to use up scraps of DK yarn in as many colors as you have available.
The pattern is described in two sizes. You should be able to make the smaller size with 100g of each of five colors in the suggested yarns, and the larger size with 200g of each color with enough leftovers for a few little baby hats. The sample blanket is made in the larger size.
 model: baby R
photos: Jess Harvie


SIZE
Smaller[larger]
FINISHED MEASUREMENTS
Width: 28.5[40] inches/ 72.5[101.5] ]cm
Length: 48[64] inches/ 122[162.5] cm
MATERIALS
Yarn
World of Wool Santorini DK [100% superwash merino wool, 252 yds/230m per 100g skein]; undyed, 5[10] skeins total; colors hand dyed using sustainably collected or purchased plant materials:
![]() [Color A] Azure, dyed with indigo, 1[2] skeins.
[Color A] Azure, dyed with indigo, 1[2] skeins.
![]() [Color B] Primrose, dyed with dead-headed buddleia flowers; 1[2] skeins.
[Color B] Primrose, dyed with dead-headed buddleia flowers; 1[2] skeins.
![]() [Color C] Sunshine, dyed with bog myrtle leaves; 1[2] skeins.
[Color C] Sunshine, dyed with bog myrtle leaves; 1[2] skeins.
![]() [Color D] Walnut, dyed with windfall walnut hulls and leaves;, 1[2] skeins.
[Color D] Walnut, dyed with windfall walnut hulls and leaves;, 1[2] skeins.
![]() [Color E] Natural white; 1[2] skeins.
[Color E] Natural white; 1[2] skeins.
Suggested widely available alternative yarns:
Stylecraft Special DK [100% premium acrylic, 323 yds/295m per 100g ball];
![]() [Color A] 1841 Cornish Blue; 1[2] balls
[Color A] 1841 Cornish Blue; 1[2] balls
![]() [Color B] 1835 Buttermilk; 1[2] balls
[Color B] 1835 Buttermilk; 1[2] balls
![]() [Color C] 1823 Mustard; 1[2] balls
[Color C] 1823 Mustard; 1[2] balls
![]() [Color D] 1806 Gingerbread; 1[2] balls
[Color D] 1806 Gingerbread; 1[2] balls
![]() [Color E] 1005 Cream; 1[2] balls
[Color E] 1005 Cream; 1[2] balls
OR
Yarnsmiths Merino DK Superwash, 100% wool, 120 yds/110m per 50g ball
![]() [Color A] 3280 Denim Blue; 2[4] balls
[Color A] 3280 Denim Blue; 2[4] balls
![]() [Color B] 3166 Canary Yellow; 2[4] balls
[Color B] 3166 Canary Yellow; 2[4] balls
![]() [Color C] 3150 Sunshine Yellow; 2[4] balls
[Color C] 3150 Sunshine Yellow; 2[4] balls
![]() [Color D] 3075 Rust; 2[4] balls
[Color D] 3075 Rust; 2[4] balls
![]() [Color E] 3050 Cream; 2[4] balls
[Color E] 3050 Cream; 2[4] balls
Yarn Characteristics
![]() The sample is made in a hand-dyed 100% superwash wool with 3 plies and a smooth profile. The pattern looks best worked in solid colors.
The sample is made in a hand-dyed 100% superwash wool with 3 plies and a smooth profile. The pattern looks best worked in solid colors.
Recommended needle size
[always use a needle size that gives you the gauge listed below - every knitter's gauge is unique]
![]() US 4/3.5mm circular needle, length at least 32 inches/80cm.
US 4/3.5mm circular needle, length at least 32 inches/80cm.
Notions
![]() yarn needle
yarn needle

GAUGE
22 sts/28 rows to 4 inches/10cm on US #6/4mm needles.
17 sts/50 rows = 4 inches/10 cm in pattern stitch. Note that each visible "v" stitch is equivalent to two rows.
Gauge is not critical in this project but working at a different gauge will result in a different finished item and will change yardage requirements.
Note: gauge is always taken after blocking. Superwash yarn may stretch when washed and this is more likely if your piece is large, so your swatch may stretch less than your finished item. This can be helped by tumble drying on a gentle setting, but if you don't have a tumble dryer then remove as much water as possible by rolling your item in towels, then gently spread on a flat surface and pat it into the smallest dimensions you can achieve without causing folds. Leave to dry completely then spread out gently without stretching before measuring.
PATTERN NOTES
[Knitty's list of standard abbreviations and techniques can be found here.]
Construction method: This blanket is a straightforward rectangle worked flat. After casting on, a foundation row is worked and then the pattern is worked in two-color Brioche or Fisherman's Rib. There are many equally valid techniques for working this stitch; I describe the "knit below" method which I find to be easiest to follow. The colors are swapped in a semi-random sequence so that two colors are used at a time and each color is used equally. One row of each of the color pair is worked from the RS, then one row of each color is worked from the WS. When starting a pair of A/B rows, you'll always work the first pass with that section's color 1, and always work the second pass with color 2. The blanket is completely reversible, but the sides are not identical, so RS and WS are used to aid description. You may find it helpful to mark the RS with safety pins or removable stitch markers, at least initially.
Techniques:
- Tillybuddy's very stretchy cast-on
This technique as described creates stitches in pairs. In this project you need an odd number of stitches, so if you use this technique, start with a slip knot which will give you an extra stitch. - When slipping stitches at the beginning and end of rows, yarn should be held at the side where it is currently to be found. That is, on RS rows 1B, 3B,5B, 7B and 9B leave yarn at the front of the work, on WS rows 2B, 4B, 6B, 8B and 10B leave yarn at the back of the work, on row 11B it will be at the front at the beginning of the row and at the back at the end of the row, on rows 13B, 15B, 17B, 19B leave yarn at the back, on rows 12B, 14B, 16B, 18B, 20B leave yarn at the front. Put another way, when working row 11B, take yarn to back of work for working knit stitches after slipping the first stitch of the row with yarn in front.
- K1b – knit 1 into the row below, making the stitch through two loops.
- P1b – purl 1 into the row below, making the stitch through two loops.
Stripe Pattern
Row 1A [RS, color 1]: (K1, k1b), rep to last st, k1. Slide sts to other end of needle.
Row 1B [RS, color 2]: Slp, (p1, p1b), rep to last 2 sts, p1, slp. Turn.
Row 2A [WS, color 1]: K1, (p1b, p1), rep to last 2 sts, p1b, k1. Slide sts to other end of needle.
Row 2B [WS, color 2]: Slp, (k1, k1b), rep to last 2 sts, k1, slp. Turn.
Rows 3A-10B: Work Rows 1A-2B another 4 times.
Row 11A [RS, color 1]: K1, (p1b, p1), rep to last 2 sts, p1b, k1. Slide sts to other end of needle.
Row 11B [RS, color 2]: Slp, (k1, k1b), rep to last 2 sts, k1, slp. Turn.
Row 12A [WS, color 1]: (K1, k1b), rep to last st, k1. Slide sts to other end of needle.
Row 12B [WS, color 2]: Slp, (p1, p1b), rep to last 2 sts, p1, slp. Turn.
Rows 13A-20B: Work Rows 11A-12B another 4 times.
DIRECTIONS
Using Color A, Tillybuddy's very stretchy cast-on (see Pattern Notes), or your preferred stretchy technique, CO 121[171] sts.
Foundation Row [WS]: Knit.
First section
Using Color A as color 1, and Color B as color 2, work Rows 1-20 of Stripe Pattern, joining Color B at the start of Row 1B, and leaving both attached until this section is complete.
Second section
Break Color A.
Using Color B as color 1, and Color C as color 2, work Rows 1-20 of Stripe Pattern, joining Color C at the start of Row 1B, and leaving both attached until this section is complete.
Third section
Break color B.
Using Color C as color 1, and Color D as color 2, work rows 1-20 of Stripe Pattern, joining Color D at the start of Row 1B, and leaving both attached until this section is complete.
Continue in this manner, using colors in the following sequence:
Fourth Section: D for color 1, E for color 2.
Fifth Section: E for color 1 and A for color 2.
Sixth Section: A for color 1 and C for color 2.
Seventh Section: C for color 1 and B for color 2.
Eighth Section: B for color 1 and E for color 2.
Ninth Section: E for color 1 and D for color 2.
Tenth Section: D for color 1 and A for color 2.
Eleventh Section: A for color 1 and E for color 2.
Twelfth Section: E for color 1 and D for color 2.
Thirteenth Section: D for color 1 and B for color 2.
Fourteenth Section: B for color 1 and C for color 2.
Fifteenth Section: C for color 1 and A for color 2.
Smaller blanket is now complete, continue to bind-off.
For larger blanket, work a further 5 sections as follows:
Sixteenth Section: A for color 1 and D for color 2.
Seventeenth Section: D for color 1 and C for color 2.
Eighteenth Section: C for color 1 and E for color 2.
Nineteenth Section: E for color 1 and B for color 2.
Twentieth Section: B for color 1 and A for color 2.
Bind off as follows:
With color A, k1, (k1b, pass tip of left-hand needle from left to right through both sts on right hand needle and k them together through the back loops, k1, pass tip of left-hand needle from left to right through both sts on right hand needle and k them together through the back loops), rep until no sts remain on left hand needle, break yarn and fasten off.
FINISHING
Soak in lukewarm water with a drop of washing up liquid or wooly wash for 20-30 minutes, or wash as you would intend to wash the blanket if it were dirty. How you do this will depend on the yarn you are using. Roll in towels, or short spin in a machine to remove excess water. Pull gently into shape on a flat surface and allow to dry completely. Do not pin or stretch.
Weave in ends.
ABOUT THE DESIGNER
 Kate has been a knitter and lover of anything woolly since childhood. She survived more than 40 years working in healthcare by playing viola, walking outdoors and knitting, hopefully not all at the same time. Since retirement in 2022, Kate has had a lot of fun trying vainly to reduce her stash, designing knitwear and playing with natural dyes in her garden shed. As well as a roomful of fiber and yarn, she has three grown-up children, a husband and a cat, and a brand new grandchild. She lives in North Yorkshire close to the moors and the sea.
Find her on Ravelry and Instagram.
Pattern & images © 2025 Kate Harvie