


Wiseknit™: A column that teaches you how to do things you'll find in knitting instructions
INTRODUCTION
Wiseknit™: Practical Knitting Wisdom
by Kate Atherley
One of the wonderful things about knitting is that there are so many different solutions to every problem, so many possible answers to every question. This column aims to expand your knitting knowledge and toolkit with practical solutions and answers to your technical knitting questions and conundrums.
Crochet Techniques for the Sac de Voyage
I hope you’ve seen the crochet bag, Sac de Voyage, in this issue. It’s a gorgeous design, and a fun way to experiment with crochet.
The bag is constructed from a number of smaller square motifs, each worked in the round, that are joined together as you go. The squares are quick to make, and use mostly basic skills, which means it’s a super first crochet project.
I personally enjoy projects like this because there’s less pressure to be precise. If your technique isn’t quite solid, your tension is a bit uneven, or there’s a few mistakes, the finished project will not be significantly affected by it. Which means that you needn’t feel intimidated, and even if you’re a crochet novice, you should give it a go!
A reminder here that we use North American crochet terminology at Knitty, and you'll always find our Abbreviations and Techniques for both crochet and knitting here.
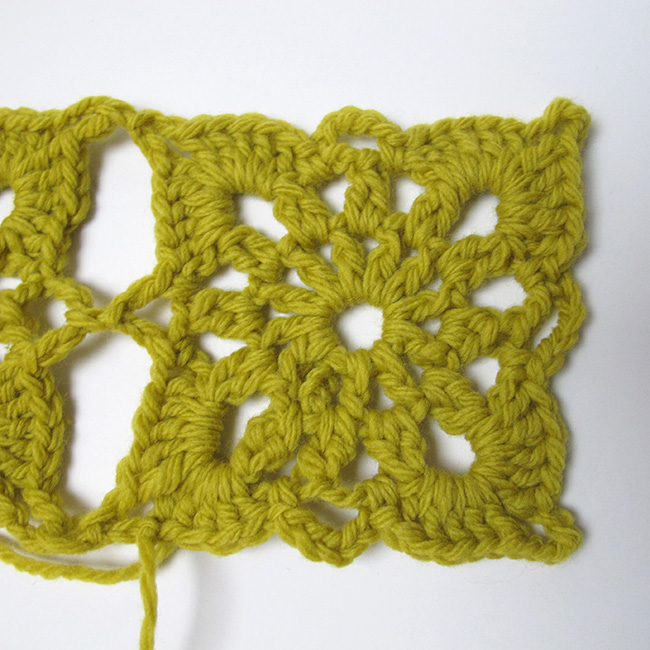
The basic square motif from Sac de Voyage
And if you don’t want to make a bag, this motif can be used in a whole load of other ways: consider a scarf or a wrap?
If you’re just starting out, there are two crochet techniques used in the project that you might not have encountered before.
Dc2tog
A typical granny square has you work clusters of dc (double crochet) stitches, which are classic and pretty. This motif does something a little different for those clusters using a dc2tog (double crochet 2 together).
Here’s how you do that.
Start as for a standard dc.
Step 1: wrap the yarn over hook, put the hook into the chain space, and pull up a loop, which gives you three loops on the hook.
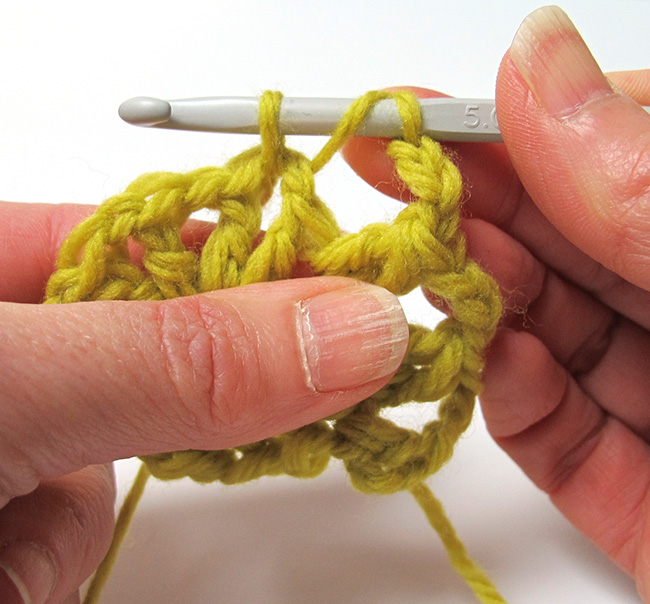
Dc2tog, step 1 complete
Step 2: Wrap the yarn over the hook, and pull that through the first two of the three loops on the hook. You now have two loops on the hook.
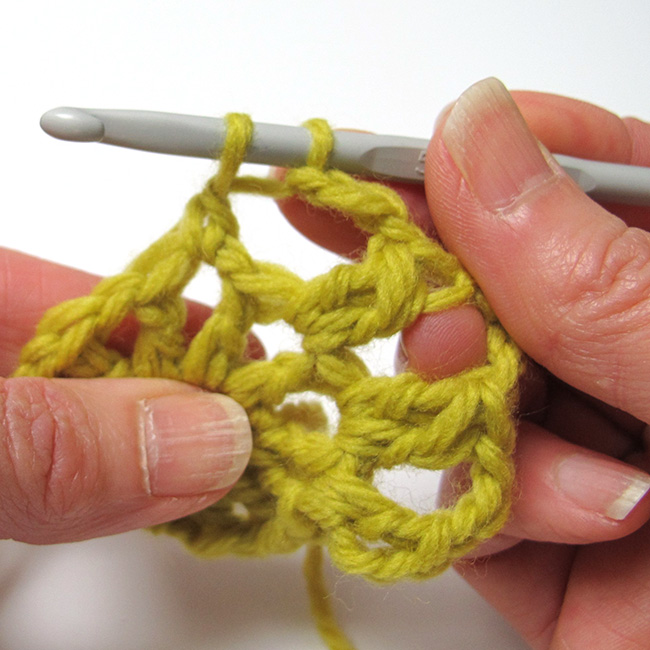
Dc2tog, step 2 complete
So far, this is the same as the usual dc. But now it changes.
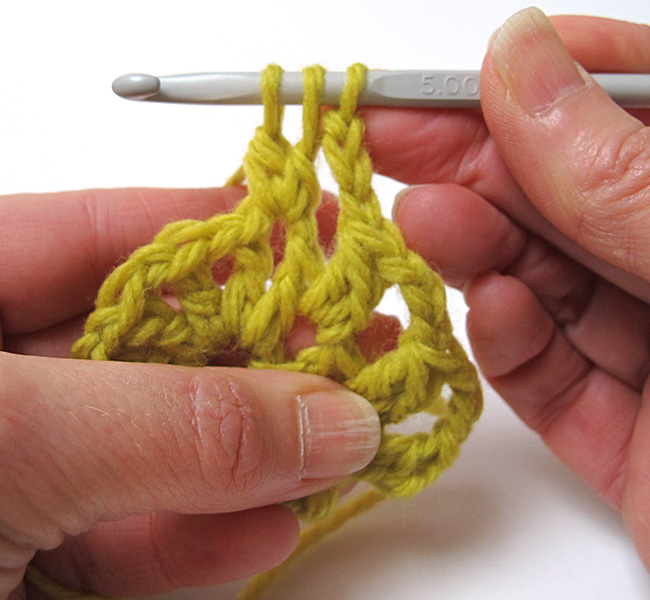
Step 3: Wrap the yarn over the hook, put the hook into the chain space, and pull up a loop. You now have four loops on the hook.
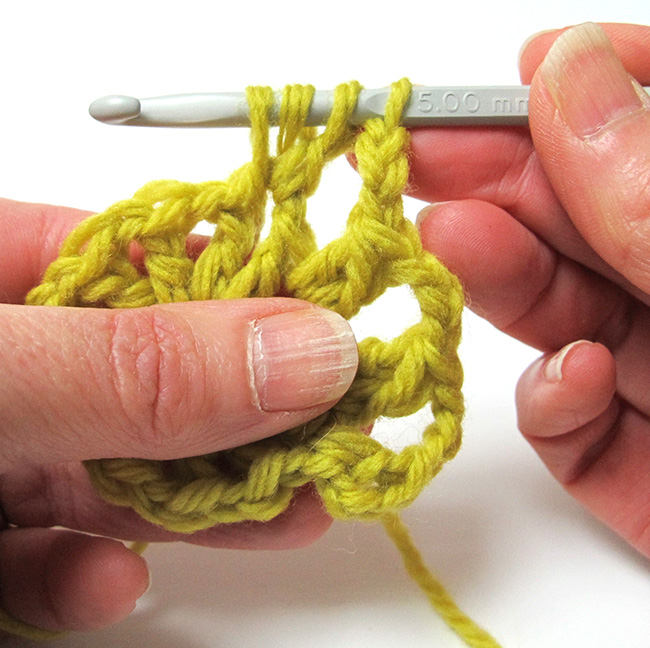
Dc2tog, step 3 complete
Step 4: Wrap the yarn over the hook, and pull it through the first two loops. You now have three loops on the hook.
Dc2tog, step 4 complete
Step 5: And finally, wrap the yarn over the hook, and pull it through all three loops. Done.
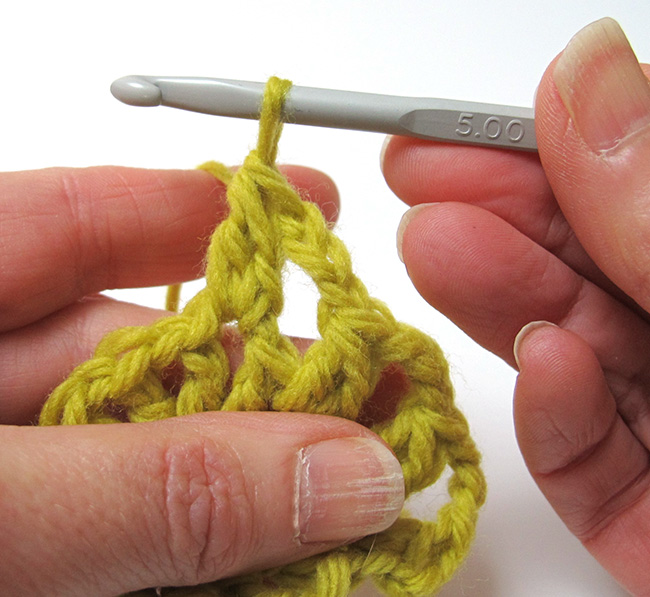
Dc2tog, step 5 complete
It’s also shown in the video below:
How to make a dc2tog
Joining as you go
Because almost no one loves sewing up, the designer has provided instructions for how to join pieces together as you go. These pieces are joined in the chain-5 spaces, at the corners and in the middle. When working the last round, you work this chain join where required.
You can see the attached chains, in the image below.
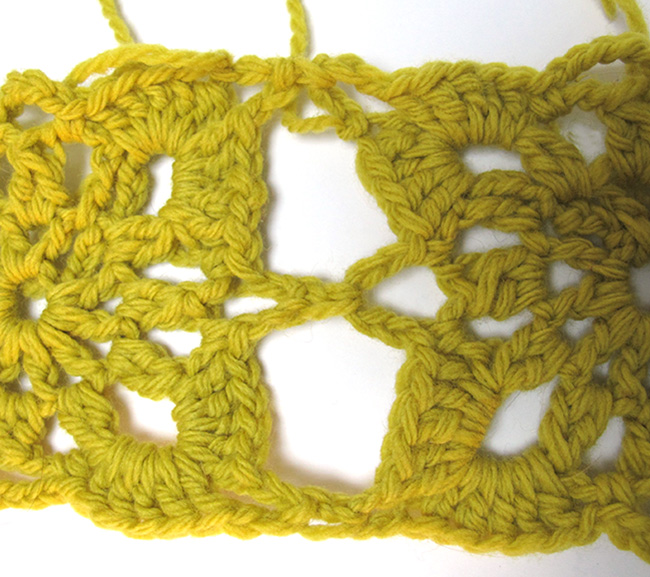
Two joined blocks
For example, I need to attach the square I’m currently working to the end of the strip. I work across three sides of the square as written, making dc clusters with chains to separate them. When I come to the corner, instead of working the usual ch-5 in the corner, I do the following:
Step 1: Chain 2.
Join as you go step 1 complete
Step 2: Grab the square you’re joining to, and insert the hook into the chain space at the corner, from front to back.
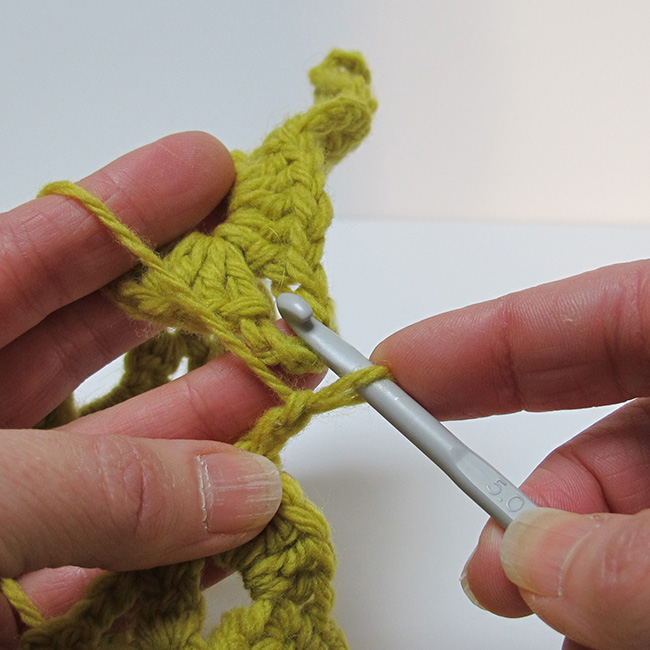
Join as you go step 2 complete
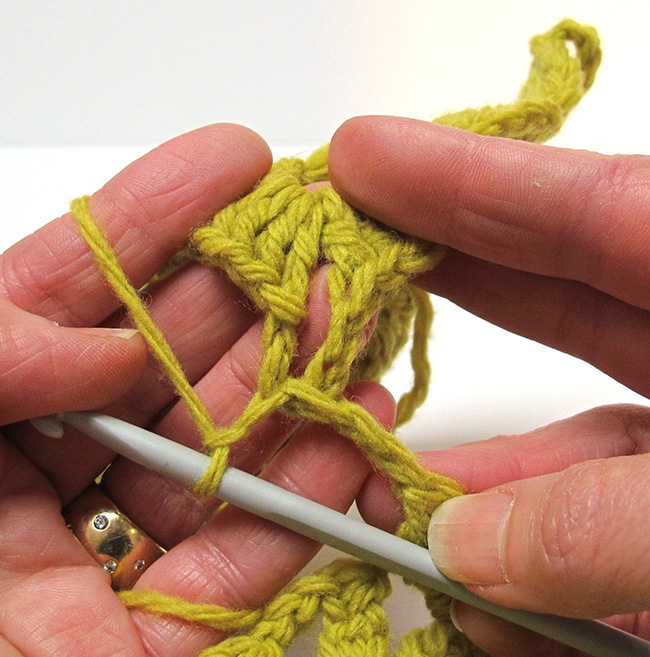
Step 3: Wrap the yarn over the hook, and bring it through the chain space, to the front.

Join as you go step 3 complete
Step 4: Wrap the yarn over the hook, and bring it through the two loops on the hook to complete the single crochet.
Join as you go step 4 complete
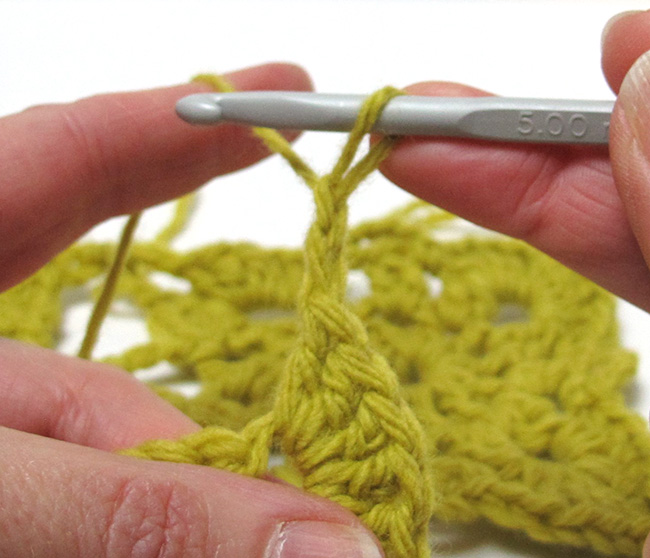
Step 5: Complete the chain with two more chains.
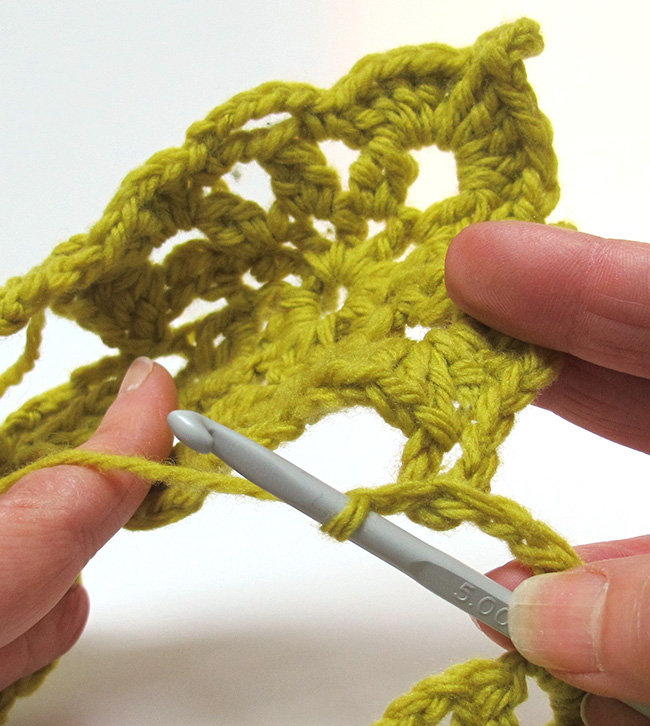
Join as you go step 5 complete
Watch the whole process in the video below:
Joining as you go
Work that in all three of the chain 5 spaces in this edge of your square, attaching them to the corresponding chains on the other square.
I hope you’ll give this pattern a try!
ABOUT THE AUTHOR
 Kate Atherley is Knitty's Managing Technical Editor and a knitting author and teacher. She’s also the co-founder and publisher of Digits & Threads, an independent, member-supported online magazine about Canadian fibre and textile arts, crafts and industry. The combination of her university degree in mathematics, professional experience in software development and usability, and training in garment and fashion design give her a unique perspective.
You can see more of her work at kateatherley.com, and on Ravelry.
Text & images © 2023 Kate Atherley.