


Sac de voyage, a free knitting pattern from Knitty.com.
INTRODUCTION
Sac de voyage
 by Olga Radchuk

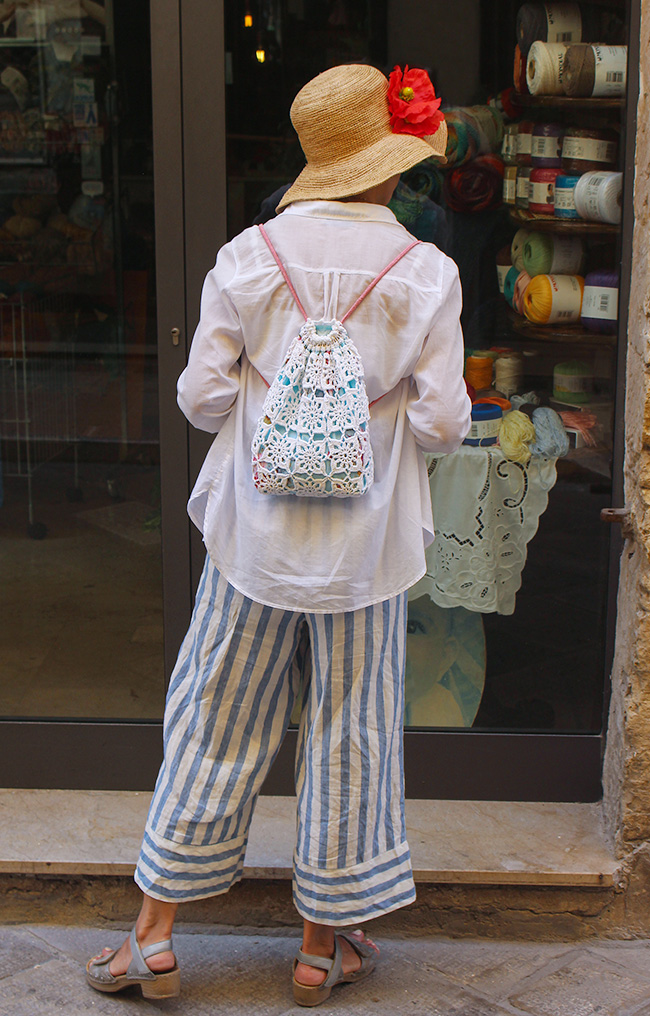
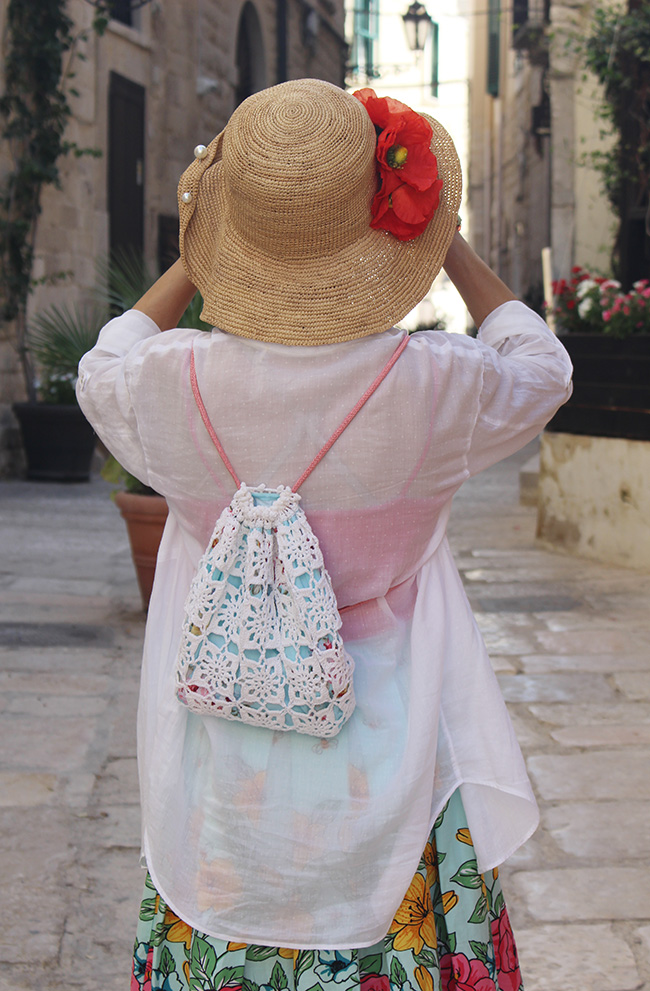
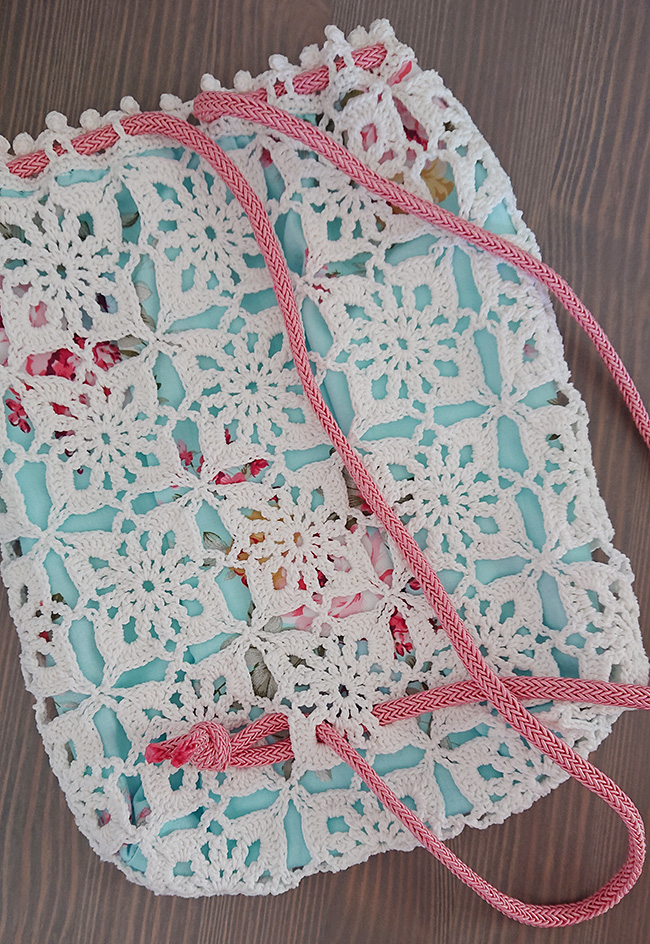
Sac de voyage is an ultra-light version of a normal backpack that keeps your wallet, your sunscreen, and a bottle of water safe and available throughout your whole journey, beit a city walk or a day-long trip.
The great thing is that nobody cares even if you smuggle it into a museum or State Apartments, because it is so small and lacy. And the closure is really reliable: as long as you have it snugly closed on your back, there is no chance to get inside.
 model: Olga Radchuk
photos: Serhii Tukaiev


SIZE
One
FINISHED MEASUREMENTS
Measured lying flat
Width: 7 inches/18 cm
Length: 10.25 inches/26 cm
Depth: 2.25 inches/6 cm
MATERIALS
Yarn
![]() Kirov Yarn Mills Camelia [100% cotton; 333.5 yd/305 m per 3.5 oz/100 g skein]; color: White; 1 skein
Kirov Yarn Mills Camelia [100% cotton; 333.5 yd/305 m per 3.5 oz/100 g skein]; color: White; 1 skein
Yarn Characteristics
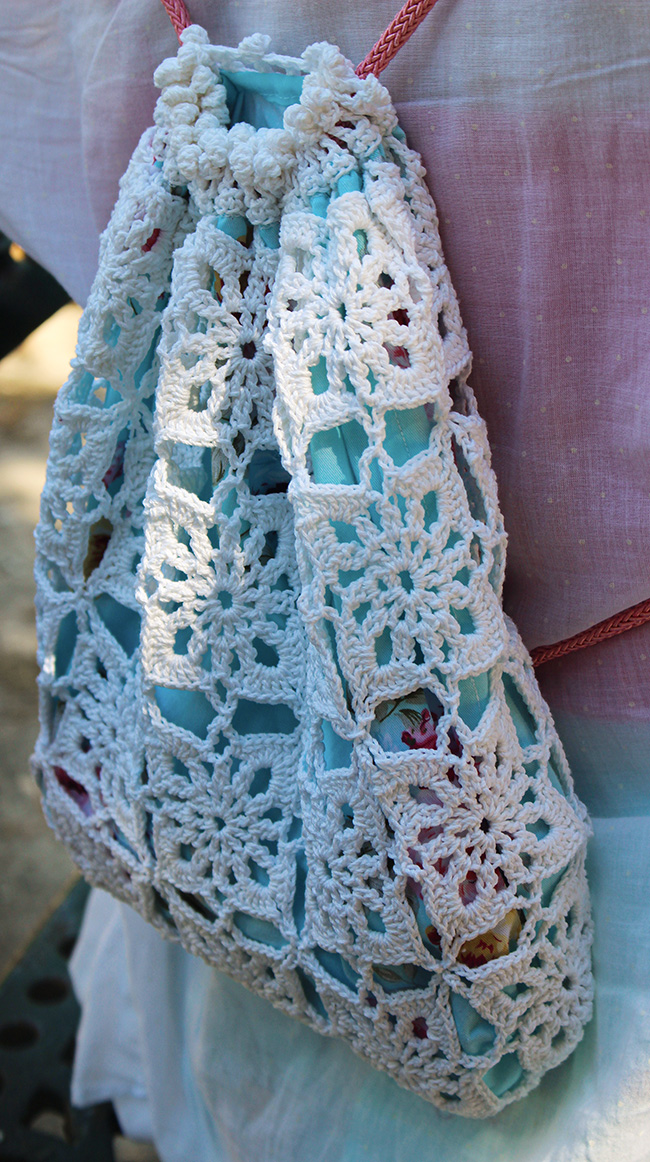
![]() The bag is crocheted using tightly plied, smooth, mercerized cotton. The yarn is dense, smooth and quite stiff. Double mercerized cotton, viscose or synthetic yarn can also be used, as well as a tightly twisted yarn that gives bias when used for knitting. Yarn with stretch should be avoided.
The bag is crocheted using tightly plied, smooth, mercerized cotton. The yarn is dense, smooth and quite stiff. Double mercerized cotton, viscose or synthetic yarn can also be used, as well as a tightly twisted yarn that gives bias when used for knitting. Yarn with stretch should be avoided.
Sample used most of the skein.
Recommended needle size
[always use a needle size that gives you the gauge listed below]
![]() #B-1/2 mm hook
#B-1/2 mm hook
Notions
![]() solid fabric for lining, such as quilting cotton, muslin, etc: See Pattern Notes for how to measure your finished bag in order to cut the lining fabric to the correct size
solid fabric for lining, such as quilting cotton, muslin, etc: See Pattern Notes for how to measure your finished bag in order to cut the lining fabric to the correct size
![]() rope or cord (see Pattern Notes for instructions on how to measure for the length you'll need). Cord shown is a polyester cord appr. 1 cm thick
rope or cord (see Pattern Notes for instructions on how to measure for the length you'll need). Cord shown is a polyester cord appr. 1 cm thick
![]() chalk marker (if your fabric is dark) or water soluble fabric marker
chalk marker (if your fabric is dark) or water soluble fabric marker
![]() sewing needle
sewing needle
![]() all-purpose sewing thread matching the fabric
all-purpose sewing thread matching the fabric
GAUGE
1 square measures 2.25 inches/6cm along each side
PATTERN NOTES
[Knitty's list of standard abbreviations and techniques can be found here. Knitty crochet patterns follow North American terminology.]
Bag construction: The bag is comprised of 35 squares in total and is 4 squares high, 3 squares wide and 1 square deep. Squares are joined while working the last round to avoid having to sew the squares together afterwards and obtain the right shape of the bag while still working on it. The border is worked across the top row of squares after all squares are joined together.
Initial bobble: Ch 2, *yo, insert hook into dc below, yo, pull up a loop, yo, draw through two loops on hook; repeat from * three more times. Yo, draw through five remaining loops on hook, yo, draw through one remaining loop on hook, pull the loop tightly. Fold dc group backward in half, no further fixing is needed.
Bobble: *Yo, insert hook into dc below, yo, pull up a loop, yo, draw through two loops on hook; repeat from * three more times. Yo, draw through five remaining loops on hook, pull the loop tightly. Fold dc group backward in half, no further fixing is needed.
Lining construction: The lining starts as a flat fabric envelope made of a long rectangle of fabric plus seam allowances, folded in half with two simple seams. The fold becomes one side of the bag. You then turn the flat envelope into a box by sewing the bottom corners as directed in the pattern below (this video shows how to make boxed corners; the only difference is that we are using one long rectangle folded in half rather than two separate rectangles). The top of the bag will then be folded down double before sewing in place.
To make the lining, lie your bag flat on the table, with the opening at the top. Measure from opening to the bottom edge (the middle of the bottom square) and add 1.5 inches/4cm; then measure from side to side of the bag, double that number and add 1 inch/2.5cm. Cut your fabric to those two measurements. (Note that the rectangle will be positioned and seamed so that the fold sits on the side of the bag, not the bottom.)
How much cord will you need? Measure from between your shoulder blades, forward over your shoulder, down past your collarbone, down the front of your body and back around to the point where the bottom of the bag will rest on your lower back. Duplicate this measurement, add 14"/36 cm for closure, and additional 4"/10 cm ease.
CHARTS
Square
Rnd 1: Ch 5, join last ch to first ch made with a sl st to form a ring.
Rnd 2: Ch 3 (counts as 1st dc), ch1, *dc into the center of the ring, ch 1; repeat from * 10 more times, sl st to top of initial ch 3 to join, sl st to ch 4 to shift start of round.
Rnd 3: Ch 3, dc into ch-sp under ch 4 of Rnd 2, ch 3, *dc2tog into next ch-sp, ch 3; repeat from * 9 more times, dc2tog, ch 2, sc to top of initial ch 3 to join. Beginning of next Rnd shifts backwards, it begins between last dc2tog and initial ch 3 of Rnd 3.
Rnd 4: Ch 3, dc 4 into ch-sp below, *sc into ch-sp under adjacent ch 3, ch 5, sc into ch-sp under next ch 3, (dc 5 ch 5, dc 5) into ch-sp under next ch 3; repeat from * two more times, sc into ch-sp under adjacent ch 3, ch 5, sc into ch-sp under next ch 3, dc 5 into ch-sp under next ch 3, ch 5, sl st to top of initial ch 3 to join. Fasten off.

DIRECTIONS
Crochet bag
Work one square, fasten off, and cut off yarn. Work 34 more squares, attaching them in their final round as indicated in the "To attach squares" section below, in the positions indicated by the diagram below.
Make a single long rectangle of 27 squares, 3 squares wide by 9 squares high.
Row 5 will form the bottom of the bag; Rows 1-4 the front and Rows 6-7 the back. Then create the side panels, working four squares between the edges of the front and back pieces, to join them. See the schematic below.
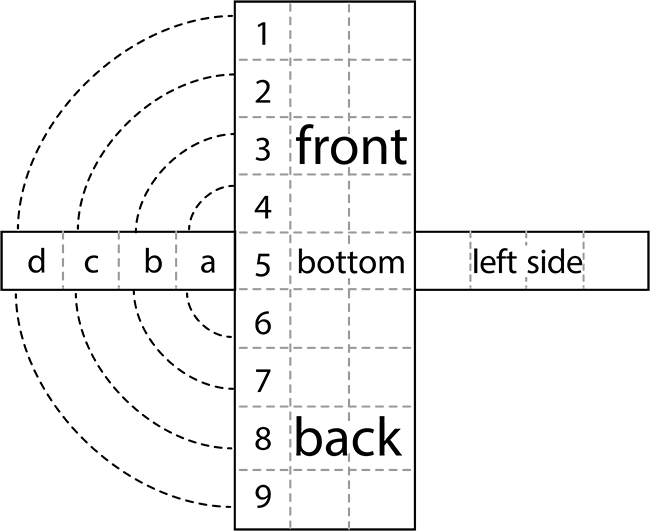
To attach squares: When working the final round, attach at the corner chains and in the ch-space in the center of a side, by working (ch 2, work sc into the ch-5 space of the adjacent square, ch 2), rather than ch 5.
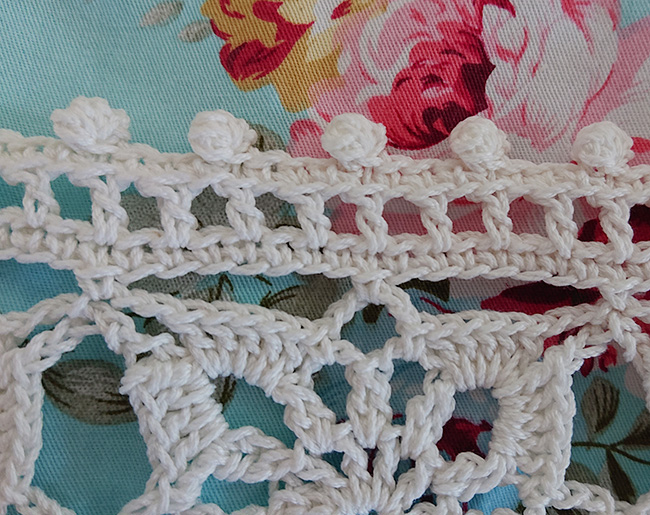
Border
Rnd 1: Join yarn in corner between two squares, ch 1 (counts as 1st sc), *ch 7, sc into ch-sp under ch 5 between two groups of dc 5 of square, ch 7, sc into corner joining of two adjacent squares; repeat from * 6 more times, ch 7, sc into ch-sp under ch 5 between two groups of dc 5 of square, ch 7, sl st to ch 1 that counts as 1st sc to join.
Rnd 2: Ch 1 (counts as 1st sc), sc in each ch and sc until end of round, sl st to ch 1 to join.
Rnd 3: Ch 3 (counts as 1st dc), *ch 1, dc in every 2nd sc; repeat from * to end of round, ch 1, sl st to top of initial ch 3 to join.
Rnd 4: Make Initial Bobble, sc 3 (in next ch, dc, ch), *make Bobble, sc 3; repeat from * until end of round, sl st to beg of initial bobble. Fasten off.
Weave in ends, wash and shape the bag as required.
Fabric Lining
Cut a rectangle of fabric sized according to the Lining instructions in Pattern Notes above. Fold it with right sides together, bringing the two short edges together. Note that the fold sits on one side of the bag (not the bottom).
Sew the second side and bottom edges closed, leaving a 0.5 inch/1.25 cm seam allowance. (You’re sewing along two adjacent sides here, an L-shape.) Serge or use a zigzag stitch down the raw edges.
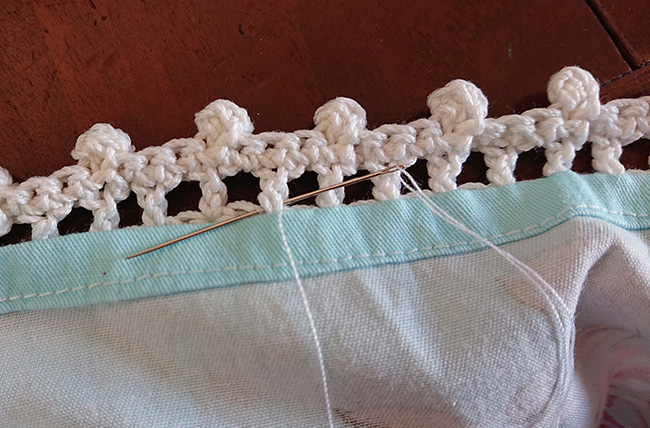
Fold 0.5 inch/1.25cm of the top edge down towards the wrong side of the fabric twice, pressing after each fold, and sew it in place (see photo below).
Boxed corners: (See Pattern Notes for a video tutorial.) With the lining inside out, flatten one bottom corner, aligning the side and the bottom seams so that the stitching runs into the center of the point. Measure 1.5 inches/4 cm down the side from the top corner and draw a line across the fabric, perpendicular to the side fold/seam.
Sew along that line. Trim the triangle corner, leaving a 0.5 inch/1.25cm seam allowance, then serge or zigzag along the raw edges. Repeat for the other corner.
Assembling
Turn the lining right side out and insert it into the bag. Hand sew the lining to the bottom of dcs worked in border rnd 3.
FINISHING
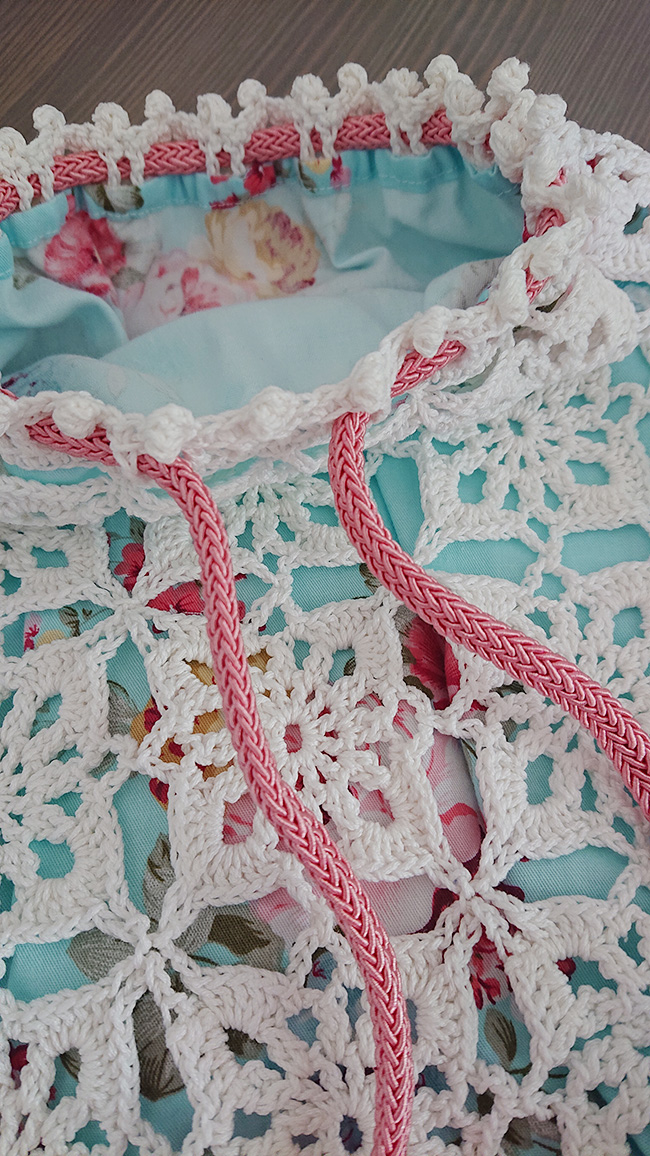
See Pattern Notes for instructions on how to measure the length of cord you require. Cut to that measurement. If the cord is synthetic, carefully melt both raw edges in the center of a flame.
Draw the rope through the round of dcs, border rnd 3, starting from the top middle square on the back. Align the rope and pull the ends through the bottom middle square outside inside the bag. After joining the other ends of the cord by an overhand knot, try the bag on and adjust the knot if necessary. Cut the ends only after making sure the straps fit your body.
ABOUT THE DESIGNER
 Olga Radchuk is not a designer. She simply needs to get the stuff out of her head from time to time, otherwise it would explode. After a while, though, new stuff sneaks in and everything starts over. One of the most important things for her is a constant exchange of ideas in the world that works like the natural water cycle. As Terry Pratchett once wrote: "Inspirations sleet through the universe continuously. Their destination, as if they cared, is the right mind in the right place at the right time." (Men at Arms).
Find Olga on Ravelry & Instagram.
Pattern & images © 2023 Olga Radchuk