


Wiseknit™: A column that teaches you how to do things you'll find in knitting instructions
INTRODUCTION
Wiseknit™: Practical Knitting Wisdom
by Kate Atherley
One of the wonderful things about knitting is that there are so many different solutions to every problem, so many possible answers to every question. This column aims to expand your knitting knowledge and toolkit with practical solutions and answers to your technical knitting questions and conundrums.
Fully Fashioned Shaping: Decreases
“Fully-fashioned shaping” is a phrase that pops up in discussions about hand-knit garments. It’s often used casually, to mean nice tailored or finishing details. It’s actually a phrase with a really specific meaning, which provides an interesting insight into knitting history.
The answer to the question about what it means also solves a common conundrum in pattern reading, AND provides a few ways to make your handknit garments look even better!
Here’s the history bit: when knitting machines (“frames”) were first invented, all they could do was make pieces with straight edges: squares and rectangles. To make anything that included shaping – a sleeve, for example, or a neckline – you’d have to make a big old square and cut it up into the shape required. We still do this today with very fine-gauge machine knits, for sewing.
Hand-knitting is cleverer than that, of course! We can easily create shaped pieces, with increases and decreases. (I mean, modern knitting machines can do this, too, but remember we’re talking about history.)
Another historical definition of the word “fashion” is as a verb, as a synonym for "make". And to describe something as “fully fashioned” means that it was completely, or properly, made. That is, a sleeve that is made as a shaped piece, without cutting required. Fabulous!
So, in essence, to draw attention to and emphasize that they've made the fabric [ahem] properly, handknitters of that era made a point of ensuring that their shaping – the increases and decreases – was visible in their work. This doesn’t mean yarnover holes, but rather placing the increases and decreases a stitch or two away from the edges of the work, so that they’re not hidden in the seams. And we've kept doing it because it looks nice, but it turns out to also make finishing easier.
How can you get this elegant look in your knitting? Let's start with decreases.
Decreases
When the pattern says “decrease at the beginning and end of the row”, instead of this basic instruction…Work 2 sts together, k to the last 2 sts, work 2 sts together.
...a fully fashioned version might look like this:
K1, work 2 sts together, k to the last 3 sts, work 2 sts together, k1.
Decreases moved in one stitch from the end
Using the fully fashioned version means that even after seaming, the decreases will still be visible in the fabric.And when you seam them together, the edge stitches disappear, and the two decreases sit right next to each other.
Look at me, showing off! I am much better than a (16th -19th century) knitting machine!
But it’s not just about showing off. Doing the decreases a stitch away from the edge has a brilliant side benefit: it makes the key finishing tasks of seaming and picking up of stitches much easier.
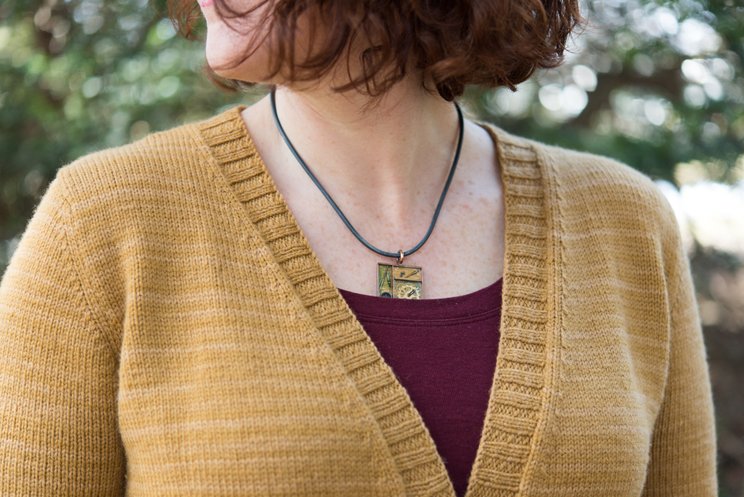
You can see the smooth lines at the edge of the garment fabric, beside the picked-up neckline
When doing a vertical seam, you work in the ladders that sit between the first and second stitch of the row. Working the first/last two stitches together for a decrease makes a mess of that ladder…
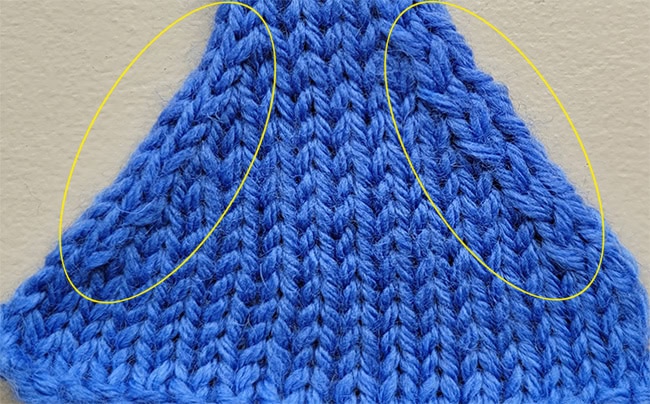
K2tog in first 2 sts and in last 2 sts
If you look closely at the circled areas above, you’ll see that they’re different on left and right sides; and because the first and last stitches are being worked together, the ladder that sits between them gets trapped and messed up – albeit differently on the two sides!
The k2tog pulls the first two stitches together and the ladder gets messed up
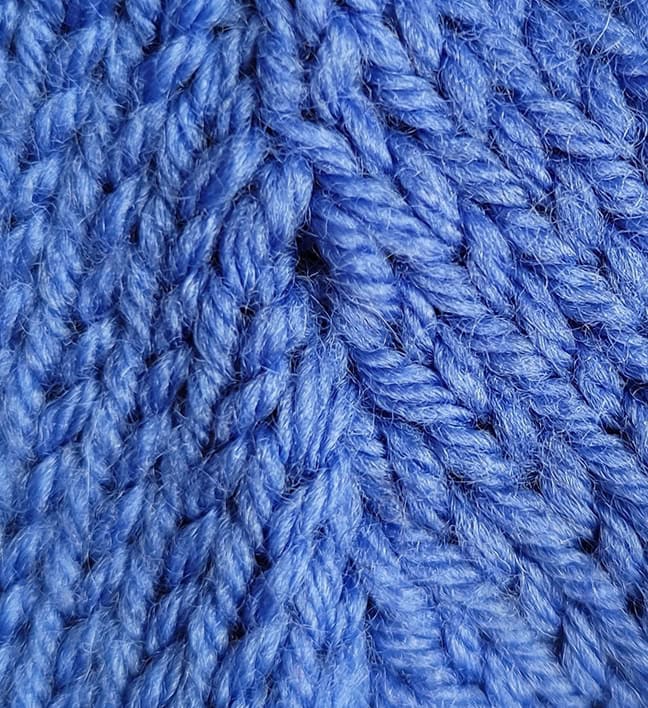
This makes it harder to seam up, and also makes the two sides of the seam look a little untidy
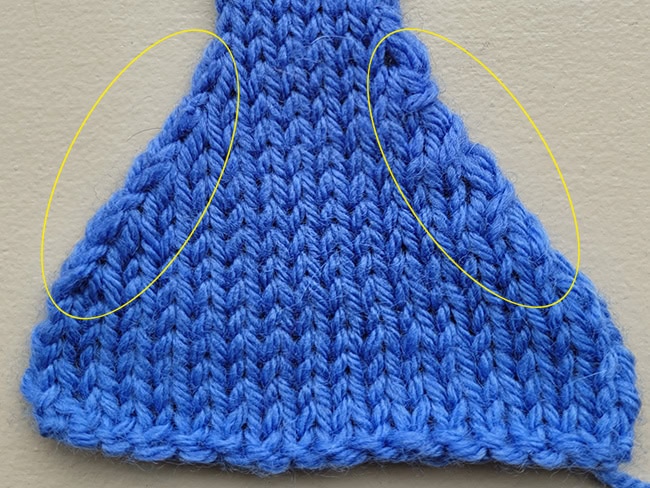
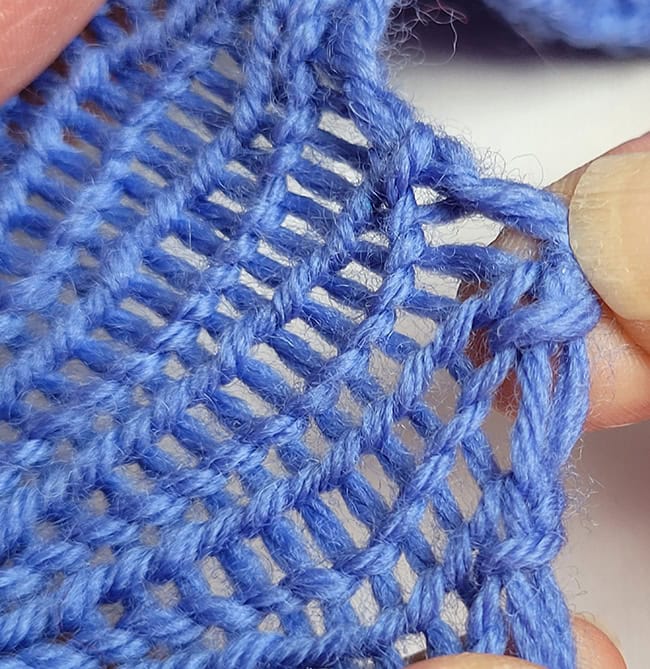
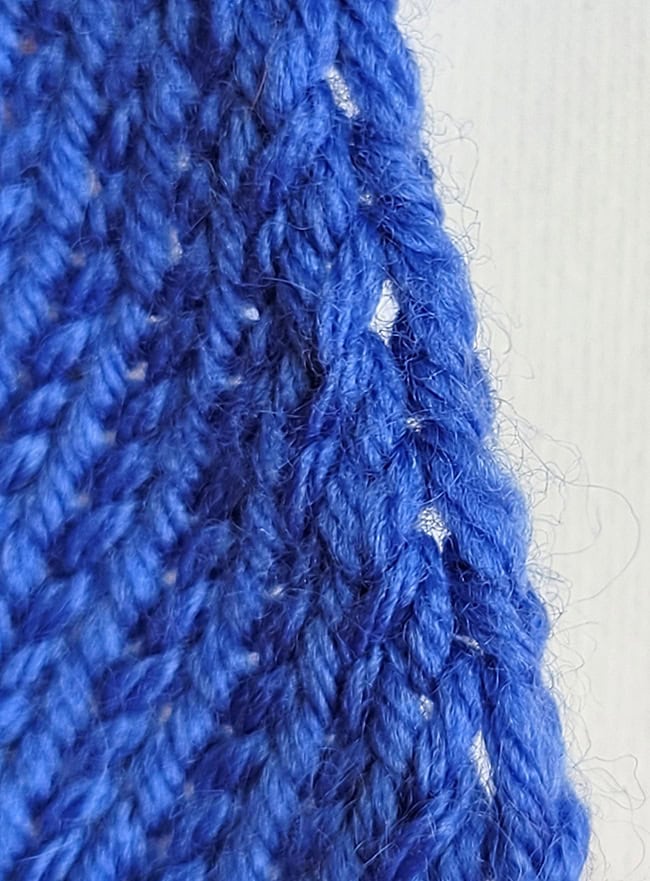
If you look closely at the edge of the fully-fashioned swatch below you can see the ladders between the first and second stitch are left intact
This makes picking up of stitches for necklines and edgings, too, as you work that pick-up-and-knit between the first and second stitches of the row, in the same place you find the ladder used for seaming.
Which decrease should you use?
Now, in the instructions above I’ve deliberately dodged the issue of which decrease to use. Because, since you're the one taking control of your knitting, you get to choose, based on the look you want to create.
There are two primary considerations: left-leaning and right-leaning.
Right-leaning decreases: K2tog leans to the right – that is, it takes the leftmost of the two stitches and folds it over the right-most, creating a right lean.
Left-leaning decreases: There are two commonly used versions – SSK and SKP. There are a few other (sometimes funky) variations of these two that sometimes have other names, but SSK and SKP are the two core ones.
Bonus tip: SSK and SKP are 100% interchangeable, so use the one you like best!
Which you place at the beginning and which you place at the end depends what look you want.
If you work
K1, ssk/skp, k to last 3 sts, k2tog, k1
the decreases will align with the edge of the work. This is what I’ve done in the image above.
I like this. I think it looks sleek.
Seamed together, it looks like the image below left.
To get the look shown in the image below right:
K1, k2tog, k to last 3 sts, ssk/skp, k1
you'll see that the decreases “feather”, slanting in the opposite direction from the edge.
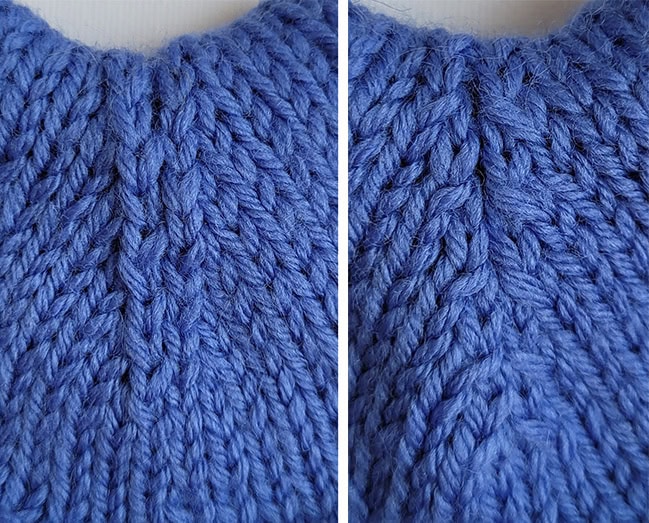
Left: K1, ssk/skp, k to last 3 sts, k2tog, k1: after seaming
Right: K1, k2tog, k to last 3 sts, ssk/skp, k1: after seaming
Very Important Note: I used ssk in my samples above; that’s the decrease that appears at the right-hand side of the swatch, and on the left-hand side of the seam. If you feel it looks a little untidy, try using SKP instead. There’s a separate discussion about how to make left-leaning decreases better match right-leaning – a topic for a future column! I’ve deliberately used an unmodified, straightforward version so you can compare it against your own work. It always feels a bit like cheating to me if the images show adjustments that aren’t explained!
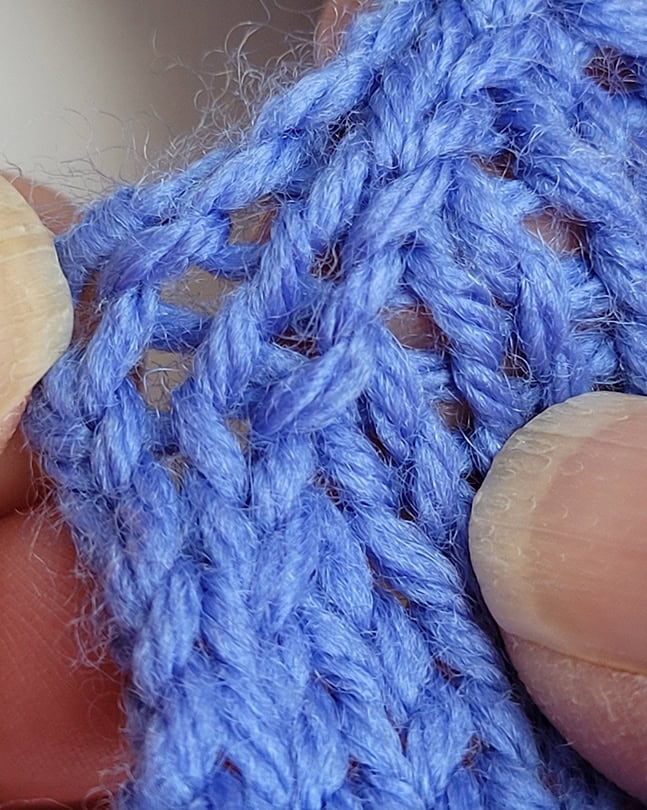
I like this second one (shown above right) a lot. It really shows off your “fully fashioned” shaping! Plus, this version can make seaming and picking up of stitches a little easier: working the decrease that lies opposite to the slant of the edge creates a little bit of extra “tension” in the stitches, and makes the ladder a bit more obvious.
The ladders are even more promiment on the edge of the feathered version
Which is the right one to do? It’s entirely your preference, based on the look you want!
See you in the First Fall issue when I'll talk about fully fashioned increases!
ABOUT THE AUTHOR
 Kate Atherley is Knitty's Managing Technical Editor and a knitting author and teacher. The combination of her university degree in mathematics, professional experience in software development and usability, and training in garment and fashion design give her a unique perspective. She’s currently working on a book about Math for Knitters, due out in 2025.
You can see more of her work at kateatherley.com, and on Ravelry.
Text & images © 2025 Kate Atherley.