Cause and Effect, a free knitting pattern from Knitty.com.
INTRODUCTION
Cause and Effect

by Rebecca Osborn
![]()
Stress is one of my main migraine triggers, so all the self-care messaging in the world is a two-edged sword. When trapped in bed with a migraine, it's so easy to blame myself. Did I forget to drink enough water? Is this because I failed to exercise or eat right this week? Did I spend too long hunched over my computer? Did I let myself get so anxious about a project that I got overly tense? The good news: you can do something about these triggers! The bad news: you could have done something about these triggers.
But after a hundred stress migraines, I've come to the conclusion that the stress and tension I experience is a symptom as much as a cause of my migraine complex. I can be kind to myself and accept that no matter how I got to where I am, if I'm breathing, it's ok.
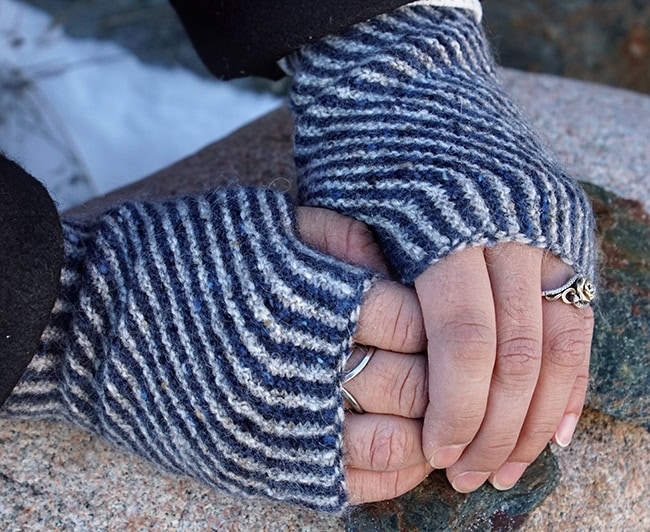
The pattern for these little mitts came from the twisted, circular nature of this stinking thinking that used to catch me up with migraines. Hidden increases and decreases create a biased slant. The mitts are closed with a decorative bindoff that can be shown off or hidden, depending on how you wear them.
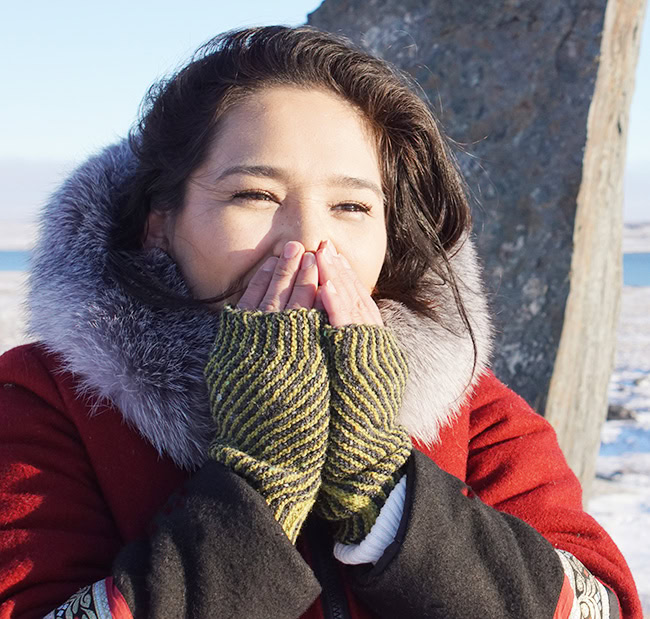
 model: Akumalik Netser
 photos: Rebecca Osborn
SIZE
Adult S[M, L]
FINISHED MEASUREMENTS
Hand circumference: 7[8, 9] in / 18[20, 23] cm
Length from cuff to tip: 7 in / 18cm
Note: Choose a size closest to your hand circumference measured around the palm, above the thumb.
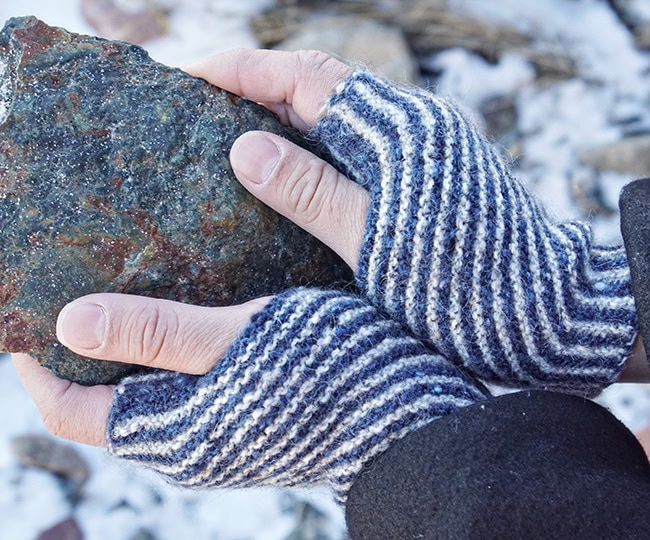
Blueberry Jam colourway (dark blue and light grey) shown above in small size with 1 in / 2 cm negative ease
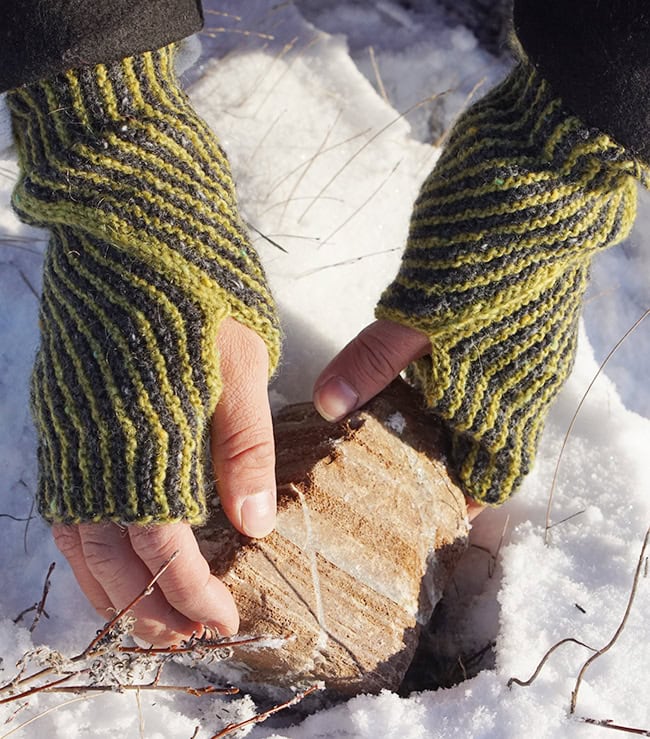
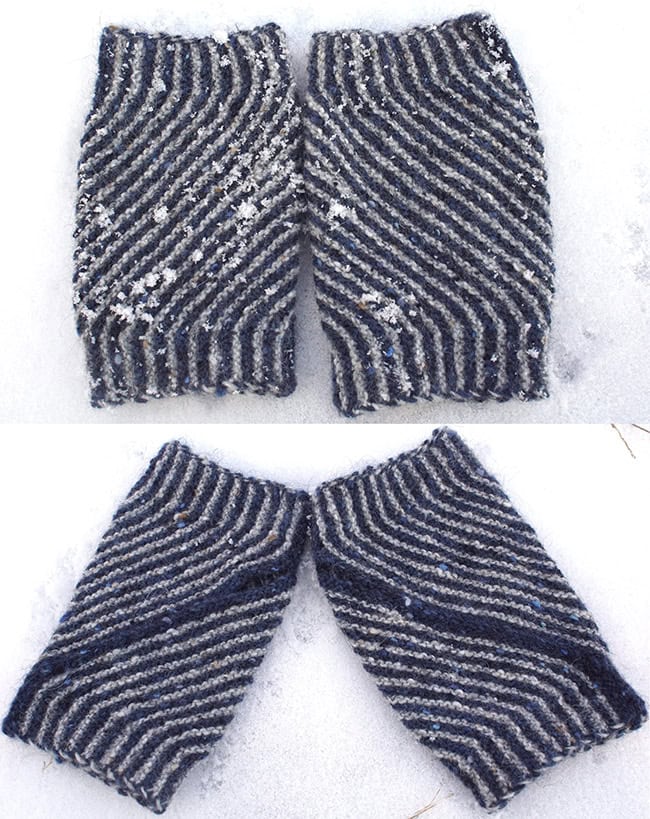
Screen Time colourway (green and dark grey) shown below in medium size with 0 in/cm ease ease
MATERIALS
Yarn
Kate Davies Designs Milarrochy Tweed [70% Wool, 30% Mohair; 109yd/100m per .88oz/25g skein]; 2 skeins, one in each of two colors:
![]() Blueberry Jam colourway
(shown above)
Blueberry Jam colourway
(shown above)
[MC] Birkin; 1 skein – less than half the skein used
[CC] Lochan; 1 skein– less than half the skein used
![]() Screen Time colourway(shown below)
Screen Time colourway(shown below)
[MC] Bruce; 1 skein– less than half the skein used
[CC] Stockiemuir; 1 skein– less than half the skein used
Yarn Characteristics
![]() This is a light, woolen-spun, singles yarn. Mohair makes the final fabric surprisingly durable.
This is a light, woolen-spun, singles yarn. Mohair makes the final fabric surprisingly durable.
This pattern looks most striking in highly contrasting solid or semi-solid colours. Consider a contrast in value (light and dark) in addition to hue.
Recommended needle size
[always use a needle size that gives you the gauge listed below - every knitter's gauge is unique]
![]() US #2/2.75mm needles for working flat
US #2/2.75mm needles for working flat
Notions
![]() spare needle in a similar size, for 3-needle bind off
spare needle in a similar size, for 3-needle bind off
![]() locking stitch marker
locking stitch marker
![]() yarn needle
yarn needle
GAUGE
28 sts/56 rows = 4 inches/10 cm in garter stitch
PATTERN NOTES
[Knitty's list of standard abbreviations and techniques can be found here.]
Construction method: These mitts are knit sideways, wrapping around the hand. The work is joined into a tube by picking up the cast on edge during the bindoff, and a thumbhole is created by leaving part of this bind-off row un-joined.
Right and Left Hands
These mitts are completely reversible; you can decide whether you want the CC three-needle bind-off hidden, with the diagonals swirling towards your pinky, or whether you want the bind-off on the back as a decorative element with the diagonals swirling toward your thumb. However, for the sake of this pattern, I will refer to right and left mitts as they appear with the bind off hidden.
Short Rows
Shaping is achieved with a few short rows, completed with the wrap & turn method. Because the pattern is in garter stitch, there is no need to hide your wraps.
Techniques:
- Sl1: All sts are slipped purlwise with yarn held to WS of work.
- Pick-up Bind-Off used to join the cast-on edge to the working edge, to make a tube. This is described in the instructions.
DIRECTIONS
Right Mitt
Using CC and the long tail or cable method, CO 60 sts.
Setup Row [WS]: With CC. Knit.
Short-row Section:
Join MC, leaving CC attached.
Row 1 [RS]: With MC. Sl1, k25, w&t.
Row 2 [WS]: With MC. Knit.
Row 3: With CC. Sl1, k22, w&t.
Row 4: With CC. Knit.
Rows 5-6: With MC. Sl1, k to end.
Place a locking stitch marker in the garter ridge just below the needle to track your progress.
Bending Section (Right):
Row 7 [RS]: With CC. Sl1, k7, M1R, k2, M1R, k to last 14 sts, k2tog, k2, k2tog, k8.
Row 8 [WS]: With CC. Sl1, k to end.
Rows 9-10: With MC. Sl1, k to end.
Work Rows 7-10 7[8, 9] more times.
You should have 8[9, 10] CC garter ridges from the marked row.
Work Rows 7-8 one more time.
Work Short-row Section again. When complete, move your locking stitch marker to the garter ridge just below the needle to track your progress.
Returning to Bending Section (Right), work Rows 7-10 8[9, 10] times. You should have 8[9, 10] CC garter ridges from the marked row.
Break MC.
Work Rows 7-8 one more time.
Pick-up Bind Off
You will now join the work into a tube by picking up the cast on row as you bind off.
Using the tip of the left needle, pick up the base of the first CO st. Using CC, work k2tog (knitting this picked up stitch together with the first stitch on the left needle).
*Pick up the base of the next CO st, k2tog, then pass the first stitch worked over the second stitch, binding off 1 st.
Repeat from * until you have BO 10 total sts, joining 10 sts of the CO edge to the working edge as you do so.
Bind off 12 stitches normally, without picking up CO sts, to leave a hole for the thumb.
Find the cast on stitch twelve stitches away from the last one you picked up, and work the Pick-up Bind Off again. In this manner, Pick-up Bind Off all remaining sts.
Break CC.
Left Mitt
Using your chosen CO method, CO 60 in CC.
Setup Row [WS]: With CC. K to end.
Join MC.
Row 1-2: With MC. Sl1, k to end.
Bending Section (Left):
Row 3 [RS]: With CC. Sl1, k7, k2tog, k2, k2tog, k to last 10 sts, M1L, k2, M1L, k8.
Row 4 [WS]: With CC. Sl1, k to end.
Rows 5 and 6: With MC. Sl1, k to end.
Work Rows 3-6 7[8, 9] more times.
You should have 9[10, 11] CC garter ridges, including the setup row after the cast on. Work rows 3-4 one more time.
Short row section:
Row 7 [RS]: With MC. Sl1, k25, w&t.
Row 8 [WS]: With MC. Knit.
Row 9: With CC. Sl1, k22, w&t.
Row 10: With CC. Knit.
Rows 11-12: With MC. Sl1, k to end.
Place a locking stitch marker in the garter ridge just below the needle to track your progress.
Returning to Bending Section (Left), work Rows 3-6 7[8, 9] more times. You should have 8[9, 10] CC garter ridges from the marked row.
Repeat the Short-row Section.
Work Rows 3-4 only from Bending Section (Left).
Work Pick-up Bind off as for Right Mitt.
FINISHING
Weave in all ends to the back of the work. Soak mitts in cool water for 20-30 minutes to allow stitches to relax, then remove water by pressing between dry towels. Lay flat and leave to fully dry.
ABOUT THE DESIGNER
 Rebecca Osborn lives, makes, and writes in Rankin Inlet, Nunavut, in Arctic Canada. She has been writing about knitting, spinning, and life on her blog, for over sixteen years, and working on the Wool n' Spinning podcast for two years.
Her new collection of knitting patterns for accessories, Migraneur, will be coming out in 2025.
Pattern & images © 2024 Rebecca Osborn


