The Cozy Quills, a free knitting pattern from Knitty.com.
INTRODUCTION
Cozy Quills
 by Danielle Denton
![]()
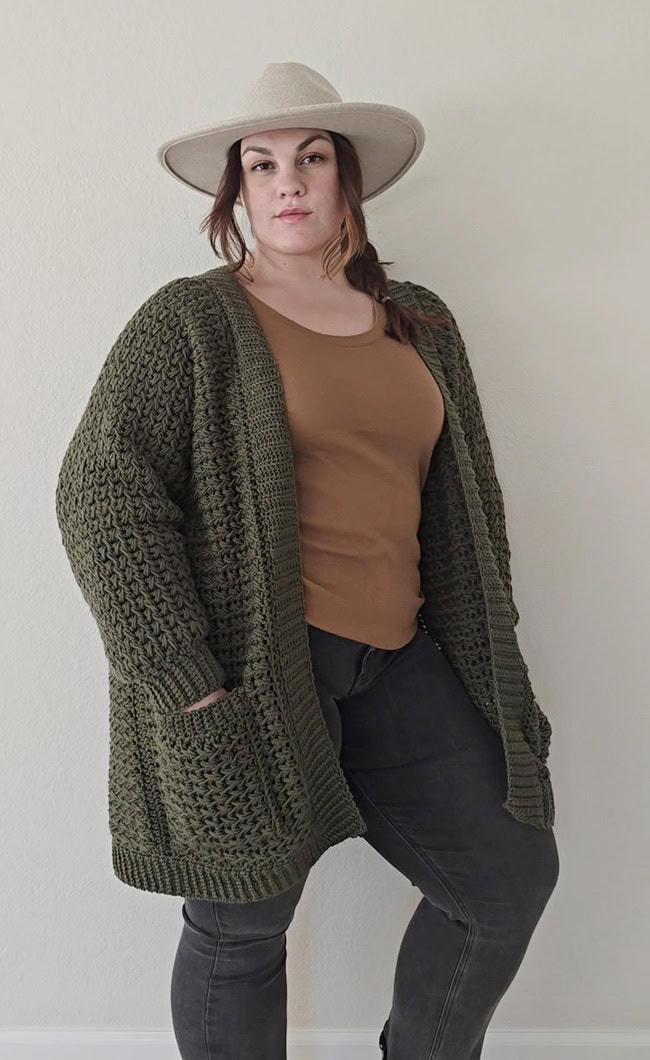
For a while now, I have been obsessed with the feather stitch. I love the texture, the thickness, and how it works up very effortlessly once you get the hang of it. You can watch your favorite show and almost never have to look down! The only downside being that this stitch is a YARN EATER! You can easily use up scrap yarn for this project and make it even more unique than it already is.
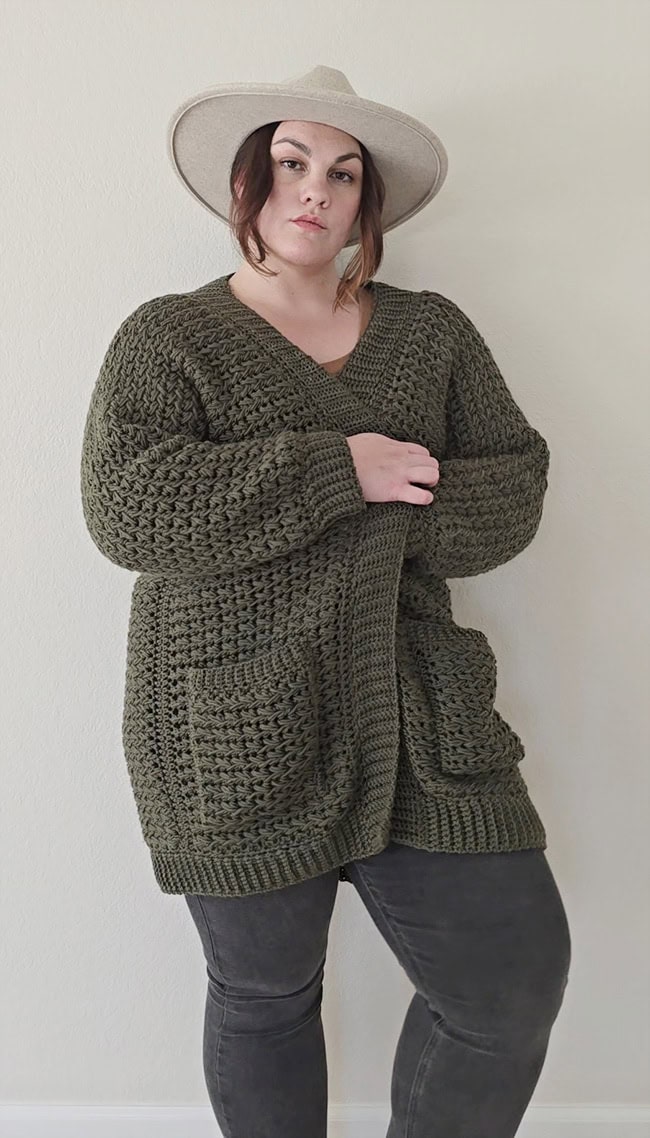
From this, I had the idea to work a cardigan in as few pieces as possible. The cardigan is worked cuff-to-cuff almost entirely in one piece other than the pockets. The ribbing is worked onto the cardigan rather than sewn on later. Removable stitch markers will be your friend throughout the pattern. You can size up for an even baggier cardigan. No matter how you work up this cardigan, you will love the finished result!
 model + photos: Danielle Denton
SIZE
Women's XS[S, M, L, 1X, 2X, 3X, 4X, 5X]
shown in size XL with 6 inches/15 cm of ease at chest/upper bust
FINISHED MEASUREMENTS
Chest/Bust: 34[37, 41.5, 46, 50, 54.5, 59, 63, 67.5] inches/ 86.5[94, 105.5, 117, 127, 138.5, 150, 160, 171.5] cm
Length: 26[26.5, 27.5, 28, 29, 29, 29.5, 30.5, 31] inches/ 66[67, 70, 71, 74, 74, 75, 77.5, 79] cm
Note: Due to the weight of the piece, garment will stretch sideways as you work, increasing finished chest measurement to 38[42, 46, 50, 54, 58, 62, 66, 70] inches / 97[107, 117, 127, 137, 147, 158, 168, 178] cm.
MATERIALS
Yarn
One yarn:
![]() Yarn Bee: Simply Flawless [100% Low Pill Acrylic; 420/384 per 7 oz/198 g skein]; color: Olive; 4[5, 5, 6, 6, 7, 7, 8, 8] skeins
Yarn Bee: Simply Flawless [100% Low Pill Acrylic; 420/384 per 7 oz/198 g skein]; color: Olive; 4[5, 5, 6, 6, 7, 7, 8, 8] skeins
Yarn Characteristics
![]() The sample shown uses a light-weight low-pill acrylic yarn. The yarn is a 4-ply but is not dense. Pattern stitch looks best in a solid or nearly-solid color. Pick the lightest-weight yarn that achieves the correct gauge to avoid the sweater being too heavy to wear.
The sample shown uses a light-weight low-pill acrylic yarn. The yarn is a 4-ply but is not dense. Pattern stitch looks best in a solid or nearly-solid color. Pick the lightest-weight yarn that achieves the correct gauge to avoid the sweater being too heavy to wear.
Recommended needle size
[always use a needle size that gives you the gauge listed below - every knitter's gauge is unique]
![]() J-10 US/6mm hook
J-10 US/6mm hook
![]() H-8 US/5mm hook
H-8 US/5mm hook
Notions
![]() removable stitch markers
removable stitch markers
![]() yarn needle
yarn needle
GAUGE
12 sts / 11 rows = 4 inches/10 cm in half double crochet with larger hook
6 feather stitches / 11 rows = 4 inches/10 cm with larger hook
PATTERN NOTES
[Knitty's list of standard abbreviations and techniques can be found here.]
Construction method: The sweater is worked cuff-to-cuff, while the ribbing is worked seamlessly onto the body. The pockets are sewn on.
To aid in keeping track of your rows, place a a stitch marker at each increase and decrease on the sleeves. When working the body of the cardigan, place markers every 10 rows.
Blo: back loop only
Ch: chain
Ch-sp: chain space
Hdc: half double crochet
Sc: single crochet
Sc sl st: Single Crochet Slip Stitch - This is used on most ribbing portions of the cardigan, joining the ribbing to the cardigan. Insert hook into the last st closest to the body of the work, YO and pull up a loop. Insert hook into the 1st st/next st on the body of the cardigan, YO and pull through the st and both loops on hook. Sc sl st is now completed.
Sk: skip a stitch
Sl st: slip stitch
CHARTS
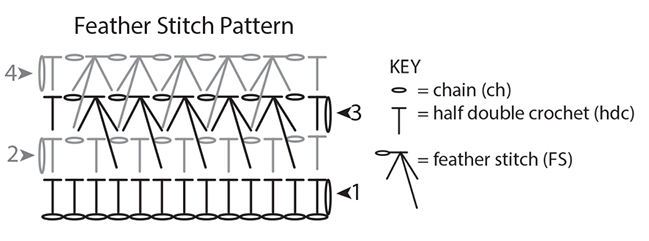
Note: Chart is for general reference to help you understand the feather stitch pattern, and does not correspond directly to a specific pattern section.
FS (Feather Stitch): A feather stitch is comprised of 3 “legs” that are worked into 3 different ch-sps. Beginning with 1 loop on the hook, YO, insert hook into the 1st ch-sp, YO and pull up a loop bringing it to the same height of your current Row (3 loops on hook), YO, insert hook into the ch-sp directly below the previous leg 2 rows down, YO and pull up a loop bringing it to the same height of your current Row (5 loops on hook), YO, insert hook into the next ch-sp to the left, YO and pull up a loop bringing it to the same height of your current Row (7 loops on hook). YO and pull through all 7 loops. Ch1 to secure and complete your FS.
Important Notes: When working into the row below, the stitch created will be worked around the stitch above, enclosing it. Don’t forget the final ch1 at the end; that ch1 will count as a ch-space in subsequent rows. The next FS will begin in the same ch-sp as the 3rd leg of your previous FS.
FS dec (feather stitch decrease): FS dec is comprised of 5 legs. Work 3 legs as for FS, work a 4th leg into the ch-sp directly below the 3rd leg, work a 5th leg into the next ch-sp (11 loops on hook). YO and pull through all 11 loops, ch1 to secure.
FS inc (feather stitch increase): Work the first 2 legs as for FS, work 3rd leg into the same ch-sp as the 1st leg of the FS.
Note: The next FS will begin in the same ch-sp as the 3rd leg of your previous FS/ FS inc.
DIRECTIONS
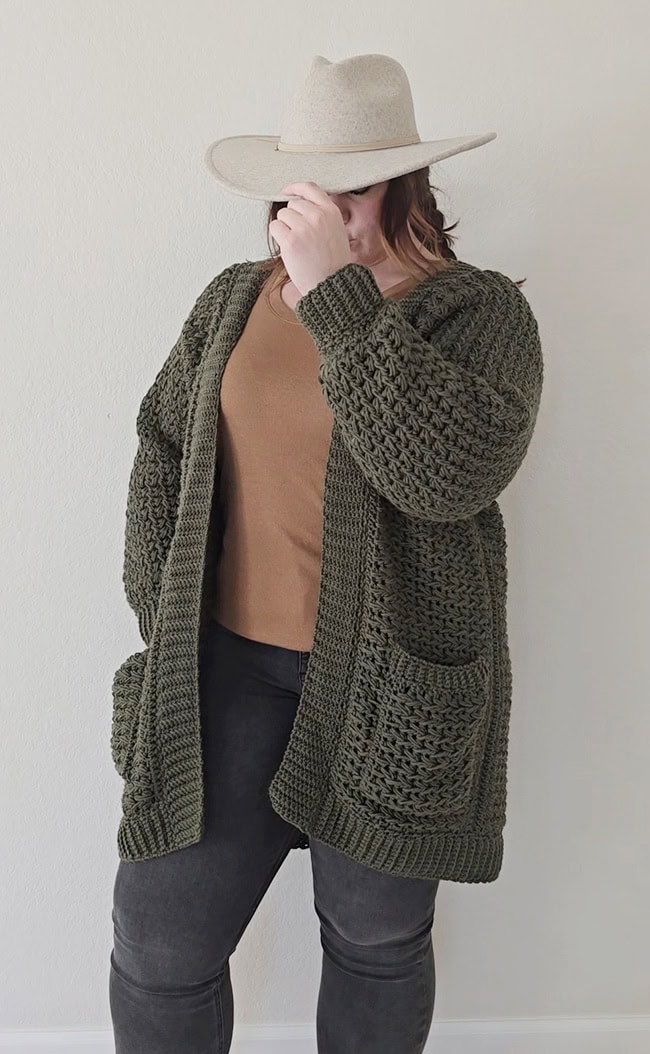
Right Cuff
Using H-8 US/ 5mm hook, ch 8[8, 8, 9, 9, 9, 10, 10, 10] .
Row 1 [RS]: Sc into back bump of the 1st ch from hook, and all rem chs. 8[8, 8, 9, 9, 9, 10, 10, 10] sts.
Row 2 [WS]: Turn. Sc blo to the last st, sc in the last st.
Row 3: Sc in first st, sc blo to end.
Rep Rows 2-3 until you have worked 24[26, 28, 30, 32, 34, 36, 38, 40] rows total, ending with Row 2.
Join cuff: With WS facing, fold cuff in half, around the middle row, hold the work so that the foundation chain is at the front. Work a sl st to join the first ch of the starting ch to the last st worked, working under both loops of both stitches. Work sl st join across to last stitch, working under both loops of the ch but under the back loop only of the last row worked. On the last st, work under both loops of both stitches. Flip cuff to the RS.
Do not fasten off. The sleeve will be worked from this point.
Right Sleeve
Switch to J-10/ 6mm hook.
The sleeves are worked in joined rows, turning each row.
Row 1 [RS]: Ch 1. Hdc into the side of every sc around. Sl st into the top of the 1st hdc to join. 24[26, 28, 30, 32, 34, 36, 38, 40 sts.]
Row 2 [WS]: Ch 1, turn. Hdc into the 1st st, ch 1, *sk 1, hdc into the next st, ch 1; rep from * around. Sl st into the 1st hdc of rnd.
Row 3: Ch 1, turn. Work the 1st leg of FS into the 1st ch-sp, work the 2nd leg through the sk hdc from the row below, work the 3rd leg in the next ch-sp, then complete your 1st FS. Work FS to end. The 3rd leg of the last FS will be worked into the 1st ch-sp of the row, which has the 1st leg of your 1st FS already worked into it. Sl st into the top of the 1st FS 12[13, 14, 15, 16, 17, 18, 19, 20] FS.
Row 4: Ch 1, turn. Work the 1st leg of FS into the 1st ch-sp, work the 2nd leg in the ch-sp from the row below (where the 3rd leg was worked on the previous row), work the 3rd leg in the next ch-sp. FS inc in the same ch-sp as the 3rd leg, FS to the last ch-sp, FS inc in ch-sp, FS once more, working the 3rd leg into the 1st ch-sp of the rnd. Sl st into the 1st FS. 2 FS increased, 14[15, 16, 17, 18, 19, 20, 21, 22] FS.
Row 5: Ch 1, turn. FS to end, working the 3rd leg of the last FS into the 1st ch-sp of row. Sl st to the 1st FS.
Rows 6-8: Rep Row 5.
Row 9: Rep Row 4. 16[17, 18, 19, 20, 21, 22, 23, 24] FS.
Rows 10-13: Rep Row 5.
Row 14: Rep Row 4. 18[19, 20, 21, 22, 23, 24, 25, 26] FS.
Rows 15-18: Rep Row 5.
Row 19: Rep Row 4. 20[21, 22, 23, 24, 25, 26, 27, 28] FS.
Rows 20-23: Rep Row 5.
Row 24: Rep Row 4. 22[23, 24, 25, 26, 27, 28, 29, 30] FS.
Work Row 5 a further 10[10, 10, 12, 12, 12, 12, 14, 14] times.
Right sleeve is complete. Do not fasten off.
Right Body
Note: Place a stitch marker every 10 rows as you work the body to keep track of your rows.
Turn work to RS.
Row 1 [RS]: Ch 51[51, 53, 53, 55, 53, 53, 55, 55] . Hdc into the top of the 2nd ch from hook, then hdc into each ch making sure to work into the top V. Work 22[23, 24, 25, 26, 27, 28, 29, 30] FS as established around sleeve, then hdc into each of the back bumps along the ch. 52[52, 54, 56, 54, 54, 56, 56, ] hdc on either side of ch.
Row 2 [WS]: Ch 1, turn. Hdc into the 1st st, ch 1, *Sk 1, hdc into the next st, ch 1; rep from * to the last hdc before sleeve. Begin working FS with 1st leg into the last hdc, continue working FS across sleeve to last FS. For the last FS work the 3rd leg into the ch-sp between the last FS and the 1st hdc, sk the 1st hdc and hdc into the next st. *Ch 1, sk 1, hdc into the next st; rep from * to end.
Row 3: Ch 1, turn. Hdc into the 1st st, ch 1, work 1st leg of FS into the 1st ch-sp, work 2nd leg of FS in sk hdc from row below, work 3rd leg in the next ch-sp, complete first FS. Work FS to the last ch-sp before the sleeve, for the next FS work the 1st leg in the ch-sp, the 2nd leg in the sk hdc from row below, and the 3rd leg in the next ch-sp, complete FS. Continue working FS across sleeve and down body to the last ch-sp of body, FS inc in last ch-sp, hdc in last st. 73[74, 77, 78, 81, 80, 81, 84, 85] FS.
Row 4: Ch 1, turn. Hdc into the 1st st, ch 1, work FS to last st, hdc in last st.
Rep Row 4 a further 10[12, 14, 16, 18, 20, 22, 24, 26] times. 14[16, 18, 20, 22, 24, 26, 28, 30] rows from the beginning of Right Body.
Do not fasten off.
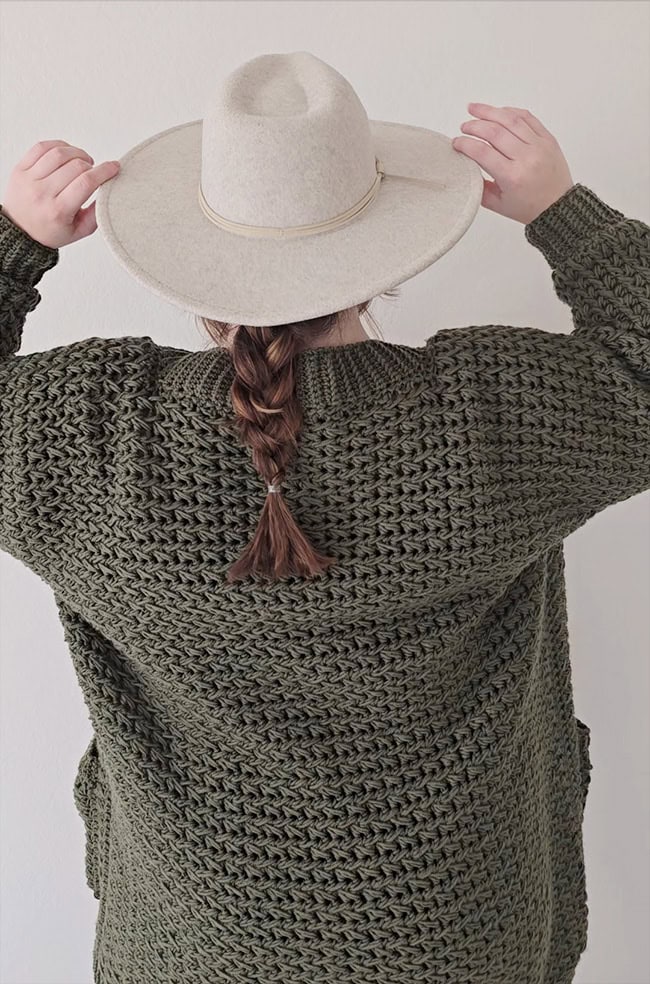
Center Back
Transition row [RS]: Ch 1, turn. Hdc into the 1st st, hdc into the next 71[73, 75, 77, 79, 79, 79, 83, 83] sts ending in the top of an FS. Begin your 1st FS in the ch-sp close to your last hdc, FS down the remaining length of the body, hdc into the last st.
Row 1 [WS]: Ch 1, turn. Hdc in the 1st st, ch 1, FS until you reach the 1st hdc, hdc into the top of the last FS from the previous row (this is the 1st FS made from the previous row after the hdc section). This is the new beginning/end of the row. Place markers into each edge of this row. 37[37, 39, 39, 41, 40, 41, 42, 43] FS.
Row 2: Ch 1, turn. Hdc into the 1st st, ch 1, work FS to last st, hdc in the last st.
Rep Row 2 a further 15[15, 17, 19, 21, 23, 25, 27, 29] times, placing a marker on Row 14[16, 18, 20, 22, 24, 26, 28, 30] .
17[17, 19, 21, 23, 25, 27, 29, 31] rows in this section excluding Transition row, 30[34, 38, 42, 46, 50, 54, 58, 62] rows from the beginning of the Right Body including Transition row.
Do not fasten off; turn work.
Left Body
Transition row [RS]:Ch 73[75, 77, 79, 81, 81, 81, 85, 86] , hdc into the back bump of the 2nd ch from hook, and into the back bumps to the end of the ch. Hdc into next next st (an hdc from the row below), FS down body to last st, hdc in last st.
Row 1 [WS]: Ch 1, turn. Hdc into the 1st st, ch 1, work FS to the 1st hdc, hdc into this st, *ch 1, sk 1, hdc into the next st; rep from * across. The last st will be an hdc. Place markers into each end of this row.
Row 2: Ch 1, turn. Hdc into the 1st st, ch 1, work 1st leg of FS into the 1st ch-sp, work 2nd leg of FS in sk hdc from row below, work 3rd leg in the next ch-sp, complete first FS. Work FS across body to last st, hdc in last st. 73[74, 77, 78, 81, 80, 81, 84, 85] FS.
Row 3: Ch 1, turn. Hdc into the 1st st, ch 1, FS across body to last st, hdc in last st.
Rep Row 3 a further 10[12, 14, 16, 18, 20, 22, 24, 26] times.
13[15, 17, 19, 21, 23, 25, 27, 29] rows worked in this section, excluding Transition row.
Next Row: Ch 1, turn. Hdc in the 1st st and in the next 51[51, 53, 53, 55, 53, 53, 55, 55] sts. Work the 1st leg of your 1st FS in the ch-sp to the right of the last hdc, work the 2nd leg in the ch-sp from the row below, then work the 3rd leg in the next ch-sp. FS over the next 21[22, 23, 24, 25, 26, 27, 28, 29] FS, sk the next st (the top of the next FS), hdc into the next st (a ch 1). Hdc into the remaining 51[51, 53, 53, 55, 53, 53, 55, 55] sts.
Join the left body on the WS of the work with the sl st join method across all hdc sts. Do not fasten off.
Left Sleeve
Turn work to the RS (you might have to feed your yarn/skein through the armhole to work this section comfortably, Row 1 will still be worked on the WS). Place a stitch marker into the 2nd and 2nd last FS of Row 1.
Row 1 [WS]: Ch 1, FS around armhole, sl st into the top of the 1st FS to join. 22[23, 24, 25, 26, 27, 28, 29, 30] FS.
Row 2 [RS]: Ch 1, turn. FS around armhole, sl st into the top of the 1st FS to join.
Rep Row 2 a further 8[8, 8, 10, 10, 10, 10, 12, 12] times.
10[10, 10, 12, 12, 12, 12, 14, 14] rows worked in this section.
Dec row: Ch 1, turn. Work 1 FS, work FS dec, FS around until 3 ch-sps remain, work FS dec, work last FS, sl st into the top of the 1st FS to join. 2 FS dec, 20[21, 22, 23, 24, 25, 26, 27, 28] FS.
Work 4 rows straight as for Row 2.
Rep the last 5 rows a further 3 times. 14[15, 16, 17, 18, 19, 20, 21, 22] FS.
Work Dec row once more. 12[13, 14, 15, 16, 17, 18, 19, 20] FS.
Work 2 rounds straight as for Row 2.
Next Round: Ch 1, turn. Hdc in each st around, sl st into the 1st hdc of rnd. 24[26, 28, 30, 32, 34, 36, 38, 40] sts.
Do not fasten off.
Left Cuff
Switch to H-8/ 5mm hook.
Row 1 [RS]: Ch 8[8, 9, 9, 9, 9, 10, 10, 10] , sc into the back bump of the 1st ch from hook, sc into the back bump of the remaining chs to last ch, sc sl st joining the cuff to the 1st hdc of the sleeve. 8[8, 8, 9, 9, 9, 10, 10, 10] sts.
Row 2 [WS]: Sl st into the next hdc, turn. Sc in the 1st st, sc blo to last st, sc in the last st.
Row 3: Turn (no turning ch). Sc in the 1st st, sc blo to last st, sc sl st in the last st joining to the next hdc on the body.
Rep Rows 2-3 around the cuff, ending with Row 2.
Join the cuff on the WS using the sl st join method. In the 1st and last sts sl st through both loops on both sts, and for the remaining sts sl st through both loops of the starting ch and blo of the sc of the last Row worked. Fasten off.
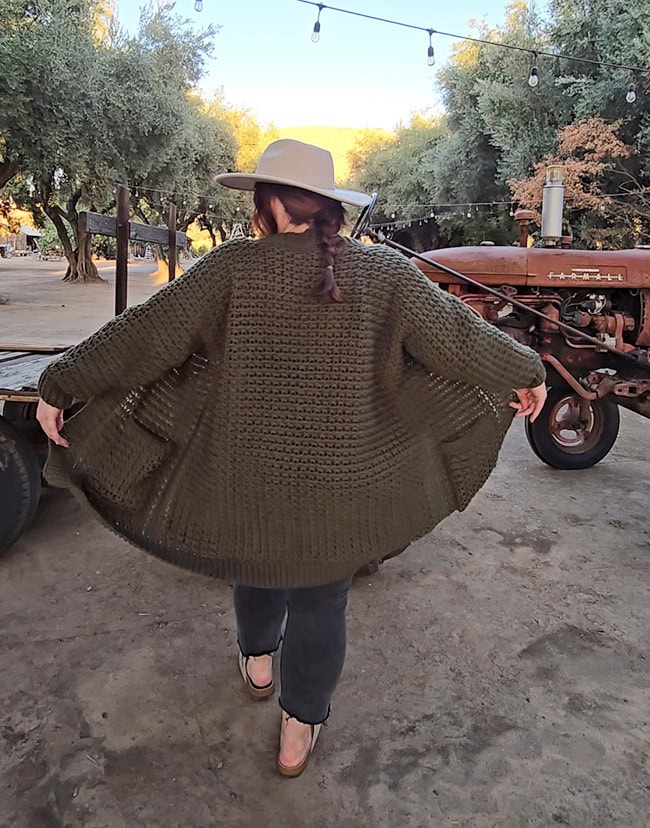
Bottom Ribbing
Using H-8/ 5mm hook, join to the top of 1st hdc at the bottom of the left panel.
Note: the 1st Row starts with a ch 1, where the next row has a single hdc. Take note of the 3 points that you will be joining the ribbing to: point 1 is the top of the hdc of row that starts with a ch1, point 2 is around the ch1 (or between the ch1 and the hdc), and point 3 is around the single hdc.
Row 1 [RS]: Ch 8[8, 8, 9, 9, 9, 10, 10, 10] , sc into the back bump of the 1st ch from hook, sc into the back bump of the remaining chs to last ch, sc sl st joining to the top of the hdc (this is the same point as join). 8[8, 8, 9, 9, 9, 10, 10, 10] sts.
Row 2 [WS]: Sl st into the next point (the ch1), turn. Sc in the 1st st, sc blo to last st, sc in the last st.
Row 3: Turn (no turning ch), sc in 1st st, sc blo to last st, sc sl st in the last st joining to the top of the hdc.
Row 4: Sl st around the single hdc of the next row, turn. Sc in the 1st st, sc blo to last st, sc in the last st.
Row 5: Turn, sc in 1st st, sc blo to last st, sc sl st in the last st joining to the ch 1.
Row 6: Sl st into the top of the hdc of the next row, turn. Sc in the 1st st, sc blo to last st, sc in the last st.
Row 7: Turn, sc in the 1st st, sc blo to last st, sc sl st in the last st joining to the next single hdc.
Rep Rows 2-7 around the bottom of the cardigan. Do not add any rows at what would be considered the seams on the side of the cardigan. All sizes will end with a join to the top of the hdc of the last Row on the right panel. Last Row should have you ending on the bottom edge of the ribbing. If you ended at the body, turn and sl st down the ribbing. Do not fasten off.
Inner Ribbing
Note: You will work into the tops of the sts to join, working 1 row into 1 row. The center back portion for the inner ribbing will be worked the same as the bottom ribbing.
Row 1 [RS]: Ch 8[8, 8, 9, 9, 9, 10, 10, 10] , sc through the back bump of the 1st ch from hook, sc through the back bump of the remaining chs to last ch, sc sl st joining to the 1st sc of the bottom ribbing (this last ch will be twisted). 8[8, 8, 9, 9, 9, 10, 10, 10] sts.
Row 2 [WS]: Sl st into the next st, turn. Sc in the 1st st, sc blo to last st, sc in the last st.
Row 3: Turn, sc in the 1st st, sc blo to last st, sc sl st in the last st joining to the next st on the body.
Rep Row 2-3 around the inner portion of the cardigan, working across the center back portion in the same manner as the bottom ribbing. Once you have joined to the last ch (this is the starting ch from the bottom ribbing section), fasten off.
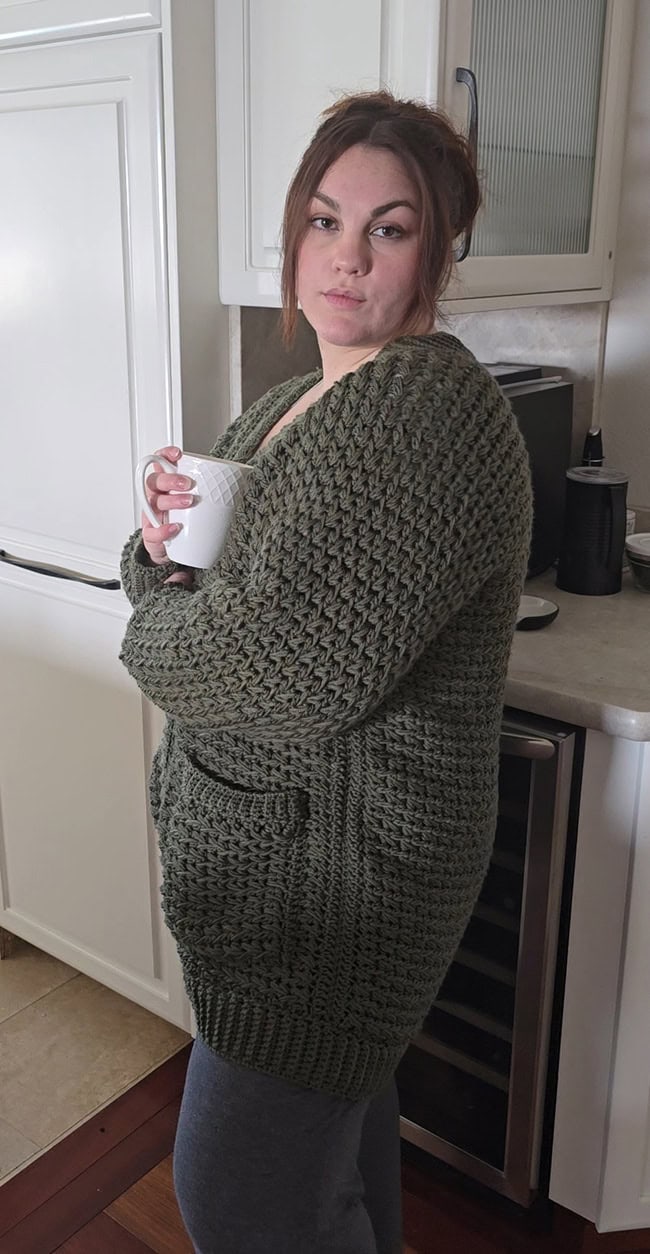
POCKETS – Make 2
Use J-10/ 6mm hook.
Row 1 [RS]: Ch 16[16, 18, 18, 20, 20, 22, 22, 24] , hdc into the back bump of the 2nd ch from hook, hdc across the remaining sts. 15[15, 17, 17, 19, 19, 21, 21, 23] sts.
Row 2 [WS]: Ch 1, turn. Hdc into the 1st st, *ch 1, sk 1, hdc into the next st; rep from * across. The last st will be an hdc.
Row 3: Ch 1, turn. Hdc into the 1st st, work 1st leg of FS in ch-sp, work the 2nd leg through the sk hdc from the row below, work the 3rd leg in the next ch-sp, complete FS. Work FS across to last ch-sp, work FS inc in ch-sp, hdc to end. 7[7, 8, 8, 9, 9, 10, 10, 11] FS.
Row 4: Ch 1, turn. Hdc into the 1st st, work 1st leg of FS into ch-sp, work the 2nd leg in the ch-sp from the row below, work the 3rd leg in the next ch-sp, complete FS. Work FS across to last st, hdc into the last st.
Rep Row 4 a further 8[8, 10, 10, 12, 12, 16, 16, 16] times.
12[12, 14, 14, 16, 16, 20, 20, 20] rows worked.
Next Row: Ch 1, turn. Hdc into the 1st st, hdc into each st across. 16[16, 18, 18, 20, 20, 22, 22, 24] sts.
Switch to H-8/ 5mm hook.
Note: You will be working into the sides of the Rows, working through the same 3 points as the bottom edge ribbing.
Row 1 [RS]: Ch 4[4, 4, 5, 5, 5, 6, 6, 6] , sc into the back bump of the 1st ch from hook, sc into the back bump of the remaining chs to the last ch, sc sl st joining to the side of the 1st hdc. 4[4, 4, 5, 5, 5, 6, 6, 6] sts.
Row 2 [WS]: Sl st into the next point (this will be the top of an hdc), turn. Sc in the 1st st, sc blo to last st, sc in the last st.
Row 3: Turn (no turning ch). Sc in the 1st st, sc blo to last st, sc sl st in the last st joining to the next point (this will be between the ch 1 and the hdc).
Row 4: Sl st into the next point (this is around the single hdc), turn. Sc in the 1st st, sc blo to last st, sc in the last st.
Row 5: Turn (no turning ch). Sc in the 1st st, sc blo to last st, sc sl st in the last st joining to the next point (this is the top of the next hdc).
Row 6: Sl st into the next point (this is between the ch 1 and the hdc), turn. Sc in the 1st st, sc blo to last st, sc in the last st.
Row 7: Turn (no turning ch). Sc in the 1st st, sc blo to last st, sc sl st in the last st joining to the next point (around the single hdc).
Rep Rows 2-7 until you have worked across this one side of the pocket. The last row should be Row 2, 4, or 6.
Fasten off, leaving a long tail of about 30 inches / 76 cm so you can sew your pocket onto the cardigan.
Pocket Placing
For all sizes, place the bottom edge of the pocket (the side opposite of the ribbing) between the bottom 2nd and 3rd columns of FS. On the 3rd column, use a removable stitch marker to mark the 2nd[3rd, 2nd, 3rd, 3rd, 4th, 3rd, 4th, 4th] FS (not row, but FS st) from both sides of the front bodies. Then place a marker on the 9th[9th, 10th, 10th, 11th, 11th, 12th, 12th, 13th] row up from the previous marker that was placed. You now have an outline for your pocket.
Use removable stitch markers to clip the pocket to the garment according to the outline, and sew it in place as follows: For the sides of the pocket, count 2 sts for every 1 row of FS on the body. For the bottom of the pocket, join 2 rows of the pocket to 1 "bar" between the FS columns for both the start and end of the bottom, then 1 row of pocket to 1 "bar" on the body.

FINISHING
To block, wash and lay flat to dry. Do not stretch or pin. Weave in any remaining ends.
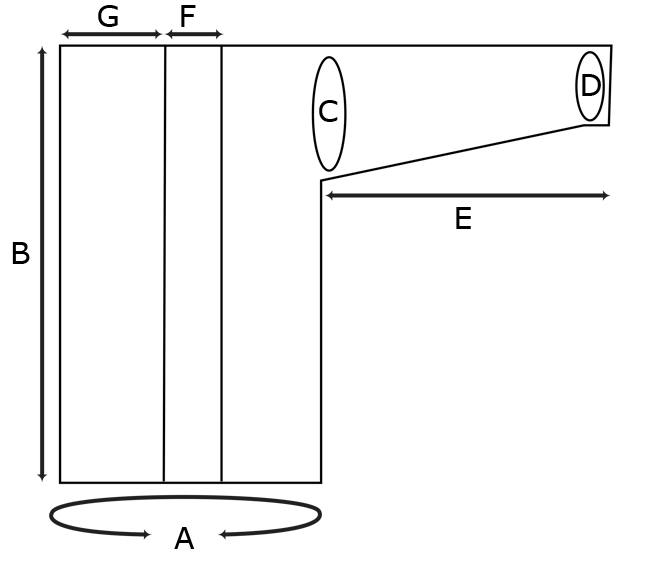
A – Body circumference: 38[42, 46, 50, 54, 58, 62, 66, 70] inches / 97[107, 117, 127, 137, 147, 158, 168, 178]cm.
B – Length (shoulder to hem): 27[27.5, 28.5, 29, 30, 30, 30.5, 31.5, 31.75] inches / 68.5[70, 72.5, 73.5, 76, 76, 77.5, 80, 80.5] cm
C – Upper Sleeve circumference: 14.75[15.25, 16, 16.75, 17.25, 18, 18.75, 19.25, 20] inches / 37.5[38.5, 40.5, 42.5, 44, 45.5, 47.5, 49, 51] cm
D – Cuff Circumference: 5.5[6, 6.5, 7, 7.5, 8, 8.5, 9, 9.5] inches/ 14[15, 16.5, 18, 19, 20.5, 21.5, 23, 24] cm
E – Sleeve length: 15[15, 15, 16, 16, 16, 16.5, 17, 17] inches / 38[38, 38, 40.5, 40.5, 40.5, 42, 43, 43] cm
F – Right/Left Front width (excluding ribbing): 5.5[6, 6.5, 7.25, 8, 8.75, 9.5, 10, 11] inches / 14[15, 16.5, 18.5, 20.5, 22, 24, 25.5, 28] cm
G – Back Neck width (excluding ribbing): 6.25[6.25, 7, 7.75, 8.25, 9, 9.75, 10.5, 11.25] inches / 16[16, 18, 19.5, 21, 23, 25, 26.5, 28.5] cm
ABOUT THE DESIGNER
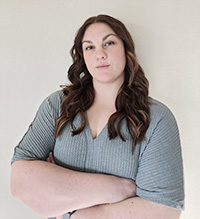 Danielle is an entrepreneur running two businesses: one working with her love of dogs as a dogsitter and one working as a designer. You can find her sitting on the couch, watching her favorite shows, and crocheting/knitting her day away!
She currently sells her patterns independently on Etsy and Ravelry.
Pattern & images © 2024 Danielle Denton


