MetaMarclay, a free knitting pattern from Knitty.com.
INTRODUCTION
Embroidery Tutorial for MetaMarclay Sweater
by Lisa Granick, aka Brooklineknitter
This tutorial provides detailed instructions and tips for laying out and embroidering the motif on the MetaMarclay sweater.
Embroidery on the front of the sweater is best done before the shoulders are seamed. I used a simple chain stitch, embroidering freehand onto the fabric without fabric stabilizer or hoop. If you would like to add any embroidery to the upper back, do so before seaming. Embroidering near the back hem is not difficult after assembly and may be done later.
 photos: Lisa Granick
SWATCH AND YARN PREP
[Knitty's list of standard abbreviations and techniques can be found here.]
- Take advantage of your knit swatch to practice embroidering the motif. In particular, figure out how much yarn you need for each dot in the motif. Measure out 80 inches/200 cm of yarn (noting the exact length), embroider a circle, and measure what remains after tucking in the end and cutting. This allows you to pre-cut yarn for the motif to the correct length, and not carry all the yarn balls in your project bag. For the samples, 71 inches/180 cm was enough yarn to embroider each circle, comfortably touch up any small gaps, and weave in the ends. Note that skinnier yarns will require more length, fatter yarns could require less.
- Pre-cutting these lengths enables you to pick a color layout for the motif, too. Coil each length around a few fingers and arrange them on the fabric to get a good idea how the color layout will look. Photograph it with your phone camera or place the coils in order on a spare knitting needle or rod to preserve the layout.
- Each dot is centered around a single stitch (or space between stitches), marked by a yarn flag. Stitch freehand, going counterclockwise starting at 3 o’clock relative to the center (you might do the opposite if left-handed). Because of the ratio of st width to row height, the outer circumference will be in the 3rd column from the center at 3 and 9 o’clock, and in the 5th row from the center at 12 and 6 o’clock (not counting the center st).
- Chain stitch embroidery: video tutorial | photo tutorial
- Be mindful not to pull the stitches too tight, or each circle will become a small bump. You can easily adjust your sts as you work but pinch the prior st as you ease a little more length into a st, otherwise you might be pulling from the prior st instead of the free end of the yarn.
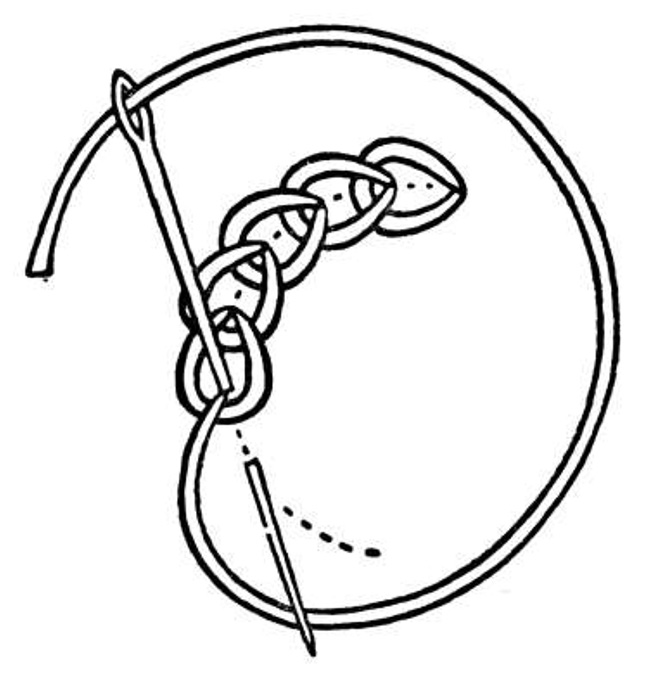
Figure 1: Chain stitch embroidery (source: Wikipedia).
Note that the needle need not re-enter the fabric at the exact spot it came out, which gives flexibility in shaping your line.
The chain stitches can be pulled and adjusted slightly as you work, to make the outer part of each chain loop a bit bigger than the inner part (relative to the center of the circle), and the dot will look even rounder.
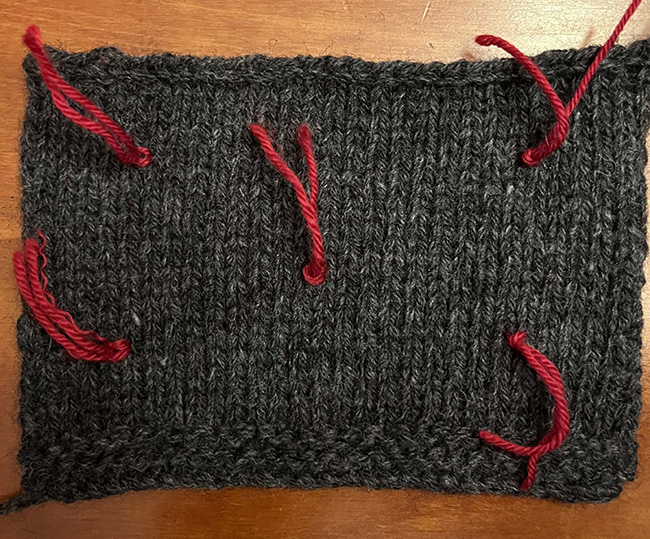

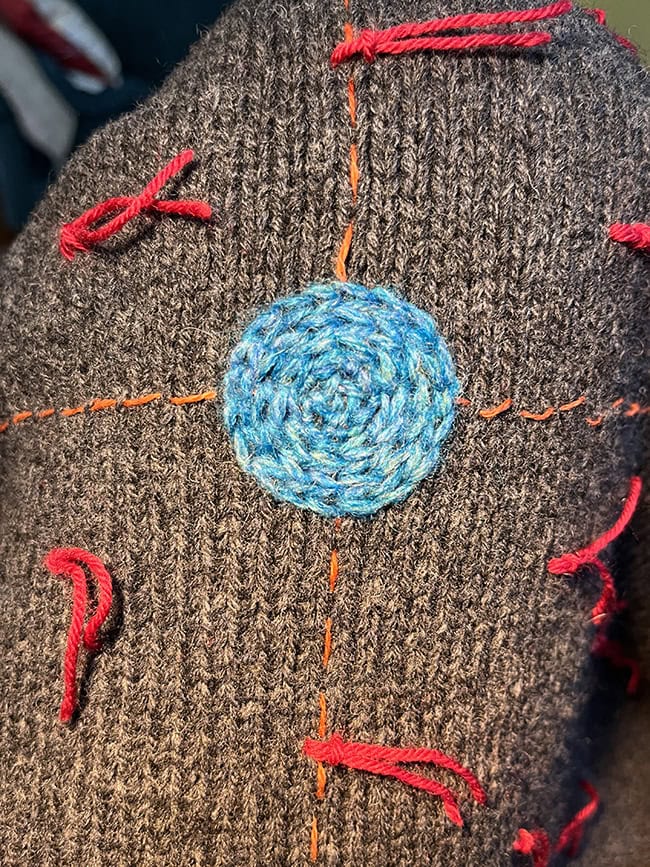
Figure 2: Swatches with yarn flags and embroidered
See above swatch with centers marked and then embroidered.
LAYING OUT THE MOTIF
Steam press the sweater front, using a damp press cloth. Cut 37 pieces of scrap yarn (1 for each embroidered dot), each about 4.5 inches (12 cm). These will serve to mark the center location for each dot.
Some notes on the motif:
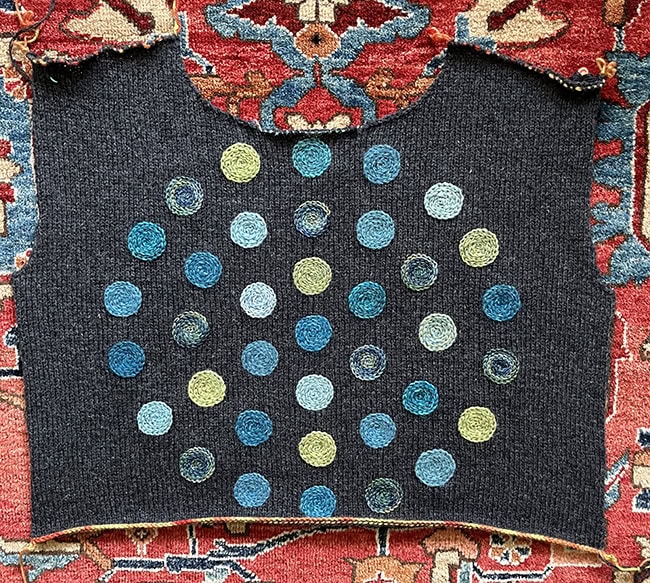
• The MetaMarclay motif is circular, with a center dot, 6 dots in the inner ring, 12 in the middle ring and 18 in the outer ring (see Figure 3). Referencing the middle ring and a clock face, there are three major axes of symmetry – vertically from 12 to 6 o’clock, and diagonally from 2 to 8 o’clock, and from 4 to 10 o’clock. The horizontal axis from 3 to 9 o’clock does divide the top and bottom symmetrically, but it is not the same as the other 3 (it passes through 3 dots vs. 7 for the others).
• Keep in mind that knit sts are shorter than they are wide, so rely more on measurements for placement, using row or st counts to keep track of symmetry.
• It is easier for the motif layout to work in cm and mm than to work in inches. If your outer ring is 35 cm, then each space along the main diagonals is 5.83 cm, and 5.8 and 5.9 are marked on the metric ruler or tape measure. In contrast, that would be 13.78 inches, and each space would be 2.29 inches, not marked on any ruler and necessitating conversion to eighths or sixteenths.
• I advise demarcating the vertical and horizontal axes by basting with a piece of well contrasting lace-weight linen or cotton yarn or heavy thread. It will be more visible if more of the running length of the thread is above the fabric than below.
• Each dot will be centered on a knit st. The vertical placement can only be as precise as the height of 1 row. The horizontal placement can be as precise as one-half st, as either a st or the ‘upside down st’ between sts can serve as a center.
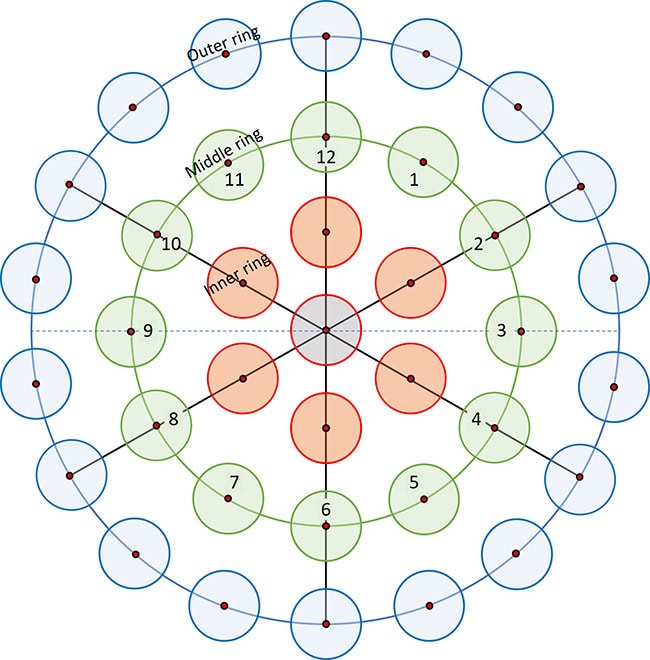
Figure 3: Motif layout
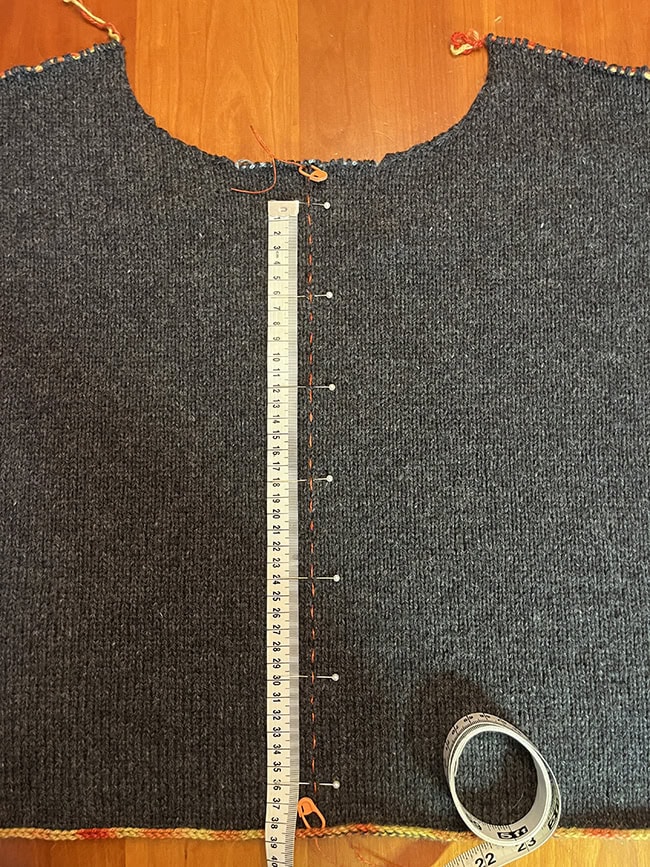
First locate the center column of sts (below the center of the neck sts on scrap yarn), and baste a reference line from top to bottom (Figure 4).
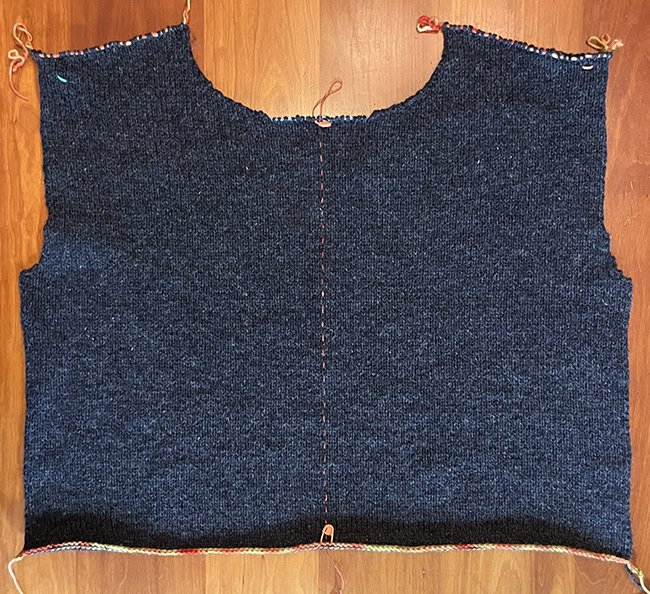
Figure 4: Basted centerline along the vertical diameter.
Place pins to mark the placement of the 7 dots on the center line (Figure 5). Each dot will be about 3.5-4 cm in diameter, so the center of the top one should be marked about 3 cm below the neck edge, and the center of the bottom one 3 cm from the cast-on edge. There are 6 equally sized spaces between the centers of the dots along the vertical reference line. Place a pin across the center line for the center of each dot. You might want to adjust the pins to fine-tune placement.
Figure 5: Centerline pins placed.
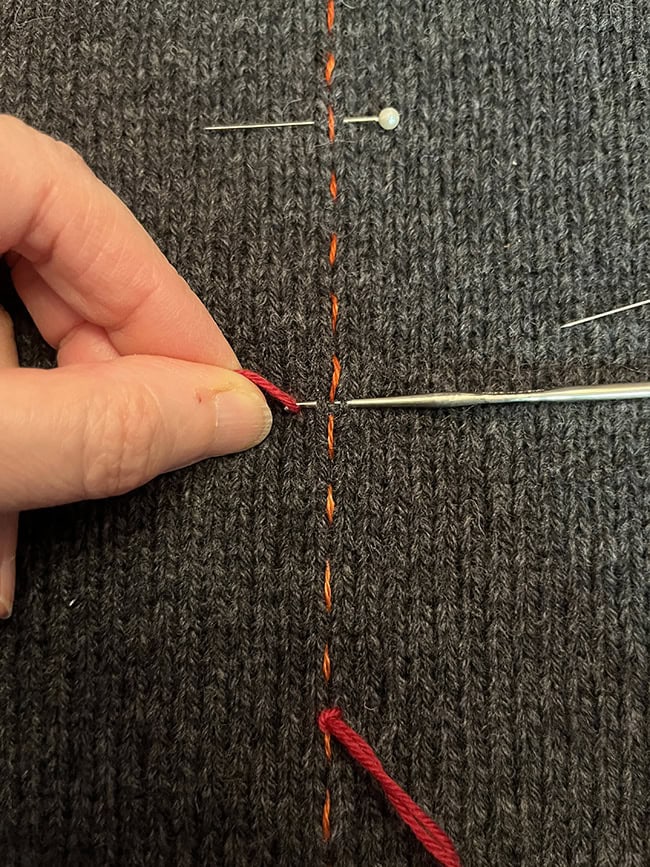
Replace each pin with a yarn flag: fold the yarn flag in half and use a small crochet hook to pull a loop under both legs of the st marked with the pin, pull the free ends of the yarn flag through the loop and snug, removing each pin in turn (Figure 6).
Figure 6: Yarn flag placement with crochet hook
Next, baste a horizontal reference line that passes through the st marked for the center dot. Go slowly and check your work, as it is easy to get into the wrong row part way. There are few dots on this line, but it is a helpful reference for fine-tuning placement of many of the dots, as the top and bottom should be symmetric along this fold line.
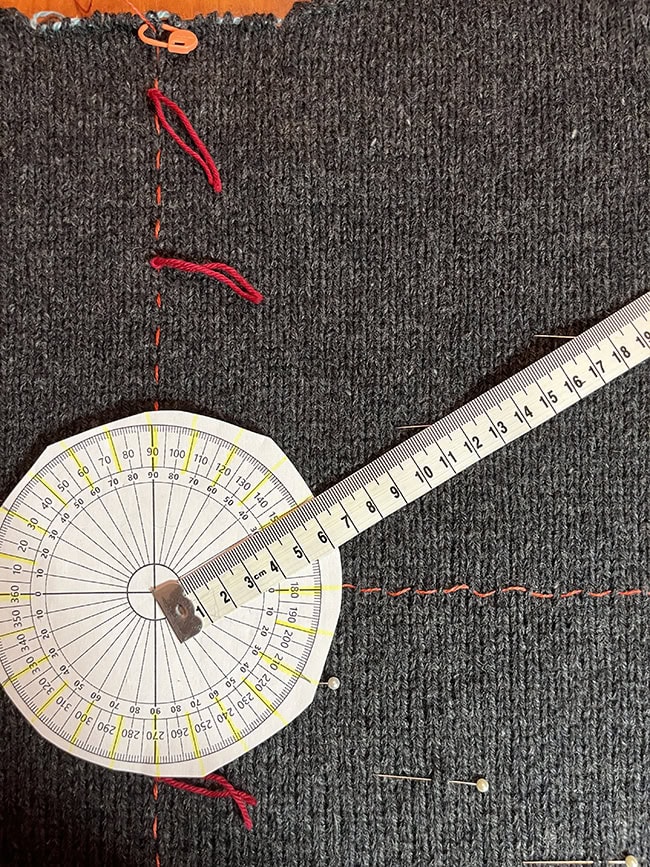
It can be helpful to use a paper protractor for placing dots along the two other major axes – print Figure 7a. Align the vertical and horizontal axes of the paper protractor with the two basted reference lines. Use a ruler or tape measure to place the centers of the 6 remaining dots along each of the two diagonals (Figure 7b). The distance between centers is the same along each major diagonal as along the vertical one. Place pins or yarn flags directly to mark the centers.
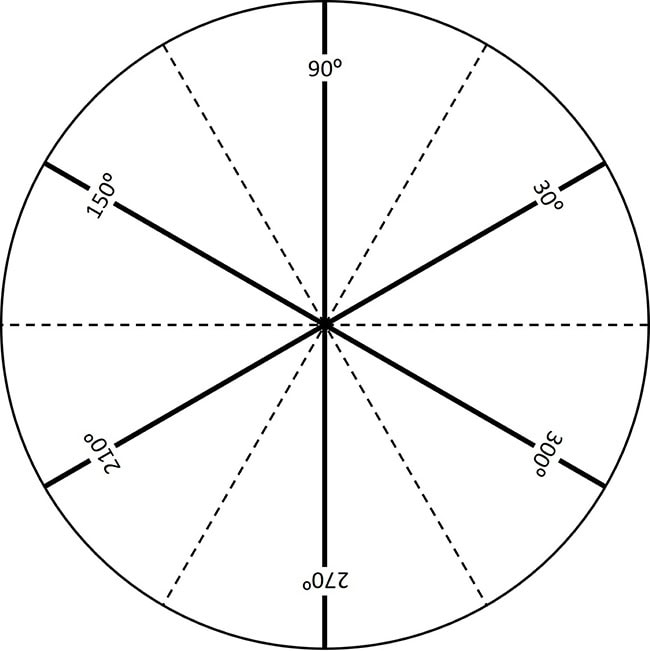
Figure 7 (A) Paper protractor
Print and cut out.
Figure 7(B) Using the paper protractor and tape measure to place the dot centers.
In placing the remaining yarn flags (3 per “wedge”) note that
• The distance from the center dot to each dot on the middle ring is equal. Similarly, the distance from the center to each dot on the outer ring is equal.
• All the dots on a given ring are equidistant from their neighbors on the same ring.
Eyeball, measure and adjust until you are satisfied with the symmetry of placement. Remove any remaining pins, replacing with yarn flags (see below).
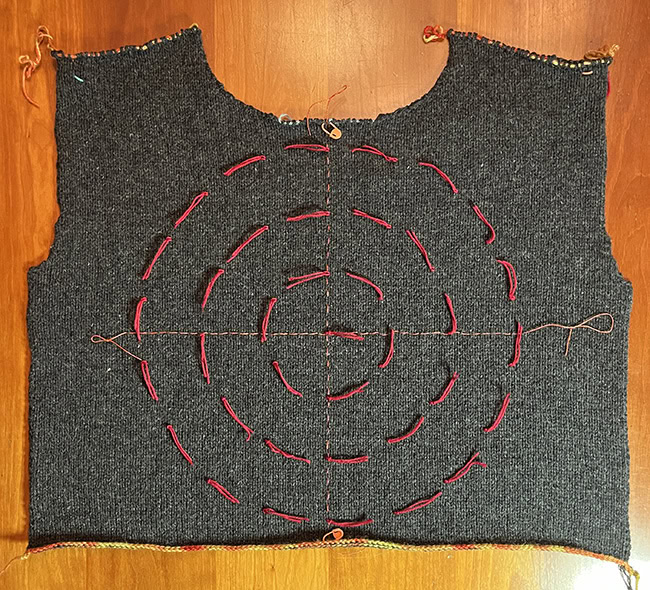
Figure 8: Complete flag set (arranged by hand to check placement for roundness).
EMBROIDERING THE MOTIF
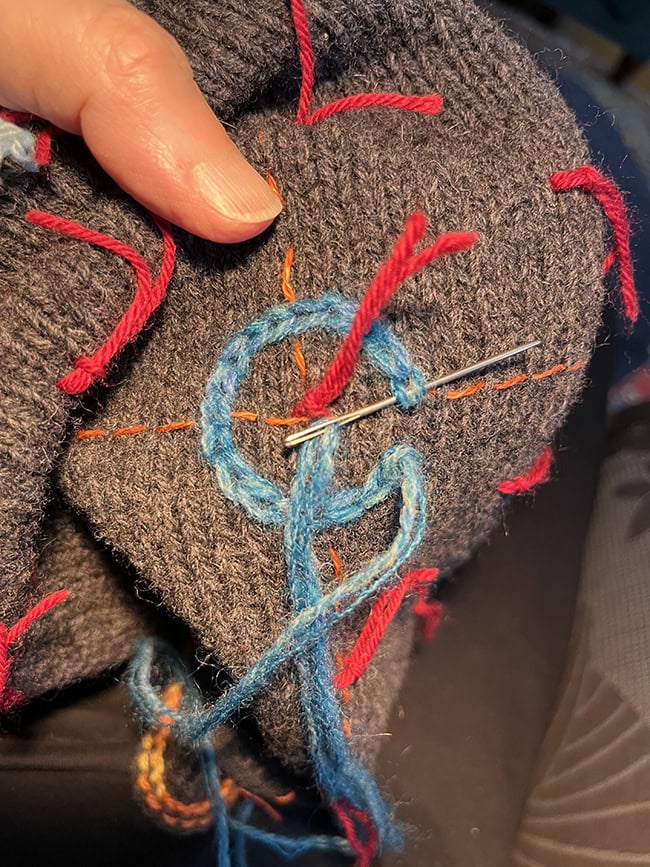
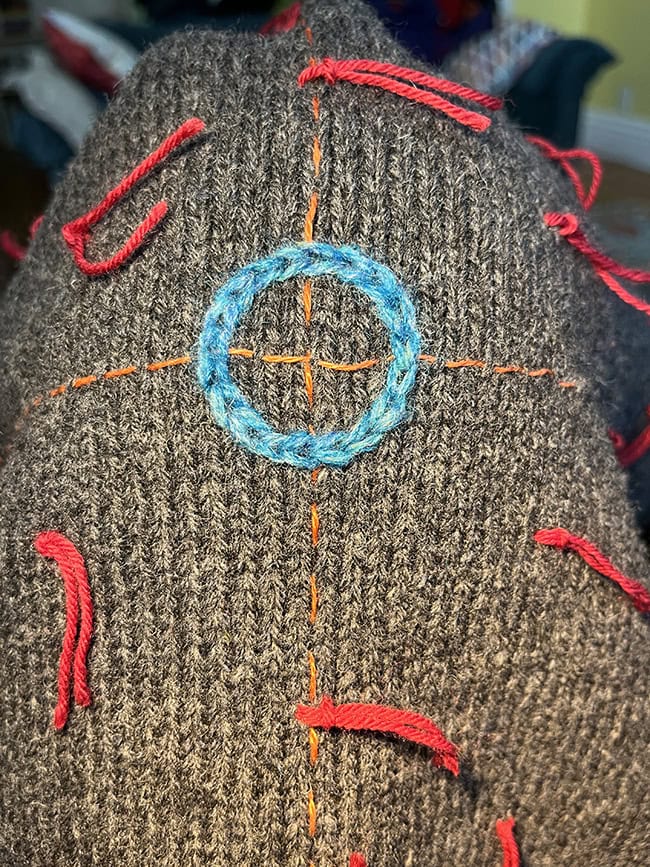
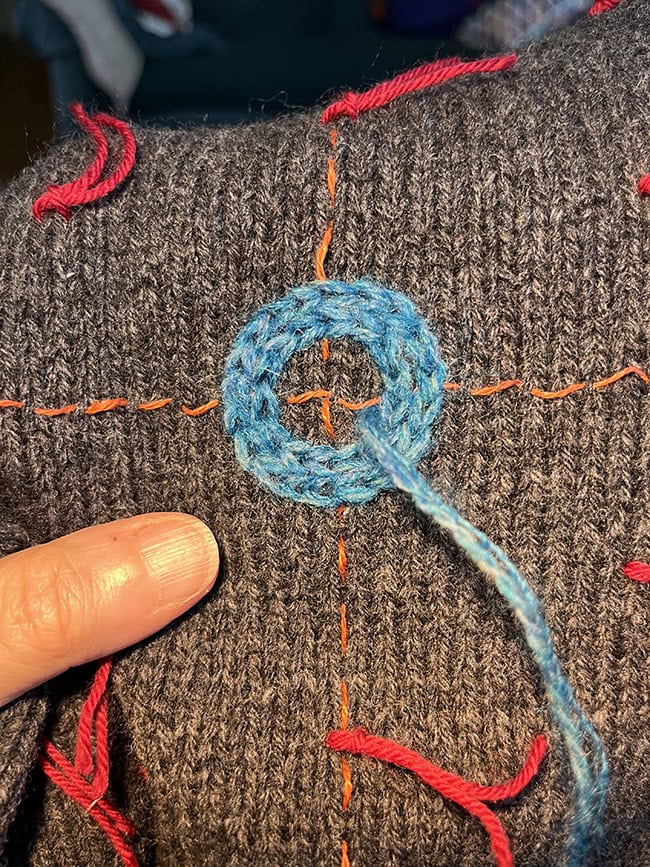
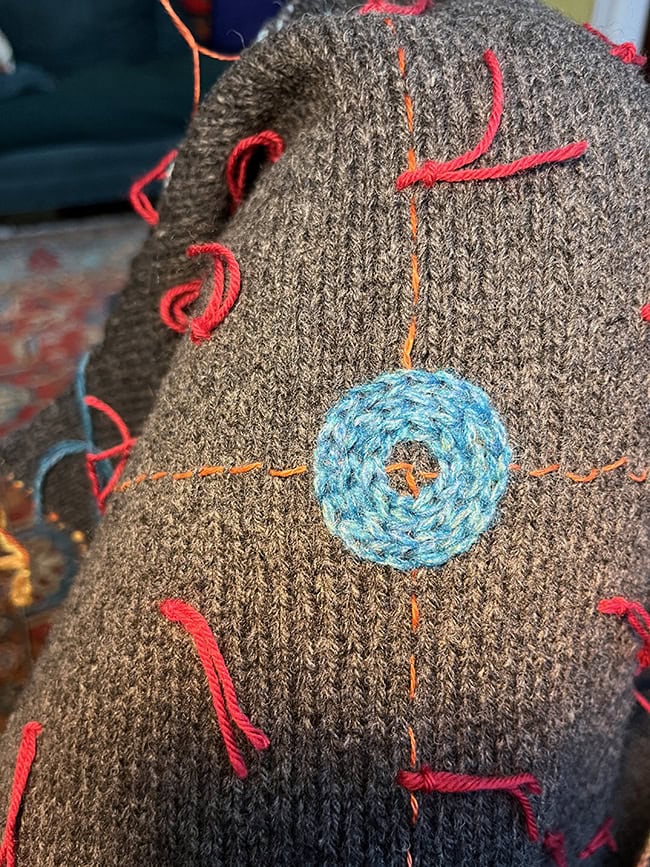
See photo tutorial below. Use a darning needle and chain st to make each dot. Each dot is centered around a single stitch, marked by the yarn flags. Stitch freehand, going counterclockwise starting at 3 o’clock relative to the center (you might do the opposite if left-handed). Because of the ratio of st width to row height, the outer circumference will be in the 3rd column from the center at 3 and 9 o’clock, and in the 5th row from the center at 12 and 6 o’clock (not counting the center st).
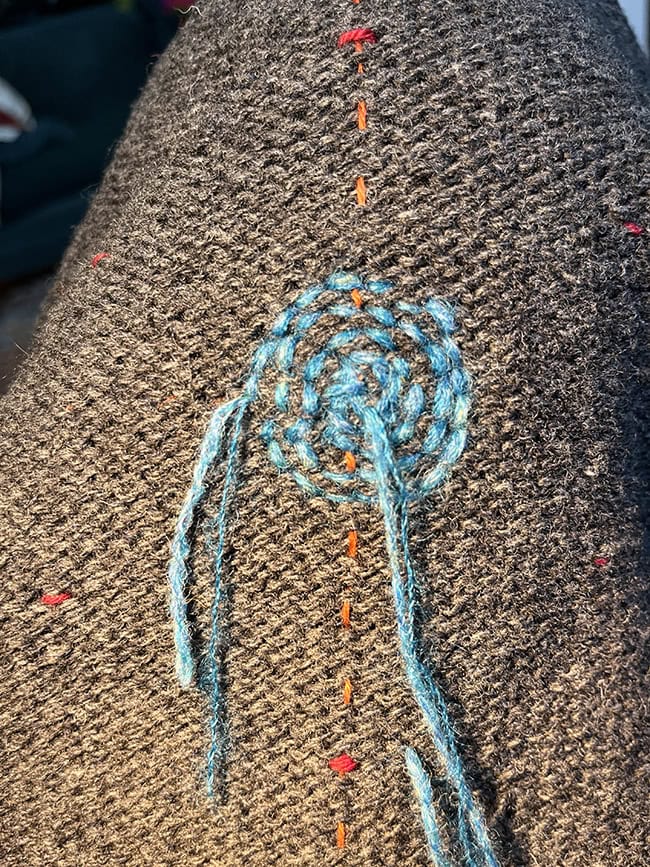
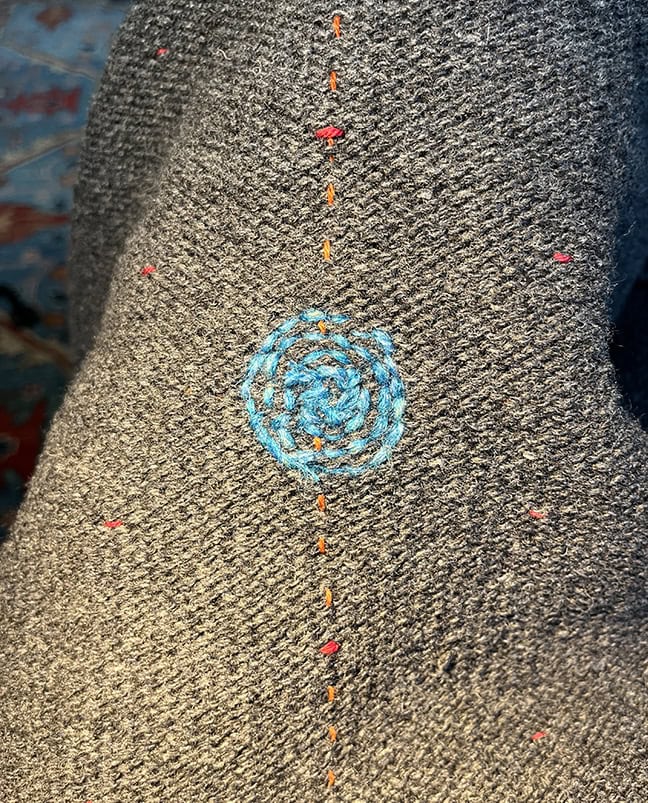
Leave the yarn marker in place until the outline of the dot you are working is complete, so you can easily see the center point. Stitch the outline, and close the chain invisibly, forming the last loop by placing the needle under and through both legs of the first loop before returning to the WS through the prior loop. Bring the needle back to the RS just inside the outline to start the next smaller circle, filling the outline. Each dot requires three chain-stitch rings of decreasing size plus a tiny center area. The center area may not be the same for each dot, because the embroidery yarn weights can vary, so the remaining space varies. Do your best with chain st, or ad lib to fill the small center space. They need not all be identical.
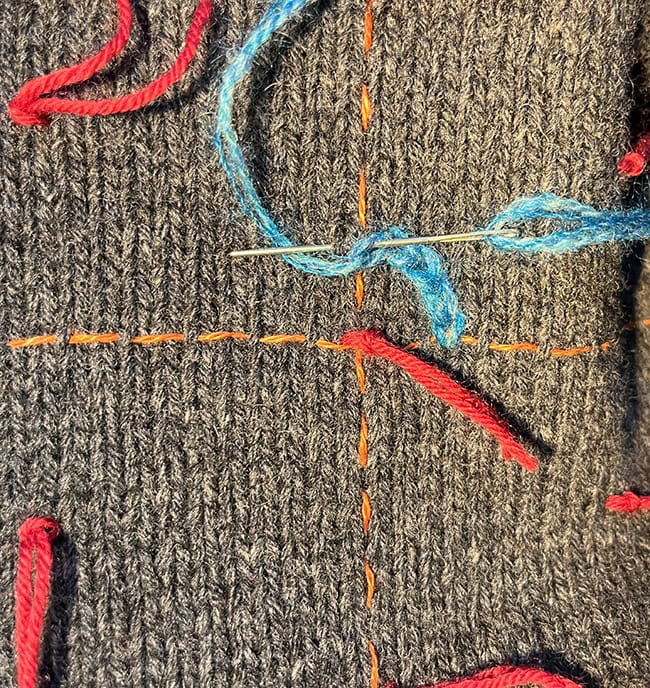
Figure 9 (A) First dot, center of motif
Started at 3 o’clock, in 3rd column from flag (not counting the flagged st at center), continued to 12 o’clock, in 5th row from center (not counting center)
(B) Invisibly closing the circle to complete the circumference
(C) Circumference complete, yarn flag removed
(D) Beginning 3rd ring
(E) Third ring done
(F) Center area filled in
(G) Back with ends
(H) Back with ends woven in (using the crochet hook can be faster than the darning needle)
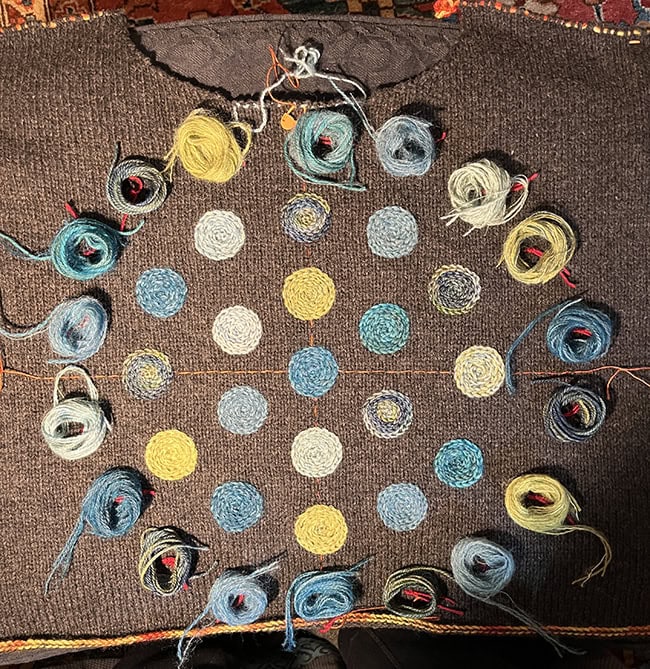
(I) Working on color layout for outer ring

(J) Motif complete and steam pressed.
In the blocking process some of the circles will get misshapen, so gently pull each back to round, and steam press the motif with a damp press cloth, if necessary.
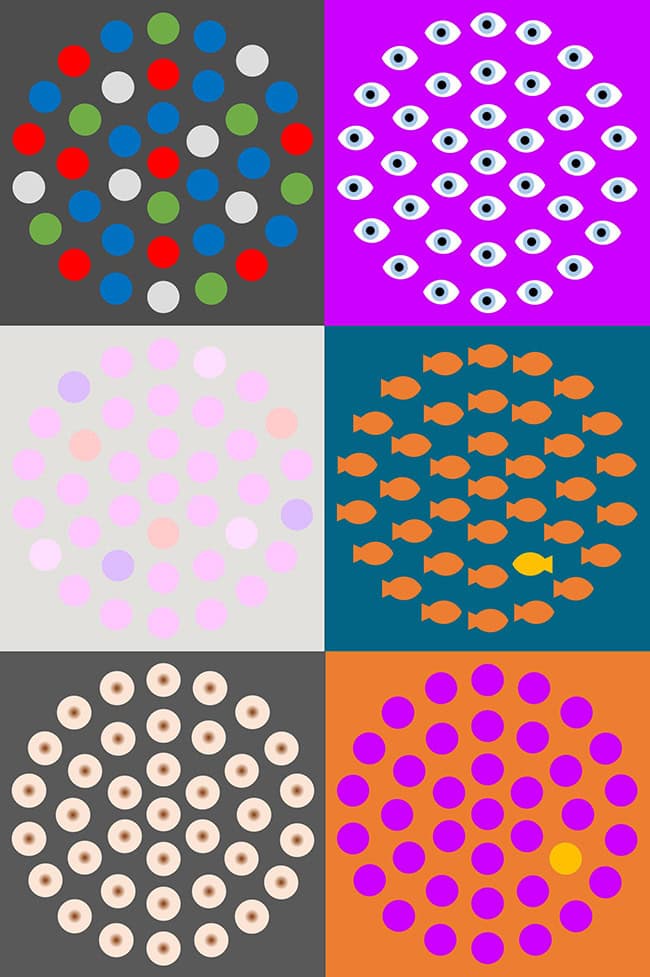
Figure 10: Additional ideas for the motif
ABOUT THE DESIGNER
 Lisa lives in Boston, where it's cold enough to wear cozy winter sweaters. She thinks maybe she should have gone to FIT instead of MIT, but she's happy to find that design work involves spreadsheets (and even protractors, on occasion).
You'll find more of her work on Ravelry.
Pattern & images © 2024 Lisa Granick, aka Brooklineknitter


