Nouvelle Vague, a free knitting pattern from Knitty.com.
INTRODUCTION
Nouvelle Vague
 by Kate Gilbert
![]()
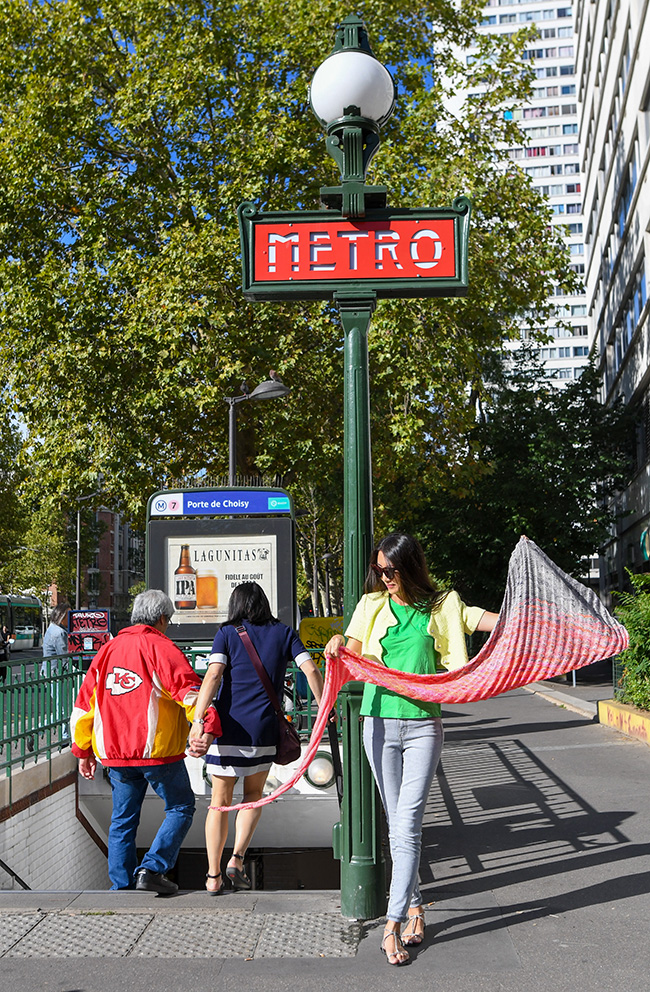
It's 17 years later and I'm no longer in Paris, but I'm still wearing scarves all the time and missing French cafés and pastries. I've always wanted to make a variation on the original Clapotis, (clap-o-TEE, if you want a reminder of how to pronounce it) so when Amy asked if I'd be interested in doing a reboot, I was excited for the excuse to revisit it.
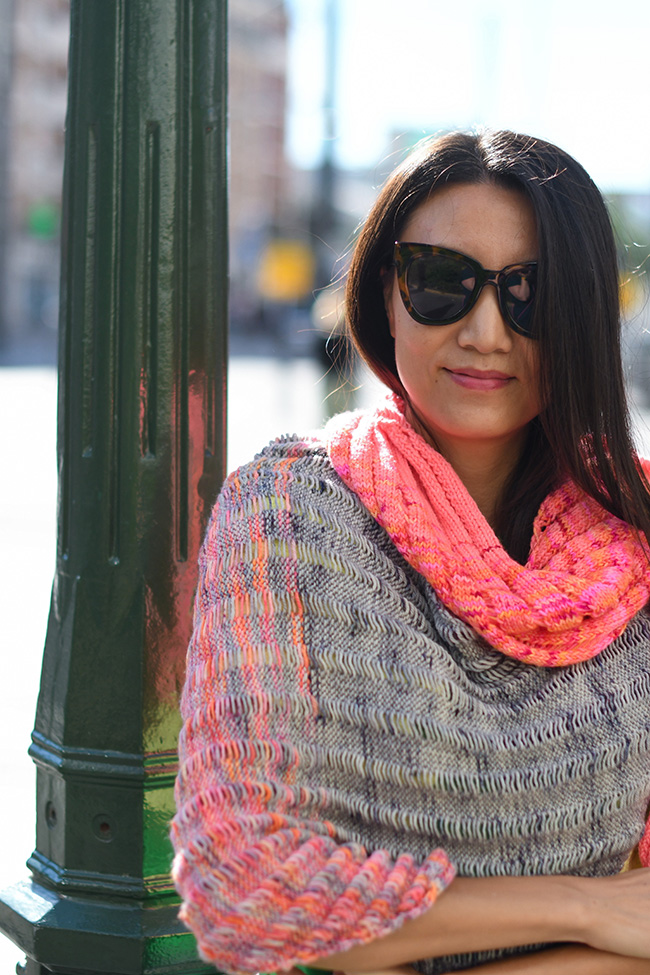
After trying curved and semi-circle versions, along with some other ideas along the way, I finally decided that making a simple shape with a pattern you could learn by heart was the most satisfying way to do it. So here's an extended triangular version that you can use to play with fades and color possibilities. The La Bien Aimée yarn here was a dream to use, and the color fade was so satisfying to watch happen. Information is included below if you'd like to make your scarf wider and longer.
The name? Nouvelle Vague ("vague" is pronounced "vagg", with a hard "g") means new wave in French. Since the original Clapotis name means ripples, we thought it worked.
 model: Ying Hui
 photos: Aimée Gille
SIZE
One
FINISHED MEASUREMENTS
Top edge (unstretched): approximately 90 inches/228.5cm
Depth (unstretched): approximately 31 inches/78.5 cm
Note: This is by nature a shifty fabric so the measurements really depend on how you lay it down.
MATERIALS
Yarn
La Bien Aimée Merino DK [100% merino wool; 252 yd/230 m per 115g skein];
![]() [CC1] Cassiopeia; 1 skein
[CC1] Cassiopeia; 1 skein
![]() [CC2] Tangeopeia; 1 skein
[CC2] Tangeopeia; 1 skein
![]() [CC3] Tang; 1 skein
[CC3] Tang; 1 skein
![]() [CC4] The Hotness; 1 skein
[CC4] The Hotness; 1 skein
The project used approximately 300 gms of yarn, 650 yds/590m, total; approximately 185 yds/170m of CC1, 150 yds/135 m of CC2, 170 yds/155 m of CC3 and 130 yds/120m of CC4.
Yarn Characteristics
![]() The yarn is a springy, smooth DK. Sticky yarns (such as those containing mohair) will make dropping stitches difficult. You can substitute a wide variety of types of yarn, solid or variegated colorways, and any thickness. If using a different thickness of yarn, choose a needle a size or two larger than recommended for that yarn.
The yarn is a springy, smooth DK. Sticky yarns (such as those containing mohair) will make dropping stitches difficult. You can substitute a wide variety of types of yarn, solid or variegated colorways, and any thickness. If using a different thickness of yarn, choose a needle a size or two larger than recommended for that yarn.
Recommended needle size
[always use a needle size that gives you the gauge listed below - every knitter's gauge is unique]
![]() US #7/4.5mm needles for working flat
US #7/4.5mm needles for working flat
Notions
![]() stitch markers (optional)
stitch markers (optional)
![]() yarn needle
yarn needle
GAUGE
20/26 rows = 4 inches/10 cm in stockinette stitch
17/26 rows = 4 inches/10 cm in pattern stitch
PATTERN NOTES
[Knitty's list of standard abbreviations and techniques can be found here.]
As with the original Clapotis, the purl side is the RS for this pattern.
Stretching in blocking is not recommended in order to preserve the sculptural, rippling quality of the dropped stitches.
The pattern uses a series of four colors to create a fade; you can use any number of colors, changing whenever you want. The instructions for the color changes are given where they were worked for the sample, but you can place them wherever you wish.
Sl 1: always slip purlwise with yarn held to the purl side of the work.
Adjusting the Size
If you would like to adjust the length, change the number of repeats worked in Section 2.
Working fewer repeats will make a shorter shawl. Working more repeats will make a longer shawl.
DIRECTIONS
Section 1 (Set-up Rows)
With CC1, CO 2 sts.
Row 1 [RS]: P1, pfb. 3 sts.
Row 2: Sl1, k1, pm, yo, kfb. 5 sts.
Row 3: Sl1, p to last st, pfb. 6 sts.
Row 4: Sl1, k1, k tbl, p1, k tbl, kfb. 7 sts.
NOTE: From this point forward through the whole pattern, on even-numbered rows, you will always be knitting the st before the marker through the back loop, purling the stitch after the marker, then knitting the next st through the back loop. The garter stitch column of sts will later be dropped and unraveled when you reach section 3, and the adjacent columns of twisted sts will stay nice and tight, helping the fabric keep its structure. If you prefer not to place markers, you can remember that the (imaginary) marker is always before the purl stitch.
Row 5 and all following RS rows: Sl1, p to last st, pfb. 1 st increased.
Row 6: Sl1, k2, k tbl, p1, k tbl, k1, kfb. 9 sts.
Row 8: Sl1, k3, k tbl, p1, k tbl, k2, kfb. 11 sts.
Row 10: Sl1, k4, k tbl, p1, k tbl, k3, kfb. 13 sts
Row 12: Sl1, k5, k tbl, p1, k tbl, k4, kfb. 15 sts.
Row 14: Sl1, k1, pm, yo, k2tog, k3, k tbl, p1, k tbl, k3, ssk, pm, yo, kfb. 17 sts.
Section 2 (Increase Rows)
Row 1 and all following RS rows: Sl1, p to last st, pfb. 1 st increased.
Row 2: Sl1, k1, k tbl, [p1, k tbl, k3, k tbl] to last marker, p1, k tbl, kfb. 1 st increased.
Row 4: Sl1, k2, k tbl, [p1, k tbl, k3, k tbl] to last marker, p1, k tbl, k1, kfb. 1 st increased.
Row 6: Sl1, k3, k tbl, [p1, k tbl, k3, k tbl] to last marker, p1, k tbl, k2, kfb. 1 st increased.
Row 8: Sl1, k4, k tbl, [p1, k tbl, k3, k tbl] to last marker, p1, k tbl, k3, kfb. 1 st increased.
Row 10: Sl1, k5, k tbl, [p1, k tbl, k3, k tbl] to last marker, p1, k tbl, k4, kfb. 1 st increased.
Row 12: Sl1, k1, pm, yo, k2tog, k3, k tbl, [p1, k tbl, k3, k tbl] to last marker, p1, k tbl, k3, ssk, pm, yo, kfb. 1 st increased.
Repeat Increase Rows 1-12 nine times more, working Color Changes as outlined below. 137 sts.
If you wish to adjust the length, work fewer or more repeats here.
Then work Rows 1-8 once more. 8 sts increased.
COLOR CHANGES:
AT THE SAME TIME, when you have completed the eight of the nine repeats, introduce the next color: as follows:
Join CC2, leaving CC1 attached.
Rows 1-2: Work with CC2
Rows 3-6: Work with CC1
Rows 7-8: Work with CC2
Rows 9-10: Work with CC1
Rows 11-12 and Rows 1-2 of the next rep: Work with CC2
Rows 3-4: Work with CC1.
Cut CC1, and continue in CC2.
Section 3:
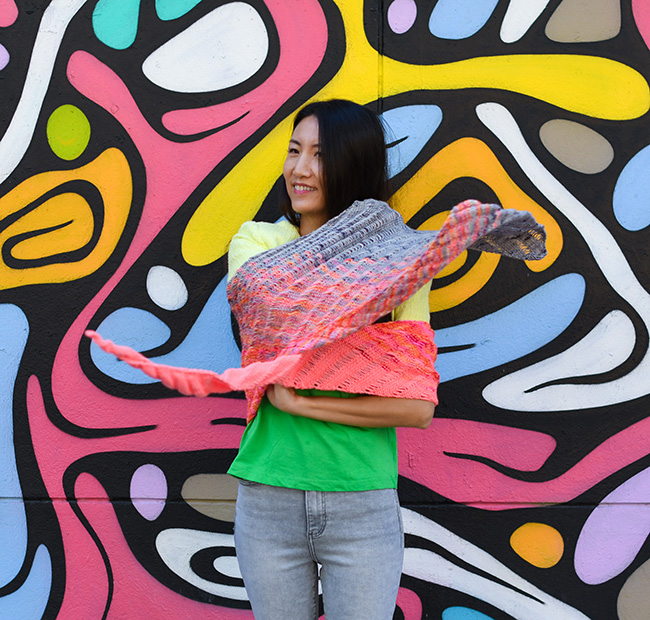
In this section you will be decreasing at the end of the RS rows and start of WS rows, and then increasing at the end of WS. This creates the triangular shape.
Row 1 and all following RS rows: Sl1, p to last 2 sts, p2tog.
Row 2: P2tog, k2, k tbl, [p1, k tbl, k3, k tbl] to last marker,to last marker, p1, k tbl, k4, kfb.
Row 4: P2tog, k tbl, [p1, k tbl, k3, k tbl] to last marker, p1, k tbl, k3, ssk, pm, yo, kfb.
Row 6: Sl1, remove marker, drop next st, let it drop down several rows, pick up top bar with left needle to form a new st (make sure this st isn't twisted), sl1 back to left needle, p2tog, k tbl, k3, k tbl, [p1, k tbl, k3, k tbl] to last marker, p1, k tbl, kfb.
Row 8: P2tog, k2, k tbl, [p1, k tbl, k3, k tbl] to last marker, p1, k tbl, k1, kfb.
Row 10: P2tog, k tbl, [p1, k tbl, k3, k tbl] to last marker, p1, k tbl, k2, kfb.
Row 12: Sl1, remove marker, drop next st, let it drop down several rows, pick up top bar with left needle to form a new st (make sure this st isn't twisted), sl1 back to left needle, p2tog, k tbl, k3, k tbl, [p1, k tbl, k3, k tbl] to last marker, p1, k tbl, k3, kfb.
Repeat Rows 1-12 until 7 sts remain, ending with Row 11, working Color Changes as outlined below. Read ahead as color changes happen at the same time as you're working these repeats. Note that as you're working the final rows, you might not have enough sts to work the repeat; just skip the repeat and work the final sts of the row.
Final WS row: Sl1, remove marker, drop next st, let it drop down several rows, pick up top bar with left needle to form a new st (make sure this st isn't twisted), sl1 back to left needle, p2tog, k tbl, k3, kfb.
7 sts remain.
AT THE SAME TIME, when you have completed three repeats, introduce the next color as follows:
Join CC3, leaving CC2 attached.
Rows 1-2: Work with CC3
Rows 3-6: Work with CC2
Rows 7-8: Work with CC3
Rows 9-10: Work with CC2
Rows 11-12 and rows 1-2 of the next rep: Work with CC3.
Rows 3-4: Work with CC2
Cut CC1, and continue in CC3.
When you have completed 10 repeats, introduce the next color as follows:
Join CC4, leaving CC3 attached.
Rows 1-2: Work with CC4
Rows 3-6: Work with CC3
Rows 7-8: Work with CC4
Rows 9-10: Work with CC3
Rows 11-12 and rows 1-2 of the next rep: Work with CC4.
Rows 3-4: Work with CC3
Cut CC3 and continue in CC4.
Section 4:
Row 1 and all RS rows: Sl 1, p until 2 sts rem, p2tog. 1 st decreased.
Row 2: P2tog, k3, kfb.
Row 4: P2tog, k2, kfb.
Row 6: P2tog, k1, kfb
Row 8: P2tog, kfb.
Row 10: P2tog, cut yarn and pull through rem st.
FINISHING
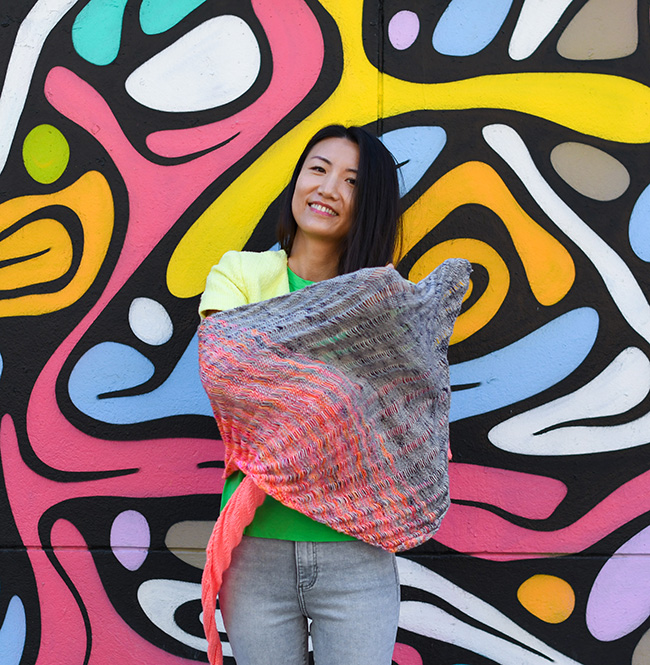
Weave in ends. Sample as shown was not washed or wetted in any way, to preserve the texture and look of the fabric.
ABOUT THE DESIGNER
 After running Twist Collective for 10 years, Kate naturally fell into helping her friends think about their businesses, goals, and projects. She now empowers solopreneurs get more done, more beautifully, and with less stress. In the slivers of her spare time, she makes things out of fabric, flour, paper, paint, and yarn... but usually not all at once!
Pattern & images © 2022 Kate Gilbert


