


Wiseknit™: A column that teaches you how to do things you'll find in knitting instructions
INTRODUCTION
Wiseknit™: Practical Knitting Wisdom
by Kate Atherley
One of the wonderful things about knitting is that there are so many different solutions to every problem, so many possible answers to every question. This column aims to expand your knitting knowledge and toolkit with practical solutions and answers to your technical knitting questions and conundrums.
Colorwork: Intarsia
I did a column a while ago about Stranded Colorwork (a.k.a Fair Isle) and I touch on related topics, but I though it was worth digging more specifically into another type of colorwork – intarsia.
The technique is having a bit of a renaissance right now in designs. Have you seen the spectacular Oh, Josephine! sweater from our last issue?
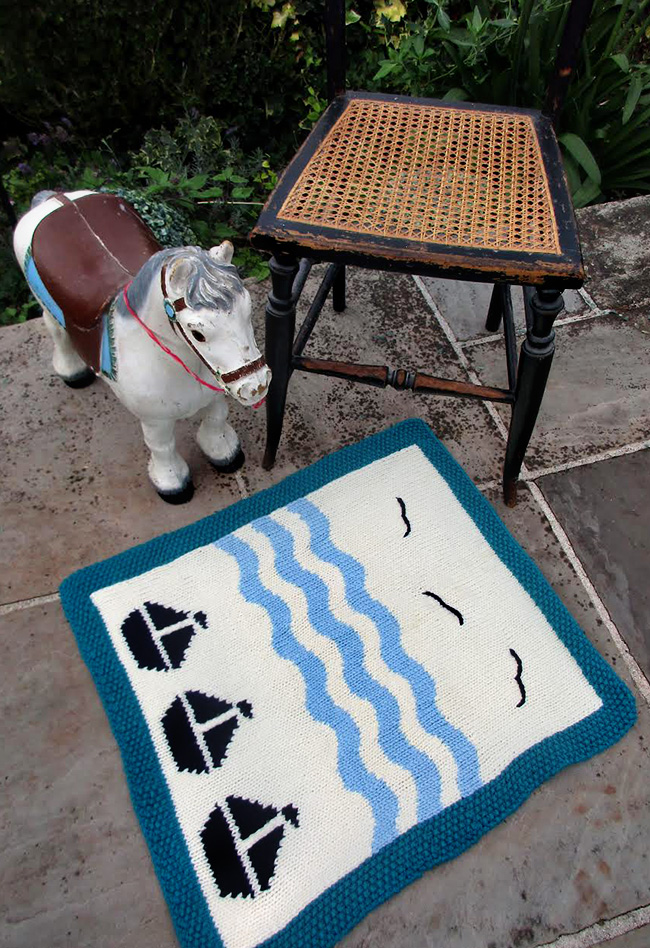
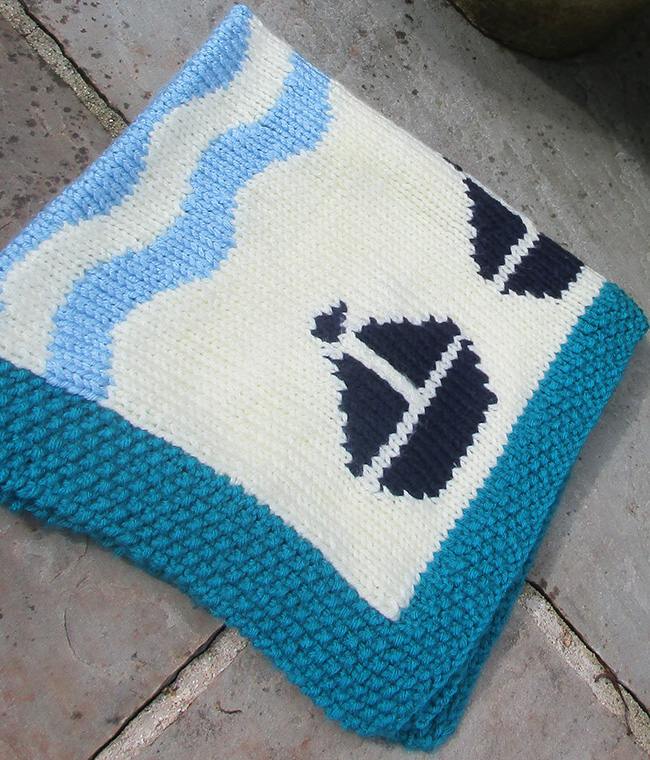
The technique also sneaks its way into the utterly charming Sailboat and Waves baby blanket in this issue.
Intarsia is a method for working larger blocks of color in a knitting project. It’s the exact opposite from Fair Isle/Stranded colorwork in two key ways: the size of the sections of color, and the way you handle the yarns.
We use intarsia when a section of color is so large it would be difficult to neatly carry or hide a second strand of yarn in the back, or when a color only appears in part of the fabric.
Oh, Josephine! is a perfect example of this… In the image below, you can see that the russet color is used only on the back, and only for one section of it. And it’s a big section.
Very distinct and very large sections of color.
There are four colors used in the body of the sweater – russet, pink, teal and olive, and each is worked only with its own ball of yarn.
We also use intarsia when there is a small, distinct section of one color – for example look at the ice cream cone on the Double Scoop sweater:
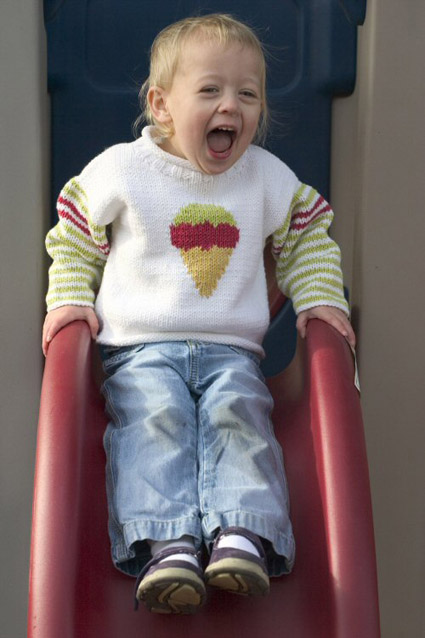
Small sections of color, each of which is only used at the center front.
Although you could strand the ice cream colors behind the white all the way across each row, there’s no point, as you only need them in the middle. It’s a waste of yarn, and it’s also hard to make it look tidy.
So we use separate balls of yarn. In Double Scoop, when working the cone and ice cream scoops of the motif, you’ll have a ball of the required motif color attached. You’ll pick it up and start working with it only when needed, and drop it when you’ve worked the required stitches. Knit with white up to where you are placing the motif, then pick up the required color – beige for the cone, pink and green for the scoops, depending where you are in the chart – work across with that, and drop that color when you’re done.
Work the white section with the white ball of yarn only, work the beige section with the beige ball of yarn only…
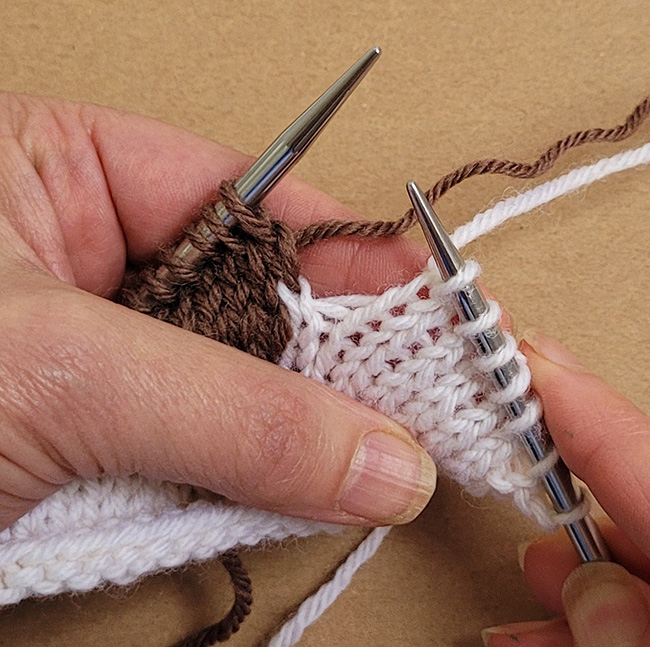
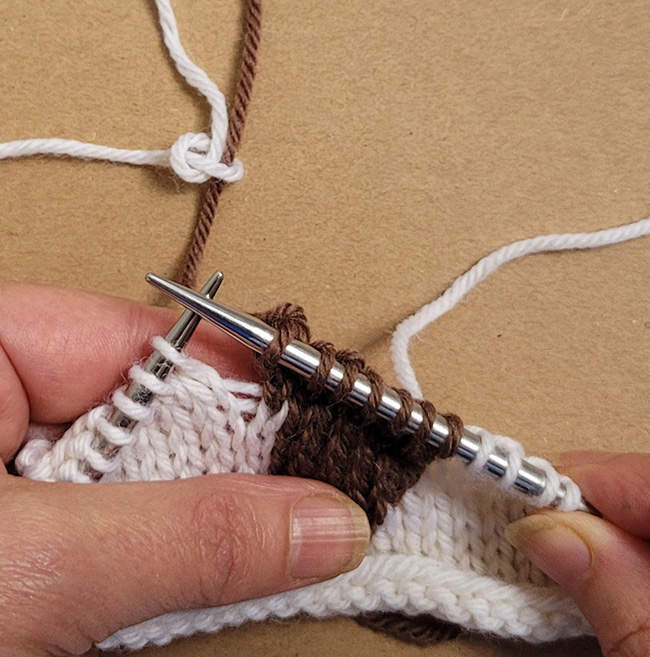
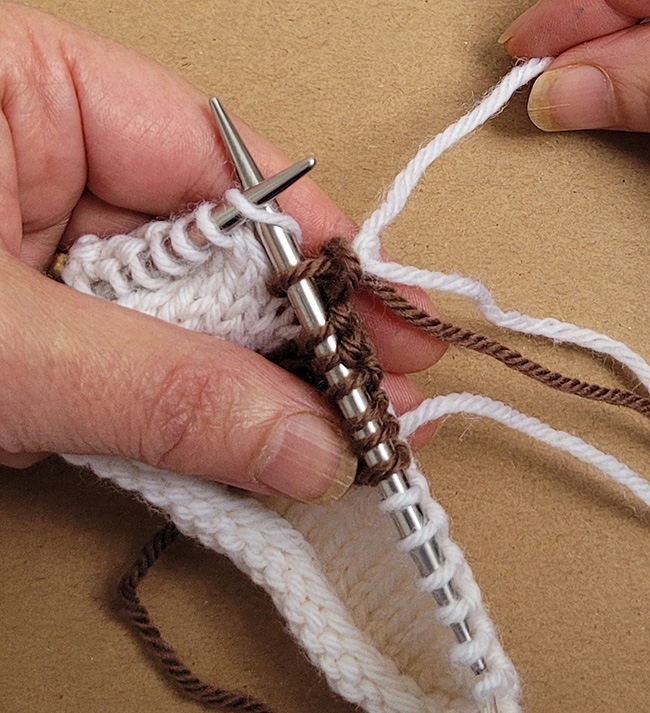
… but when changing colors, always twist the two so that you don’t have any gaps.
The somewhat interesting question is what happens with the white, the background color that appears either side of the motif.
When a color simply never occurs again in a row or round, as in Oh, Josephine!, we will have one ball for each color attached, and when we drop one and pick up the other, we twist the two around each other to prevent gaps, as shown in the photo above. There’s nothing magical about the twist,. You can go in either direction; you’re just catching the one yarn around the other.
When working the body, that means there are four balls of yarn attached. (Although note that it’s not always a full ball of yarn; it’s easier if you wind off a shorter length of yarn from the ball, and work with that. Certainly, for the ice cream cone colors, you’d only need a few grams of each. Either way, though, intarsia projects tend not to be wildly portable…)
(There’s a separate discussion here about working in the round. Intarsia is most easily worked flat, back and forth in rows because otherwise the working yarn is stuck at the end of the previous section of color etc etc. The Oh, Josephine! pattern provides information about how to work intarsia in the round.)
In the case of Double Scoop, however, you need the white on the other side of the motif. In the lower parts of the cone section, where it’s pretty pointy and there aren’t that many stitches in beige, the obvious solution is to carry the white across the back while working the beige, trapping the floats as you wish.
Since the beige section is small, it’s fine to strand the white across the back.
But when the beige section gets wide, you’ll actually get a better looking result if you attach a second ball of white yarn: work in white to the motif, drop that strand and pick up the ice-cream cone color, twisting the two around each other, work the ice cream, then drop that strand and pick up the second strand of white, twisting the two around each other.
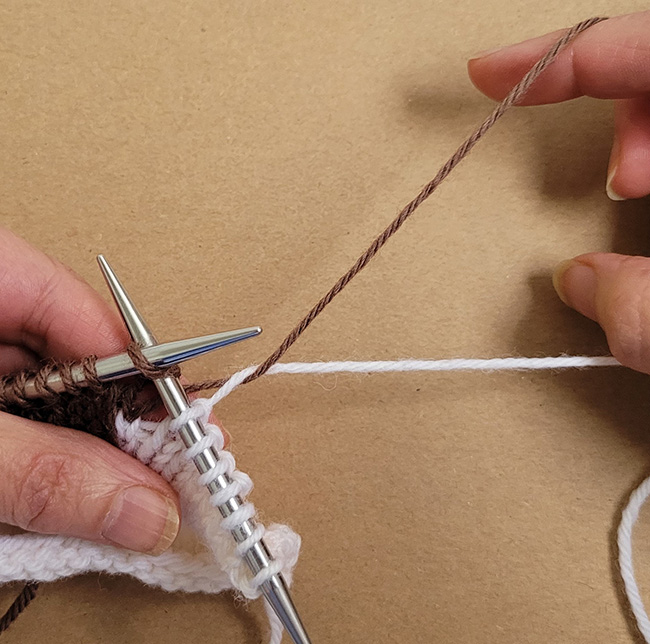
To attach a new ball of yarn, loosely tie the new strand around the strand you’ve just finished working with.
You’ll have one ball of yarn attached for each distinct section of color.
So when does it qualify as too wide to strand? There isn’t a hard and fast rule here. To some extent it depends on your preference. For me, if it’s getting to more than about 10 or 15 stitches, then I might consider it.
Which brings us to the Sailboat and Waves blanket. The Sailboat motifs are absolutely worked with the Intarsia method, as there is a lot of plain white fabric in between them. You need a separate ball of the dark blue for each boat. Do you need separate balls of white? Well, that’s an interesting question… and to answer it, let’s talk about the Waves pattern for a second.
In the upper and lower rows of the Waves pattern, there are between four and ten stitches in the MC between short sections of the contrast color.
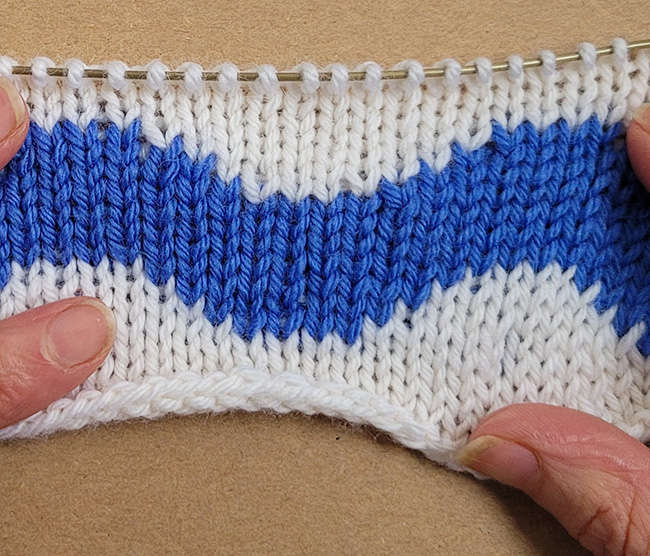
caption
Given that the motif is worked all the way across, the obvious approach would be to use Fair Isle techniques to work the two colors, keeping both attached and active across the rows. However, the designer used intarsia at those points, to keep the back of her work tidy and free of floats. Not only does it look tidier on the back, but this way, there’s no risk of baby fingers and toes getting caught in floats.
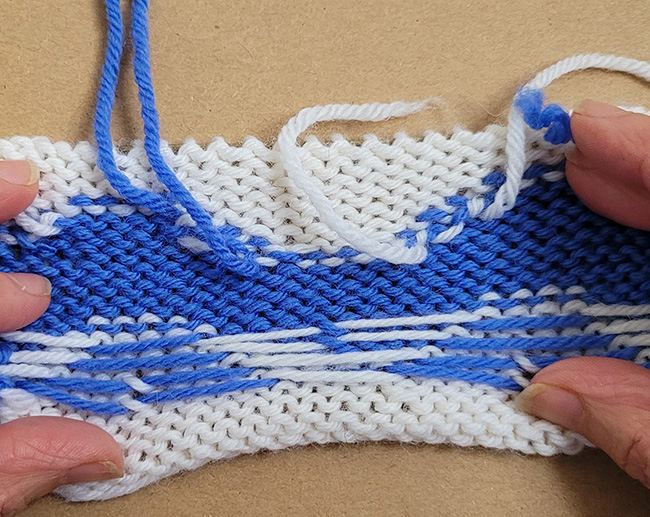
The lower 2-color rows of the waves chart were worked with the stranded colorwork method, using one ball of each color and carrying both across the entire row. The upper 2-color rows were worked with the intarsia method, using one ball of each color for each distinct section. The first method results in fewer ends to be woven in, but creates floats at the back that can catch baby toes and fingers; the intarsia method results in more ends to be woven in, but nothing for baby to get tangled up in.
There’s a huge difference on the back of the work, as you can see in the upper and lower sections of the sample in the photo above. The front looks the same, but the back looks very different.
You could absolutely work the Sailboats section with only one ball of white attached, but to reduce the floats, the designer chose not to.
Oh, and the birds? Since they are tiny sections of color, they’re actually done with my other favourite colorwork technique: duplicate stitch. That is, they are embroidered on after the knitting is done.
Not only is this baby blanket pattern utterly charming, but it’s technically very interesting! I hope you might consider knitting it.
ABOUT THE AUTHOR
 Kate Atherley is Knitty's Managing Technical Editor and a knitting author and teacher. The combination of her university degree in mathematics, professional experience in software development and usability, and training in garment and fashion design give her a unique perspective. She’s currently working on a book about Math for Knitters, due out in 2025.
You can see more of her work at kateatherley.com, and on Ravelry.
Text & images © 2024 Kate Atherley.