


NAME, a free knitting pattern from Knitty.com.
INTRODUCTION
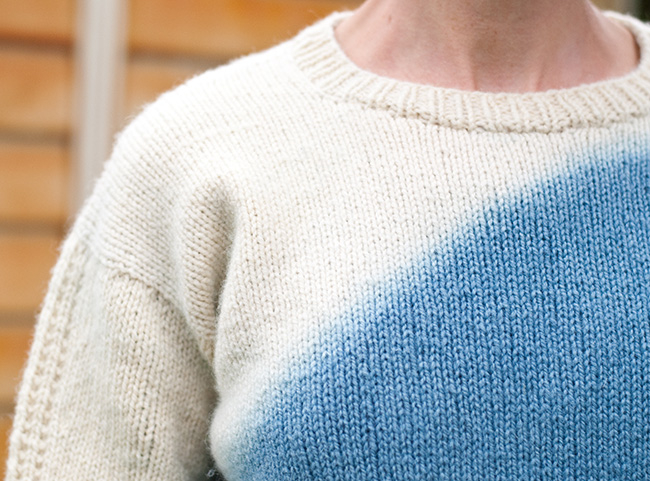
Indigo Dip Dye Tutorial for Mer Bleue Sweater
by Elizabeth and Debbie Sullivan
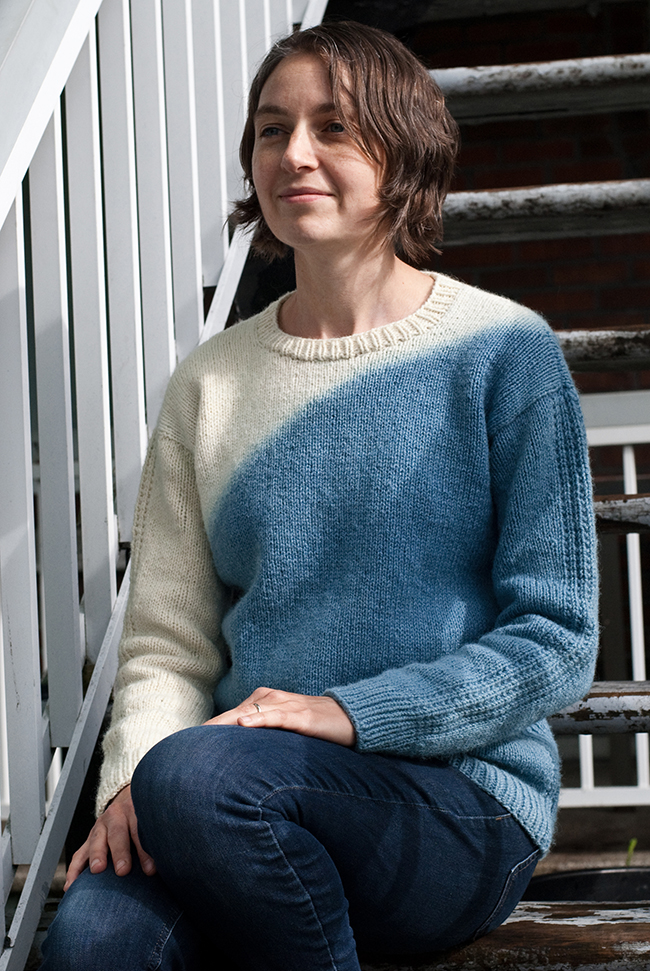
The magical process of indigo dyeing has been used to create blue textiles in cultures and traditions around the world since pre-historic times. In this tutorial we cover the dye process we used to create the asymmetric diagonal stripe featured in our Mer Bleue sweater pattern.
Indigo is a unique type of natural dye which requires a special process of creating a “living” vat through fermentation, and dipping your fibre or fabric into the vat multiple times to build up layers of colour. This process works especially well for a large project (such as our sweater) since the vat does not require heating (as many other dye types do), and the multiple dips create a beautiful gradient of colour at the dip line.
 photos: Debbie Sullivan


NOTES
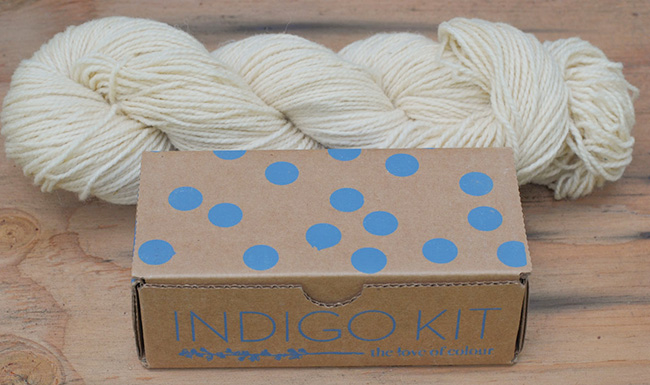
About the dye kit:
We used an Indigo Dye Kit from The Love of Colour, a small business focused on natural dyeing, based in Toronto, Ontario. There are many different approaches to dyeing with indigo. This kit uses a simple method to create a fructose vat and is designed to be approachable for beginners. If you’re an experienced indigo dyer, you could certainly use your preferred type of vat for this project, as long as the container is large enough to dip your sweater.
The kit contains full instructions for mixing and maintaining your vat, but we recommend also reading through these FAQs from the Love of Colour for additional information on dyeing with indigo.
We used the contents of just one kit for our indigo vat, but you may want to consider purchasing extra materials if you’re knitting a larger size, if you’d like a darker final colour for your sweater, or if you’re new to indigo dyeing and want to practice on some smaller pieces before dipping your sweater.
About the yarn:
The yarn we chose for this project is Winfield, a woolen-spun worsted weight wool, sourced from a small farm in southern Ontario. This type of yarn is particularly well suited to this project because the open structure of the fibres allows the dye to penetrate fully into the fabric of the sweater. If you’re using a yarn (or gauge) that creates a denser fabric you may notice white or light spots in between your knit stitches.
A woolen-spun yarn is also a good choice for this project because of the way it interacts with water. If you lift a wet woolen-spun yarn out of water, you’ll notice that the liquid immediately starts to drop to the lowest point, much more quickly that it would in a worsted yarn of comparable fibre. This means that if you slowly pull your sweater out of the indigo after each dip most of the liquid will remain in your vat, and you’ll maintain a more consistent dip line.
We also chose to wash our yarn very thoroughly before knitting, rather than attempting to scour the partially knit sweater. If you’re using a fibre that has a high lanolin content or contains residues of spinning oils, you’ll want to be especially careful to clean it thoroughly before dyeing it. If you’re dyeing a garment that has previously been worn, be aware that stains from grease, sweat or deodorant may not be noticeable before dyeing, but can significantly impact dye uptake and create unwanted dark or light areas.
About the pattern:
When designing Mer Bleue, we chose to use a modified drop-shoulder because the wider shoulder gives more room for error during the inexact dyeing process, so the dip line is less likely to end up in an odd place (which would be more of a risk with a raglan or set-in sleeve). You could use this technique on other patterns or projects, but you’ll want to choose a style that allows for some margin of error in the placement of the dip line, as the exact location is hard to predict. You may also want to choose a pattern that allows for knitting one sleeve and the collar after the dye process (as we did for Mer Bleue), to avoid any possibility of accidentally dyeing those parts of the sweater!
For our sweater, we chose to create a dye line that ran from about the mid-point of the left shoulder to a few inches under the right arm. You may want to mark the end points of your dye line placement while wearing the sweater (especially if you’re knitting a larger size), as the line will appear curved when worn if it’s too close to the drop shoulder seam.

MATERIALS
![]() Indigo kit (see note above), contains 25g indigo powder, 50g calcium hydroxide, 75g fructose
Indigo kit (see note above), contains 25g indigo powder, 50g calcium hydroxide, 75g fructose
![]() Partially knit sweater
Partially knit sweater
![]() Two large containers (approximately 40L) to use for your vat and rinsing bin
Two large containers (approximately 40L) to use for your vat and rinsing bin
![]() Rack or shelf that fits in the bottom of your vat
Rack or shelf that fits in the bottom of your vat
![]() Mask (for use when mixing powders)
Mask (for use when mixing powders)
![]() Stick for stirring your vat
Stick for stirring your vat
![]() Small container (for pre-mixing vat ingredients)
Small container (for pre-mixing vat ingredients)
![]() Dowel or stick for supporting sweater, approx 3 feet long
Dowel or stick for supporting sweater, approx 3 feet long
![]() Strong, smooth waste yarn
Strong, smooth waste yarn
![]() Blunt-tipped yarn needle
Blunt-tipped yarn needle
![]() Tailor’s chalk (optional)
Tailor’s chalk (optional)
![]() Measuring tape
Measuring tape
![]() Plastic bag or plastic wrap
Plastic bag or plastic wrap
![]() Clamps or clips
Clamps or clips
![]() Gloves (we used short nitrile gloves for mixing the vat, and long rubber gloves for dipping)
Gloves (we used short nitrile gloves for mixing the vat, and long rubber gloves for dipping)
![]() Drying rack
Drying rack
![]() Vinegar or lemon juice (to neutralize your sweater after dyeing)
Vinegar or lemon juice (to neutralize your sweater after dyeing)
DIRECTIONS
Step 1: Gather Materials and Make a Dye Plan
Dyeing with indigo can be very fun (almost magical!) but it does require some patience, and the process will take several days. It’s worth taking the time to gather all your materials in advance and plan where and when you’ll do each step so that you don’t run into hiccups along the way.
This is an ideal project to do outdoors, if you have the space and good weather! If you don’t have access to an outdoor space, you’ll need somewhere indoors that you can safely leave your vat for several days, and you may want to use a drop cloth or other floor protection as it’s hard to completely avoid drips. You’ll also need access to very hot water to make the vat.
For your vat, you will need a container large enough to hang your sweater in a straight line along the diagonal. We used a 40L storage bin, and we recommend looking for a bin that tapers towards the bottom, so that you have a wide opening at the top without diluting your indigo more than necessary. You may need a larger bin if you’re working with a larger sweater, or if you want a steeper/longer diagonal line. You will also need a similarly sized container for soaking/rinsing your sweater.
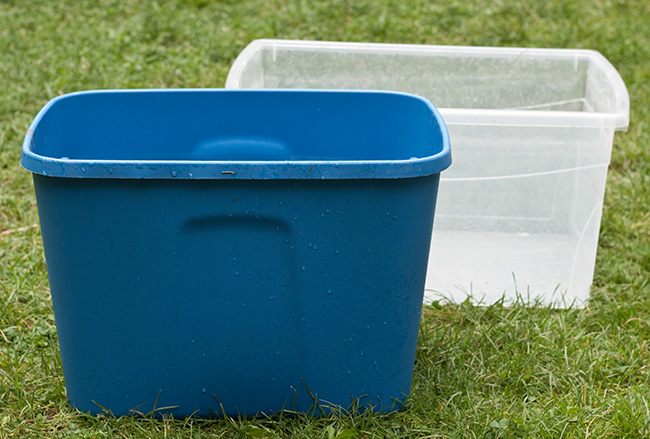
Front left is the bin we used for our vat, and our rinsing bin is shown behind on the right
We highly recommend finding some kind of rack that fits into your bin, to prevent the sweater from sitting in the sediment that will form at the bottom of the vat. We purchased a small baking rack from a thrift store, and added a canning jar ring under each corner to keep it from touching the bottom of the bin.

The bottom of the bin with rack placement
Step 2: Mix your vat
This step should be done at least one day before you plan to do your first dip. Mix your vat according to the instructions in the kit, using very hot water. Although the instructions didn’t specify to, we found that it helped to pre-dissolve each component in a small container before adding it to the vat (the indigo won’t really dissolve, but you make it into a slurry with a small amount of water).
The kit recommends using about 15-20L of water for your vat. We used a larger amount (about 25-30L) and you can use more if you need to, but a more diluted vat will mean that you’ll need to do more dips to get a deep shade. You’ll want to make sure that the surface of the liquid in your vat is close enough to the top edge of the bin that the dip line will be in a desirable place when you suspend your sweater from the sides of the bin.
You will need to stir your vat every 10-20 minutes during the first hour after mixing, and 3-6 more times throughout that day. If you’re dyeing over the course of several days you’ll want to stir your vat once a day or so on subsequent days. When the vat is ready to dye, the surface may be blue and slightly shiny, but the liquid underneath will be green. (If you’re using a dark-coloured bin you can scoop up some of the liquid to check.)
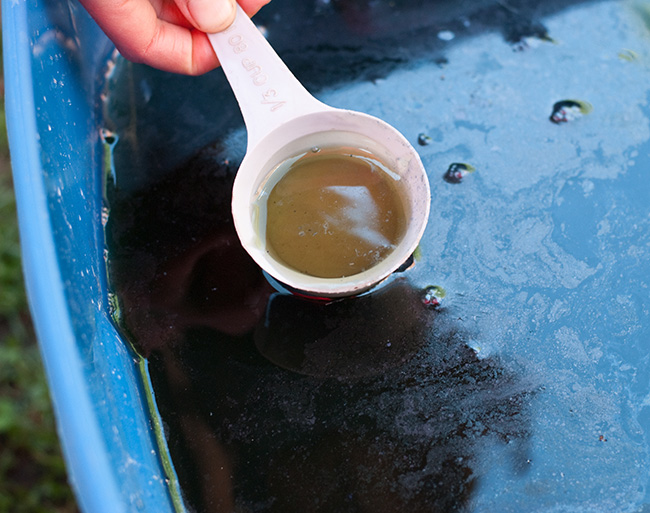
Checking the vat by scooping out some liquid
Step 3: Prepare your sweater
Once your vat is ready to go, you’ll need to prepare your sweater to be suspended over your bin, in order to achieve the diagonal dip line. To start, measure the distance from the top edge of your bin to the surface of the liquid. This will allow you to plan where to place the dowel that will support your sweater. Once you know the measurement (in our case about 4 inches), lay out your sweater and determine where you’ll need to place the dowel. We found it helpful to use an extra stick to mark where we wanted the dip line, and measure 4 inches from that to determine the dowel placement.
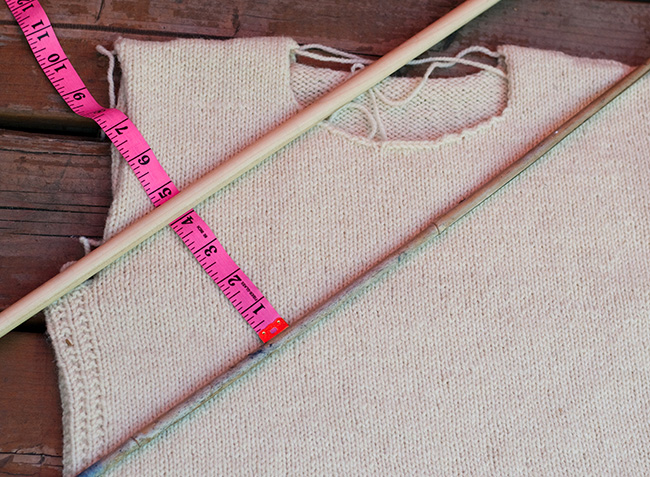
Measuring for the dowel placement
Once you’ve determined where to place your supporting dowel, you’ll need to attach it by sewing through both layers of your sweater, and around the dowel to secure it. We found it helped to mark the dowel placement with tailor’s chalk first. (If you do use chalk or any other type of marking, we recommend testing it on a swatch to make sure it will wash out of your fabric first!)
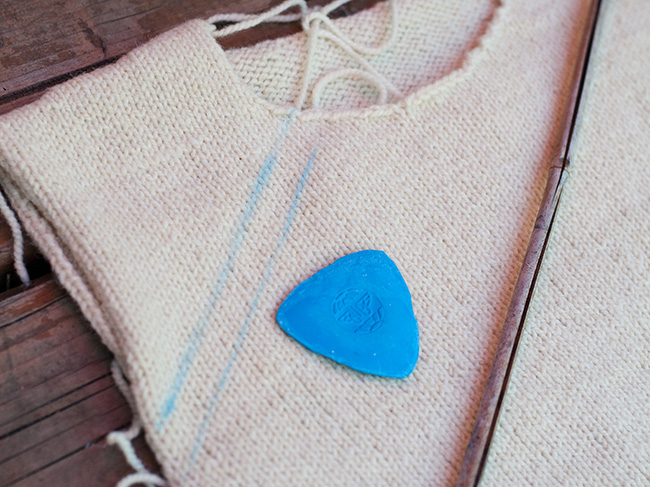
Marking the dowel placement with tailor’s chalk
With your blunt-tipped needle and smooth waste yarn, use large running stitches to secure the dowel to your sweater along the marked lines. Since part of our dye line was more than 4 inches away from the edge of the sweater we looped simply stitched through the edge of the sweater and looped the yarn around the dowel to maintain the line on the shoulder side.
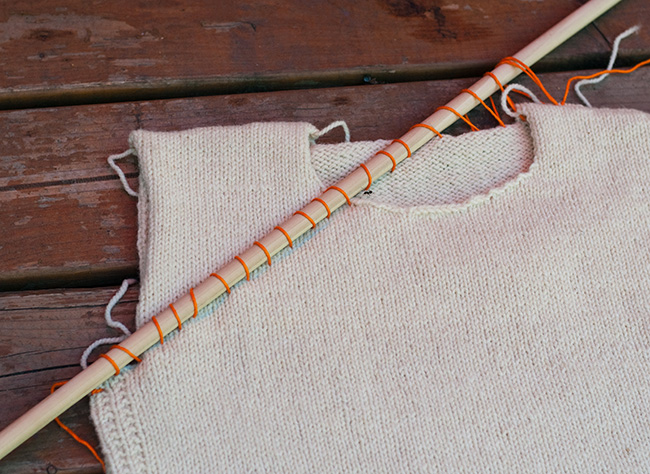
Attaching the dowel by sewing it to the sweater
Once your dowel is in place, use the plastic bag or plastic wrap to cover the unfinished shoulder of the sweater, to avoid getting accidental dye splashes on the section that you want to remain white. We used a large plastic bag, which we placed under the dowel, folded over the top of the sweater, and rolled tightly before securing it with clamps and zip ties.
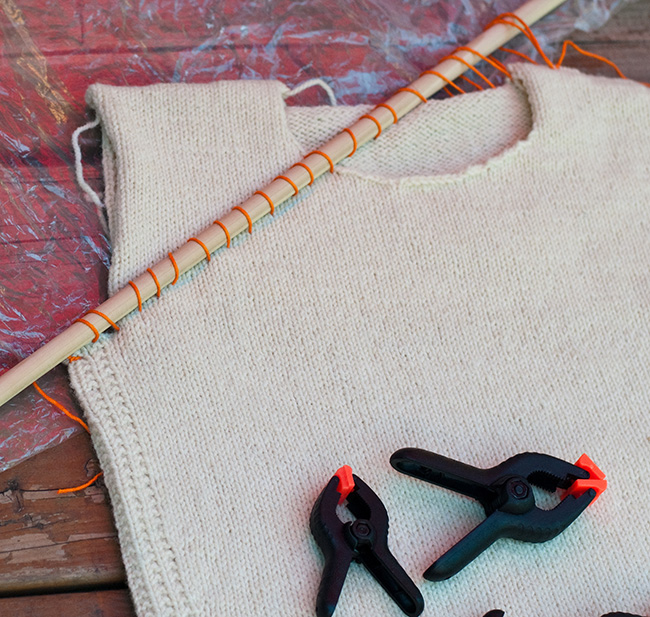
Placing the plastic bag under the sweater before wrapping
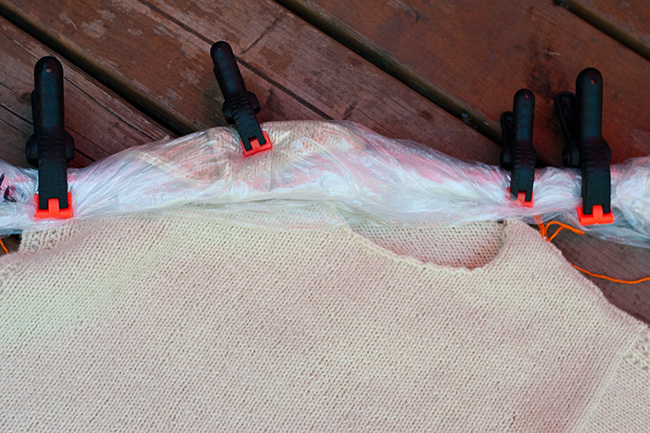
The wrapped and clamped dowel
Step 4: Start dyeing!
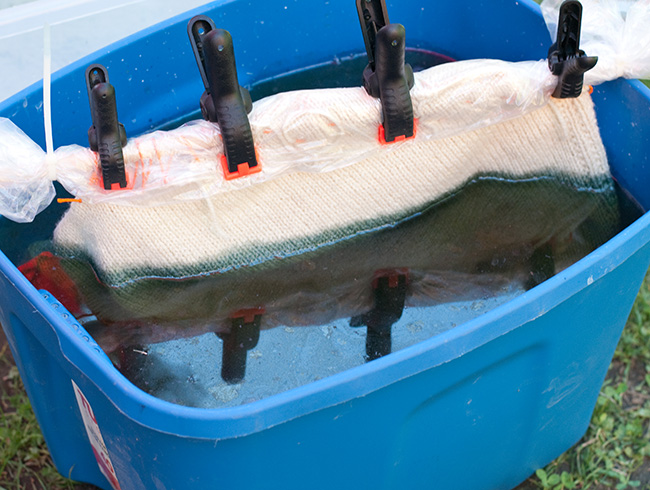
Before dipping your sweater into the indigo vat you’ll need to fully wet it by soaking it in clear water in your second large container. You’ll want the liquid in this bin to be a little higher than the vat itself, so the sweater is fully wet up to the dip line. It’s important to make sure that the wool is fully soaked through and not holding air bubbles before you dip it, since adding oxygen into the vat can cause it to stop working. You can also use this step to check the dowel placement and dip line, as the weight of the wet sweater may pull it down more than expected.
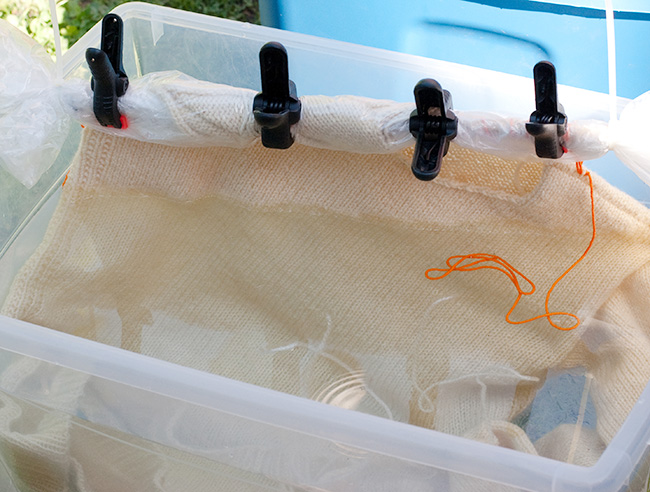
Soaking the sweater before dyeing
Once your sweater is fully soaked, pull it out of the water and gently dip it into your indigo vat. You want to work gently and try not to drip into the vat, as excessive splashing can also introduce too much oxygen and cause the vat to become inactive.
The first dip in the indigo vat
Keep your sweater submerged for at least 15 minutes, and up to 30 minutes. During that time, you can put on your gloves and gently move the sweater under the surface of the vat to ensure even dyeing.
When you’re done the first dip, very slowly pull the sweater out along the side of the bin, letting the liquid drain back down into the vat (you can squeeze it carefully if you want) and then lift it out to drip over your other bin (or the ground). DON’T let it drip back into the vat.
Your sweater should be a greenish colour, and will change to blue as it is exposed to air and the fibre is oxidized – the magic of indigo! We chose to dunk our sweater into the rinse bin before hanging it to finish oxidizing, as we found the reduced the amount of rinsing required at the end of the dye process.
Oxidizing after first dip
Leave your sweater to oxidize for at least 15-20 minutes and then repeat the process. Even if it’s still damp, you’ll need to soak your sweater in the rinse bin again before dipping (to make sure you’re not introducing air bubbles into the vat). After the first dip, the sweater will no longer appear green when removed from the bin, but instead will be a greenish blue. (You’ll likely see a decrease in the intensity of the colour change from each dip as the colour develops.)
.jpg)
Removing sweater from vat after 2nd dip
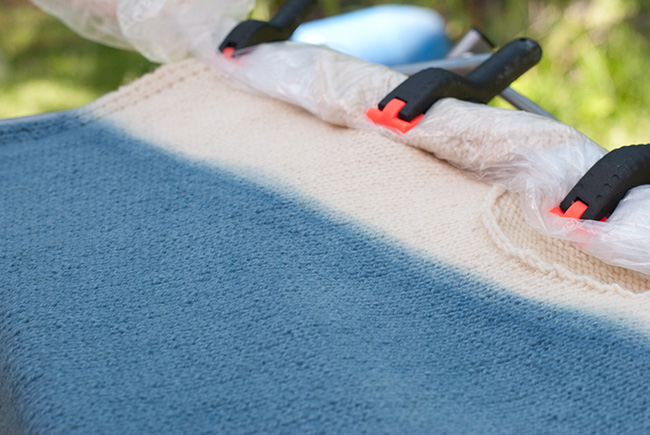
When you hang your sweater to oxidize between dips, we recommend supporting the sweater over a drying rack, rather than hanging it from the dowel, in order to avoid distorting the shape of the sweater. It’s also a good idea to give the rack a quick wipe between dips, to make sure you won’t end up with any accidental spots on the unprotected white section of the sweater.
Supporting the oxidizing sweater on a drying rack
Step 5: Continue Dipping and Oxidizing
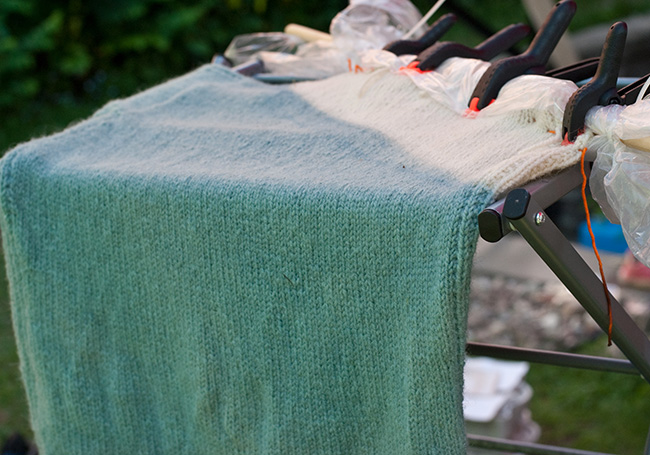
You’ll need to repeat the process of dipping and oxidizing your sweater at least a few more times. If you want a pale blue colour you may only need to dip it 3-4 times, but if you want to achieve the shade shown in our example you’ll need to dip it at least 8-10 times, which you may want to do over the course of several days.
Sweater after 5 dips in vat
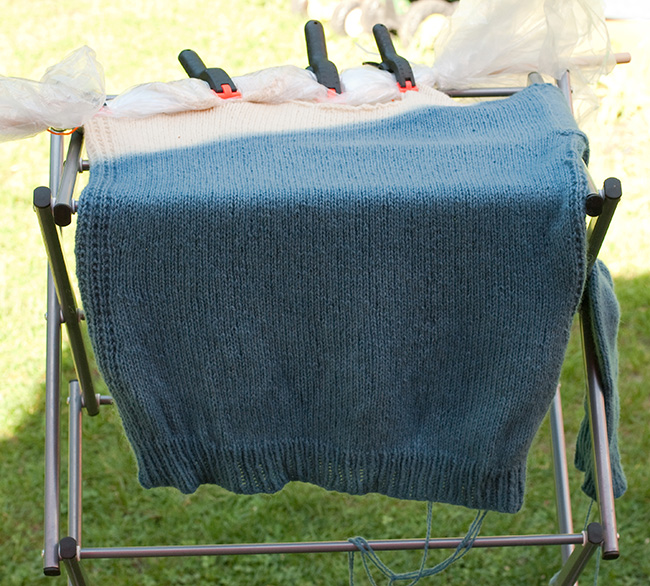
We dipped ours about 10 times, leaving it in the vat for at least 20 minutes and oxidizing for at least 30 minutes between dips. Remember that your sweater will be a few shades lighter after it dries, since wet fibre always looks darker.
.jpg)
Finished sweater, after 10 dips, before rinsing.
It is possible to achieve an even darker blue with indigo, but you will need to do more dips, and depending on how careful you are you may find that your vat stops working at some point. If the liquid starts looking blue rather than green, or you don’t notice an increase in darkness between dips, you can test the vat by dipping a few yards of white yarn. If the yarn doesn’t come out green and then turn blue after being exposed to air, your vat is no longer working properly. (If you’re an experienced indigo dyer you may be able to revive it by adding more calcium hydroxide or fructose.)
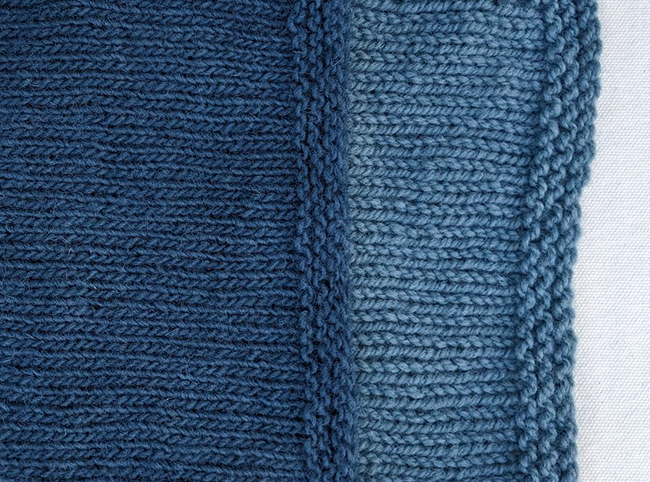
Swatches showing variation in shade: right swatch was dipped about 10 times, left swatch was dipped about 20 times.
Step #6: Rinse and neutralize your sweater
If possible, allow your sweater to oxidize for about 24 hours after the last dip before doing a final rinse. Rinse the sweater in clear water, and then neutralize it by soaking in a bin of water with about ½ cup vinegar (or the juice from 2-3 lemons or limes). This step is especially important to restore the ph of wool or other animal fibres.
Continue rinsing by soaking your sweater in clear water in your rinsing bin, suspended from the dowel, until the water remains clear. (This took about 4-5 rinses for our sweater.) We recommend drying it thoroughly at this point, and then removing the plastic wrap and dowel. You can then finish knitting the second sleeve and collar, and give the whole thing a last rinse when you wet block it. That way if there is any slight dye transfer onto the undyed areas it will affect the whole sweater and you won’t have a noticeable difference in colour between the body and sleeve.
ABOUT THE DESIGNERS
 Elizabeth and Debbie Sullivan are sisters and co-owners of Sweet Paprika Designs, a Montreal-based business specializing in hand-dyed yarns, kits, and knitting and crochet patterns. Their grandmother got them started on their crafting journeys by teaching them to knit when they were kids, and they've never looked back. They've delved into crochet, dyeing, spinning and weaving and a variety of other fibre crafts along the way, and their business grew out of their shared passion for creating beautiful things with yarn.
You can find all of Sweet Paprika's yarns and patterns on their website and connect with them on Facebook or Instagram.
Pattern & images © 2024 Elizabeth and Debbie Sullivan