




Fillamore, a free knitting pattern from Knitty.com.
INTRODUCTION
Fillamore
by Kate Harvie

The Great Kilt, feileadh mòr in Gaelic (pronounced fillamore, with emphasis on the last syllable), or belted plaid (pronounced plad) was part of traditional male Scottish Highland dress from about the end of the 16th century until 1746, when after the defeat of Bonnie Prince Charlie's Jacobites at Culloden, it was made illegal for men to wear unless part of the British army. The laws prohibiting such wearing were repealed in the 1780s, but by this time the suppression of the old clan system and of Gaelic language and culture meant that the belted plaid had fallen out of use.
Forget the modern kilt or clan tartans, which are early 19th century marketing inventions, the original garment would be made in whatever colours and checks were locally available to the weaver, and was a large piece of woven woollen cloth, about 54-60 inches wide and 4-7 yards long, which was gathered and fastened by a belt around the waist, with the lower part reaching to the knees and the upper part available to wrap around the shoulders and head, or held in position by a pin or brooch.
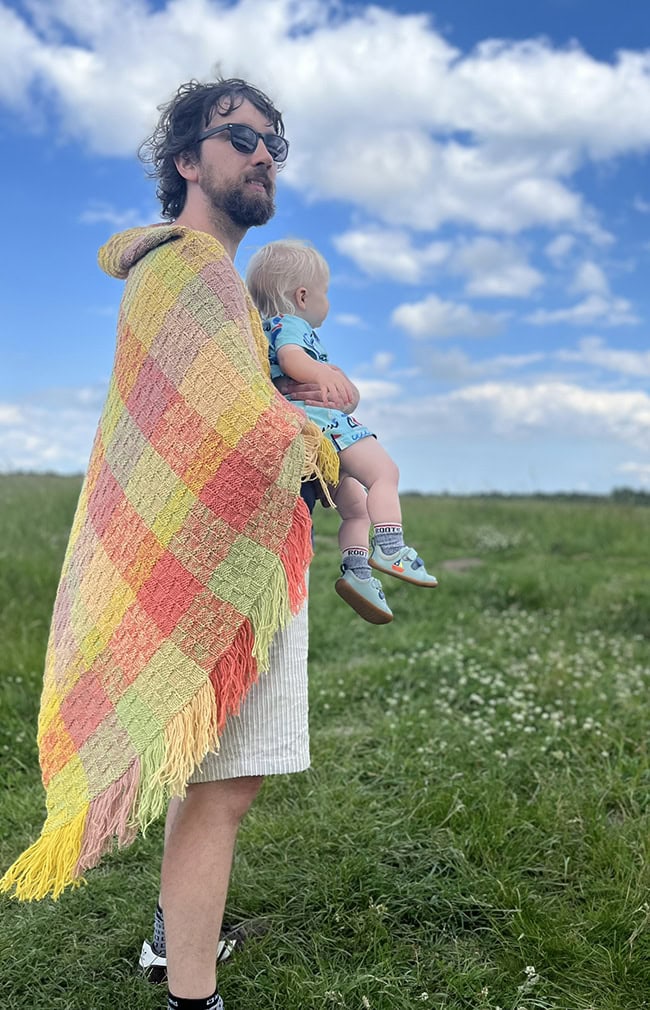
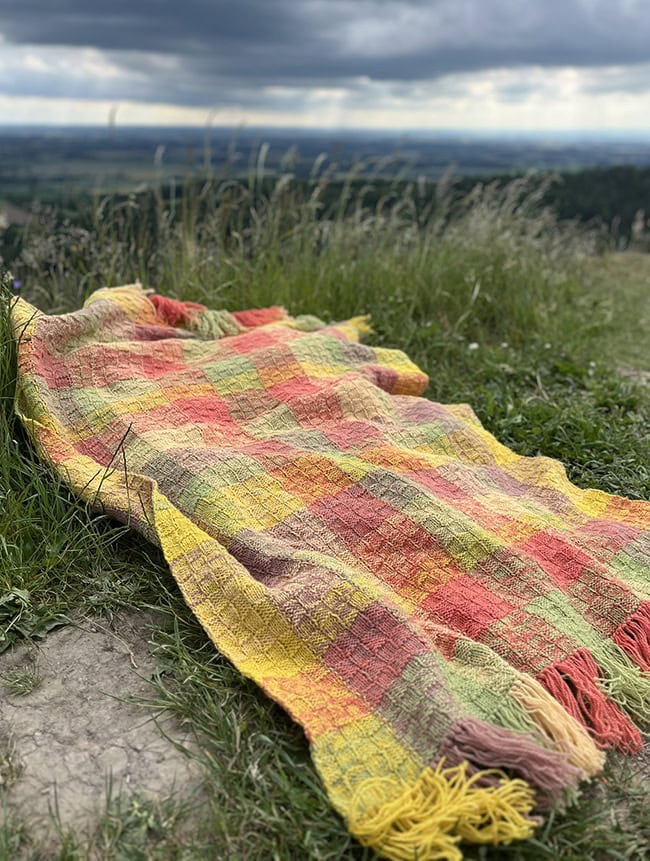
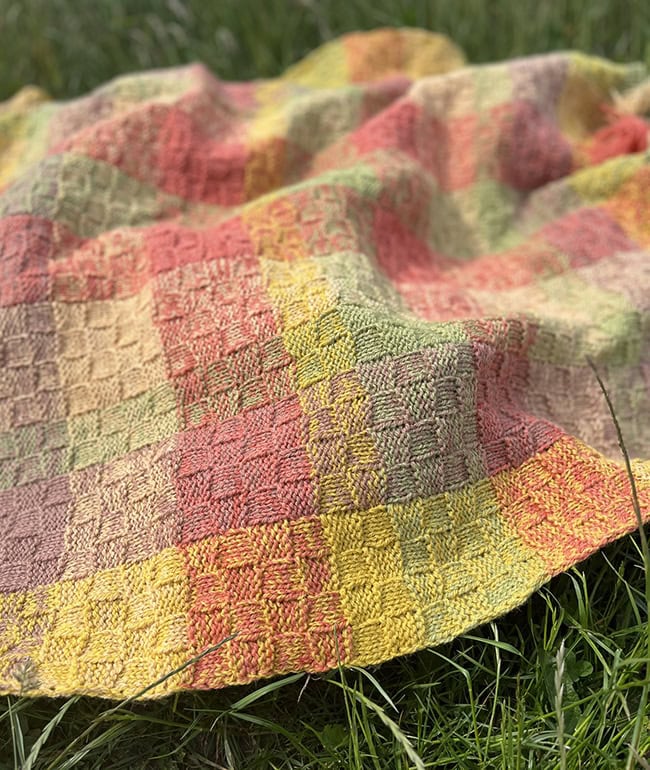
Anyway, that's the history lesson, now to the knitting. This is not a Great Kilt, but it is an attempt to make checks out of knitting, by working with two strands simultaneously, one strand making vertical stripes and the other making horizontal stripes. The result is a blanket that can be used for a baby, a great granny or anyone in between, without prohibition. The fabric is a simple basketweave pattern which makes the blanket completely reversible.
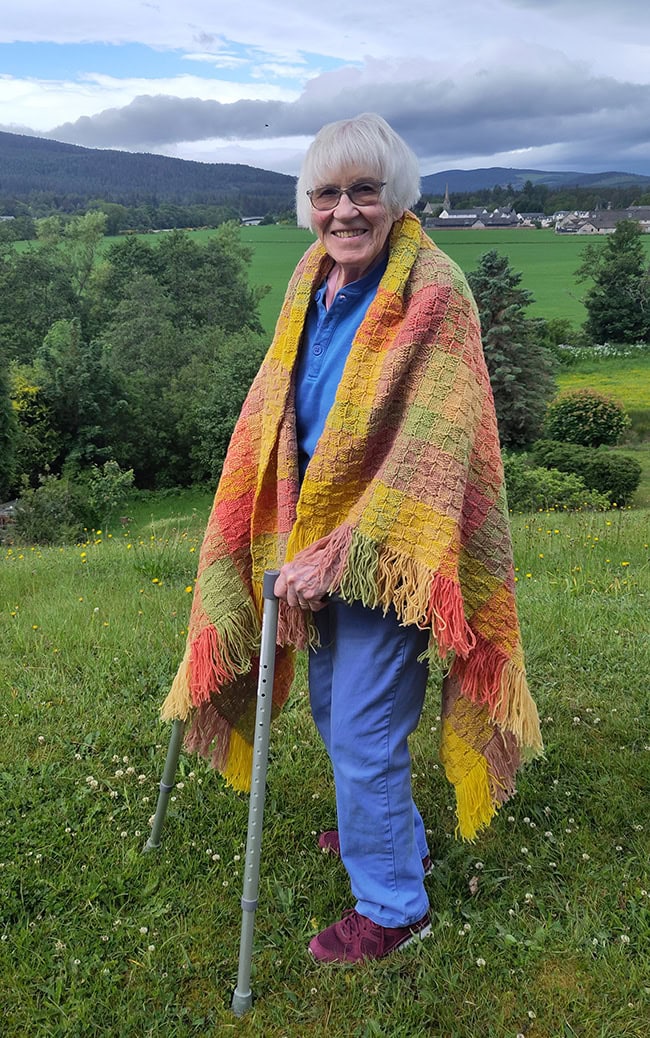
 model: Great Grandma, Dad, and R.
photos: Kate Harvie, Jess Hayward



SIZE
One size, but infinitely customisable by adding or removing horizontal or vertical stripes.
FINISHED MEASUREMENTS
Sample shown measures:
Width: 39.5 inches/100 cm
Length: 54.75 inches/139 cm excluding fringe
MATERIALS
Yarn
World of Wool Breiwick 4-ply [100% Shetland wool, 383 yds/350m per 100g skein], dyed by me using natural dyes either sustainably foraged or purchased.
[A] Sunshine Yellow, dyed using bog myrtle leaves (Myrica gale), 2 skeins.
[B] Mushroom, dyed using oakmoss lichen (Evernia prunastri), 2 skeins.
[C] Pale Apricot, dyed using bog myrtle, madder (Rubia tinctorum) and cochineal (Dactylopius coccus), 2 skeins.
[D] Coral, dyed using madder and cochineal, 2 skeins.
[E] Green, dyed using common reed (Phragmites australis), 2 skeins.
Commercially available pre-dyed yarn recommendation:
West Yorkshire Spinners Signature 4ply [75% wool, 25% nylon, 437yds/400m per 100g skein];
[A] 1001 Sunflower, 2 balls.
[B] 0530 Pennyroyal, 2 balls.
[C] 0240 Butterscotch, 2 balls.
[D] 0234 Honeysuckle, 2 balls.
[E] 0395 Chocolate Lime, 2 balls.
Note: These suggested colors are not an exact match to the colors used in the sample, but they should give a similar, balanced palette.
Yarn Characteristics
The sample is made in a pure two-ply Shetland yarn, which is on the heavier end of 4-ply weight. In US terms it might be described as Sport weight. It is similar in composition and handle to Jamieson's Spindrift or Jamieson and Smith 2 ply jumper weight. You can use any fingering or sport weight yarn which gives gauge and a fabric that you like, and solid or only slightly heathered colors will work best.
The suggested needle size for the yarn used in the sample is 3.25 to 3.75mm (US 3-5) which is different from the needles used in this project.
For reference, each 16 st by 24 row square uses approximately 22 yds/20m of yarn in total, or 11yds/10m of each color. For a blanket of this size worked at this gauge you will use around 3300yds/3000m of yarn, excluding fringe. You can work more or fewer vertical or horizontal stripes to make a blanket of any size.
Recommended needle size
[always use a needle size that gives you the gauge listed below - every knitter's gauge is unique]
US #8/5mm long circular needle, at least 32 inches/80 cm in length, but you will find it easier with a longer needle, especially as your blanket gets bigger.
Notions
a digital scale is recommended for dividing up the yarn
crochet hook US size D/3mm for placing fringe. Size not critical, but I found a 3mm hook did the job well
yarn needle
GAUGE
16.5 sts/24 rows = 4 inches/10 cm in stockinette stitch using yarn held double
16 sts/26 rows = 4 inches/10 cm in pattern stitch using yarn held double.
Note: Gauge is not critical in this project but working at a different gauge will result in a different finished item and will change yardage requirements.
PATTERN NOTES
[Knitty's list of standard abbreviations and techniques can be found here.]
Construction method: This blanket is worked flat in one piece, using yarns held double. Vertical stripes are made by changing colors every few stitches using intarsia, and horizontal stripes are made simultaneously by changing color every few rows. This gives a checked fabric without seaming.
Techniques:
You will always work with two balls at a time, one "warp" ball and one "weft" ball. The warp balls are swapped in and out using intarsia, and the weft balls are used one at a time across the entire width of the blanket, and changed after one or two pattern repeats according to the pattern instructions. Do not break yarns unless instructed to do so.
It is important to twist the warp yarns together every time you change color on every row, to avoid holes. The new color should be brought below and to the right of the old color. Because you have a large number of balls of yarn in use at once, it is important to ensure the yarns are untangled after every even numbered row. If you have the space, the easiest way to avoid tangles is to use center pull balls and place the yarns on the floor in order in front of you. You can put them in a cardboard box to keep them under control. When you work odd numbered rows the yarns will become twisted, but these should untwist when working even numbered rows. If the yarn is sticky you may need to shake or ease them out, starting at the left-hand side.
If you do need to untangle the yarns, start with the weft ball and then work from left to right across the other balls, with the work ready to start an odd numbered row.
It is also important to ensure that you don't mix up the warp and weft balls when changing weft colors. One suggestion to help with this is to put the weft ball into a distinctive dish or bowl and place it to one side.
CHARTS
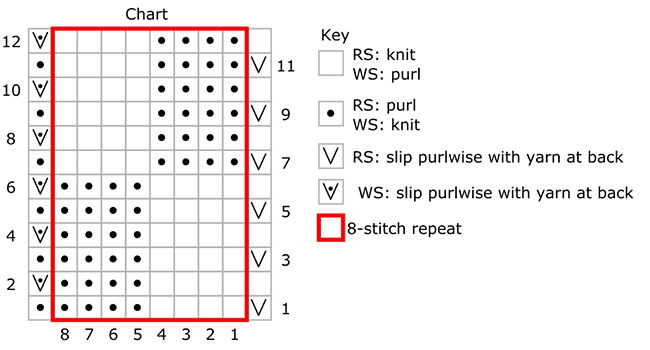
Woven Squares Pattern
Rows 1-6: S1p wyib, (k4, p4) to last st, p1.
Rows 7-12: S1p wyib, (p4, k4) to last st, p1.
DIRECTIONS
Prepare yarns
For yarns A, B, C and D, divide yarn into two equal parts. One part becomes the weft. Divide the other part into two equal sections, which become the warp balls. That is, the weft is half of the yarn, and the warp is the other half, which is divided into two equal parts.
For yarn E, divide the yarn as above, then take one of the warp balls and divide this also into two equal sections.
The easiest way to divide the yarn is by weight. If the yarn is in hanks or skeins which need to be wound before using, wind them off first, then wind half off onto a second ball, weighing regularly as you go.
Cast on, work first section.
Note: when casting on, leave a tail of at least 6 inches/15 cm of each yarn.
Take the large ball of A, and one of the smaller balls of A. Using cable cast-on, and both strands held together, cast on 17 sts. Set aside smaller ball of A and join in one of the small balls of B, cast on another 16 sts. Set aside B, take one of the smallest balls of E and cast on another 8 sts. Set aside E and join in one of the smaller balls of C, cast on another 16 sts. Set aside C and join in one of the smaller balls of D, cast on another 16 sts. Set aside D and join in the medium sized ball of E, cast on another 16 sts. Set aside E and join in the other small ball of D, cast on another 16 sts. Set aside D and join in the other small ball of C, cast on another 16 sts. Set aside C and join in the other smallest ball of E, cast on another 8 sts. Set aside E and join in the other small ball of B, cast on another 16 sts. Set aside B and join in the other small ball of A, cast on another 17 sts. Total 162 sts.
You are now set up to work the first section with all the warp colors in order, and using the large ball of A as the weft color.
Before working first row, set out warp yarns in front of you in order. It will help to put them in a line on the floor, or around the edges of a box (see photo below). Place weft yarn to your right if you hold your yarn in your right hand, to your left if you hold it in your left hand. It will help if the weft yarn is higher than the warp. I placed mine in a bowl on a side table on my right.
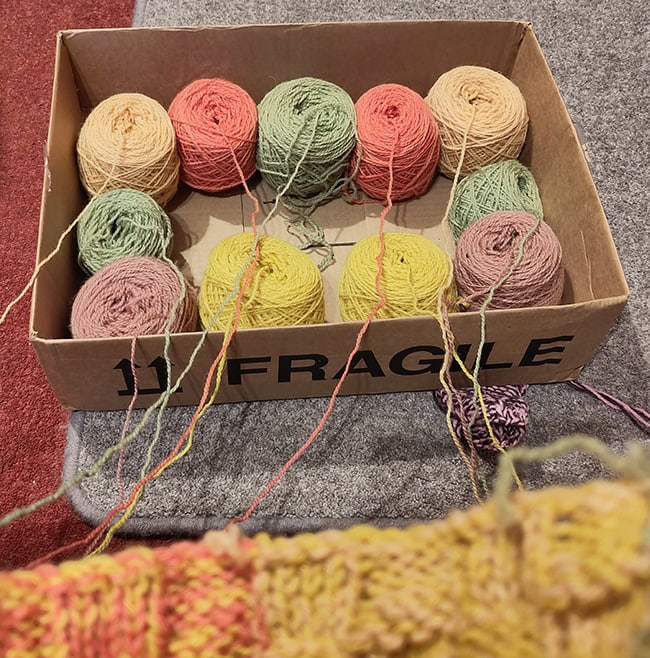
Row 1, setup pattern [RS]: Work Woven Squares Pattern across, swapping warp colors as you get to them (see notes below for guidance). Across your work you will have two repeats of A, two of B, one of E, two of C, two of D, two of E, two of D, two of C, one of E, two of B and two of A.
Work as set until you have completed Rows 1-12 of Woven Squares Pattern twice.
Advice on swapping colors:
Take particular care to identify the correct balls of yarn after you have been working with two strands of the same color.
Rows 1, 3, 5: Colors are changed at back of work. Work to point where you change color. Take both yarns to back. Lift up weft yarn out of the way, avoiding twists. Take old warp color down and to the left, and bring new warp color below and to the right of the old color. Continue work.
Rows 2, 4, 6: Colors are changed at front of work. When working first (slipped) st, take needle tip in front of weft yarn and behind warp yarn from right to left as in the illustration below. Work to point where you change color. Lift up weft yarn out of the way, avoiding twists. Take old warp color down and to the left, and bring new warp color behind and to the right of old color. Take weft color and new warp color to back, leaving old color at front of work. Continue work.
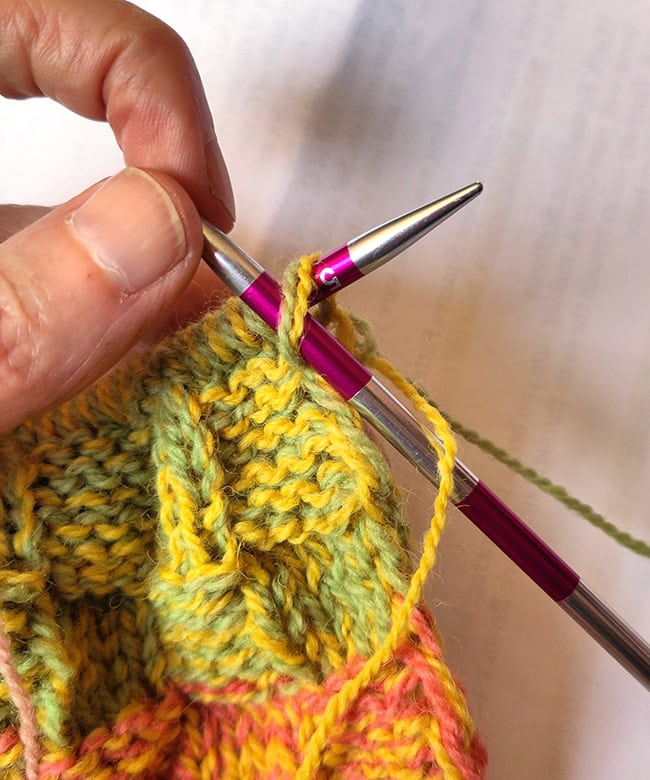
Rows 7, 9, 11: Colors are changed at back of work. Work to point where you change color. Lift up weft yarn out of the way, avoiding twists. Take old warp color down and to the left, and bring new warp color below and to the right of the old color. Bring weft color and new warp color to front, leaving old color at back of work. Continue work.
Rows 8, 10, 12: Colors are changed at front of work. When working first (slipped) st, take needle tip in front of weft yarn and behind warp yarn from right to left as in the illustration. Work to point where you change color. Bring both yarns to front. Lift up weft yarn out of the way, avoiding twists. Take old warp color down and to the left, and bring new warp color behind and to the right of old color. Continue work.
Remaining Sections
Break weft yarn Color A, making sure you break the correct ball. Join in large ball of B. The warp colors remain the same throughout. You can work the first few stitches with both weft colors together, to avoid having to sew in the ends later. Work Rows 1-12 of Woven Squares Pattern twice.
Work further sections as follows, changing weft yarn as indicated, and keeping warp yarns as set:
Break weft yarn B and join in E; work 12 rows (one pattern repeat)
Break weft yarn E and join in C; work 24 rows (two pattern repeats)
Break weft yarn C and join in D; work 24 rows (two pattern repeats)
Break weft yarn D and join in E; work 24 rows (two pattern repeats)
Break weft yarn E and join in A; work 12 rows (one pattern repeat)
Break weft yarn A and join in D; work 24 rows (two pattern repeats)
Break weft yarn D and join in C; work 24 rows (two pattern repeats)
Break weft yarn C and join in B; work 24 rows (two pattern repeats)
Break weft yarn B and join in E; work 12 rows (one pattern repeat)
Break weft yarn E and join in A; work 24 rows (two pattern repeats)
Break weft yarn A and join in B; work 24 rows (two pattern repeats)
Break weft yarn B and join in C; work 24 rows (two pattern repeats)
Break weft yarn C and join in A; work 12 rows (one pattern repeat)
Break weft yarn A and join in D; work 24 rows (two pattern repeats)
Break weft yarn D and join in E; work 24 rows (two pattern repeats)
Bind off as follows, using yarns as set: (p2tog, sl st from RH needle back to LH needle), rep until only 1 st remains, break all yarns, leaving a tail of at least 6 inches/15 cm, and fasten off.
Fringe (optional)
Cut 128 lengths of each color, each length about 12 inches/30cm long when stretched. The easiest way to do this is to wrap the yarn around a hardback book of appropriate size (I used a book about 7.5 inches/20 cm by 5 inches/13 cm and about an inch thick), and then cut the strands along the opening edge of the book. Cut an extra 4 strands of A.
You will attach the strands of yarn 2 at a time along each stitch of the cast-on and cast-off edges of the blanket, matching the appropriate warp color stripes.
Take two strands of yarn and fold them in half. Pass your crochet hook through a loop of the cast-on or cast-off edge of the blanket and draw the folded loop of the fringe through, then draw the ends through the loop and pull tight to fasten off. Repeat for each cast-on and cast-off stitch.
FINISHING
For each cast-on and cast-off yarn tail, thread onto yarn needle and weave into work so that the yarn tail is hidden in the fringe. Weave in any remaining yarn ends neatly and securely.
Soak blanket in warm water with a drop of dish washing liquid or woolly wash for 20-30 minutes, or according to the washing instructions for the yarn. How you do this will depend on the yarn you have used. Short spin or roll in towels to remove excess water, pull gently into shape, taking care to arrange the fringe neatly, and allow to dry flat. Do not pin or stretch.
Once blanket is fully dry, trim fringe to desired length, and snip off any protruding yarn ends.
ABOUT THE DESIGNER
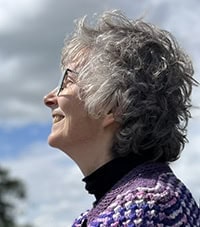 Kate has been a knitter and lover of anything woolly since childhood. She survived more than 40 years working in healthcare by playing viola, walking outdoors and knitting, hopefully not all at the same time. Since retirement in 2022, Kate has had a lot of fun trying vainly to reduce her stash, designing knitwear and playing with natural dyes in her garden shed. As well as a roomful of fiber and yarn, she has three grown-up children, a husband and a cat, and a growing number of grandchildren and granddogs. She lives in North Yorkshire close to the moors and the sea.
Find her on Ravelry and Instagram.
Pattern & images © 2026 Kate Harvie