


Onew, a free knitting pattern from Knitty.com.
INTRODUCTION
Onew
 by Fiberlous Designs

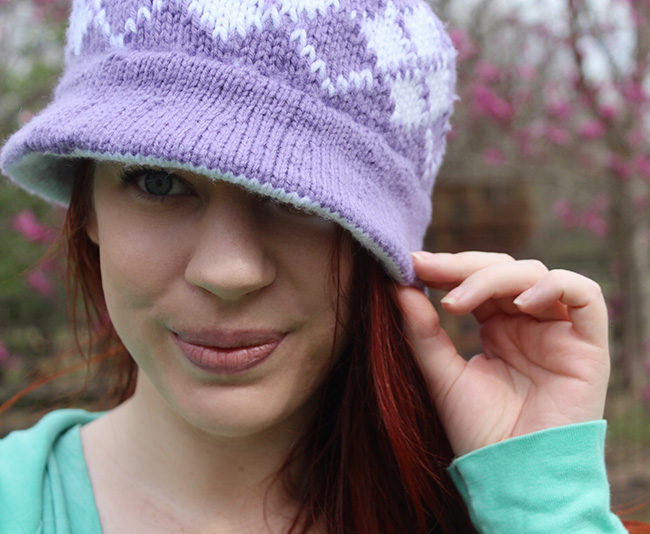
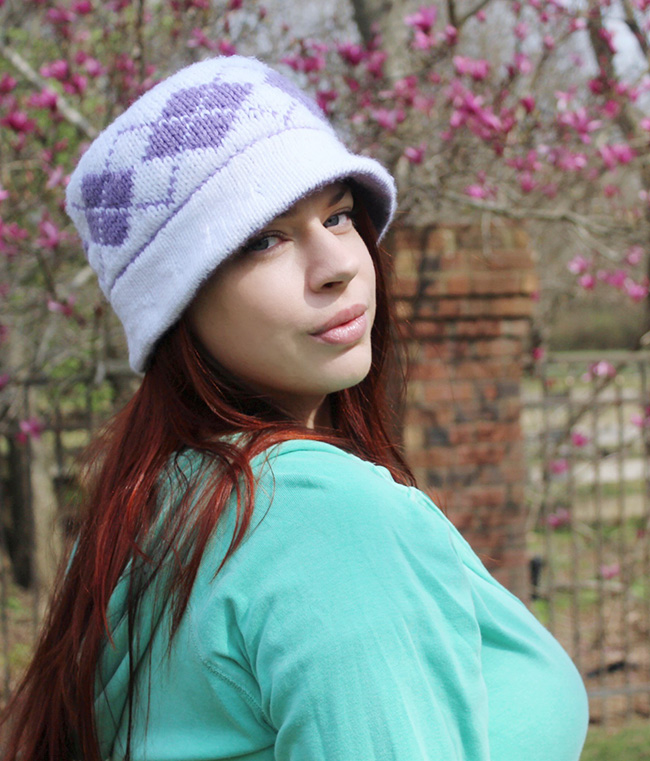
Onew is a reversible bucket hat with a double-knit argyle pattern. This design was inspired by street fashion, K-Pop fashion, and Onew from SHINee's lavender hair era.
I'm a better knitter than I am a seamstress, but sometimes I like to approach creating knitting patterns similar to creating something by sewing. This hat is completed in one piece, and it utilizes picking up and knitting stitches around bound off pieces to create shape and structure where seams usually would be.
As knitters, we are not beholden to seams, but they have their purpose. Seams create shape and structure to help a knit item hold its shape. So for this hat to achieve and hold that quintessential bucket hat shape even when stretched over the head, certain points of this pattern are created by binding off completely, then picking up and knitting to start a new section. Like piecing together cut out shapes in sewing, but without the scissors and pins.
Binding off the edges first helps prevent the knit fabric from stretching too much and losing its shape, and picking up and knitting along the bound off edges sandwiches the edges inside the new layer of fabric, providing a little bit of bulk and structure along these faux “seams” to help achieve the shape as well. Along the brim especially, the bulk inside the seam helps encourage the brim to flare out, like you'd expect with a sewn bucket hat.
It's the best of both worlds: the shape and structure of seams, but the convenience of in-the-round knitting.
Double knitting colorwork is a perfect match for this pattern. Because you carry both strands across the entire round, even large color work sections are a breeze. Then add in the fact that double knitting is reversible, and it's like getting two hats in one!
 model + photos: Fiberlous


SIZE
Small[Large]
FINISHED MEASUREMENTS
Hat body: 20 inches/51 cm [24 inches/61 cm] circumference
Note: Choose the size closest to 1 inch larger than your actual head circumference. When between sizes, size up rather than down. The fit can also be adjusted around the brim by pulling the sewn bind off tighter or looser to your personal preference – see Finishing.
MATERIALS
Yarn
Loops & Threads Impeccable [100% acrylic; 285yd/260m per 4.5 oz/127.5g skein];
![]() [CC1] White; 1 skein (around 150 yds used)
[CC1] White; 1 skein (around 150 yds used)
![]() [CC2] Lavender; 1 skein (around 150 yds used)
[CC2] Lavender; 1 skein (around 150 yds used)
Yarn Characteristics
![]() The sample shown uses an aran-weight acrylic yarn, worked at a tighter gauge for more structure and a denser fabric. Cotton and cotton-blend yarns would also be a great choice for summer weather, and wool or mohair-blend yarns could create a warm, cozy look for fall or winter months.
The sample shown uses an aran-weight acrylic yarn, worked at a tighter gauge for more structure and a denser fabric. Cotton and cotton-blend yarns would also be a great choice for summer weather, and wool or mohair-blend yarns could create a warm, cozy look for fall or winter months.
Recommended needle size
[always use a needle size that gives you the gauge listed below - every knitter's gauge is unique]
![]() US #5/3.75mm needles for small circumference in the round
US #5/3.75mm needles for small circumference in the round
![]() US #5/3.75mm circular needle for working in the round and holding stitches, 16-20 inch/40-50cm.
US #5/3.75mm circular needle for working in the round and holding stitches, 16-20 inch/40-50cm.
![]() 2 other circular needles in a similar length and size for picking up and holding stitches
2 other circular needles in a similar length and size for picking up and holding stitches
Notions
![]() USF-5/3.75mm crochet hook for casting on
USF-5/3.75mm crochet hook for casting on
![]() stitch marker needle
stitch marker needle
![]() yarn needle
yarn needle
GAUGE
20 sts/30 rounds = 4 inches/10 cm in stockinette stitch
16 sts/26 rounds = 4 inches/10 cm in double knitting
PATTERN NOTES
[Knitty's list of standard abbreviations and techniques can be found here.]
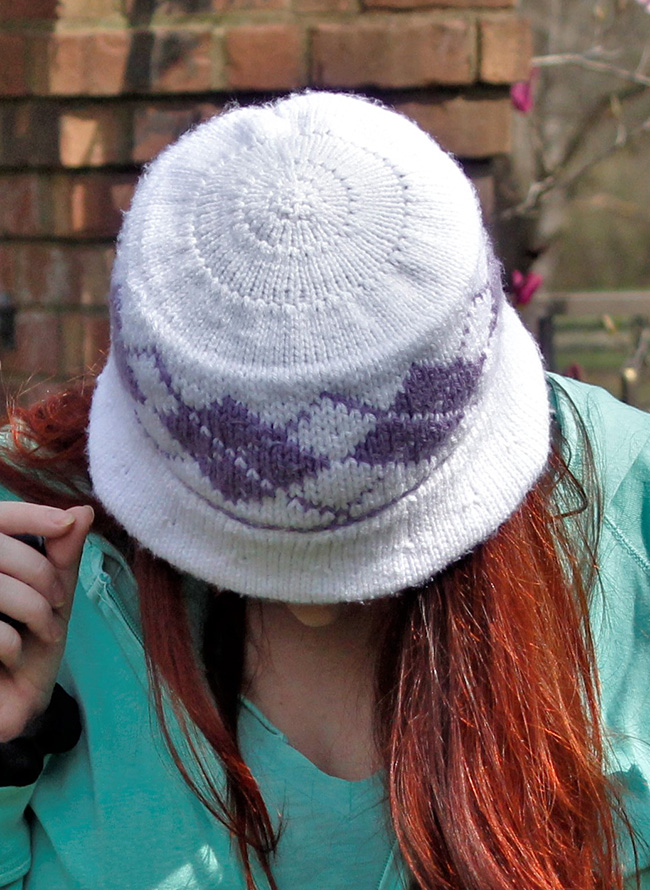
Construction Method: This hat is knit in the round from the top down, created with two crown base pieces being picked up and knit to create one, seamless piece that is double knit in the round. The brim is folded and attached to the body of the hat using a sewn bind off.
Techniques:
Pinhole Cast On
Stitch by Stitch Hem Sewn Bind Off
Working Double Knitting
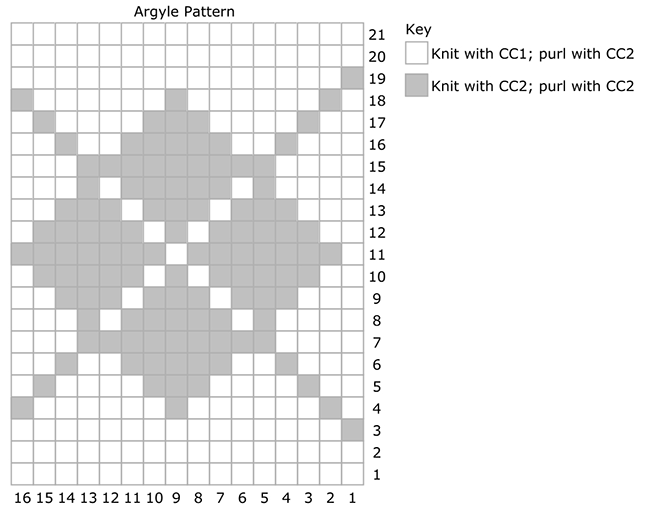
Double knitting is a technique that simultaneously creates a double-sided fabric that appears as stockinette on both sides. This pattern uses it to create a negative image on the inside of the hat. To achieve this, both yarns are used for each round, and each square in the chart corresponds to two stitches – one on the facing side of the fabric which is knit and one on the inside of the fabric which is purled.
CC1 square on chart: move both yarns behind the work, K1 with just CC1. Then move both yarns to the front of the work, P1 with just CC2.
CC2 square: move both yarns behind the work, K1 with just CC2. Then move both yarns to the front of the work, P1 with just CC2.
On Binding Off and Picking Up and Knitting
This pattern calls for you to bind off stitches, and then pick up and knit stitches along the same edge. You might be tempted to skip this – don't! Picking up and knitting after binding off instead of simply continuing without binding off first, results in a virtually invisible way to continue the fabric around the angle of the crown to achieve that flat top. The bound off edges hidden inside the “seam” also help maintain that round, flat top that evokes a sewn bucket hat, instead of the more rounded shape that conforms to your head that you'd associate with a knit hat.
CHARTS
DIRECTIONS
Crown Pieces
Using CC1, the crochet hook, and the pin-hole cast on method, CO 5[6] sts.
Distribute them across needles for small circumference and join for working in the round. Mark start of round.
Round 1: Kfb around. 10[12] sts.
Knit 2 rounds.
Round 4: Kfb around. 20[24] sts.
Knit 2[3] rounds.
Next round: Kfb around. 40[48] sts.
Knit 4[8] rounds.
Next round: Kfb around. 80[96] sts.
Knit 8 rounds.
Bind off all sts, but do not cut yarn. Note: this necessitates bringing the entire ball of yarn through your final stitch/loop. If it's easier, just cut the yarn and then rejoin it when you pick up and knit around the border.
Using CC2, make a second piece exactly the same.
Set Up for Double Knitting
For both crown pieces:
Using a US 5/3.75mm circular needle and the working yarn still attached from binding off, pick up and knit into every stitch around the bind off edge. 80[96] sts total. Leave live sts on the needle.
Hold the two crown pieces with wrong sides together with the CC1 piece upmost, and line up the beginning of the rounds so that both left-hand needle tips are pointing to the right, positioned as if to start working the CC1 side.
Using a third US 5/3.75mm circular needle, transfer the live stitches from both crown pieces to the third needle, slipping them purlwise, alternating with one stitch from the CC1 crown piece and then one stitch from the CC2 crown piece.
When this is complete, you will have 160[192] sts on the working needle. Place marker for start of round.
The Body
Round 1: Work Argyle Pattern chart 5[6] time around.
Continue as set until chart is complete.
Working with only the CC2 yarn, leaving the CC1 yarn still attached at the beginning of the round, bind off as follows:
Knit the next two stitches (one from the CC1 side and one from the CC2 side) together; *knit the next two stitches together; return these two sts to the left needle and knit them together through the back loop; repeat from * until all sts have been worked. Break CC2 yarn, and pull through the remaining st to finish the bind off.
Brim
Using the circular needle, the attached CC1 yarn, and with the CC1 side facing, pick up and knit 80[96] sts into the holes created by the bind off. Place BOR marker and join for working in the round.
Teen Size
Round 1: (K4, kfb) 5 times, (k5, kfb) 5 times, (k4, kfb) 5 times. 95 sts.
Rounds 2-6: Knit. (5 rounds)
Round 7: K3, (LLI, k6) 5 times, (LLI, k7) 4 times, (LLI, k6) 5 times, LLI, k4. 110 sts.
Rounds 8-18: Knit. (11 rounds)
Cut CC1 and switch to CC2.
Rounds 19-29: Knit. (11 rounds)
Round 30: K3, (k2tog, k5) 5 times, (k2tog, k6) 4 times, (k2tog, k5) 5 times, k2tog, k3. 95 sts.
Round 31-35: Knit. (5 rounds)
Round 36: K3, (k2tog, k4) 5 times, (k2tog, k5) 4 times, (k2tog, k4) 5 times, k2tog, k2. 80 sts.
Adult Size
Round 1: (K4, kfb) 3 times, (k5, kfb) 11 times, (k4, kfb) 3 times. 113 sts.
Rounds 2-6: (5 rounds)
Round 7: (K6, LLI) 3 times, (k7, LLI) 11 times, (k6, LLI) 3 times. 130 sts.
Rounds 8-18: Knit. (11 rounds)
Cut CC1 and switch to CC2 yarn.
Rounds 19-29: Knit. (11 rounds)
Round 30: (K5, k2tog) 3 times, (k6, k2tog) 11 times, (k5, k2tog) 3 times. 113 sts.
Rounds 31-35: (5 rounds)
Round 36: (K4, k2tog) 3 times, (k5, k2tog) 11 times, (k4, k2tog) 3 times. 96 sts.
Sewn Bind Off
Fold the brim so the purl sides are touching, and the bottom side of the brim meets its matching color on the main body.
Align the start of round to its corresponding stitch from the main body bind off.
Cut a long tail of the working yarn, about 3 feet/90cm long, and thread it onto a tapestry needle.
Using the contrasting (CC2) purl bumps visible just above the bind off ridge, join the live edge to the base of the hat as follows:
Setup: Thread the working yarn tail under a CC2 purl bump from bottom to top.
- Bring the working yarn under the CC2 purl bump directly to the left from top to bottom.
- Slip the first stitch off the left-hand needle with the working yarn as if to knit.
- Bring the working yarn through the next stitch on the left-hand needle as if to purl, but leave the stitch on the needle.
- Bring the working yarn under the same purl bump from step 2 from bottom to top.
- Pull the working yarn to tighten up the stitches.
Repeat these 5 steps across the circumference of the hat. Adjust the fit of the hat around the brim/forehead by either pulling the bind off tail tighter or gently tugging around the sewn bind off to achieve more slack before weaving in the end. Cut yarn, leaving a tail long enough to weave in. Weave in ends.

FINISHING
To block, gently steam. Optionally, use a round, flat object like a plate or circle of cardboard or foam cut to measure 5 inches/12.5cm[6.5 inches/16.5cm] diameter to shape the top of the hat.
Weave in and secure tail, hiding the end inside the brim.
ABOUT THE DESIGNER
 Most of Fiberlous' designs are driven by curiosity and experimentation. Sometimes too focused on whether or not she could, she doesn't stop to ask herself if she should. When she's not knitting or dreaming up another design, she's cuddling her furbaby or writing yet another bullet-point list somewhere.
You can find her on Ravelry as Fiberlous.
Pattern & images © 2023 Fiberlous Design