Rabbitduck, a free knitting pattern from Knitty.com.
INTRODUCTION
Rabbitduck
by Cissy Yao
![]()
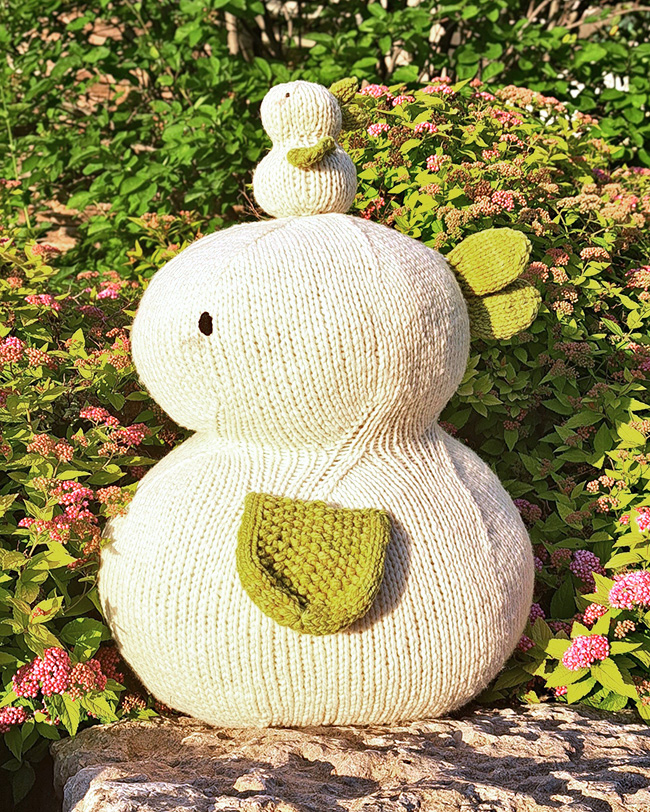
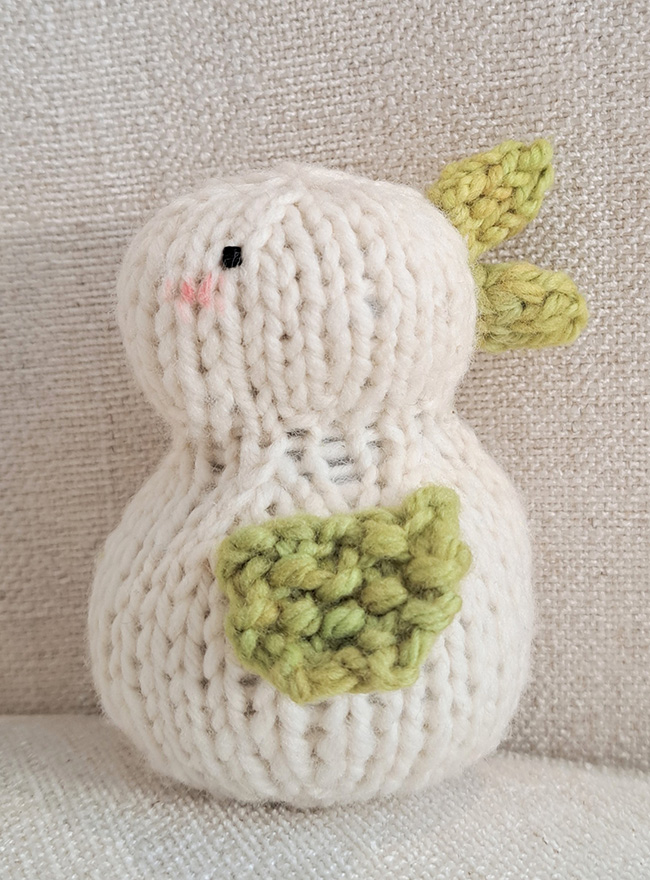
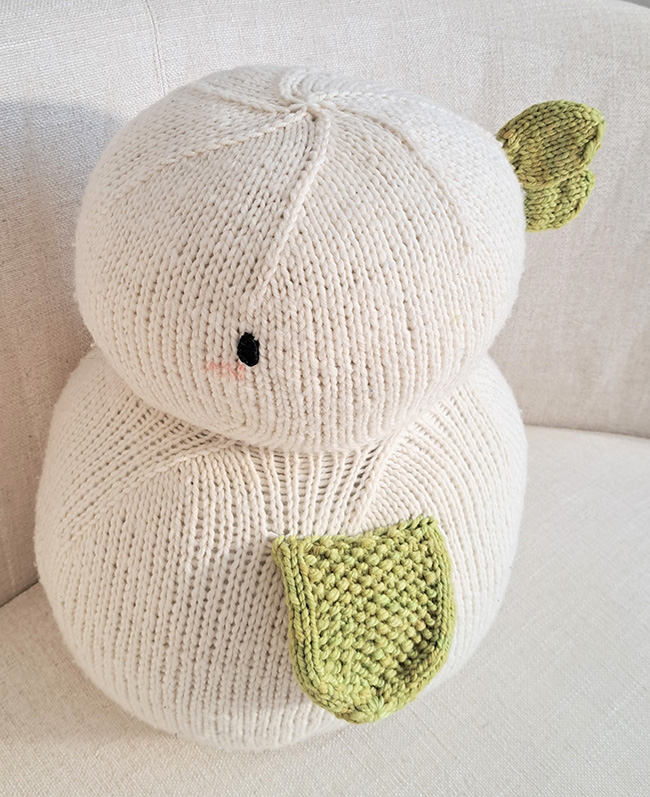
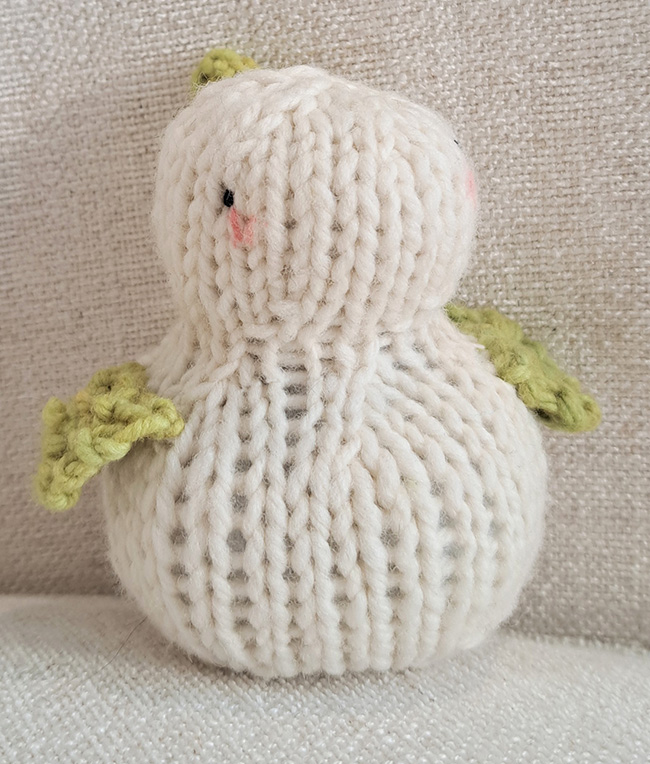
This chunky knitted fellow looks just like a duck! Or maybe a rabbit. Hm. Maybe both, or maybe neither? The rabbitduck is its own lovely creature and is cute either way!
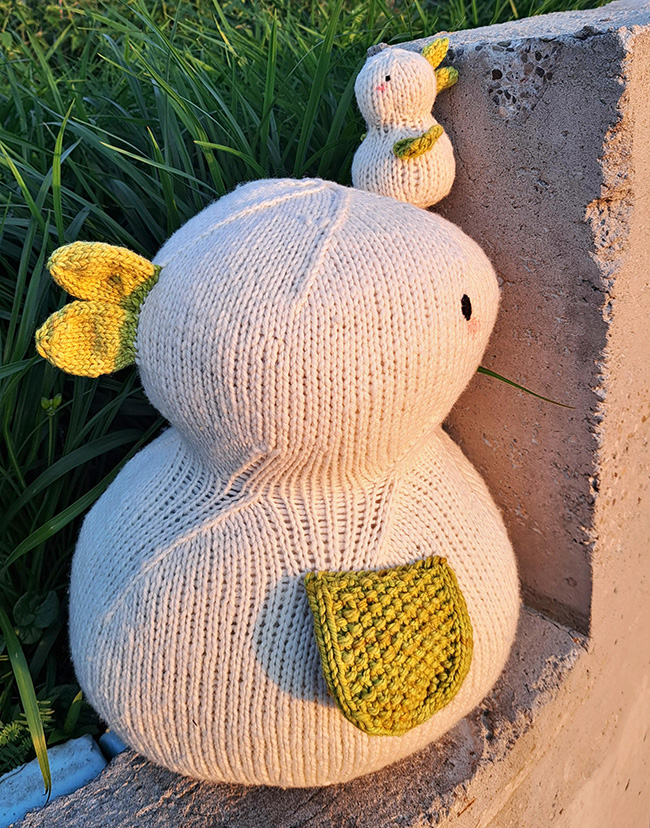
This furry and/or feathery friend works up quickly in a bulky wool yarn. Make the Mini size as a fun stashbuster, or the Mega size for maximum whimsy.
The rabbitduck in either size is also a relatively straightforward knit that would work well for an adventurous beginner. The combined body and head is worked in one piece, with the paws/wings and ears/bill knitted separately.
 photos: Cissy Yao
SIZE
Mini[Mega]
FINISHED MEASUREMENTS
Height: 4[16] inches/ 10[41] cm
Length: 3.5[14] inches/ 9[36] cm
MATERIALS
Yarn
Knit Picks Wool of the Andes Bulky [100% Peruvian Highland wool; 137 yd/125 m per 3.5 oz/100 g skein];
![]() [MC] color: White; 1[2] skeins
[MC] color: White; 1[2] skeins
![]() [CC]; color: Green Tea Heather; 1[1] skeins
[CC]; color: Green Tea Heather; 1[1] skeins
Note: For the Mini size, only a very small amount of both MC and CC is used. Feel free to use scraps of a bulky-weight yarn instead.
Yarn Characteristics
![]() The sample shown uses a chunky wool yarn with a tight twist. A springy acrylic or wool blend would also work well for this pattern.
The sample shown uses a chunky wool yarn with a tight twist. A springy acrylic or wool blend would also work well for this pattern.
Recommended needle size
[always use a needle size that gives you the gauge listed below - every knitter's gauge is unique]
![]() 1 set US #10/6 mm needles for small circumference in the round – traditional or flexible DPNs, 2 circulars or one long circular for magic loop; note: some sections are worked on very small stitch counts, so you might find DPNs easiest.
1 set US #10/6 mm needles for small circumference in the round – traditional or flexible DPNs, 2 circulars or one long circular for magic loop; note: some sections are worked on very small stitch counts, so you might find DPNs easiest.
![]() For the Mega size only: 1 US #10/6 mm 24-32 inch/60-80 cm circular needle
For the Mega size only: 1 US #10/6 mm 24-32 inch/60-80 cm circular needle
Notions
![]() black embroidery floss and embroidery needle for eyes
black embroidery floss and embroidery needle for eyes
![]() light pink permanent marker for cheeks or pink embroidery floss (optional)
light pink permanent marker for cheeks or pink embroidery floss (optional)
![]() polyfill stuffing
polyfill stuffing
![]() stitch markers
stitch markers
![]() yarn needle
yarn needle
GAUGE
14 sts/24 rounds = 4 inches/10 cm in stockinette stitch
Note: gauge is not crucial for toys, but working at a different gauge will affect yardage used and finished size. What's most important is that the fabric be dense enough that the stuffing doesn't come out.
PATTERN NOTES
[Knitty's list of standard abbreviations and techniques can be found here.]
Construction method:
The combined body and head is worked from bottom to top in the round. Then, the paw/wing and ears/bill are knitted separately and sewn on.
Finishing touches: Eyes are embroidered using black floss. 10 mm safety eyes or small buttons can be substituted for this purpose, though never use safety eyes or buttons for toys intended for young children since they pose a choking hazard.
Light pink permanent marker is used to add blush to the cheeks. This is a cute touch, but is not necessarily lightfast or washfast. Feel free to omit this step or to substitute it with embroidery using pink floss.
Techniques:
- Mattress stitch for toys
- Embroidered eyes for stuffed toys
- Working tiny rounds
DIRECTIONS
Body and Head
With MC, using the Long Tail method, cast on 6[6] stitches. Distribute sts across needles as you prefer and join for working in the round.
Body Increases:
Round 1: (Kfb, pm) 6 times around. 12[12] sts.
Round 2: (Kfb, k to marker, sm) 6 times around. 6 sts increased.
Repeat last round 1[13] more times. 24[96] sts.
Note: When working the Mega size, change to the circular needle as work gets larger
Next round: Knit.
Next round: (Kfb, k to marker, sm) 6 times around. 6 sts increased.
Repeat last 2 rounds 0[5] more times. 30[132] sts.
Clip a removable stitch marker in this round to help you keep track.
Next round: Knit.
Repeat last round until work measures 1.5[3.5] inches/ 4[9] cm from last increase round.
You can remove the removable marker – you'll use it again in the next section.
Body Decreases:
Next round: (K to 2 sts before marker, k2tog) 6 times around. 6 sts decreased.
Next round: Knit.
Repeat last 2 rounds 0[5] more times. 24[96] sts.
Next round: (K to 2 sts before marker, k2tog) 6 times around. 6 sts decreased.
Repeat last round 1[8] more times. 12[42] sts.
Next round: Knit.
For Mini size only: Stuff the body with polyfill.
Head Increases:
Next round: (Kfb, k to marker, sm) 6 times around. 6 sts increased.
Repeat last round 1[8] more times. 24[96] sts.
Clip a removable stitch marker in this round to help you keep track.
Next round: K all sts.
Repeat last round until work measures 1[2.5] inches/ 2.5[6] cm from last increase round.
You can remove the removable marker.
Head Decreases:
Next round: (K to 2 sts before marker, k2tog) 6 times around. 6 sts decreased.
Next round: K all.
Repeat last 2 rounds 0[4] more times. 18[66] sts.
For Mini size only: Stuff the head with polyfill.
For Mega size only: Stuff the body, then the head, with polyfill.
Next round: (K to 2 sts before marker, k2tog) 6 times around. 6 sts decreased.
Repeat last round 1[9] more times. 6[6] sts.
Cut yarn, leaving a 12 in/30 cm tail, and draw through the remaining stitches. Stuff the head with additional polyfill if needed before drawing yarn tight.
Paw/Wing (Make 2):
For Mini size only:
With CC, using the Long Tail method, cast on 3 stitches. Do not join in the round, this is worked flat.
Row 1 [WS]: Kfb, kfb, k1. 5 sts.
Rows 2-5: (K1, p1) twice, k1.
Bind off in pattern.
For Mega size only:
With CC, using the Long Tail method, cast on 30 stitches. Distribute sts across needles as you prefer and join for working in the round.
Round 1: (K2, (p1, k1) 5 times, p1, k2) twice.
Round 2: (K2, (k1, p1) 5 times, k3) twice.
Repeat last 2 rounds 8 times more.
Next Round: (K1, ssk, (k1, p1) 4 times, k1, k2tog, k1) twice. 26 sts.
Next Round: (K2, (p1, k1) 4 times, p1, k2) twice.
Next Round: (K1, ssk, (p1, k1) 3 times, p1, k2tog, k1) twice. 22 sts.
Next Round: (K1, ssk, (p1, k1) 2 times, p1, k2tog, k1) twice. 18 sts.
Next Round: (K1, ssk, p1, k1, p1, k2tog, k1) twice. 14 sts.
Next Round: (K1, ssk, p1, k2tog, k1) twice. 10 sts.
Cut yarn, leaving a 24 inch/60 cm tail, and draw through remaining stitches.
Ear/Bill (Make 2):
For Mini size only:
With CC, using the Long Tail method, cast on 6 stitches. Distribute sts across needles as you prefer and join for working in the round.
Knit 3 rounds.
Cut yarn, leaving a 24 inch/60 cm tail, and draw through remaining stitches.
For Mega size only:
With CC, using the Long Tail method, cast on 12 stitches. Distribute sts across needles as you prefer and join for working in the round.
Round 1: (K2, m1L, k2, m1R, k2) twice. 16 sts.
Rounds 2-9: Knit 8 rounds.
Round 10: (K1, ssk, k2, k2tog, k1) twice. 12 sts.
Round 11: Knit.
Round 12: (K1, ssk, k2tog, k1) twice. 8 sts.
Cut yarn, leaving a 12 inch/60 cm tail, and draw through remaining stitches.
FINISHING
Sew each ear/bill piece to the front of the head, and each paw/wing piece to the sides of the body, using whipstitch. Sew up hole at base of body.
Using black embroidery floss and sewing thread, embroider eyes onto the sides of the head.
Optional: Using pink permanent marker, lightly draw in blush marks below and slightly to the side of the eyes opposite the ears/bill.
Weave in ends.
ABOUT THE DESIGNER
 Cissy has been knitting nonstop since she learned in seventh grade and is obsessed with all things fiber.
She can be contacted as Everspace on Ravelry and EverspaceSpins on Instagram.
Pattern & images © 2024 Cissy Yao


