HXGN shawl, a free knitting pattern from Knitty.com.
INTRODUCTION
HXGN
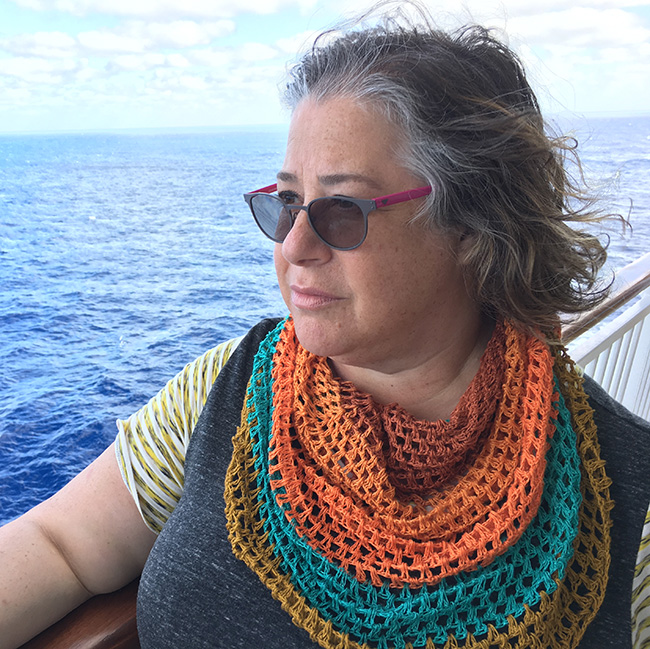 by Amy Singer
![]()
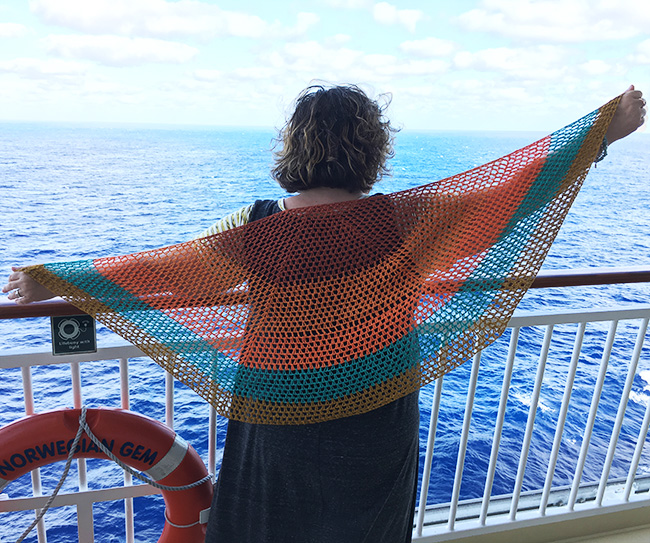
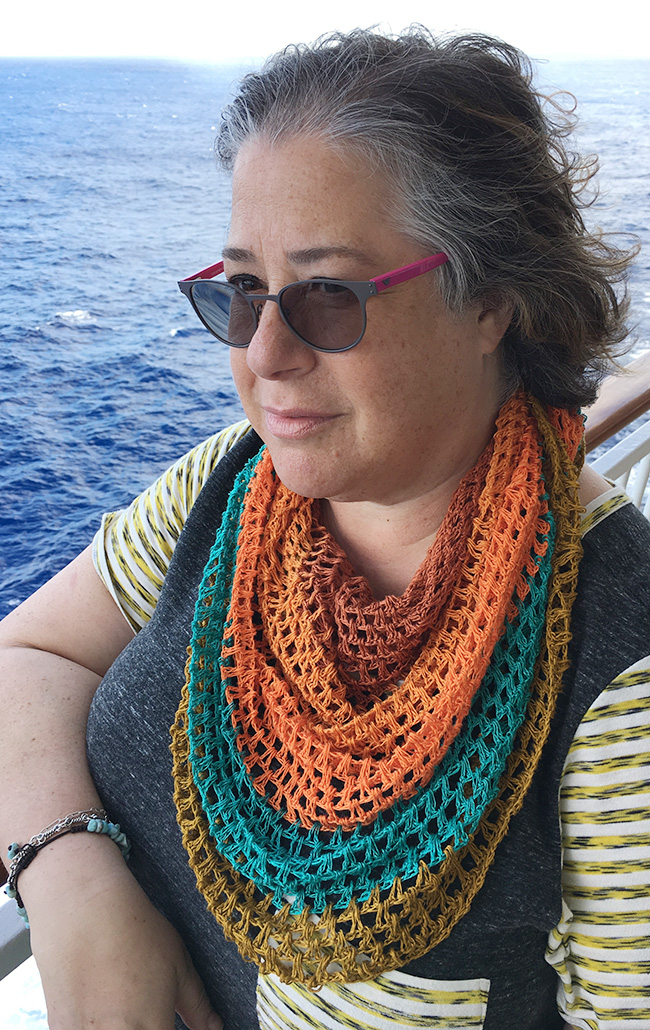
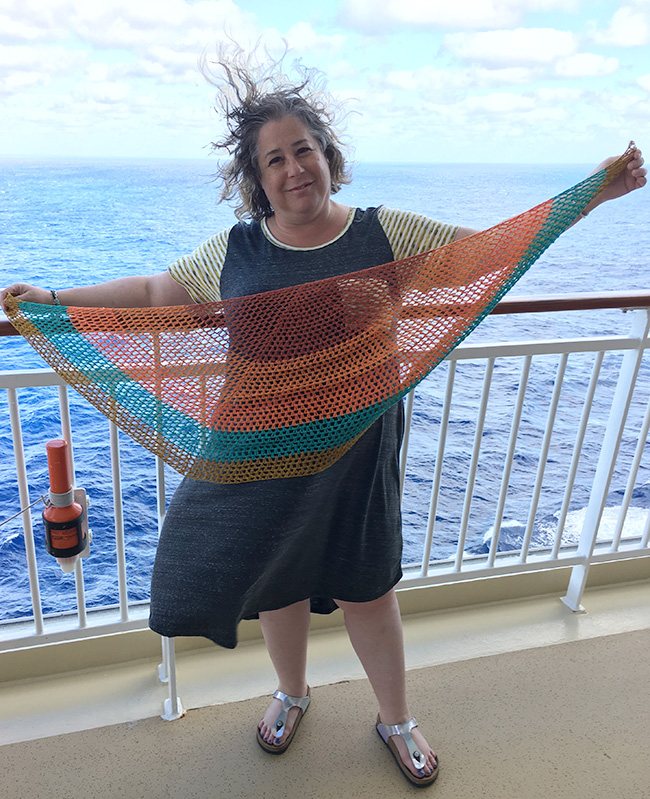
I went through a phase of crocheting half-granny triangle shawls, despite the fact that they're the wrong shape for my body. They're not very wide and they are very deep, with a point that aims directly at my posterior. So I was wondering if there was a way to make something that looked like a half-granny square but was a more flattering shape for my body.
I found inspiration in Edie Eckman's book, Connect the Shapes Crochet Motifs — a half hexagon! Really, it's just one additional wedge added to a triangle, but that wedge makes all the difference. As for the name, take half of the letters away from HEXAGON and you get HXGN.
I stumbled upon the Namolio linen yarn at Unwind Brighton in the summer of 2014. Since then, Namolio has stopped offering this linen in tiny skeins, but I've got some suggestions for you in the Yarn Characteristics section below. Of course, you can easily use leftover yarns that are the same weight, like sock yarn, or any long-color-change yarn.
 model: Amy Singer
 photos: Mark Sadler
SIZE
One
FINISHED MEASUREMENTS
Wingspan: 57.5 inches/146 cm
Depth: 20 inches/51 cm
MATERIALS
Yarn
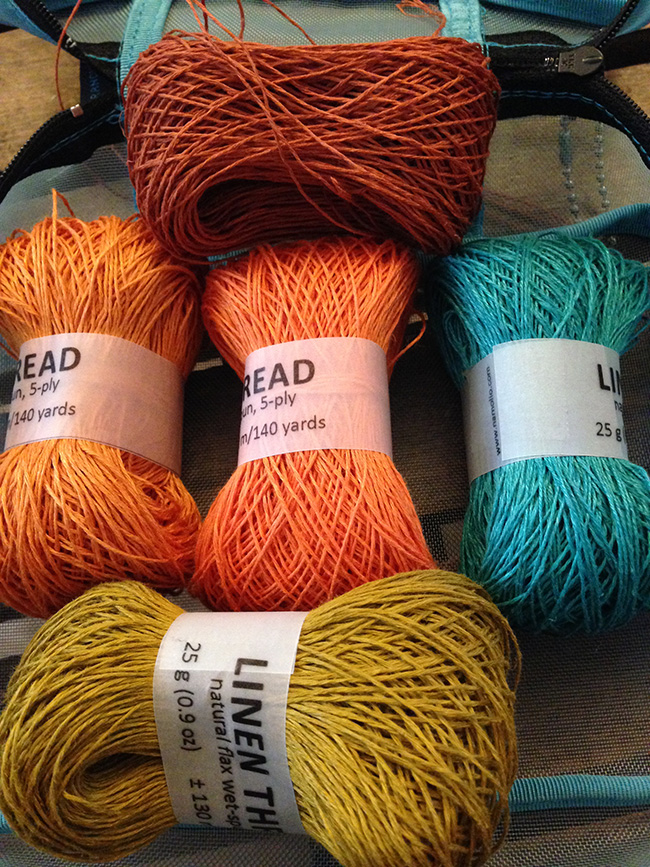
Namolio 5-ply [100% natural flax wet-spun; 140yd/130m per 25g skein]; color:
![]() [CC] Rust, 1 skein
[CC] Rust, 1 skein
![]() [CC] Cantaloupe, 1 skein
[CC] Cantaloupe, 1 skein
![]() [CC] Tangerine, 1 skein
[CC] Tangerine, 1 skein
![]() [CC] Olive oil, 1 skein
[CC] Olive oil, 1 skein
![]() Namolio 3-ply [100% natural flax wet-spun; 162yd/149m per 25g skein]; color:
[CC] Aqua, 1 skein
Namolio 3-ply [100% natural flax wet-spun; 162yd/149m per 25g skein]; color:
[CC] Aqua, 1 skein
Note: I chose the 3-ply weight of Namolio linen only because I wanted to include the aqua color in this project and it wasn’t available in the 5-ply. The weight difference was negligible.
Yarn Characteristics
![]() Namolio 5-ply (shown above) is a light-fingering-weight multi-stranded pure linen yarn. It's no longer available in the same small skeins I used. To get the same crisp look, you'll want 700 yards/650 metres of light-fingering-weight linen, hemp or cotton yarn. The new linen/silk blend from Miss Babs, Damask, would give a slightly drapier, more elegant-looking result. You can also use mini-skeins or leftovers of any piled yarn, noting that drapier fibers like superwash wools, alpaca, or silk, will result in a drapier shawl. Be sure to adjust the hook size to get a similarly open fabric, whatever yarn you use. This will necessarily result in a finished project of a different size. Working with a heavier yarn can result in a similar-size shawl using less yardage. Since this design can be worked until your yarn is used up, the finished size is up to you. If using DK or worsted weight, you’ll need about 400-500 yds/350-450m to get a similar size.
Namolio 5-ply (shown above) is a light-fingering-weight multi-stranded pure linen yarn. It's no longer available in the same small skeins I used. To get the same crisp look, you'll want 700 yards/650 metres of light-fingering-weight linen, hemp or cotton yarn. The new linen/silk blend from Miss Babs, Damask, would give a slightly drapier, more elegant-looking result. You can also use mini-skeins or leftovers of any piled yarn, noting that drapier fibers like superwash wools, alpaca, or silk, will result in a drapier shawl. Be sure to adjust the hook size to get a similarly open fabric, whatever yarn you use. This will necessarily result in a finished project of a different size. Working with a heavier yarn can result in a similar-size shawl using less yardage. Since this design can be worked until your yarn is used up, the finished size is up to you. If using DK or worsted weight, you’ll need about 400-500 yds/350-450m to get a similar size.
Recommended needle size
[always use a needle size that gives you the gauge listed below - every knitter's gauge is unique]
![]() US B-1/2.25mm crochet hook (or size needed to produce an open fabric)
US B-1/2.25mm crochet hook (or size needed to produce an open fabric)
Notions
![]() sharp-pointed yarn needle
sharp-pointed yarn needle
GAUGE
7.5 clusters/9 rows = 4 inches/10cm in pattern stitch
Note: gauge is always taken after blocking.
PATTERN NOTES
[Knitty's list of standard abbreviations and techniques can be found here.]
Abbreviations:
Ch: Chain
DC: Double Crochet
Corner: work (2 dc, ch 1, 2 dc) in space indicated
Chain Space (ch-sp): the space underneath the Ch 1 indicated, from the row below.
Turning Chain: The chain made in the previous row to bring the work to the height needed for the current row.
Note: Each Ch 3 counts as 1 DC.
Techniques:
- Sliding loop (photo tutorial)
- How to change colors:
I used all the yarn in each color except for the rust — only used about half that ball. I chose to only change color using a Gentle Color Change. If you want to waste less yarn, you can use the Abrupt Colour Change at any point in a row.- Gentle Color Change:
Holding together one strand each of existing and new colour, work across as follows: Ch 3, (ch 3, 1 dc into next ch-sp) to corner, ch 3, (1 dc, ch 3, 1 dc) into the corner, (ch 3, 1 dc into next ch-sp) to next corner, ch3, (1 dc, ch 3, 1 dc) into the corner, (ch 3, 1 dc into next ch-sp) to end of row, ch 3, 1 dc into top of previous row's turning chain. Turn. Cut existing colour and secure the loose end (leave a tail long enough to weave in later) and continue with new colour only, following pattern as established in Row 5.
- Abrupt Colour Change:
Leaving at least a 5 inch/13 cm tail, tie the new color around the existing colour (as if starting a bow), and pull it up so that the new colour is right at the top. Cut existing colour and secure the loose end (leave a tail long enough to weave in later) and continue with the new colour only.
- Gentle Color Change:
DIRECTIONS
Shawl
Create a sliding loop to start.
Row 1: Ch 3, 6 dc into ring. Turn.
Row 2: Ch 3, 1 dc into first dc, [ch 1, skip 1 dc, corner in next dc] twice, ch 1, skip 1 dc, 2 dc in last dc. Turn.
Row 3: Ch 3, 1 dc into same st, ch 1, 2 dc in next ch-sp, ch 1, corner in next ch-sp, ch 1, 2 dc into next ch-sp, ch 1, corner in next ch-sp, ch 1, 2 dc into next ch-sp, ch 1, 2 dc into top of previous row's turning chain. Turn.
Row 4: Ch 3, 1 dc into same st, (ch 1, 2 dc into next ch-sp) twice, ch 1, corner, (ch 1, 2 dc into next ch-sp) twice, ch 1, corner, (ch 1, 2 dc into next ch-sp) twice, ch 1, 2 dc into top of previous row's turning chain. Turn.
Row 5: Ch 3, 1 dc into same st, (ch 1, 2 dc into next ch-sp) to next corner, ch 1, corner, (ch 1, 2 dc into next ch-sp) to next corner, ch 1, corner, (ch 1, 2 dc into next ch-sp) to end of row, ch 1, 2 dc into top of previous row's turning chain. Turn.
Repeat Row 5 until you're out of yarn, changing colours as required. (See Pattern Notes for Colour Change instructions.)
On last stitch of last row, form a DC and pull a tail of at least 5 inches through both loops to end.
 .
.
FINISHING
Weave in ends securely, backstitching through multiple threads to lock in place. Be sure to weave each color into its own color section.
Soak well and stretch the fabric to its full size, especially at the top edge where the stitches can compact. Stretch the top edge as straight as possible, lay flat (and pin, if desired) into the half-hexagon shape. Let dry.
ABOUT THE DESIGNER
 Amy is a knitter. What is her damage?
Editor's note: These photos were taken in 2017. A lifetime ago.
Pattern & images © 2022 Amy Singer


