


Wiseknit™: A column that teaches you how to do things you'll find in knitting instructions
INTRODUCTION
Wiseknit™: Practical Knitting Wisdom
by Kate Atherley
One of the wonderful things about knitting is that there are so many different solutions to every problem, so many possible answers to every question. This column aims to expand your knitting knowledge and toolkit with practical solutions and answers to your technical knitting questions and conundrums.
Stretchy bind offs
At Knitty, we’re big fans of a stretchy bind off. After all, we published the popular and beloved of sock knitters Jeny’s Surprisingly Stretchy Bind Off method. JSSBO is brilliant when you needs tons of stretch, like for a toe-up sock.
Jeny’s is best suited to a situation where the item is intended to be stretched out, like a toe-up sock that is worn with negative ease in the leg. But there are other places where you need stretch to put the item on, but the item should rest or be worn unstretched: the top edge of a fingerless mitten, or on the neckline of a sweater, for example. In these situations, Jeny’s can flare out a little and look a little less tidy.
If you need a bind off that’s slightly more flexible than the standard, but not as much as Jeny’s, I offer a few solutions, in increasing order of stretchiness.
The common factor with all of these is that they add more yarn to the bind off edge, giving it the ability to stretch and move more. Note that the degree of stretch in any edge is going to be affected by your own knitting method and how tightly you pull the yarn. You might need to experiment! If you’re not sure, thread a lifeline through your final row before you bind off, so that if it’s not right for your needs, you can easily undo and rework it.
Just Not Too Tight, Version 1
If you find that the standard method tends to pull in a bit too much, use a larger needle in your right hand to work the stitches as you go. How much larger? Two to three sizes is about right for most knitters, but do experiment to see what works best for you!
Flexible – Level 1: Just Not Too Tight, Version 2
If you are working a fabric of mixed knits and purls, work the bind off in the pattern stitch. Not only does this make the edge look tidier, but it also makes it slightly looser... for most knitters, purl stitch is a little bit looser than a knit stitch, and so adding purl stitches into the mix will add a bit more yarn to the edge.
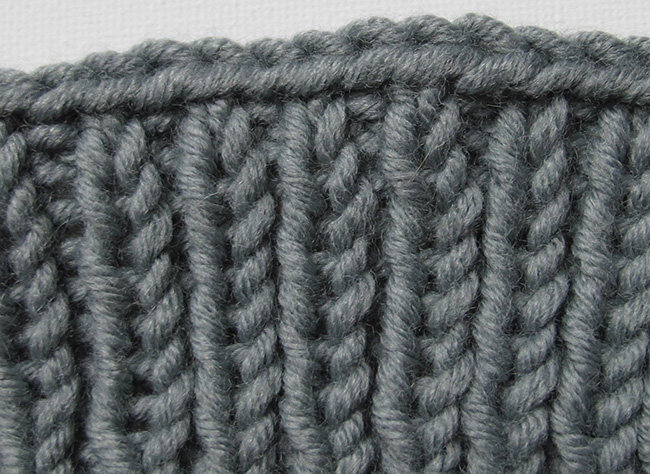
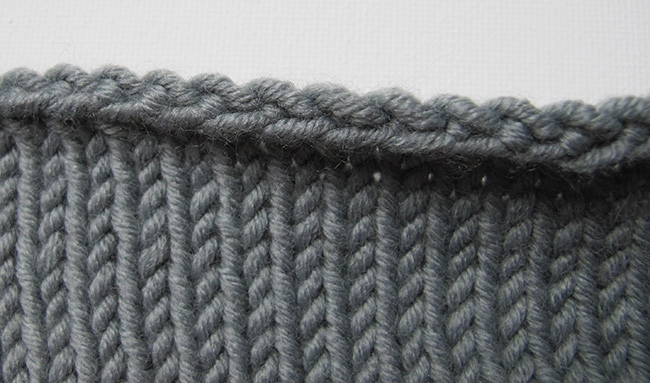
a ribbing fabric with all the stitches in the bind-off row knitted

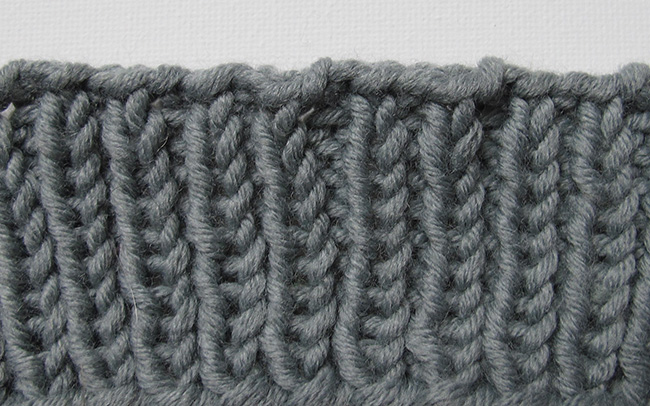
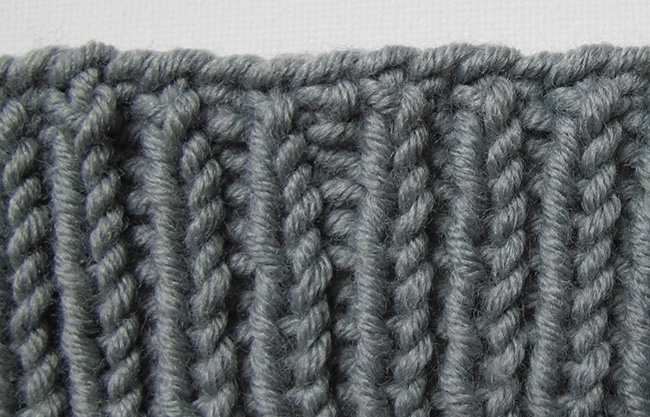
a ribbing fabric with the stitches in the bind-off row worked in pattern
The purl stitch is slightly larger/looser than a knit stitch, because for conventional Western-style knitters (as opposed to combination/Eastern uncrossed knitters), the yarn travels a slightly longer path around the needle for a purl wrap rather than a knit wrap. That extra yarn makes the resulting stitch a smidge looser. It’s generally undetectable in most fabrics, but we can use it to our advantage in a bind-off edge. Notice also in the first image how the bind off edge rolls to the front; if you work the bind off in ribbing pattern, the edge sits more neatly on the top. If you compare the two pictures, it looks like the knitwise version might be stretchier because it’s flared out, but it’s a bit of an illusion. The ribbed version does have more give because of the extra yarn, and because it ‘buckles’ in alignment with the ribbing, it pulls in more and so looks better when relaxed.
A Smidge More Relaxed Version 1: Suitable for Stockinette and Garter
Bind off purlwise. If working a stockinette fabric, bind off in purls, when facing the WS row. The result looks exactly the same as if you’d bound off knitwise on the RS row, and it’s cleverly a bit looser, due to those larger purl stitches.
If working garter stitch, you are getting a slightly different edge than if you’d bound off knitwise, but I think it is better suited to garter, and it’s just that bit stretchier.
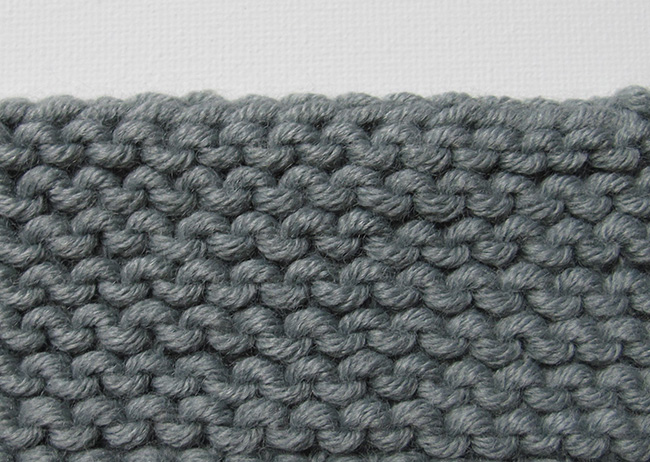
garter stitch bound off knitwise
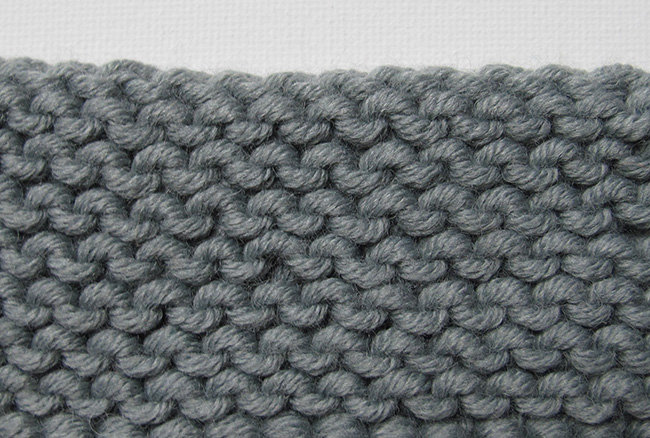
garter stitch bound off purlwise
A Smidge More Relaxed, Version 2: Suitable for Ribbing
If I’m working in ribbing, I will always bind off in pattern, but that can still be too tight. To add even more yarn to the edge, then, I need a different solution. In this case, I make extra stitches as I go. I call it the extra yarnovers bind off and you can see it below.
Extra yarnovers bind off: ribbing, bound off in pattern, with a yarnover introduced and bound off every fourth stitch
This video starts after two stitches have been bound off, and demonstrates the last two stitches and the yarnover.
Extra yarnovers bind off (demonstrated above): Bind off as usual, but every fourth stitch make a yarnover on the right-hand needle. You now have two loops on the right-hand needle. Immediately lift the rightmost stitch over the yarnover to bind it off, and then continue binding off as normal for another four stitches before making the next yarnover.
I use this a lot on sweater necklines and the tops of fingerless mittens.
Nice and Stretchy (but not so much that it flares): The Lace Method
This is my go-to bind off for lace shawls that I need to stretch out for blocking; and I often recommend it for toe-up sock knitters who find that, because of their method or tension, Jeny’s is a bit too stretchy. I do it a smidge differently than the usual but the results are the same.
Lace bind off, knitted version (as demonstrated in the video above): K1, *k1; insert the tip of the left needle into the fronts of these two stitches from left to right (as if to do an SSK decrease), and knit them together from that position; repeat from * until all sts have been worked. Cut yarn and pull up and out through final st to secure.
the lace bind off worked over stockinette stitch
You can see (above) that the edge is rolling forward a bit . This is because it’s looser than the fabric below. I wouldn’t use this for a sweater neckline, or a standard scarf, however. It's best used when there’s an edge that’s worn stretched, like the top of a toe-up sock, or the bottom edge of a top-down sweater; or if you’re going to stretch the piece, like a lace shawl, a lot with blocking.
As demonstrated above, here's how I do a 1x1 ribbing bind off: K1, *p1, insert the tip of the left needle into the fronts of these two stitches from left to right (as if to do an SSK decrease), and knit them together from that position, k1, insert the tip of the left needle into the fronts of these two stitches from left to right, and knit them together from that position; repeat from * until 1 st remains, p1, insert the tip of the left needle into the fronts of these two stitches from left to right, and knit them together from that position. Cut yarn and pull up and out through final st to secure.
It works well with any ribbing pattern. Just knit the knits and purl the purls.
the lace bind off worked over ribbing
And then fabulously stretchy:
And if you need more stretch, we refer you back to the wonderful Jeny’s Surprisingly Stretchy Bind Off method.
Remember this: there’s no one best bind off method. The key is to get an edge is that it works well for your own knitting tension, and your project. You might need to experiment a bit, but it’s worth it to ensure that the items you’re making look great and feel comfortable.
ABOUT THE AUTHOR
 Kate Atherley is Knitty's Managing Technical Editor and a knitting author and teacher. She’s also the co-founder and publisher of Digits & Threads, an independent, member-supported online magazine about Canadian fibre and textile arts, crafts and industry. The combination of her university degree in mathematics, professional experience in software development and usability, and training in garment and fashion design give her a unique perspective.
You can see more of her work at kateatherley.com, and on Ravelry.
Pattern & images © 2022 Kate Atherley.