


Wiseknit™: A column that teaches you how to do things you'll find in knitting instructions
INTRODUCTION
Wiseknit™: Practical Knitting Wisdom
by Kate Atherley
One of the wonderful things about knitting is that there are so many different solutions to every problem, so many possible answers to every question. This column aims to expand your knitting knowledge and toolkit with practical solutions and answers to your technical knitting questions and conundrums.
Sock Secrets: Top-down sock gussets
Knitty's been publishing great sock patterns for two decades (and counting). We enjoy both a beautiful-to-wear standard sock construction – see this issue’s Undertoe – and more innovative and interesting-to-knit sock structures like last issue’s Palindrome.
Visit our Library to see all the socks we have published over the years.
We figured it was time for an important Socky Tip!
Top-Down Sock Gussets
I’ve been a sock knitter for over 30 years, and I’ve been teaching sock knitting for over 20, and this is absolutely the biggest challenge in top-down sock knitting.
No, it’s not the toe! (Need help with grafting? This column will help. Or skip it entirely and use my no-graft toe, as featured in these patterns.)
A top-down sock with a heel flap requires you to pick up and knit stitches along the edge of the heel flap. This forms the gusset and lets you resume working in the round for the foot. The picking up can be a challenge in a couple of different ways: it’s not always clear where to work the pick-up, and then there’s the issue of gaps or holes at the top.
Most patterns have you slip the first stitch of every row in the heel flap: it’s not mandatory by any means, but it can make this step a little easier by creating a tidy chain on the edge of the flap.
Slipped stitches on the edge of the heel flap make it easy to identify where to pick up the stitches
After you’ve completed the heel turn, you will begin by picking up and knitting stitches along the first side of the heel flap, from the heel up to the instep. The purpose of the slipped stitches is twofold: to make it easier to figure out where to put the needle, but also to get the number right: you need 1 stitch for every 2 rows – therefore 1 stitch is picked up in every slipped stitch.
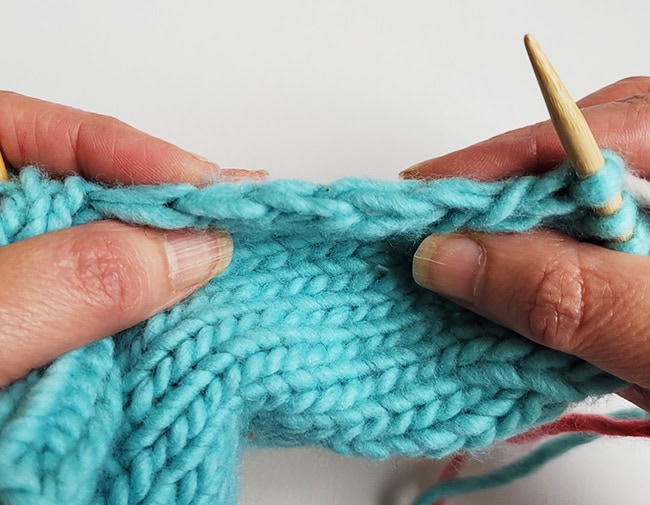
Hold your work with RS facing, and using the tip of the needle that has the heel stitches, work the pick up and knit along that first edge. Note that you can use a crochet hook for this, or a smaller needle, if you find it easier. If you are using smaller needles, just remember to change back to the proper size for working.
Always poke the tip of the needle under both strands of the edge stitch – under the full v of that slipped stitch. Make sure you’re working under the stitch right on the very edge. It can roll down a little, so unroll it a bit with your left hand if you need to.
Yup, poke the needle under both strands.
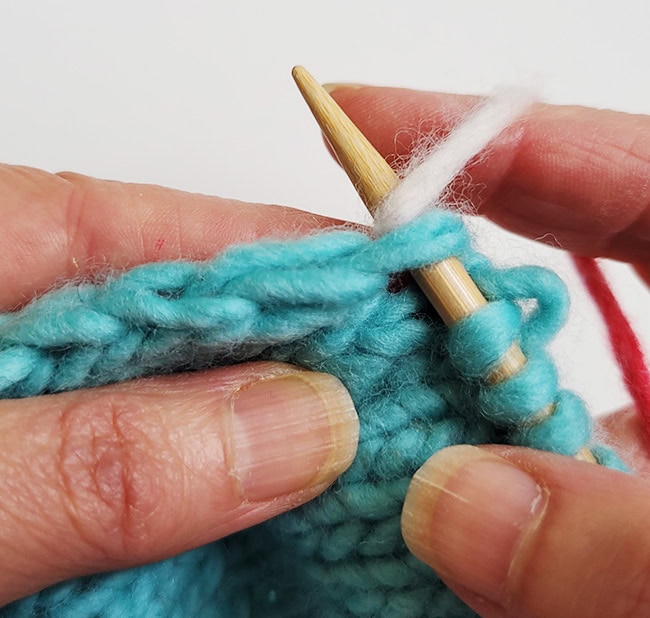
The inside view. That slipped-stitch selvedge edge should be entirely covered up by the picked-up stitches.
Opinion differs on this. Some worry that picking up under both strands of the edge stitch will make too big a ridge on the side of the sock heel. With a standard sock yarn, most find it’s barely noticeable. If you only work under one strand of the slipped stitch, the edge is less stable and tidy.
Wrap the yarn around the tip of the needle as if to knit, and pull it through.
Work this way until you run out of slipped stitches. But that’s not the end of it! If you just stop there, you’ll get gaps at the top of the heel.
To close up the gaps and avoid holes, you need two more stitches. The magic is in where you get them, though. Do not work in the corner… doing that actually makes the hole worse, as you’re forcing apart neat columns of stitches.
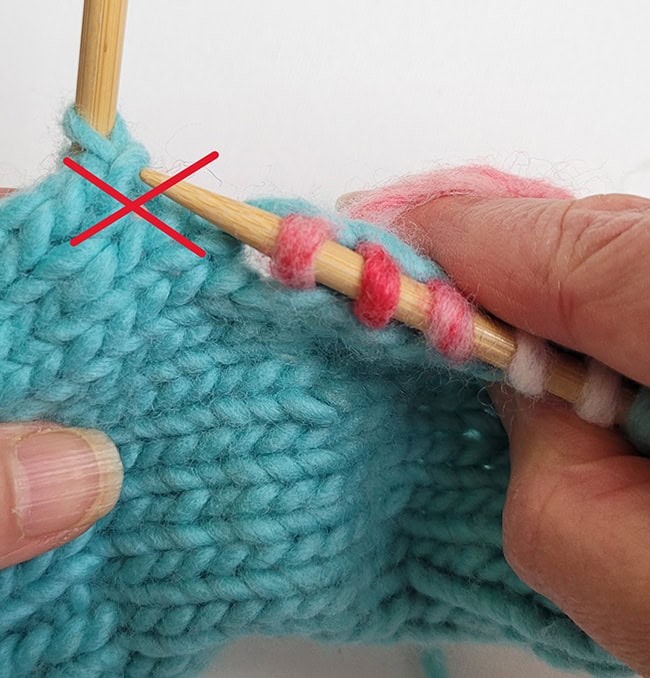
Nope, don’t go for the corner! That will make a hole.
Related: some patterns tell you to work an M1R or M1L increase in the gap. For the same reason, I don’t like this.
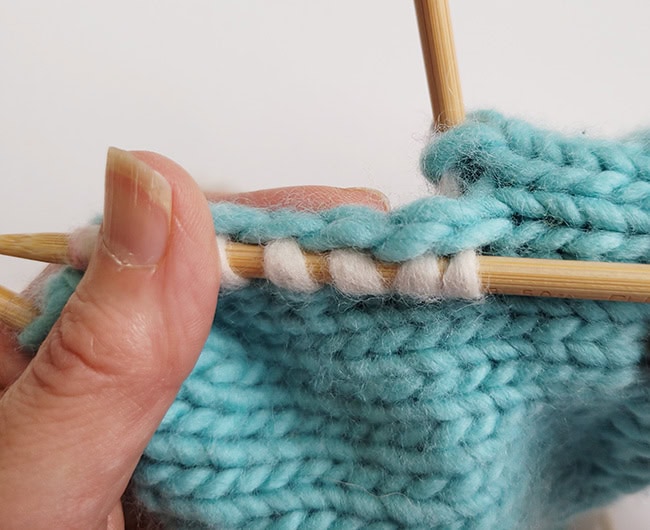
Instead, get those two extra stitches by continuing in the straight line established by your slipped stitches. Yes, really! Stitch in the ditch, if you will.

After the first “bonus” stitch.
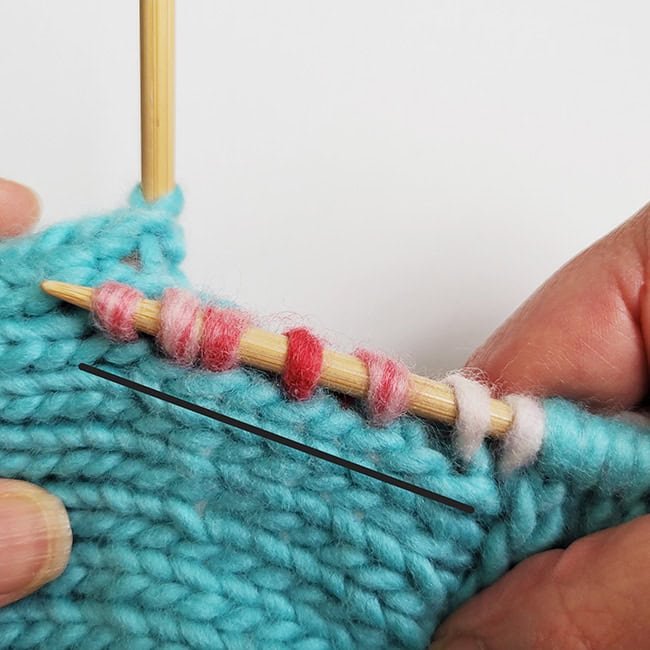
I’ve put a line on the image just to emphasize the straight line.
You might find one more stitch on the edge that’s not a slipped stitch – that’s fine. And then the other one or two should actually be in the leg of the sock. Instead of working under an edge stitch, you’ll be poking the needle from the right side of the fabric into the inside of the sock – that’s ok! You don’t need an edge to pick up a stitch. Just poke the needle tip through the fabric and wrap the yarn around as before.
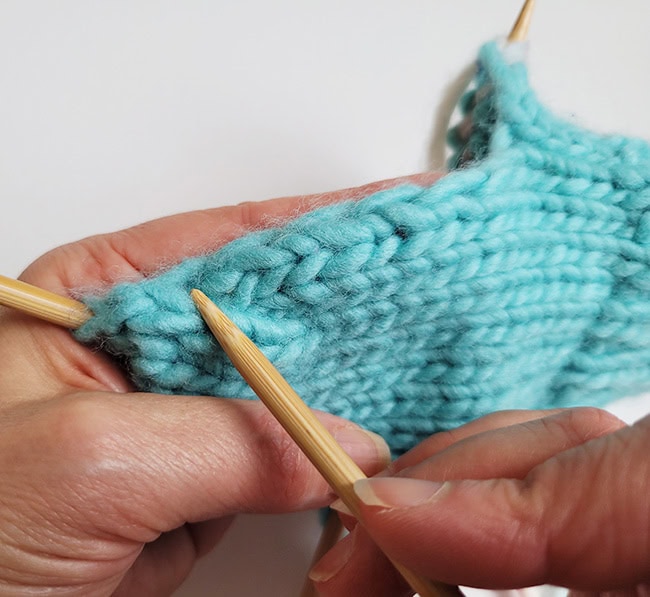
Getting those last 2 stitches on the first side
You’ll be working into the middle of stitches in the leg, a round or two above the point where you separated off instep and heel. Part of the reason you get gaps at the tops of the heels is that the first and last instep stitches tend to stretch out when working the heel. Those stitches sit on a holder or a spare needle, and they stretch out a bit as you work the active stitches. Picking up a stitch or two above that separation row helps cover up any stretched-out stitches.
You may well find yourself with more stitches than the pattern calls for here – many patterns just expect you to get one for every slipped stitch. (Mine always account for the extra two…) The exact number doesn’t actually matter. After all, you’re just going to work gusset decreases until you hit the correct stitch count for the foot. It isn’t a problem if you work a couple more.
Once you’ve completed that first pick-up and knit, count the number of stitches you've got. You’ll want to match that on the other side.
With a new needle/the other side of your magic loop, work across the instep stitches as per the pattern. And then with a new/empty needle, work a matching pick up and knit down the other side.
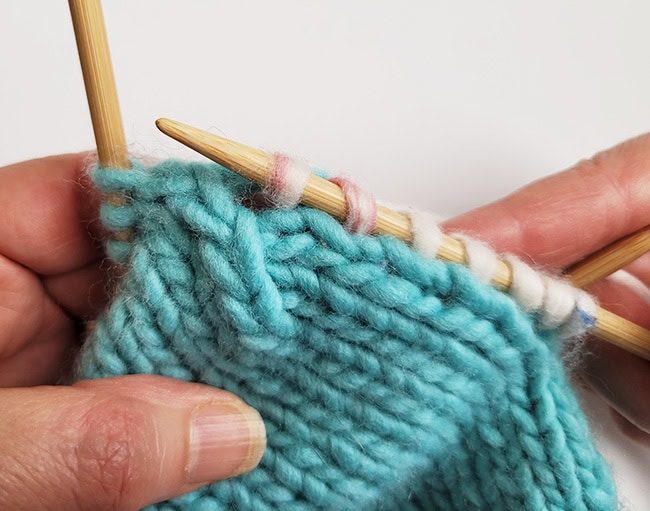
The trick with this is to count up from the bottom, so you don’t have to guess at the starting point. The position of the picked-up stitch closest to the heel turn is usually pretty obvious, so use your needle tip to count up slipped stitches and then two more gaps in the sock leg, to determine where to start.
Start by counting up from the last one you need, in the corner right by the heel turn.
On the second side: Counting up to get the correct number of stitches and the starting position
And done!
And here’s a dirty secret: although it’s best if you have the same number on both sides, sometimes it just seems like one side needs one more stitch than the other… that’s ok, just keep track. You’ll work a final decrease round, working the decrease only on the side with the extra stitch. Easy-peasy!
Before you do start decreasing though, no matter what number of stitches you have, work an even round to ‘lock’ and tidy those picked up stitches: work in pattern on the instep, knitting the heel stitches normally, and knitting any picked-up stitches through the back loop, tbl. Then start your decrease rounds.
ABOUT THE AUTHOR
 Kate Atherley is Knitty's Managing Technical Editor and a knitting author and teacher. The combination of her university degree in mathematics, professional experience in software development and usability, and training in garment and fashion design give her a unique perspective. She’s currently working on a book about Math for Knitters, due out in 2025.
You can see more of her work at kateatherley.com, and on Ravelry.
Text & images © 2025 Kate Atherley.