Hand Sown, a free knitting pattern from Knitty.com. Free knitting pattern for a DETAILS HERE.
INTRODUCTION
Hand Sown
by Jessica Bolof
![]()
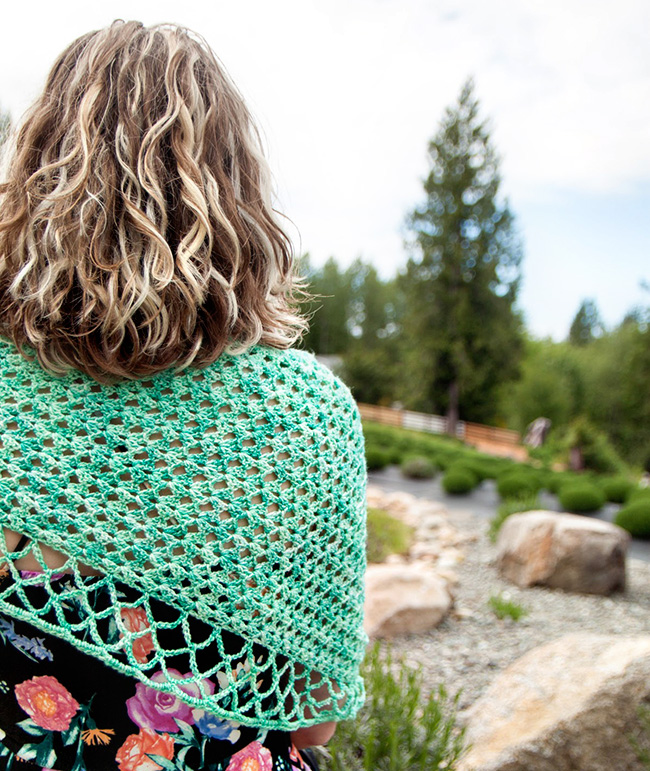
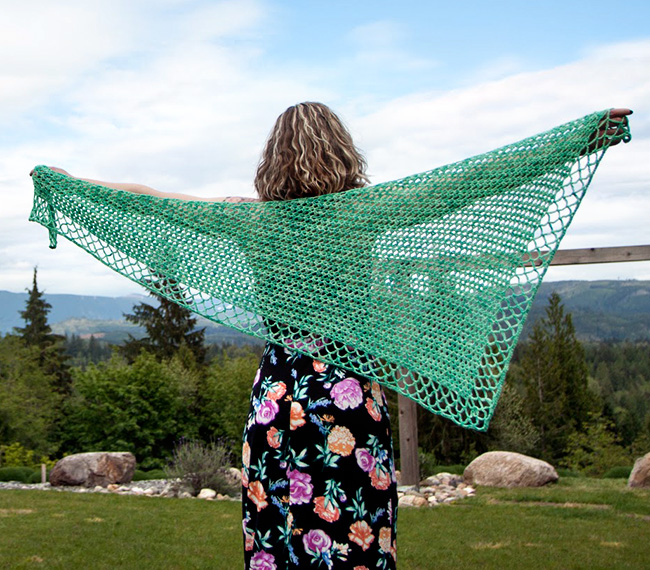
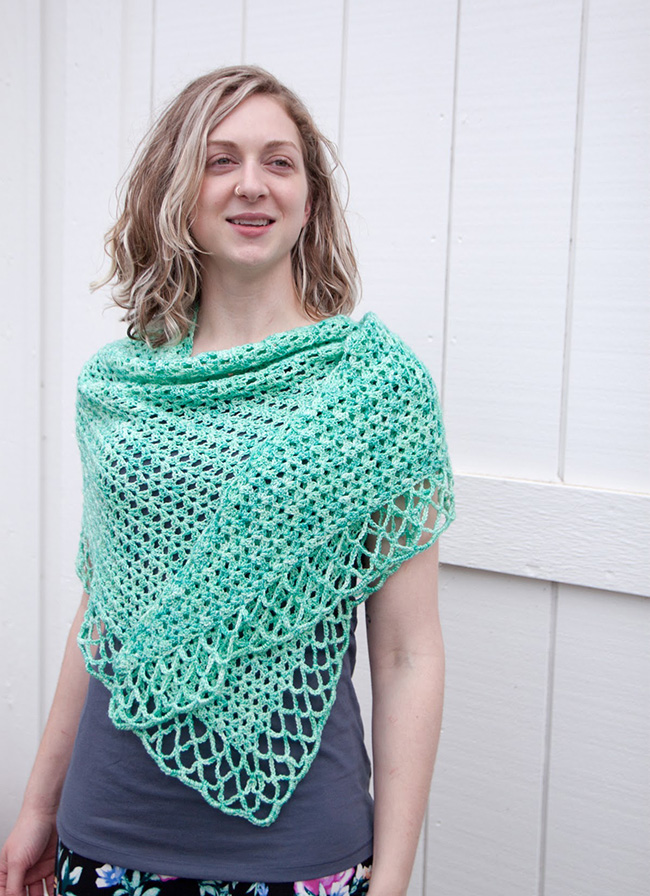
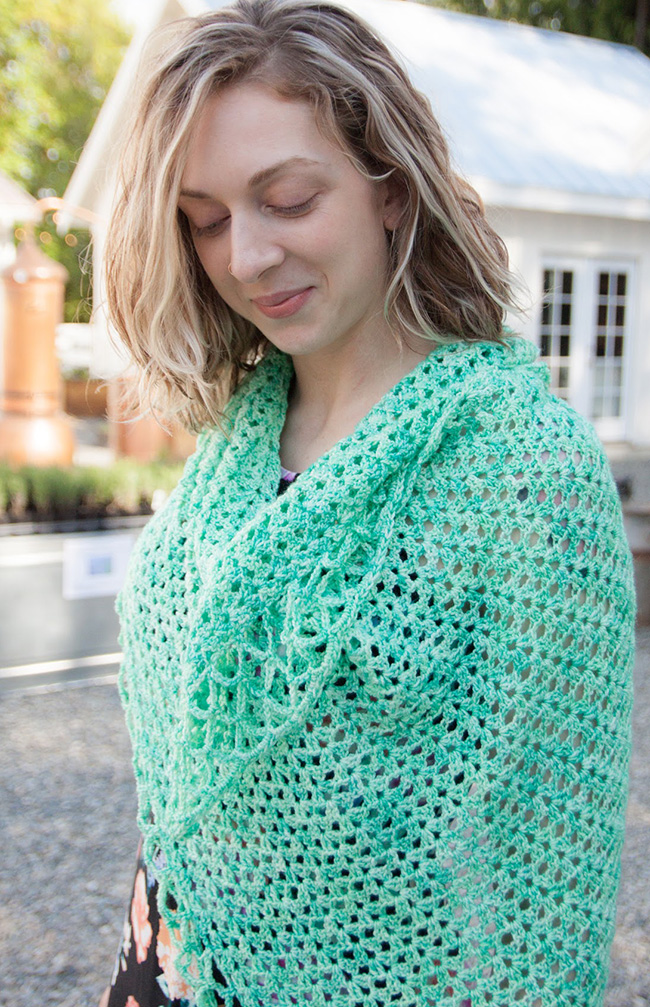
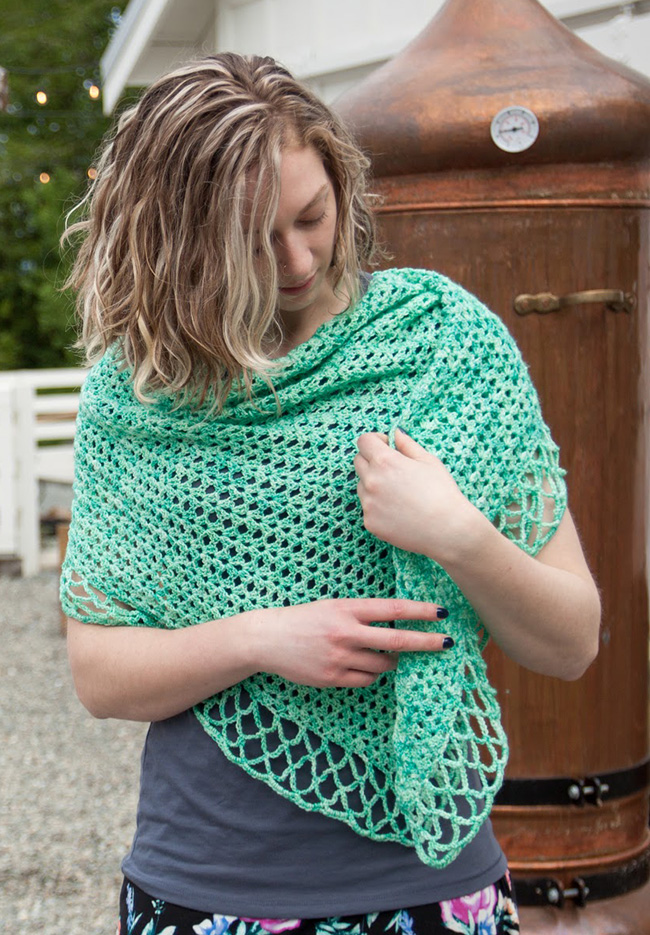
Striking rows and rows of lavender with their new green growth was the perfect backdrop for this shawl. I even won over my gorgeous friend Amber with the idea of shawls during our photoshoot. The lace pattern grows from just a few stitches on the left side to the wider right end. The airy border is then quickly hooked. You can easily customize the size of your shawl if desired.
Carefully tend to your stitches with this classic stitch shape and a beautiful shawl will grow before your eyes! It is deceptively simple to make with only chains, single, half double, and double crochet stitches. If you can make a granny square you can make this sock-yarn stunner! To make it even more relaxing use split ring stitch markers to mark each repeat, remove before starting border.
I’ve always been inspired to make elegantly simplified lace patterns in my designs. My main teacher of crochet, my great aunt Dolores, taught me to “read” my stitches and anticipate how they would build off of each other. I think she would have enjoyed this design. Maybe even selecting it as a rare variance from her usual projects of thin cotton crochet thread lace and worsted weight blankets.
 model: Amber Jahn
 photos: Jessica Bolof
SIZE
One
FINISHED MEASUREMENTS
Shawl vertical depth: 29 inches/74 cm
Length (top edge): 61 inches/ 155 cm
Note: This pattern is adjustable for different gauge and yardage – see yarn information below.
MATERIALS
Yarn
![]() Schmutzerella Yarns Dude [80% Superwash Merino, 20% Nylon; 400yd/365m per 100 g skein]; color: Frog's Breath; 2 skeins
Schmutzerella Yarns Dude [80% Superwash Merino, 20% Nylon; 400yd/365m per 100 g skein]; color: Frog's Breath; 2 skeins
Yarn Characteristics:
Choose a solid, semi-solid, speckled, or gradient yarn, just stay away from highly variegated yarns. The sample uses a smooth fingering-weight sock yarn, but any yarn can be used. Go up 2-3 hook sizes from suggested size for yarn.
Recommended needle size
[always use a needle size that gives you the gauge listed below - every knitter's gauge is unique]
![]() US #O-8/5mm crochet hook
US #O-8/5mm crochet hook
Notions
![]() split ring markers
split ring markers
![]() yarn needle
yarn needle
GAUGE
4.5 V-stitch shells horizontally and 8 vertically in 4 inches/10cm.
18 sts/8 rows = 4 inches/10 cm in V-stitch Shell
PATTERN NOTES
[Knitty's list of standard abbreviations and techniques can be found here.]
Shawl starts at small left point, increasing the depth and working to the right. Border is crocheted on after the main body.
Magic Ring
There's a tutorial here.
V-stitch Shell
Double crochet twice into ch-space, ch 2, double crochet twice into ch-space.
Ch: chain
Ch-sp: chain space
Hdc: half double crochet
Sc: single crochet
DIRECTIONS
Shawl Body
Row 1 (RS): Start with a magic ring; draw up a loop in the cnetre of the ring, and ch 3, work V-stitch Shell into the magic ring, tighten the ring. Turn work.
Row 2-4: Ch 3, V-stitch Shell into ch-space, double crochet on turning chain. Turn work.
Row 5: Ch 3, V-stitch Shell into space right after turning chain, [V-stitch Shell into ch-space] across to end of row, double crochet on turning chain. Turn work.
Rows 6-8: Ch 3, V-stitch Shell into ch-space] across to end of row, double crochet on turning chain. Turn work.
Repeat Rows 5-8 24 more times, for 26 total pattern sections. 163 sts.
Since the border works from the same multiple as the shawl body you can make this any size you want! I recommend leaving 20% of your yarn before you begin the border so you won't run out.
Border
Place marker.
Row 1 (RS): [Ch 10, sc into ch-space of V-stitch Shell] to end of short edge. [Ch 10, sc into top of turning chain] to end of long edge (last one in magic ring). Place marker. Turn work.
Row 2: [Ch 10, sc into ch-space of previous row of ch 10] all the way around to marker, twice in the corner. Turn work.
Row 3: [Ch 10, sc into ch-space of previous row of ch 10] all the way around to marker. Turn work.
Row 4: [Ch 5, sc into ch-space of previous row of ch 10] all the way around to marker. Turn work.
Row 5: Ch 2, hdc 5 times in ch-space to the corner. In the corner, hdc 5 times in ch-space, ch 2, hdc 5 times in ch-space, hdc 5 times in ch-space to marker.
Fasten off.
FINISHING
Block by giving the shawl a gentle bath, and then rolling in a towel to remove excess water. I gently shape it with blocking wires (mine are 1/16th tig welding wires) and T-pins on a polyester blanket or towels. If you prefer, steaming with a garment steamer, or using your steam iron to carefully shoot steam at it (never touching with the iron).
Weave in ends.
ABOUT THE DESIGNER
 Jessica enjoys making gluten free and allergy-friendly foods, being a nerd, and going on adventures with her husband, daughter, and son.
You can email her or find her on Ravelry and on Instagram.
Pattern & images © 2021 Jessica Bolof.


