


Quilted, a free knitting pattern from Knitty.com. Free knitting pattern for a DETAILS HERE.
INTRODUCTION
Quilted
by Katrina Walser

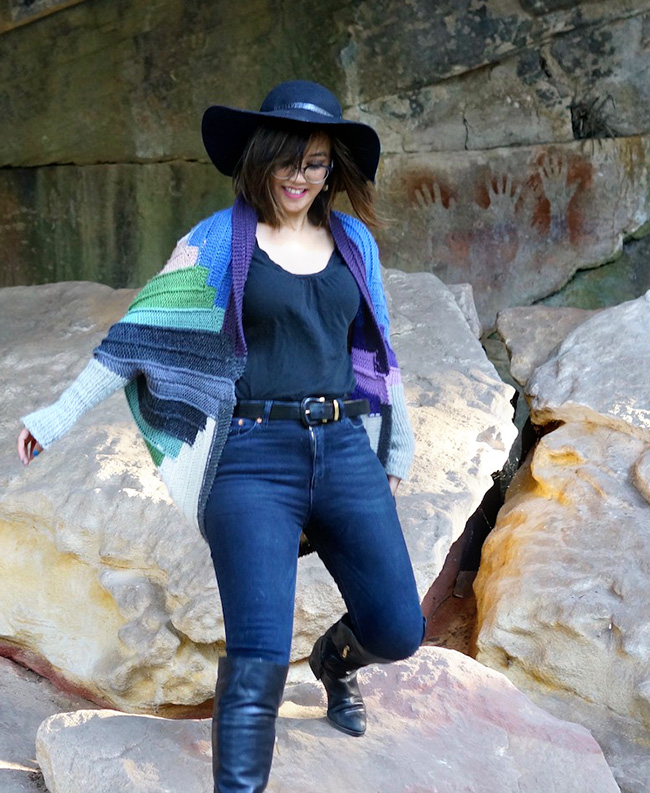
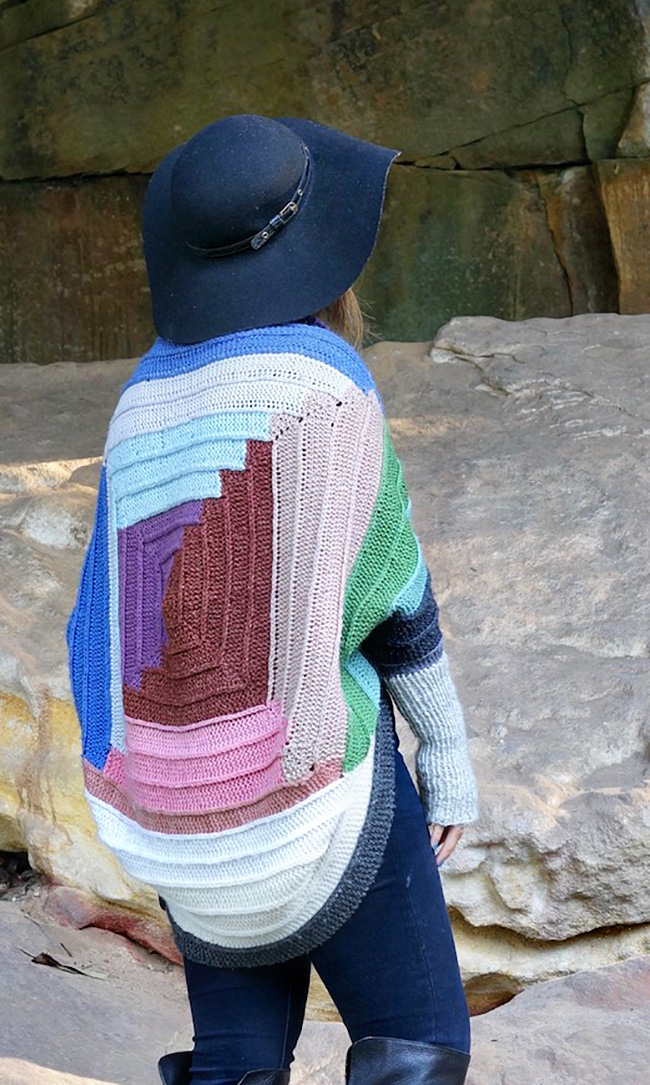
My winter wardrobe has always been made up of crisp, fancy blazers and large coats. But as it has done for so many aspects of our lives, 2020 upended my closet. Here in the Southern Hemisphere, the long lockdown months were during the winter, and since we were home so much I found myself craving a huge, cosy and soft jacket that I could knit relatively quickly and mindlessly. This shrug ticks all those boxes. It's constructed by making a square of knits and slip stitches, folding it in half and seaming up the sides, then picking up stitches and knitting sleeves in the round.
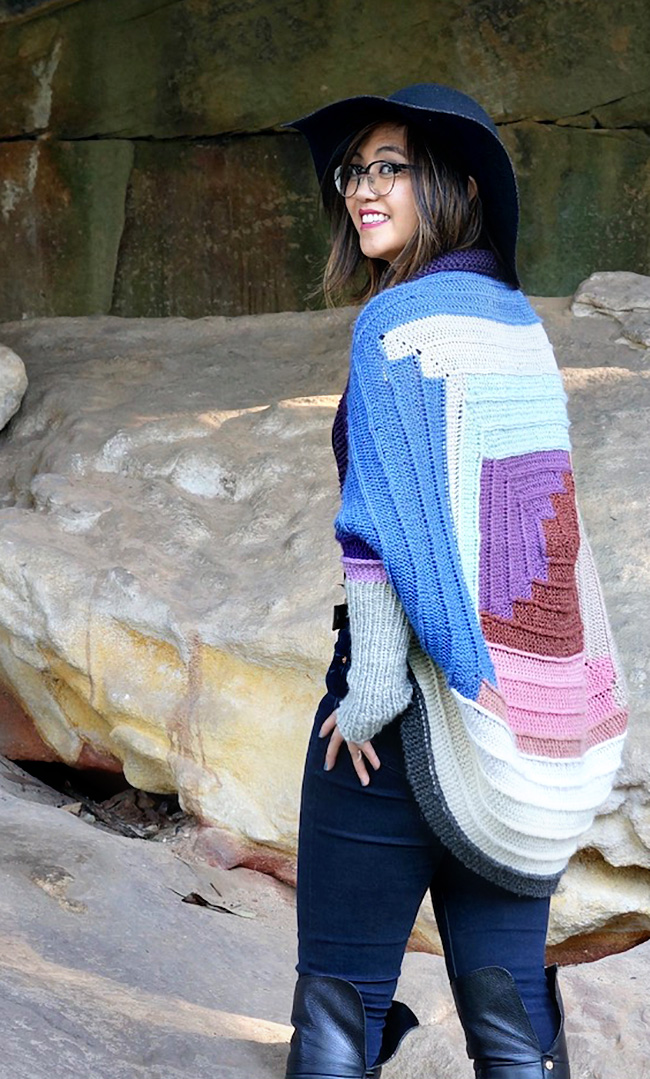
The square that makes up the main body of the shrug was inspired by the geometric shapes and bright colours that I associate with quilting, and is designed for you to use up the scraps in your stash. It's constructed using the Ten Stitch Blanket method, which gives you lots of lovely color changes without having to sew up any seams!
 model + photos: Katrina Walser


SIZE
Customized – see Finished Measurements section below
FINISHED MEASUREMENTS
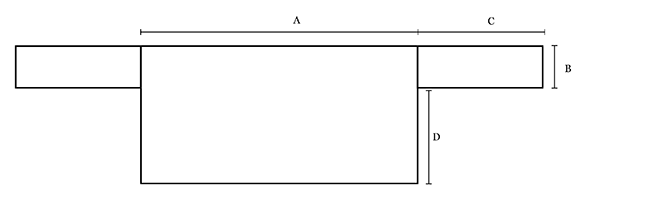
The shrug is oversized and open at the bust. The amount you stretch the body during blocking will determine the ease and fit. The sample is shown with a 36 inch / 91.5cm square body (Measurement A) stretched to 40 inch / 101.5 cm after blocking, on a model with a 32.5 inch / 82.5cm elbow to elbow measurement and a 34.5 inch / 88 cm bust.
Take the following measurements before casting on:
Hold your arms straight out to your sides perpendicular to your body, forming a T-shape. Measure from elbow to elbow, across your shoulders. Multiply this number by 1.1 and write it down as Measurement A.
Measurement A: __________________________inches/cm
Measure the circumference of your arm at your elbow, then subtract 1 inch / 2.5 cm. Divide the resulting number by 2. Write this down as Measurement B.
Measurement B: __________________________inches/cm
Measure a straight line down the inside of your arm from your elbow to the knuckle of your thumb (or where you want the sleeve to end). Subtract 1.25 inches / 3 cm. Write this down as Measurement C.
Measurement C: __________________________inches/cm
MATERIALS
Yarn characteristics:
This pattern is designed to use up small amounts of yarn from your stash, as in the sample.
Use either worsted-weight yarn, or fingering-weight yarn held double, or a mix of both.
Wool or acrylic blends would work well with this project. Avoid using too much yarn with a high cotton, bamboo (or other rayon) or silk content, as the weight and lack of elasticity of these fibers may pull the garment out of shape or weight it down.
Calculate the approximate amount required for each piece as follows:
Recommended needle sizeFor Body:
The sample size (36 inches square) uses the equivalent of approx. 1440 yds/1317m of worsted weight yarn for the Body. For every 2-inch/5-cm increment above or below 36 inches for Measurement A, add or subtract an additional 10% to the required yardage of the previous size. (e.g. 34 inches square requires 1296 yds/1185m, 38 inches square requires 1584 yds/1449m; 40 inches square requires 1742 yds/1593m, etc.). You may need to adjust this, depending on your gauge.For Sleeves:
Total yardage required = (Measurement B in inches x 2 x Measurement C in inches) x 2. Multiply by .9144 to calculate meters.
[always use a needle size that gives you the gauge listed below - every knitter's gauge is unique]
OR
Notions
![]() 5 removable stitch markers
5 removable stitch markers
![]() small scale
small scale
![]() yarn needle
yarn needle
GAUGE
20 sts/40 rows = 4 inches/10 cm in garter stitch
22 sts/27 rows = 4 inches/10cm in 1x1 ribbing, unstretched
Exactly matching gauge is not important for this piece as all parts of it are worked to specific measurements rather than stitch or row counts. Matching st gauge is more important than matching row gauge; just keep in mind that you may need to adjust the total amount of yarn used if your gauge differs.
PATTERN NOTES
[Knitty's list of standard abbreviations and techniques can be found here.]
The body of the shrug is based on the Ten Stitch Blanket pattern, used here with permission from Frankie Brown. Frankie's patterns are published to raise money for the Children's Liver Foundation in the UK. You can donate here.
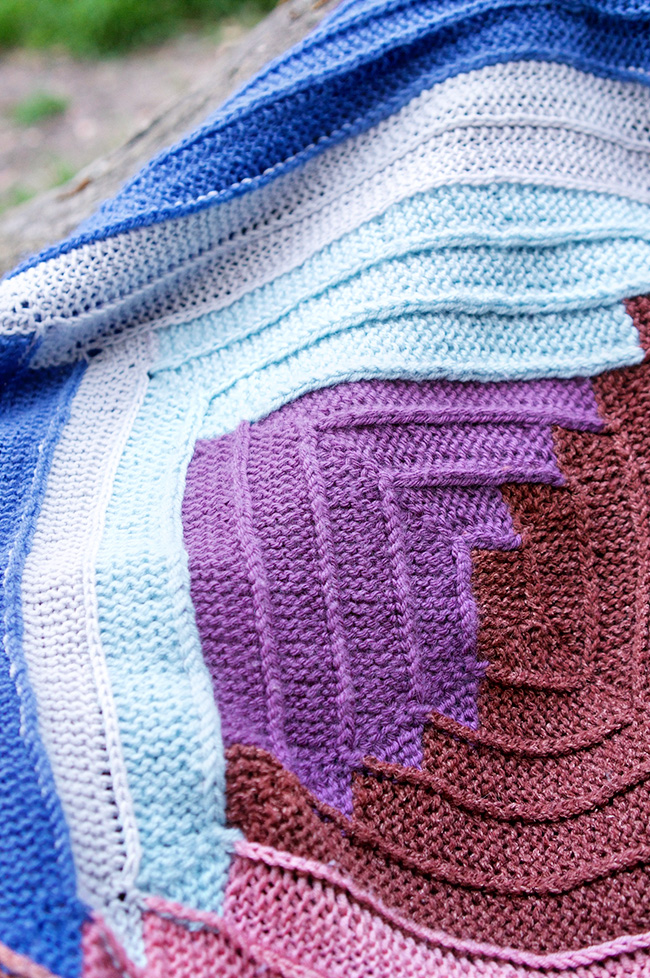
Guide to choosing and placing colors
Your choice of colors and color placement will be the biggest determining factor to the look of your shrug. If you wish to achieve the quilt-like effect shown in the sample, there are a few simple guidelines I suggest on when to change colors:
- Do not change colors in the middle of a straight section. For best effect, change color immediately after a Corner Turn (on Row 1 of the next straight section).
- Otherwise, change colors on the RS row before the Corner Turn (the row where you Chain Join into the purl bump marked with the stitch marker).
- Decide which side is the top of the body of your shrug, then always change colors after turning the top right corner and the bottom left corner. On the other two corners, you can choose whether to change colors or keep going with the current colour. This will visually divide the body of your shrug into two halves along a diagonal.
- Choose a single complementary color for the sleeves.
- To avoid running out of a color in the middle of a stripe, weigh your yarn before and after the first stripe of a new color to figure out how much yarn you used for that stripe. The next stripe will need approximately 1 additional gram if using worsted-weight yarn.
- Because of all the color changes, this shrug has a lot of ends to weave in. Weave them in as you go at each color change using Stephen West's Weavin' Stephen technique.
Corner Turn
Note: Do not pick up and work the wraps as you knit their corresponding stitches.
Row 1 [RS]: Sl1, k4, w&t.
Row 2 [WS] and all even rows: K to end.
Row 3: Sl1, k3, w&t.
Row 5: Sl1, k2, w&t.
Row 7: Sl1, k1, w&t.
Row 8: K to end, place removable marker into the last stitch.
Row 9: K1, w&t.
Row 11: Sl1, k1, w&t.
Row 13: Sl1, k2, w&t
Row 15: Sl1, k3, w&t.
Row 17: Sl1, k4, w&t.
Row 18 [WS]: K to end.
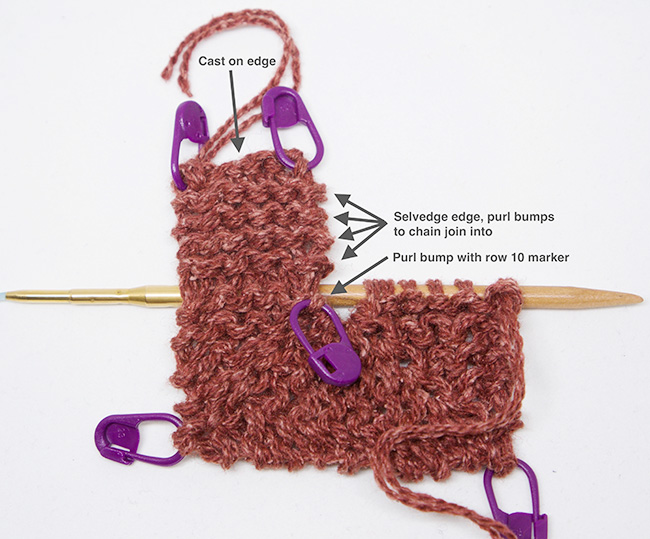
Chain Join
Worked into the last stitch of a RS row. Slip one stitch knitwise so all sts are on the right hand needle. Insert your left-hand needle into the next lowest purl bump on the selvedge edge of the work and pick up and knit 1 stitch. Pass the slipped stitch over the picked up stitch. See set-up diagram below.
DIRECTIONS
Setup for body
The body is worked flat on DPNs or circular needles.
Using your first body color, CO 6 sts. Place removable marker into the first and last CO stitches.
Row 1 [RS]: Sl1, k to end.
Row 2 [WS]: K all sts.
Rows 3-10: Repeat Rows 1-2 four more times. Place removable marker into the last stitch of Row 10.
Work Rows 1-18 of Corner Turn.
Next row [RS]: Sl1, k to end.
Next row: K all sts.
Work Rows 1-18 of Corner Turn.
Your live stitches are now perpendicular to the selvedge edge of the first 10 rows of work. You will now work your first straight section, Chain Joining stitches to the selvedge edge. Use the marker you placed at the end of Row 10 to find the first purl bump to join into. Remove the marker when you have worked the first Chain Join.
Next row [RS]: Sl1, k4, Chain Join.
Next row [WS]: Sl1 wyif, k5.
Repeat last 2 rows 5 more times, working Chain Joins once into each purl ridge on the selvedge edge and also into the first CO stitch, which has a marker in it. Remove this marker.
Work Rows 1-18 of Corner Turn.
This is the top right corner of your shrug body. If you are following the Guide to choosing and placing colors from Pattern Notes above, change color here.
For the next section, you are working perpendicular to the cast-on edge rather than a selvedge edge. Work each Chain Join into a cast-on stitch rather than a selvedge purl bump.
Next row [RS]: Sl1, k4, Chain Join.
Next row [WS]: Slp wyif, k5.
Repeat last 2 rows 4 more times, working Chain Join once into each cast-on stitch. Your last join will be into the last CO stitch, which has a marker in it. Remove this marker.
Work Rows 1-18 of Corner Turn.
Your needles are now parallel to the cast on stitches.
Body
Note: Read the Guide to choosing and placing colors in the Pattern Notes before continuing with the body.
**Row 1 [RS]: Sl1, k4, Chain Join.
Row 2 [WS]: Sl1 wyif, k5.
Rep last 2 rows until Chain Join has been worked with the marked st, then work 1 more WS row. Remove marker.
Work Rows 1-18 of Corner Turn.
If you want to change colors for the next block, break the current yarn and join the next color. Always use the Weavin' Stephen technique to weave the ends in when you change color.
Repeat from ** until piece is a square (Measurement A) inches/cm wide; AT THE SAME TIME, on the final repeat, work until the RS row that Chain Join is worked with the marked stitch, then BO instead of working the WS row. Remove all markers.
Wet block the body. Using many different yarns will result in a slightly misshapen body; stretch and pin the work as you block so that it forms a square.
Fold Body in half horizontally with WS facing each other. Using mattress stitch, seam the sides from the bottom corner up (shown as D on Schematic), stopping (Measurement B) inches/cm before the folded edge.
Sleeves
With RS facing and using DPNs or long circulars for the magic loop method, pick up and knit 1 st into each purl bump of the selvedge edge of the armhole. Join to work in the round and pm for beg of round.
Round 1: (K1, p1) to end.
Repeat this round until the sleeve measures (Measurement C) inches/cm.
BO all sts using Jeny's Surprisingly Stretchy bind off.
Repeat for other side.
FINISHING
Weave in ends. Block again if desired.
ABOUT THE DESIGNER
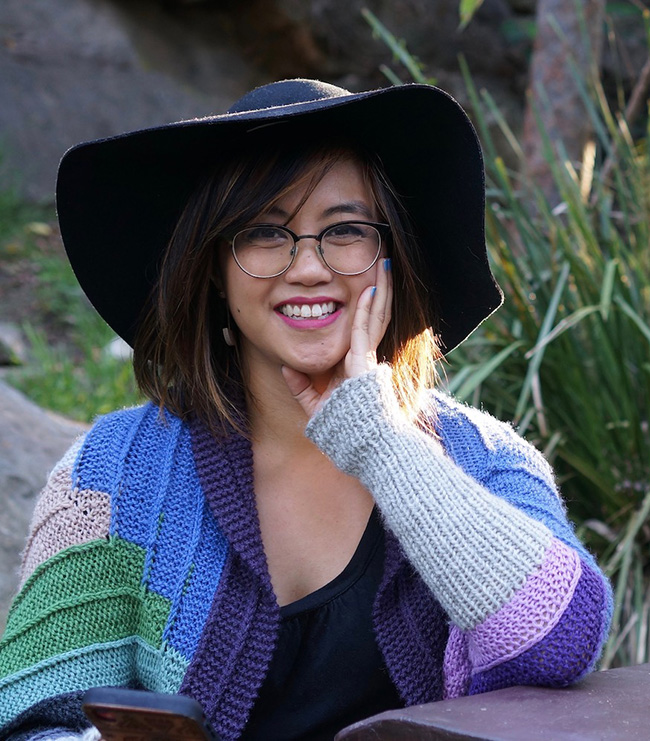
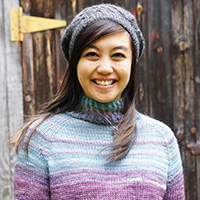 Katrina Walser is a knitting designer and teacher based in Sydney, Australia. She recently moved back to Sydney from New York with her husband and young daughter and is having fun exploring Australian yarns and readjusting to warmer weather and lighter weight knits.
You can find her at her website or on Ravelry, Instagram or YouTube.
Pattern & images © 2021 Katrina Walser