


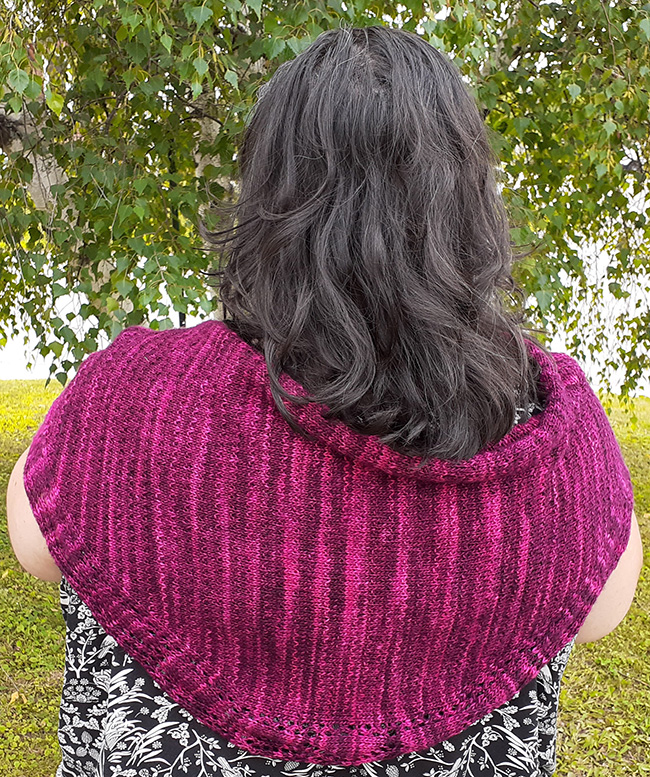
Summerlea Shawlette, a free knitting pattern from Knitty.com. Free knitting pattern for a DETAILS HERE.
INTRODUCTION
Summerlea
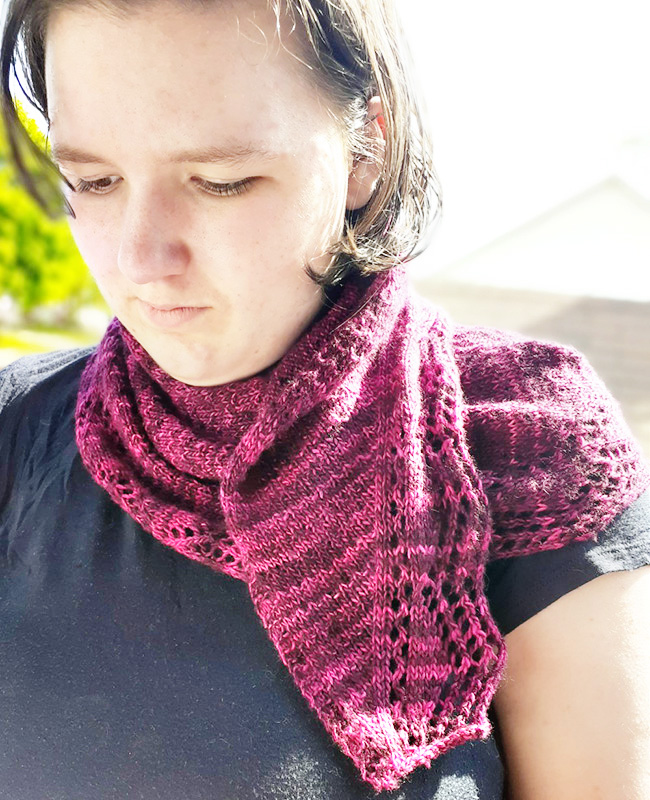

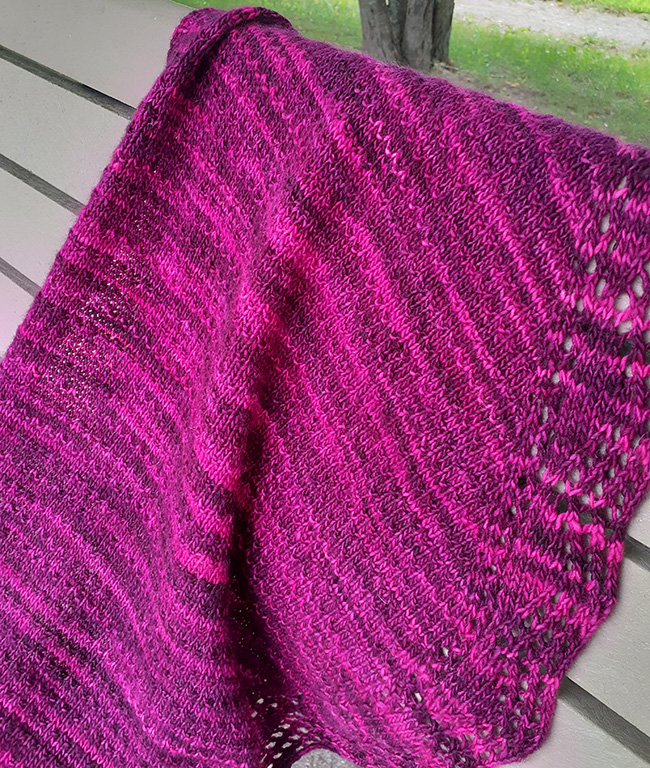
If you've been holding on to a skein of beautiful hand-dyed fingering-weight yarn, this might be the project that gets it on your needles: a simple tip-to-tip shawl construction that shows off the beautiful color variations in a hand-dyed skein of yarn. It's the perfect project for a special gift.
This shawlette is worked from tip-to-tip and features a lace edging along the bottom, a simple textured stitch for the body, and a garter stitch border worked along the neckline to complete the shape. You'll cast on enough stitches to begin the top edge and lace edging. To create the shawl body, increases are worked along the border of the lace pattern to gradually create the first half of the crescent shape. Once it has reached its full depth, a few repeats of the lace pattern are worked straight (no increases and decreases) before you begin decreasing along the same edge to complete the other half of the shawlette.
While it's a small one-skein project, there are a few ways to wear it – like a traditional shawl, as a bandana shawl, or even as a scarf. It's also very easy to adjust and create a large shawl as long as you have enough yarn.
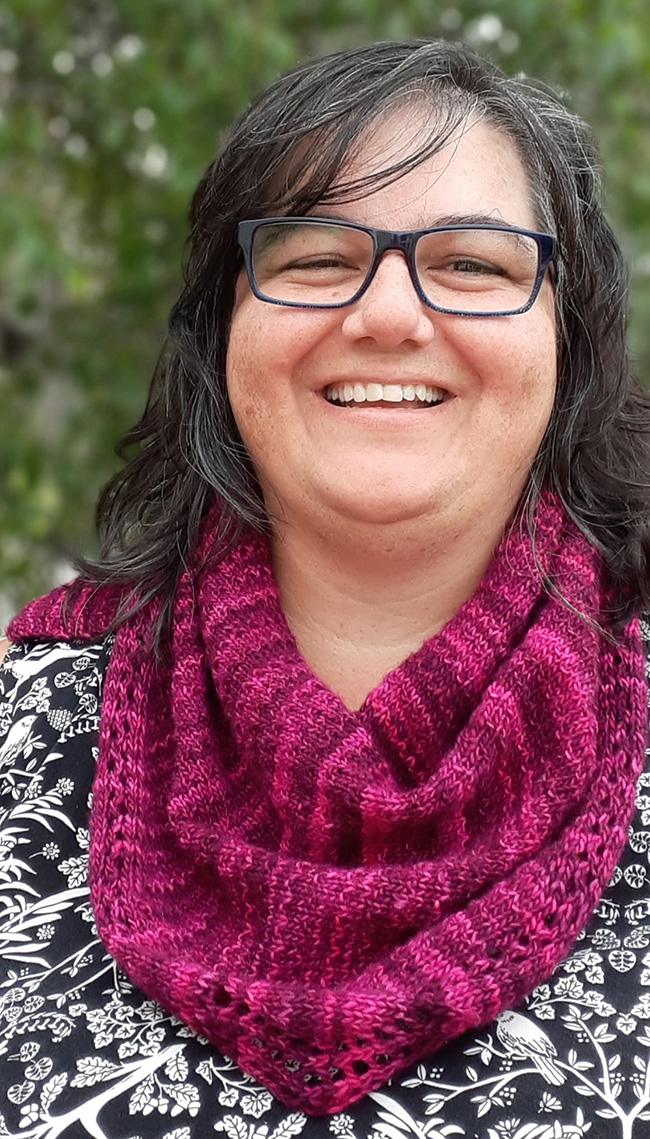
 model: TJ Lyons, Tonia Lyons
photos: Tonia Lyons


SIZE
One
FINISHED MEASUREMENTS
Width: 48 inches/122 cm
Depth at center: 17.5 inches/44.5 cm
MATERIALS
Yarn
![]() Neighborhood Fiber Co. Rustic Fingering [100% Superwash Merino; 475 yds/435 m per 4 oz skein]; color: Dupont Circle; 1 skein
Neighborhood Fiber Co. Rustic Fingering [100% Superwash Merino; 475 yds/435 m per 4 oz skein]; color: Dupont Circle; 1 skein
Yarn Characteristics:
The sample shown uses a superwash merino in fingering weight that is hand-dyed with wonderful drape and movement. Look for a superwash merino or other fingering-weight yarn that has good drape and will block easily (the neck edge will have a noticeable curl before blocking).
Recommended needle size
[always use a needle size that gives you the gauge listed below - every knitter's gauge is unique]
![]() US #6/4mm needles for working flat
US #6/4mm needles for working flat
Notions
![]() stitch marker
stitch marker
![]() blocking mats and pins
blocking mats and pins
![]() optional: wires or blocking combs
optional: wires or blocking combs
![]() yarn needle
yarn needle
GAUGE
22 sts/34 rows = 4 inches/10 cm in Stockinette stitch
23 sts/32 rows = 4 inches/10 cm in Pepper Pattern stitch
PATTERN NOTES
[Knitty's list of standard abbreviations and techniques can be found here.]
As written, the shawlette uses all but a few yards of the recommended yarn. If your gauge is different or you want to make a larger shawl, you'll need a second skein of yarn.
The shawl size is easy to adjust. Add more repeats of the central panel or more repeats of the increasing (and decreasing) sections, depending on the amount of yarn you have. Weigh your yarn to keep track of how much yarn each section uses.
If you aren't sure if you'll have enough yarn, weigh your skein of yarn before you begin. Work the increasing section until you've used a little less than half the skein and have completed a full repeat of the stitch pattern. Skip the central body instructions and begin the decreasing section with the remaining half-skein.
Markers are used to divide the shawl into three sections: the 3-stitch edge, the shawl body, and the bottom lace edging.
Video Tutorial Here
Pepper Pattern (for shawl body)
Row 1 [RS]: Knit.
Rows 2, 4, 6, 8: Purl.
Row 3: K1, (p1, k1) to end of row.
Row 5: Knit.
Row 7: P1, (k1, p1) to end of row.
CHARTS
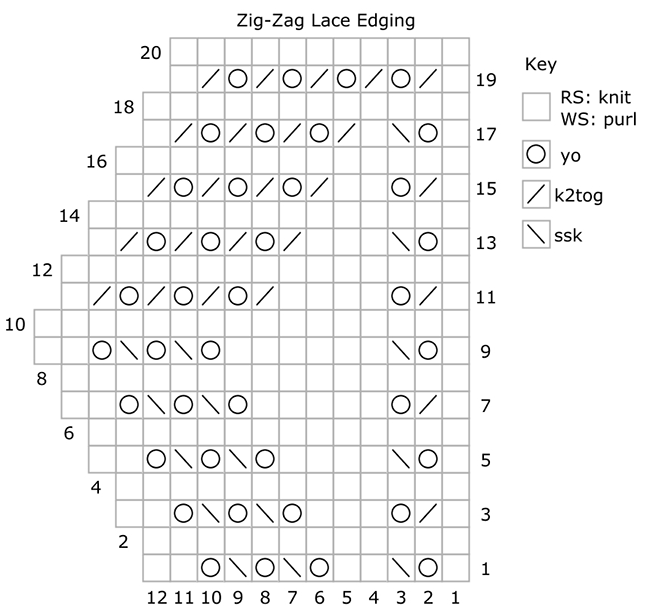
Zig-Zag Lace Edging
Row 1 [RS]: K1, yo, ssk, k2, [yo, ssk] 2 times, yo, k2. 12 sts.
Row 2 and all WS rows: Purl.
Row 3: K1, k2tog, yo, k3, [yo, ssk] 2 times, yo, k2. 13 sts.
Row 5: K1, yo, ssk, k4, [yo, ssk] 2 times, yo, k2. 14 sts.
Row 7: K1, k2tog, yo, k5, [yo, ssk] 2 times, yo, k2. 15 sts.
Row 9: K1, yo, ssk, k6, [yo, ssk] 2 times, yo, k2. 16 sts.
Row 11: K1, k2tog, yo, k4, [k2tog, yo] 3 times, k2tog, k1. 15 sts.
Row 13: K1, yo, ssk, k3, [k2tog, yo] 3 times, k2tog, k1. 14 sts.
Row 15: K1, k2tog, yo, k2, [k2tog, yo] 3 times, k2tog, k1. 13 sts.
Row 17: K1, yo, ssk, k1, [k2tog, yo] 3 times, k2tog, k1. 12 sts.
Row 19: K1, [k2tog, yo] 4 times, k2tog, k1. 11 sts.
Row 20: Purl.
DIRECTIONS
Set-Up
CO 15 sts.
Row 1 [WS]: P12, k3.
Row 2 [RS]: K4, M1L, pm, k1, k2tog, yo, k to end. 16 sts. 5 sts before the marker - 3 sts for garter edging and 2 sts for Shawl Body; 11 sts after marker for Lace Edging.
Row 3: P to last 3 sts, k3.
Increasing:
Row 1 [RS]: K3, work Pepper Pattern to marker, M1L, sm, work Zig-Zag Lace Edging to end. 1 st increased in shawl body.
Row 2: Work Zig-Zag Lace Edging to marker, work Pepper Pattern to last 3 sts, k3.
Work as set until you have completed the Zig-Zag Lace Edging 8 times in total. See Pattern Notes if you're using different yardage.
After working the Zig-zag Lace Edging 8 times, there will be 3 sts for the top edge, 82 sts for the shawl body, and 11 sts for the Zig-zag Lace Edging.
Central Body
Row 1 [RS]: K3, work Pepper Pattern to 1 st before marker, k1, work Zig-Zag Lace Edging to end.
Row 2: Work Zig-Zag Lace Edging to marker, p1, work Pepper Pattern to last 3 sts, k3.
Continue as set until you have worked 3 more repeats of the Zig-Zag Lace Edging.
Decreasing
Row 1 [RS]: K3, work Pepper Pattern to 2 sts before marker, k2tog, sm, work Zig-Zag Lace Edging to end. 1 st decreased in shawl body.
Row 2: Work Zig-Zag Lace Edging to marker, work Pepper Pattern to last 3 sts, k3.
Continue as set until you have worked 8 more repeats of the Zig-Zag Lace Edging, and 2 sts rem in shawl body.
Final Row 1 [RS]: K3, remove m, k2tog, remove m, yo, ssk, k to end. 16 sts.
Final Row 2 [WS]: P to last 3 sts, k3.
BO rem 15 sts.
FINISHING
To block: soak shawl in lukewarm water and an appropriate wool wash. Roll in towel to squeeze most of the moisture out. Stretch it out and pin the points of the lace edging; use pins, wires or combs to keep the top edge straight.
Weave in ends.
ABOUT THE DESIGNER
 Tonia is a knitting teacher, writer, and designer living in Quebec, Canada. When she's not knitting, you can usually find her with a cup of coffee and a good novel.
Find more of her knitting-related designs and articles at toniaknits.com and knitting tutorials on her YouTube channel, Nerdy Knitting.
Pattern & images © 2021 Tonia Lyons