


How to Get Hooked: Information and instructions for knitters who want to learn how to crochet
INTRODUCTION
How to Get Hooked
by Julia Madill
As the new crochet columnist for Knitty, I want you to know I get it. This is KNIT-ty, not CROCHET-y! In this column, I aim to share some fun crochet tips and techniques, knowing I am primarily speaking to the unconverted: knitters. Fear not, my stick-wielding friends! I am one of you! As someone who learned to knit first, crochet second, I hope to guide you down the same path and, hopefully, remove some stumbling blocks along the way.
Two crochet seams for knitting
Putting together a knitting project is a bit like accessorizing an outfit: the wrong finishing touch can bring a good look down! There are many ways to put two pieces of knitting together, and you may not have experimented with crochet seams if you aren’t a crocheter. Rest assured, you only need the most basic crochet skills to work a crocheted seam, and this guide will take you through the whole process.
Why work a crochet seam?
- You want a structured seam with little stretch. Sometimes you need a seam to add structure or framework to a project. Perhaps you want the shoulder or side seams of a garment to stabilize the shape. Or maybe you want to strengthen the bottom seam of a knit bag to prevent it from stretching when holding heavy objects.
- You want a decorative seam on the right side of the work. Many common knitting seams aren’t all that attractive when worked on the right side of a garment. If you want to create visible, decorative seams as a design element in your knitting, the single crochet seam is a great way to seam and embellish in one step!
- You want a quick or temporary seam. If you have ever had to undo a length of mattress stitch, you know that removing a sewn seam can be tedious work. Crochet seams are relatively quick to work and a cinch to undo.
- You hate sewing. For those who loathe threading a needle, you can still avoid sewing seams when you crochet them! A crochet seam may not be appropriate for all projects, but as it is worked with a crochet hook instead of a needle, this method still gets you off the hook (pun intended) sewing-wise.
How to crochet a slip-stitch seam
This is probably the most common crochet seam used to join pieces of knitting. It creates a strong, structured seam with little stretch. In most cases, you can use this seam in place of mattress stitch, noting it will be less flexible. It appears as a horizontal chain on the side facing as you work and a horizontal line of dashes on the opposite side. This seam pinches the two pieces of fabric together, creating a selvage ridge above the slip stitches. This seam is worked with the wrong side of the knitting facing and is not visible on the right side of the work.
I have outlined how to work a seam across bind-off edges, side edges and cast-on edges. The slip stitch technique is the same across all edges; the only difference is where you insert your hook. In general, precisely where you insert your hook is not crucial, but consistent stitch placement across the edge will give you the best results.
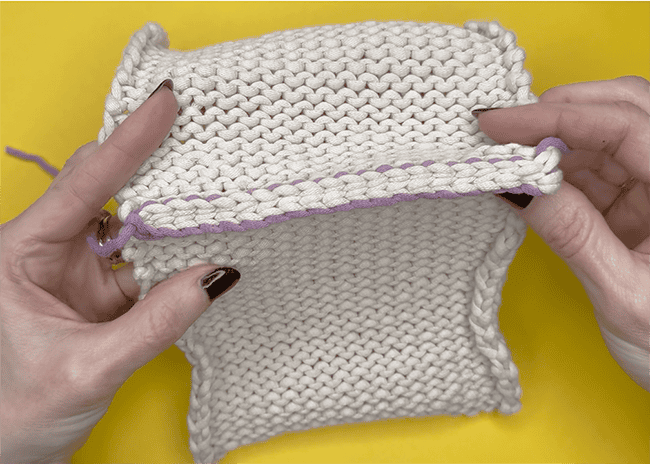
The front of the slip stitch seam (the side that is facing as you work) looks like a chain lying flush with the knit fabric.
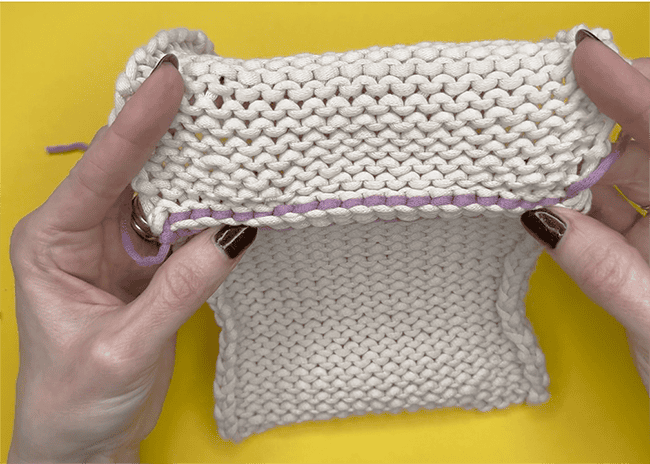
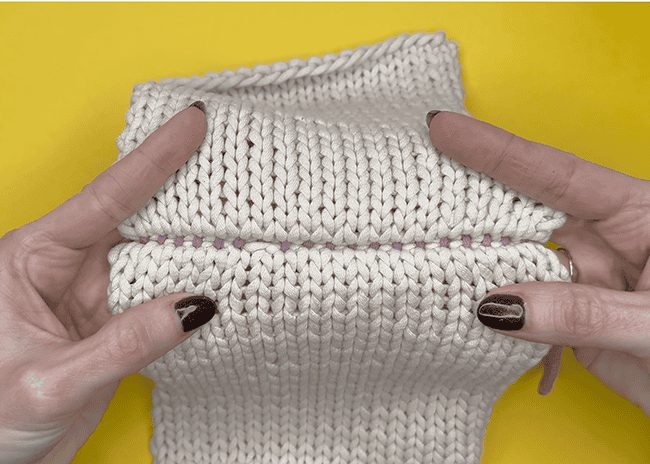
The back of the slip stitch seam presents as a neat line of horizontal dashes, a bit like a machine-sewn seam.
From the right side of the work, the seam is virtually invisible, though detectible here as it was worked in a contrast colour. Can you see where I missed a stitch?
The joined pieces of fabric are sandwiched between the slip stitch seam and create a ridge. This firm selvedge edge can be an advantage in areas where you want to add stability.
Set Up (all edges)
- Place the knit pieces to be seamed with right sides together and wrong sides facing out. Align edges to be seamed.
- Use a crochet hook a few sizes smaller than the needles used to knit the pieces. Crochet stitches are larger than knit stitches, and using a smaller hook will ensure you can work one slip stitch to one knit stitch.
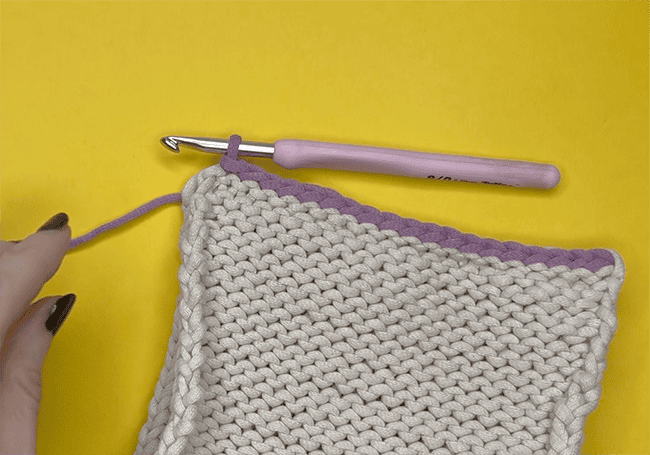
- Begin at the right-hand edge if right-handed, left-hand edge if left-handed (photos show right-handed version)
Bind-off edges
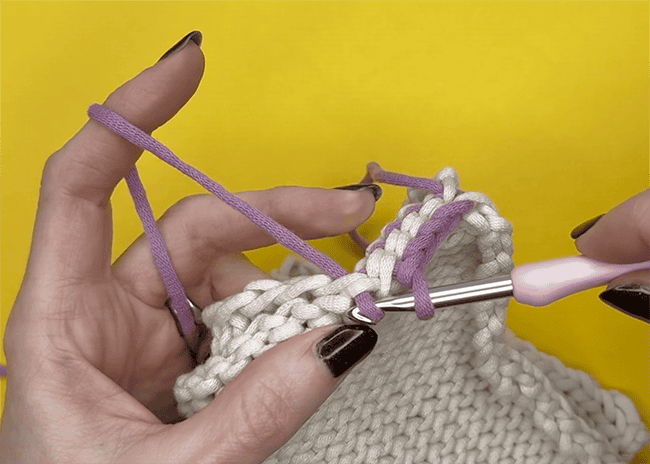
Step 1: Insert your hook through both loops of the first bound-off stitch of the front fabric, and then the back fabric. This will look like 4 loops on your hook.
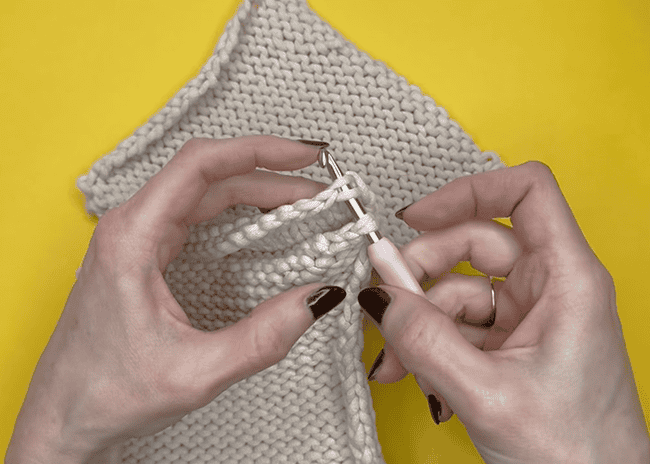
Step 1.
Step 2: With your seaming yarn at the back and leaving a tail long enough to weave in later, pull a loop through to the front. 1 loop on hook.
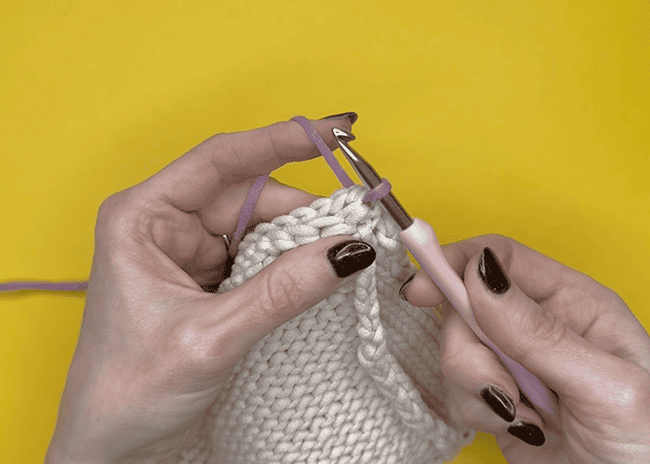
Step 2
Step 3: Insert your hook through the next pair of bound-off stitches as in Step 1.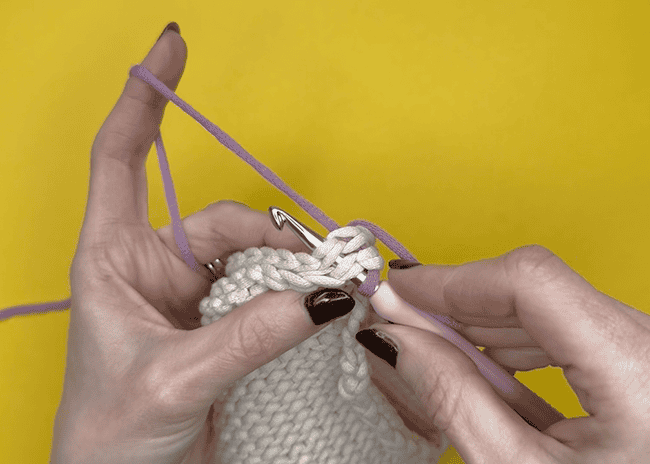
Step 3.
Step 4: Yarn over hook (yoh) and draw a loop through the knit fabric as well as through the loop on the hook. This creates one slip stitch. 1 loop remains on hook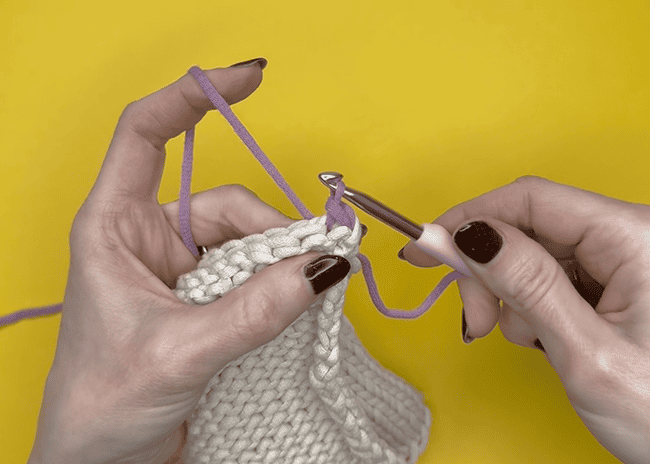
Step 4.
Step 5: Repeat steps 3-4 until the end of the seam.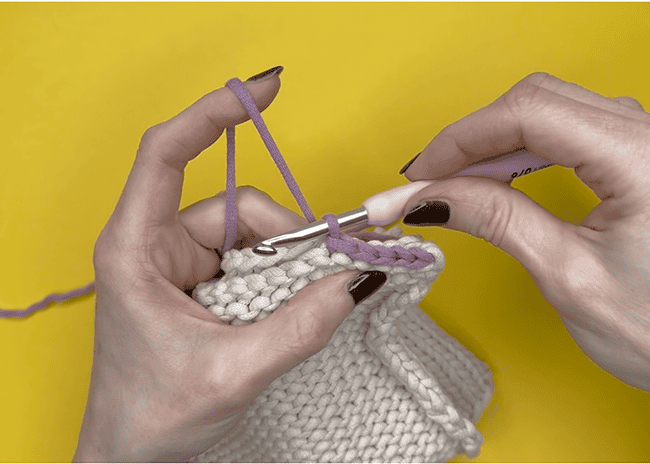
Step 5.
Step 6: Cut the seaming yarn and pull the tail through the last loop on the hook to fasten off. 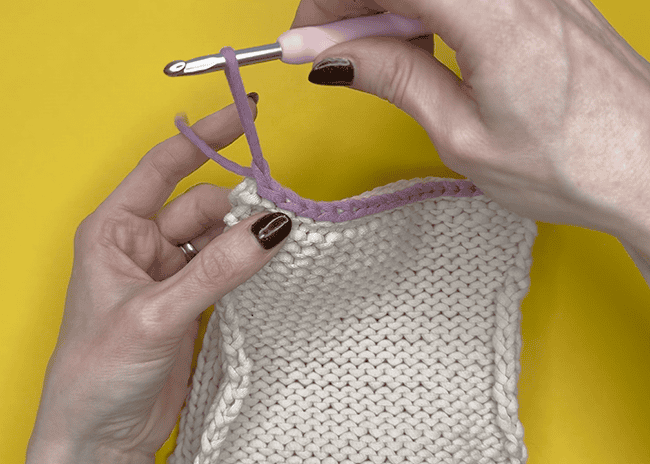
Fasten off.
Cast-on Edge
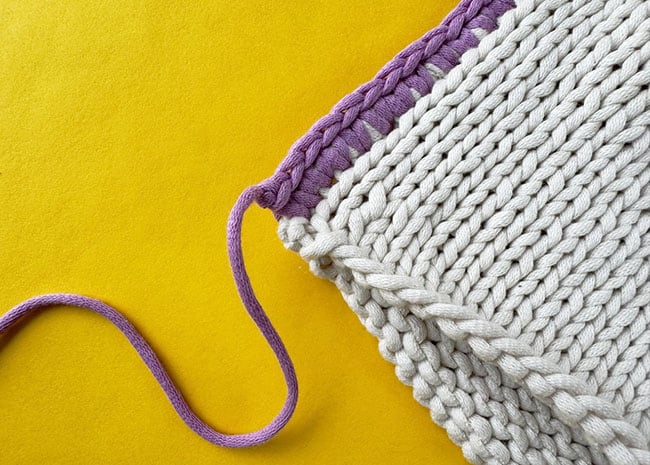
Most cast ons (like the long-tail cast on seen here) will have a horizontal strand at the base of each stitch along the first row. If you use a cast on that presents differently, simply find a consistent spot at the base of each stitch where you can insert your hook. Consistency is more important than the exact space in which you work.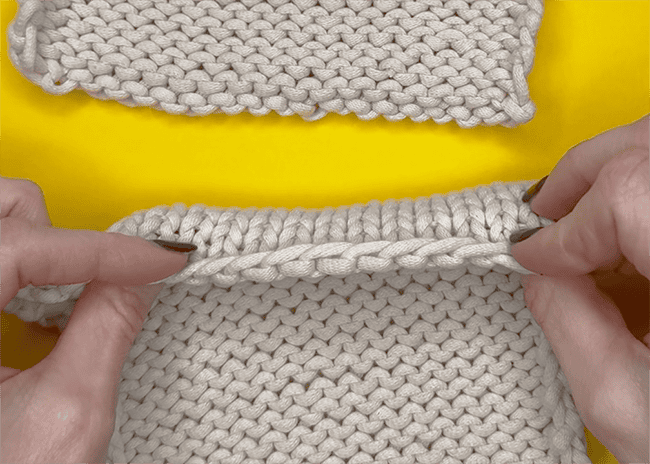
The long-tail cast on edge seen here has horizontal strands at the base of each stitch.
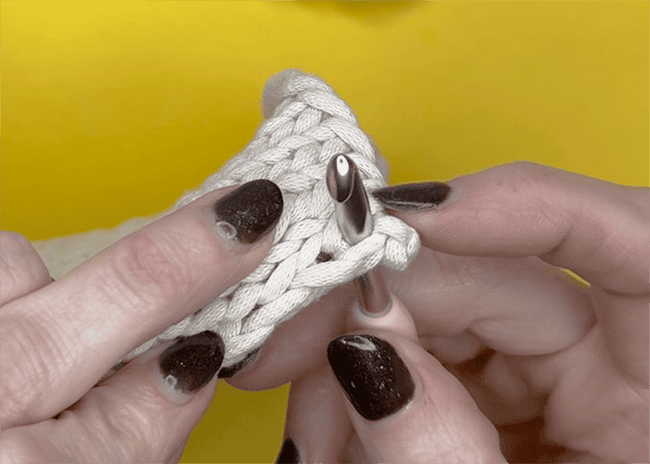
Work the seam as described in the Bind-Off Edge instructions above, but insert your hook into these horizontal strands from each piece of knit fabric. This means you only have 2 loops on your hook at the end of Step 1.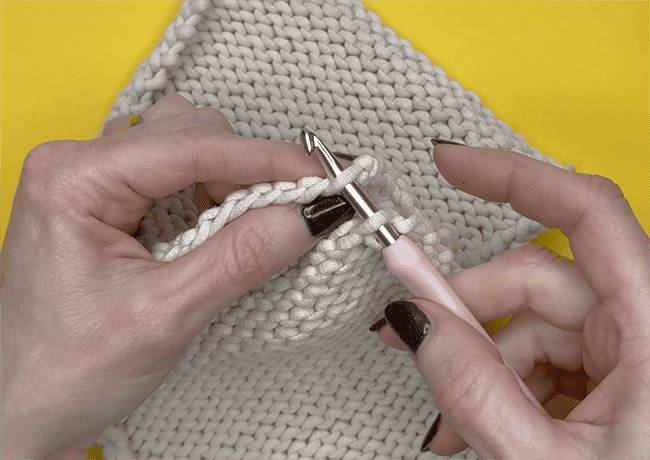
When working along a cast on edge, you will only have two loops on your hook at the end of Step 1.
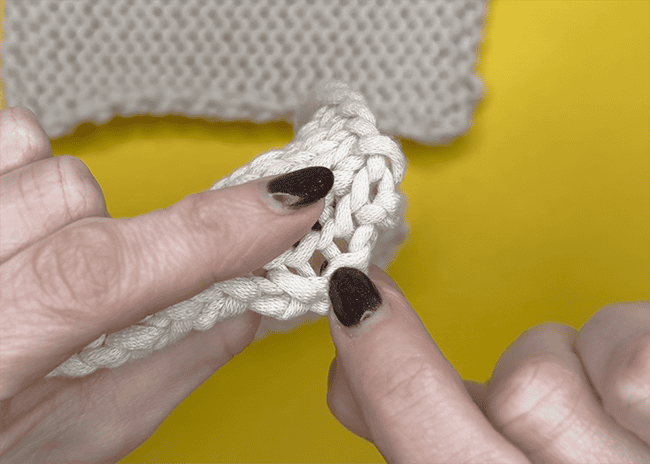
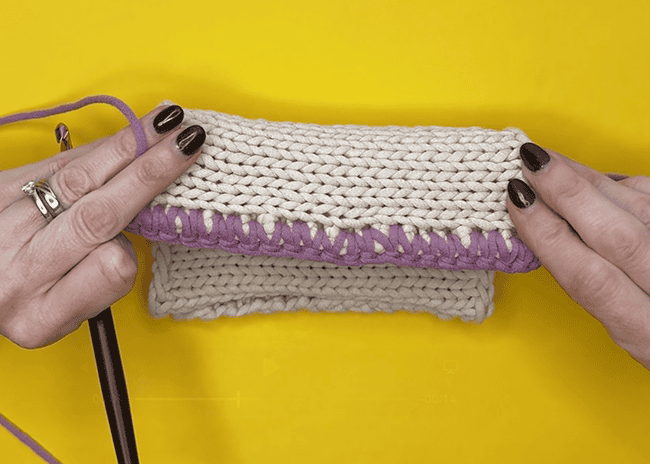
The cast-on seam is less bulky than the bind off, as only two loops are sandwiched into the selvage edge.
Side Edges
Here you will be working the seam between the last two stitches at the side edge of each knit piece as you would when working mattress stitch. The edge stitch of each knit piece will be taken into the seam.
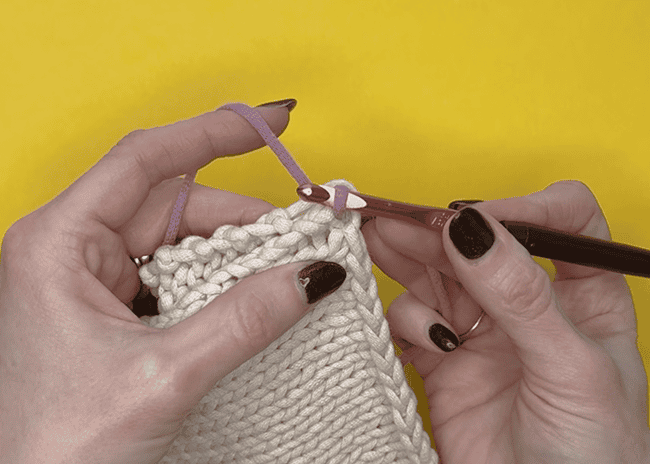
Here you can see the bars between the columns of stitches. You will be inserting your hook between these bars to work your seam.
Where to insert your hook, viewed from the right side of the knit fabric.
Again, work the slip stitch seam steps as given for working along the bind-off edge, but insert your hook between the column of stitches as shown.
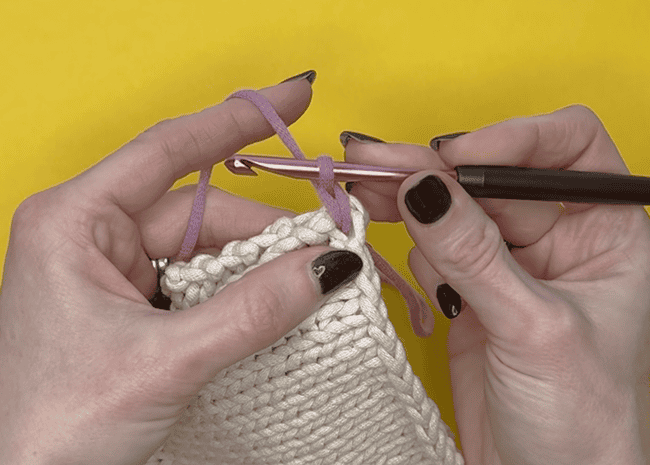
Getting ready to work Step 2. The hook is catching the edge stitch from each piece of fabric.
Each time you insert your hook, move one row down, ensuring one horizontal strand between the knit stitches is between each of your crochet slip stitches. If needed, you can skip a row and have two bars between your slip stitches to adjust the tension of your seam. It may be necessary to work into every second space (two bars between) when joining garter stitch or other knit stitch patterns with rows which are not as tall.
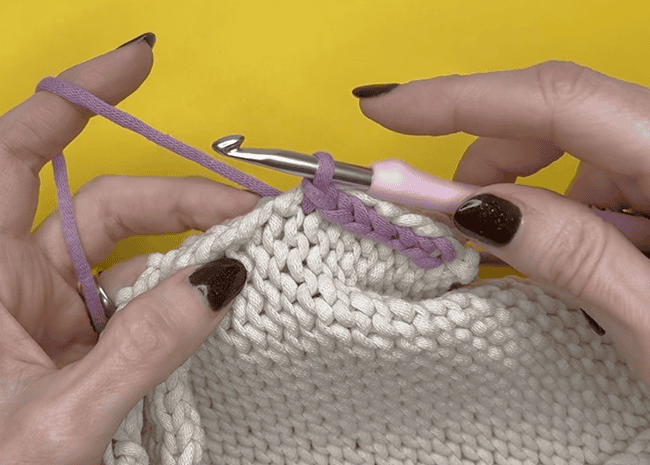
After repeating Steps 3 and 4, a few times, you will begin to see a chain of slip stitches forming on the side of the work facing you.
How to work a crochet slip-stitch seam on knitting
Single Crochet Seam
A single crochet seam will connect your two pieces and encase the edge. If you sew, you can think of the slip stitch seam as a standard straight stitch, and the single crochet seam as an overlock or serger stitch. A single crochet seam will enclose the raw edge, though it creates a pronounced ridge or “spine” and won’t lie flat. I wouldn’t recommend using a single crochet seam on the inside of a sweater, but if worked on the right side, it can be used for a decorative effect. This seam has a right and wrong side, but the “wrong” side is still attractive and not as distinctly different as seen in the slip stitch seam.
The right side of a single crochet seam worked along the side edge of two pieces of stocking stitch.
Here’s what the single crochet seam looks like from the wrong side.
Set up and hook placement is the same as given for the slip stitch seam, only you will be working with the wrong sides of the knit fabric together and the right side facing out. The biggest difference is that you will add an extra yarn over hook (yoh or yo) before completing each stitch, which creates a single crochet stitch rather than a slip stitch.
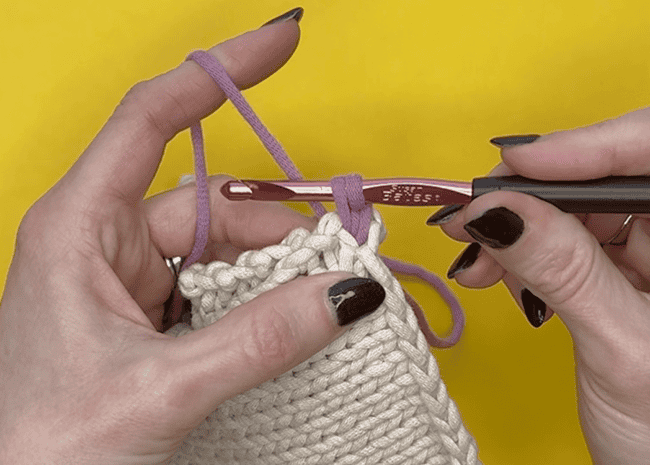
Step 1: Insert your hook through both knit fabrics as outlined for the slip stitch seam (side edges shown in photos and video). With your seaming yarn at back and leaving a tail long enough to weave in later, pull a loop through to the front. – 1 loop on hook.
Step 1
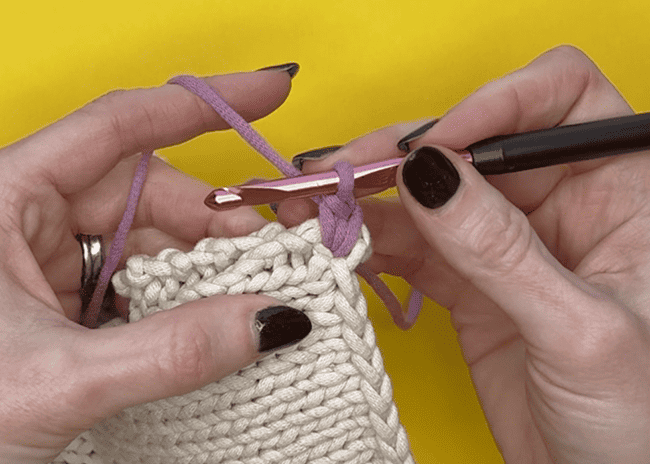
Step 2: Yarn over hook, and draw a loop through the loop on the hook. This creates a chain 1 (ch 1), or turning chain, which is standard practice before working a row of single crochet. This turning chain brings your working yarn up to the height of a single crochet stitch, reducing distortion on the first stitch made (this step isn’t necessary for the slip stitch seam, as slip stitches are flat and have no significant height). This extra chain is only worked before the first stitch of the seam. 1 loop on hook.
Step 2
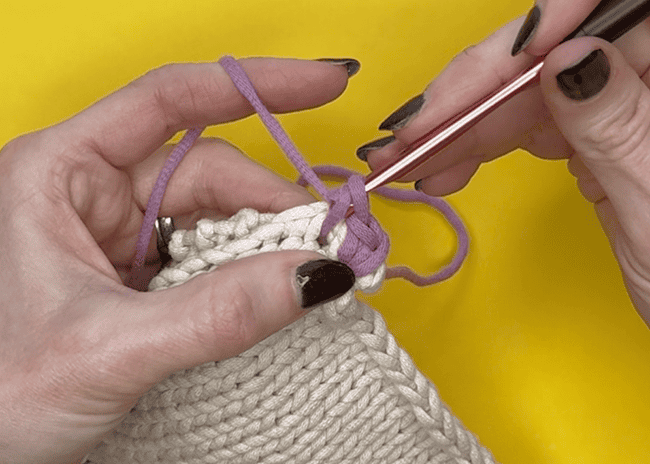
Step 3: Insert your hook into the same space you pulled up the first loop of seaming yarn, and draw up a loop. – 2 loops on the hook.
Step 3
Step 4: Yarn over hook, and draw through both loops on the hook. This completes 1 single crochet stitch. – 1 loop remains on the hook.
Step 4
Step 5: Insert your hook into the next stitch or space of your seam and draw up a loop. – 2 loops on hook.

Step 5
Step 6: Yarn over hook, and draw through both loops on the hook. This completes 1 single crochet stitch. 1 loop remains on the hook.
Step 6
Step 7: Repeat Steps 5-6 until the end of the seam. Cut yarn and fasten off.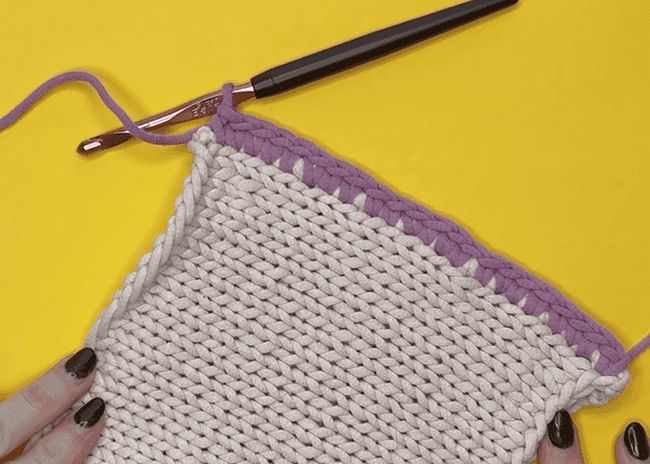
Step 7
How to work a single crochet seam on knitting
If you are working the single crochet seam around a corner, work 3 single crochet stitches into the same corner space to create a sharp turn. Curves can be adjusted similarly by adding extra stitches where needed to accommodate the curve.
Both the single crochet and slip stitch seams can easily be “un-zipped” by untying the end which was fastened off and pulling on the yarn tail.
While you may not be ready to abandon sewn seams altogether, I’m sure you’ll find a time when grabbing a crochet hook is just the thing to put your knitting together. Adding another tool to your knitting toolkit is bound to come in handy. And, hey – if you’re completely new to crochet, you’ve just learned how to work the slip stitch and the single crochet stitch. Knit and crochet need not be mutually exclusive, so remember to toss a crochet hook in your knitting bag!ABOUT THE AUTHOR
 Julia Madill is a knit and crochet pattern designer, tech editor, and graphic artist, and Knitty's new Crochet Editor. She loves sharing what she has learned in her 10+ years of experience in the yarn industry, providing others with the tools to create in their own style, voice and aesthetic. Her book, Every Way with Granny Crochet is available from David and Charles publishers.
She lives in Toronto with her partner, two daughters, a cat named Pickles and a whole lot of yarn.
Text & images © 2026 Julia Madill