


Wiseknit™: A column that teaches you how to do things you'll find in knitting instructions
INTRODUCTION
Wiseknit™: Practical Knitting Wisdom
by Kate Atherley
One of the wonderful things about knitting is that there are so many different solutions to every problem, so many possible answers to every question. This column aims to expand your knitting knowledge and toolkit with practical solutions and answers to your technical knitting questions and conundrums.
“The Jogless Jog” On Stripes in the Round
When working stripes and colour changes when knitting in the round, something funny happens.
There’s a “jog” in the stripe at the start of the round. That is, the start and end of the stripe don’t line up.
regular ole joggy stripes
The first time I noticed this, I thought I’d made a mistake. Absolutely not! This happens because of how knitting in the round works. You’re actually knitting in a spiral, so the start and end of round can’t line up. You can see it clearly here:
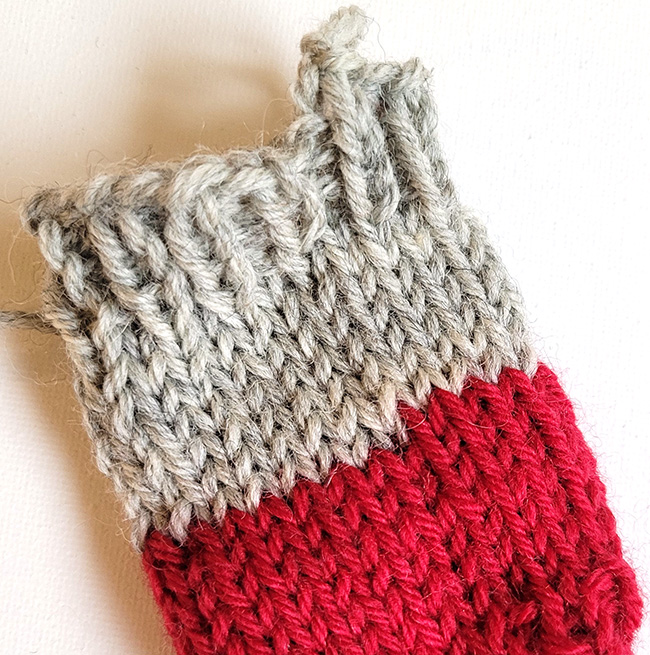
big bad jog on the right side of the work
It’s even more obvious on the wrong side of the work:
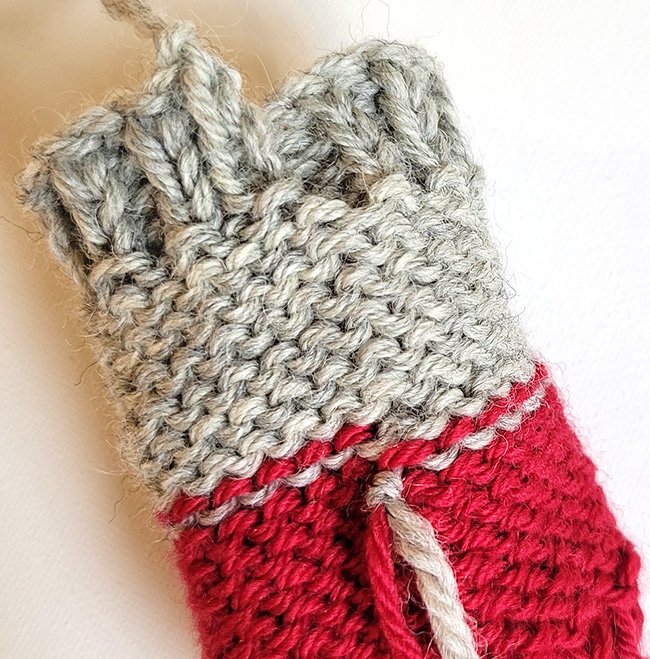
big bad jog on the wrong side of the work
I’ve left the end at the top unwoven, too, so you can see the effect of the spiral in the bind-off edge… the last bind-off stitch is higher than the first.
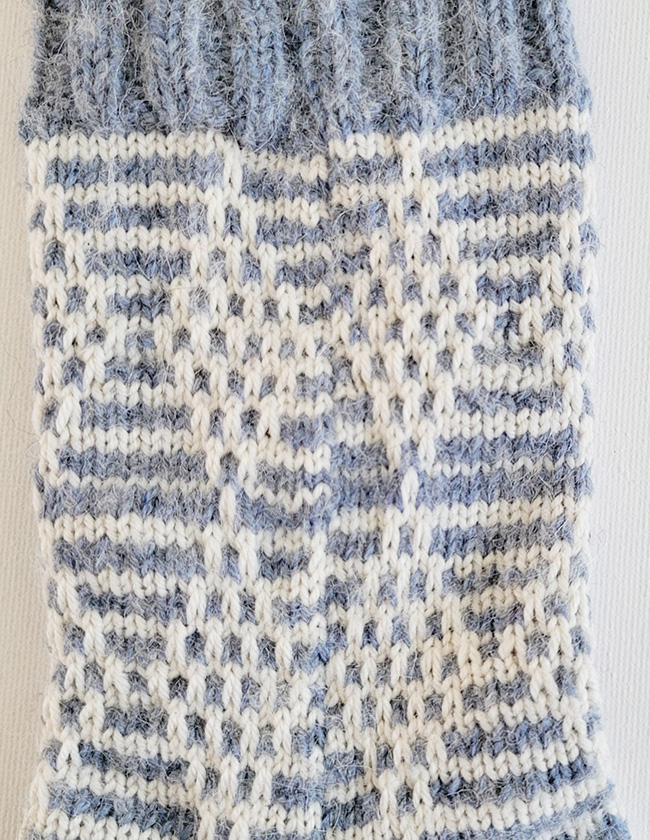
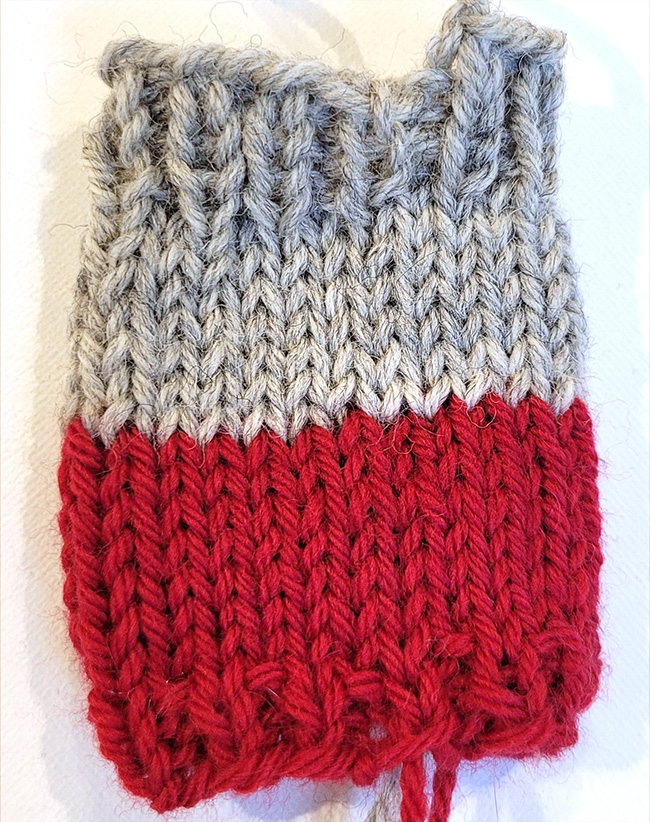
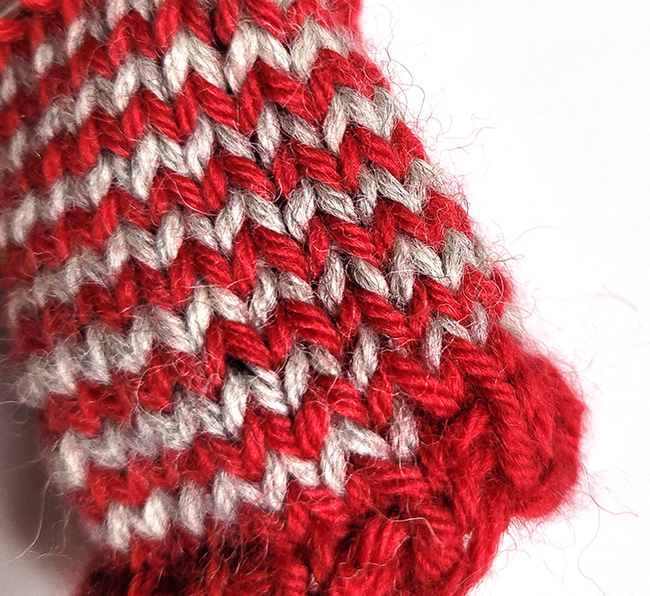
It’s worth noting that it's really visible in the projects above, but it’s a lot less obvious in a stranded colorwork pattern like this:
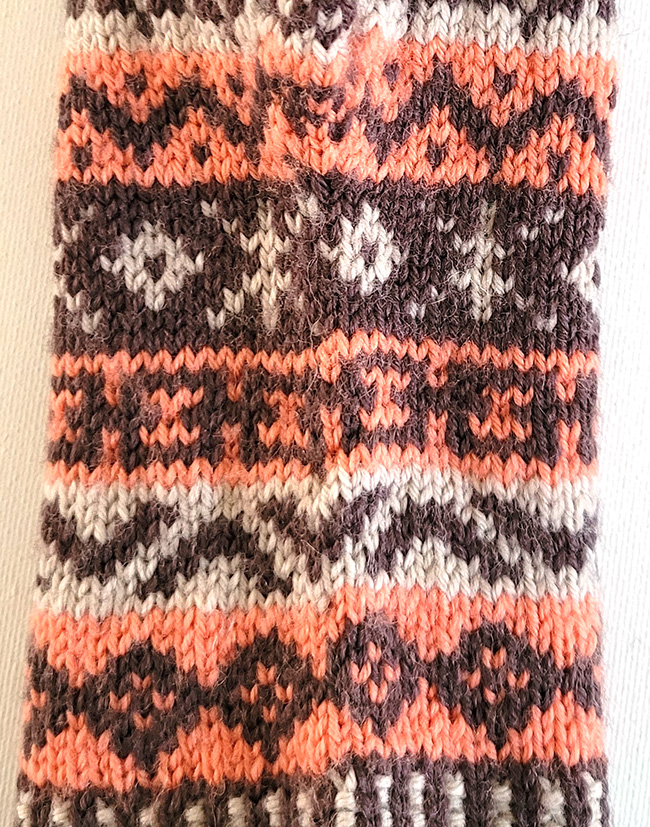
joggy jogs in stranded colorwork
Technically, this mitten has stripes, but because there’s lots of color changes, the jog is significantly less noticeable. This is why that Fair Isle and stranded colorwork knitters, in general, worry about it less. (This is also why a lot of stranded colorwork patterns have vertical stripes at the start of the round, to eliminate that pesky blip.)
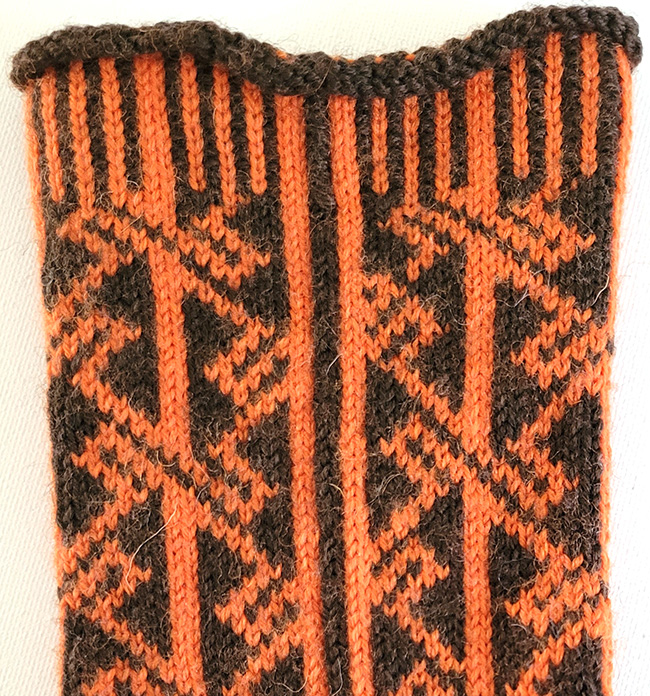
the vertical stripe hides any jogs that might occur
If you see a jog in your circular knitting projects, don’t worry! Your knitting is technically correct – but it does look a bit funny. (If you’ve got a pair of store-bought socks with stripes, have a close look: they have a jog, too.)
Many knitters find this bothersome, and clever people have worked out ways to make it look a little neater.
Whether I worry about it depends a lot on the project, and where the start of the round is positioned when I’m wearing it.
If I’m working a sock, especially one for me, I will place the start of the round as a point where it’s less visible when it’s being worn. I set things up so that the start of the round is on the inside of the leg, and on the center of the sole. And then I just let it do what it will.
If it’s a hat, the start of the round is pretty darn visible, and so I will take the time to tidy things up.
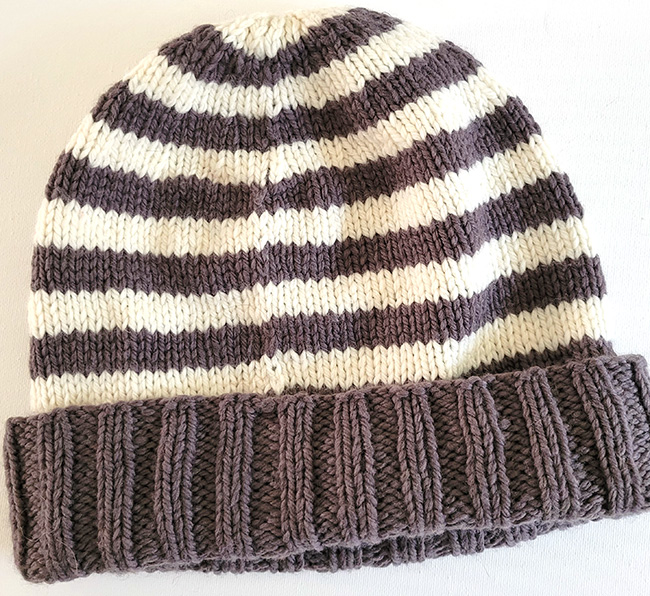
no-jog striped hat
There’s a few different ways to do it, and I offer five, for different situations.
Note that in all cases, the solution might not be absolutely invisibly perfect – you can often see a little bit of something at the start of the round. Again, that’s not you doing anything wrong, that’s just the nature of the beast. But I bet one of these solutions will make it look at lot better than it did before!
The Simplest Jogless Jog Solution 1
If you’re working very deep stripes and cutting the yarn
If the stripes are very deep, or it’s large blocks of color, and you’re cutting the old yarn (rather than carrying it up as you work), you can tidy things up a fair bit when you weave the ends in.
Pull the end of the upper stripe’s yarn upwards and across the “gap” to the left; pull the end of the lower stripe’s yarn downwards and across the gap to the right.
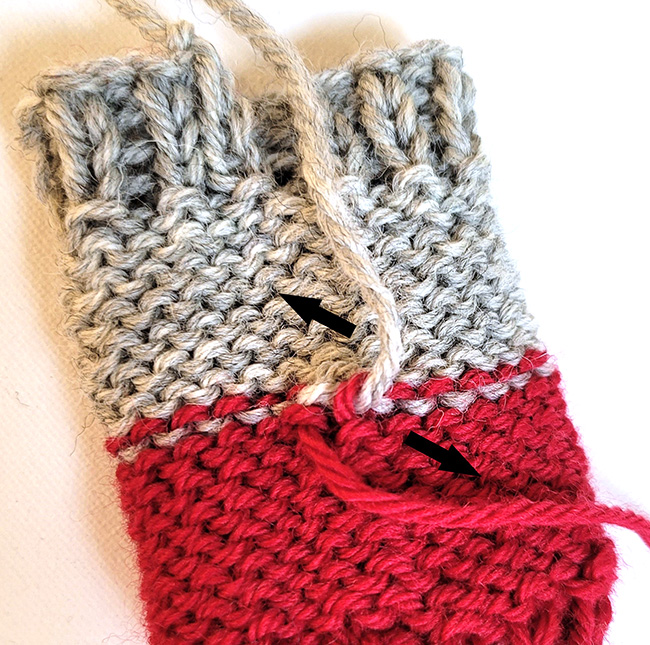
Simplest Jogless Jog Solution 1
much better
The Classic Jogless Jog Solution 2
If you’re working deep (4+ round) stripes
I love this one, it’s very straightforward to work.
When it’s time to change color, join the new yarn and work the first round as normal.
At the start of the second round, slip the first stitch purlwise.
That’s it!
Classic Jogless Jog Solution 2: At the start of the second round of the new color: just slip that first stitch purlwise
What this does is pull up the start of previous round, so it’s a bit better lined up with the end.
This only works with deep stripes because what you’re doing is “short-changing” the first stitch of the round, each time you work a stripe. In this hat sample, each stripe is 4 rounds deep, except for at the start of the round: that column of stitches is short a row. You can see it in the circled area in this photo.
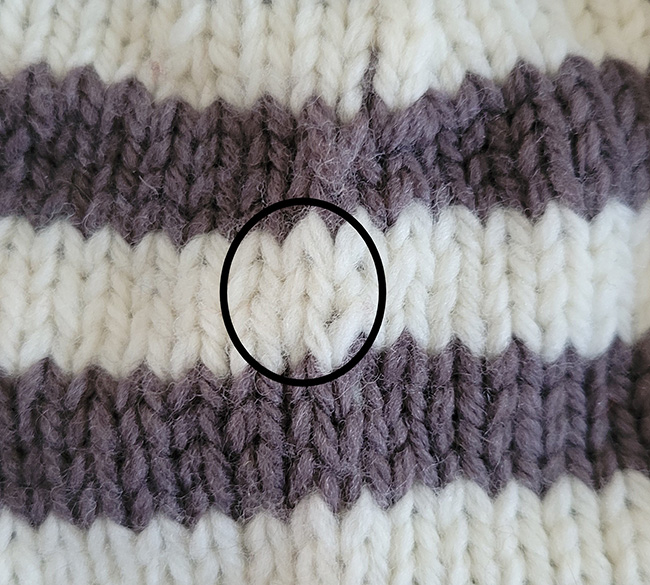
The circled area is at the start of the round, showing the first and second stitches. You can see the first stitch has only three round worked, but the second stitch has four rounds worked.
“Shortchanging” that stitch too often can cause a vertical pucker in your work.
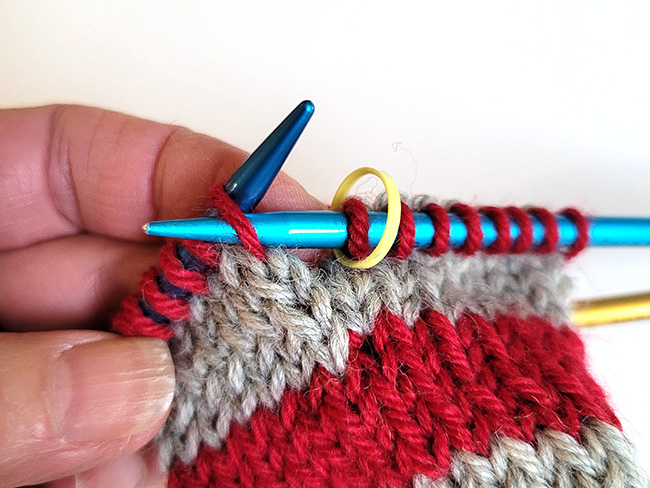
The Classic Jogless Jog Solution 3
If you’re working shallow stripes (2-3 rounds)
This one also works by futzing with the start (well, actually, the end) of the round. There are a few different ways to do it, this is the one I like the best. I’ve heard this referred to as “change early and lift”, which is a nice way to remember the steps.
Step 1: At the end of the last round of the old color, work the stitch with the old color, but then return the stitch to the left needle and knit it again with the new color.
Jogless stripes: step one
Change color and work the first round with the new color, right up to the last stitch.
Step 2: When only the last stitch of the round remains, use the tip of the right needle to pick up the right leg of the stitch’s mother (from the row below, this will be the old color), and place that on the left needle. Work a k2tog on the lifted-leg and the stitch.
Jogless stripes: step two
You’ll find you’ll need to snug up the yarns when you’re changing, and some people like to twist them around each other.
A Different Solution Entirely: Helical Stripes
Helical striping is a completely different way to work stripes in the round that dodges the start of the round entirely!
Helical Stripes for 2-Color 1-Round Stripes:
This works similarly to the deep-stripe solution from above, but solves the issue with vertical puckering because the color change point is different every time.
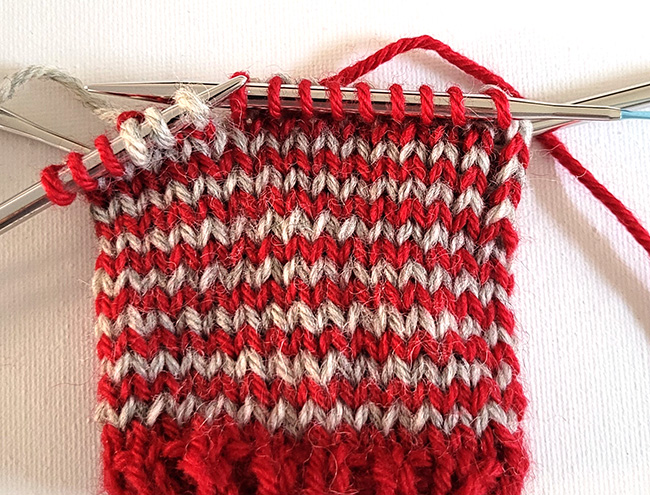
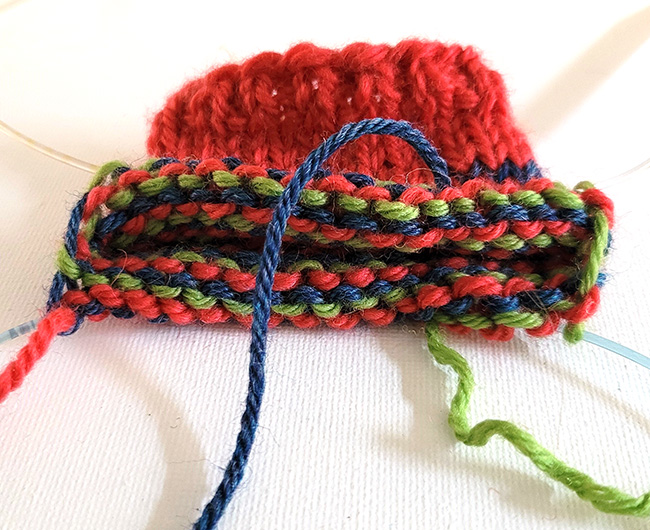
I’ve worked with red until 3 sts of grey remain; I’m going to slip the grey stitches, getting me to where the grey working yarn sits so I pick up that yarn and start working around with it.
Setup round: When you’re ready to change to Color 2, join it at the start of the round, and knit to the last 3 stitches of the round. Slip the last stitches stitches of the round (in Color 1) purlwise.
Working the stripes: *Pick up the available working yarn (Color 1) and knit until 3 stitches of the previous stripe (Color 2) remain. Slip those 3 stitches purlwise. Pick up the available working yarn (Color 2) and knit until 3 stitches of the previous stripe (Color 1) remain. Slip those 3 stitches purlwise. Repeat from *.
You can see how it’s set up in the photo above.
Once you’ve completed your stripe section, just continue in the round in the final color.
A note about this: the color changes in the stripes themselves are remarkably invisible. No jog! It’s amazing. But you can see the start and end of the striping sequence.
it’s subtle, but you can see that the first grey stripe isn’t connected to anything, it just starts.
What you’re actually doing here is working two nested spiral – one in each color – and the start of the sequence shows that.
Helical Stripes for 3+ Colors:
You can also extend this idea, working more than 2 nested spirals.

A three-color helical stripe pattern. There’s no real adjustments needed to the pattern to do this. Just keep careful count of rounds worked when you get to the thumb gusset
It’s set up a little differently. You’ll need to divide your stitches up into portions, as many as you have colors. That is, for three colors, divide your stitches up into thirds; for four colors, divide your stitches up into quarters. The number of stitches in each portion doesn’t have to be exactly the same, but keep them as close as you can. For example, to work three-color helical stripes in a sock on 56 stitches, you should divide them up into 18, 18 and 20.
Work a setup round:
Work the first third of the round with your Color A; drop Color A, join Color B and work the next third of your stitches, then drop Color B; join Color C and work the last third of your stitches… then keep going around with Color C until you hit the dropped Color A strand. Drop Color C.
The process:
Pick up the available color, and knit around until you hit the next color. Drop the one you’ve just worked with, pick up the next one, and knit around until you hit the next color. Drop the one you’ve just worked with, and…
How to work three-color helical stripes
That’s it. The bit that might seem weird is that for two colors you’re working a third of the round, and for one of them you’re working two-thirds of the round.
I love this method because it doesn’t require any thinking at all, just knit until you hit the next yarn and switch.
Like two-color helical stripes, you can see the start and ends of the stripes. But I think it looks rather fun!

At the top and bottom of the mitt hand, I’ve circled where the stripes start, so you can see what it looks like. Not a mistake!
Unlike two-color helical stripes, you’re always changing color in the same place: have a look at the inside of my work here.
The three yarns are attached at different spots, and you’ll always knit with one until you hit the next. You will always change color in those same three places, dropping one yarn and picking up the next.
This can make things easier to manage if you’re working a pattern that requires counting rounds, for example the gusset increases in this mitten.
No matter what solution you prefer, go forth, and stripe!
ABOUT THE AUTHOR
 Kate Atherley is Knitty's Managing Technical Editor and a knitting author and teacher. She’s also the co-founder and publisher of Digits & Threads, an independent, member-supported online magazine about Canadian fibre and textile arts, crafts and industry. The combination of her university degree in mathematics, professional experience in software development and usability, and training in garment and fashion design give her a unique perspective.
You can see more of her work at kateatherley.com, and on Ravelry.
Text & images © 2023 Kate Atherley.