


Cheddar The Goldfish, a free knitting pattern from Knitty.com.
INTRODUCTION
Cheddar The Goldfish
 by Frances Gillespie

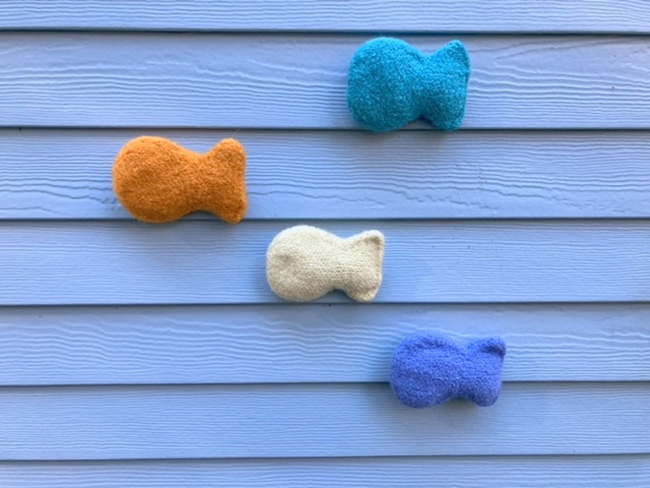
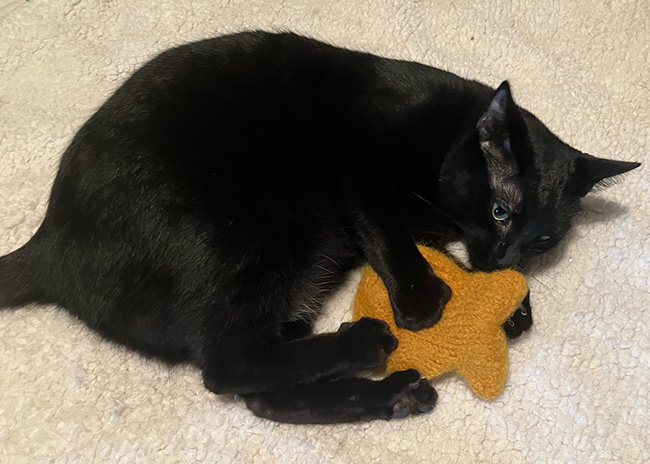
Cheddar is a goldfish cat toy. Yes, that kind of goldfish, the ones Pepperidge Farm makes. He is without ornamentation for kitty safety, felted for durability and filled with catnip. He is a super easy knit, made in one piece and requiring only knowledge of knit and purl, increase and decrease.
Please feel free to attach a stick and string to Cheddar if you would prefer one of those "fishing" type cat toys!
 photos: Frances Gillespie


SIZE
One
FINISHED MEASUREMENTS
With yarn and at gauge given, finished piece measures 5.75 inches/19 cm long
MATERIALS
Yarn
Patons Classic Wool, [100% wool; 194 yd/177m per 3.5oz/100g skein];
![]() MC: Yellow or Teal Chalk or Soft Sprout or Softened Pansy; 1 skein
MC: Yellow or Teal Chalk or Soft Sprout or Softened Pansy; 1 skein
![]() CC (Optional): Black; 1 skein (a yard or so will be fine)
CC (Optional): Black; 1 skein (a yard or so will be fine)
Yarn Characteristics
![]() This is a basic 100% wool worsted yarn. One skein will make a whole school of goldfish (about six). Other similar yarns will work, but do not use superwash wool; please swatch and test felt a sample prior to knitting your goldfish.
This is a basic 100% wool worsted yarn. One skein will make a whole school of goldfish (about six). Other similar yarns will work, but do not use superwash wool; please swatch and test felt a sample prior to knitting your goldfish.
Recommended needle size
[always use a needle size that gives you the gauge listed below - every knitter's gauge is unique]
![]() US #9/5.5mm needles for working flat
US #9/5.5mm needles for working flat
Notions
![]() darning needle
darning needle
![]() sewing needle
sewing needle
![]() matching thread
matching thread
![]() catnip (5-10 g)
catnip (5-10 g)
GAUGE
Gauge is not critical but should be loose to allow for shrinkage during felting. Sample gauge pre-felting was 14 sts/18 rows = 4 inches/10cm using single strand of Patons Classic Wool.
PATTERN NOTES
[Knitty's list of standard abbreviations and techniques can be found here.]
LLI, RLI: The purl rows call for knitwise increases; since Cheddar is felted, the type of increase you use doesn't matter. The knitwise ones are a little simpler, so stick with those!
DIRECTIONS
You will begin at the tail end and work in stockinette.
Using MC and your preferred method, CO 17 sts.
Row 1 [RS]: K
Row 2 [WS]: P
Row 3: K1, k2tog, k to last 3 st, k2tog, k1. 2 sts decreased.
Row 4: Purl.
Rows 5-10: Repeat Rows 3-4 three more times. 9 sts.
Row 11: K1, RLI, k to last 2 sts, LLI, k1. 2 sts increased.
Row 12: Purl.
Rows 13-16: Repeat Rows 11-12 two more times. 15 sts.
Row 17: Knit.
Row 18: P1, RLI, p to last 2 sts, LLI, p1. 17 sts.
Rows 19-24: Work 6 rows even in stockinette, starting with a RS/knit row.
Row 25: K1, k2tog, k to last 3 st, k2tog, k1. 2 sts decreased.
Row 26: P1, p2tog, p to last 3 st, p2tog, p1. 2 sts decreased.
Rows 27-30: Repeat Rows 25-26 2 more times. 5 sts.
You are now at the nose end and will continue, working in nose-to-tail direction to make Cheddar's second half.
Row 31: Knit.
Row 32: P1, RLI, p to last 2 sts, LLI, p1. 2 sts increased.
Row 33: K1, RLI, k to last 2 sts, LLI, k1. 2 sts increased.
Rows 34-37: Repeat Rows 32-33 two more times. 17 sts.
Rows 38-43: Work 6 rows even in stockinette, starting with a WS/purl row.
Row 44: P1, p2tog, p to last 3 sts, p2tog, p1. 15 sts.
Row 45-46: Work 2 rows even in stockinette
Row 47: K1, k2tog, k to last 3 sts, k2tog, k1. 2 sts decreased.
Row 48: Purl.
Rows 49-52: Repeat Rows 47-48 two more times. 9 sts.
Row 53: K1, RLI, k to last 2 sts, LLI, k1. 2 sts increased.
Row 54: Purl.
Rows 55-60: Repeat Rows 53-54 3 more times. 17 sts.
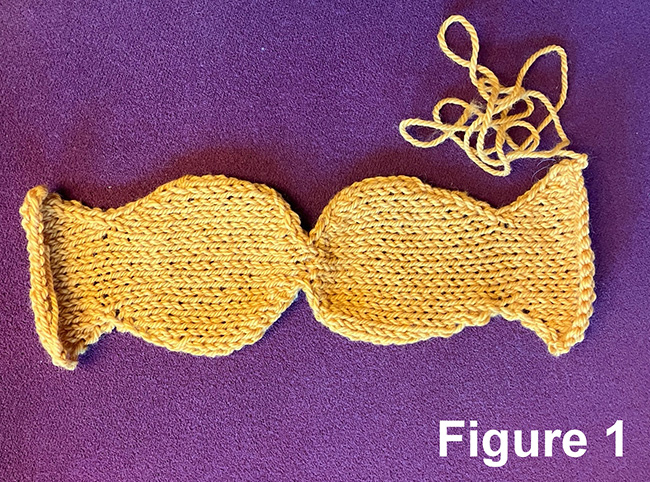
Bind off. Cheddar will now look as in Figure 1.
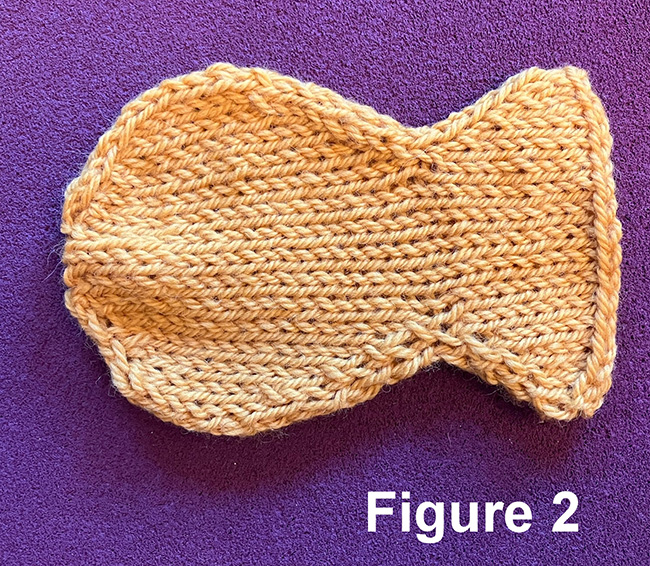
Fold him at the nose and loosely seam around using darning needle and same yarn. Leave a 2" opening at the back of the tail. Cheddar will now look as in Figure 2.
FINISHING
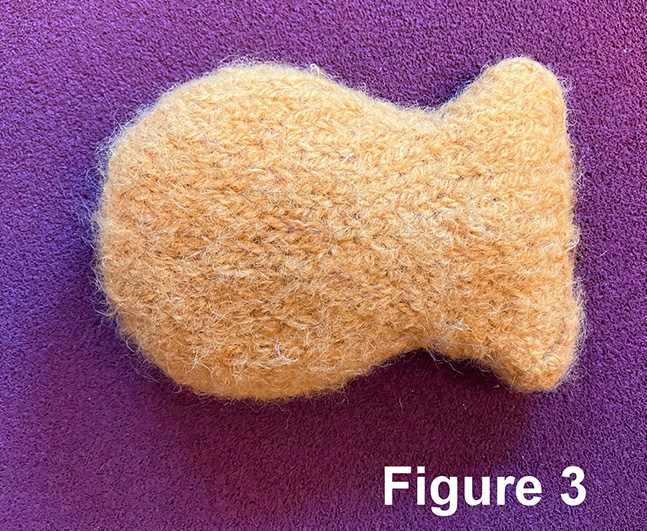
Fasten off all yarn ends. You are now ready to felt your fishy. Place him in a mesh bag in your washing machine; set on extra small load and hot water, and add a tiny pinch of laundry detergent. Start the machine.
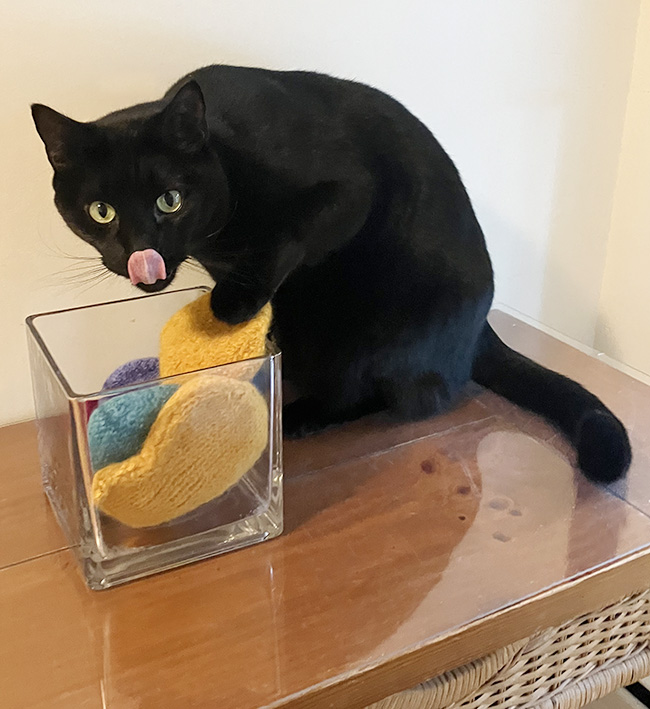
Check every five minutes or so until it reaches the desired level of felting. (Be careful not to let it go through the spin cycle or he may get creases). Remove him from the bag and set him somewhere warm to dry. When he is dry, stuff him firmly with catnip, and sew him shut with matching thread. You may also need to secure any seams with needle and thread that did not completely close during felting. (See Figure 3).
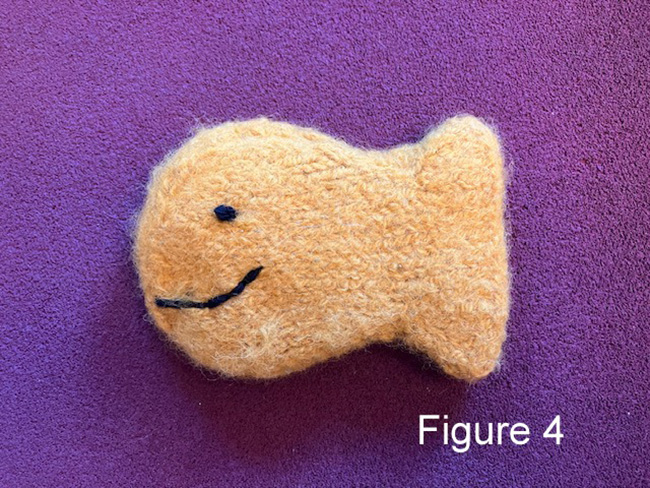
If you would like to add eyes and a mouth – and plan to supervise kitty while playing – you can embroider these on. I used French knots for eyes and running stitch for the mouth using CC. (See Figure 4).
ABOUT THE DESIGNER
 Frances is a longtime knitter who branched out into felting about 20 years ago. She's fascinated with the process of designing the unusual, weird, and unloved critters.
Find her here on Ravelry.
Pattern & images © 2023 Frances Gillespie