Frostbitten, a free knitting pattern from Knitty.com.
INTRODUCTION
Frostbitten
 by Artesanitarium Designs
![]()
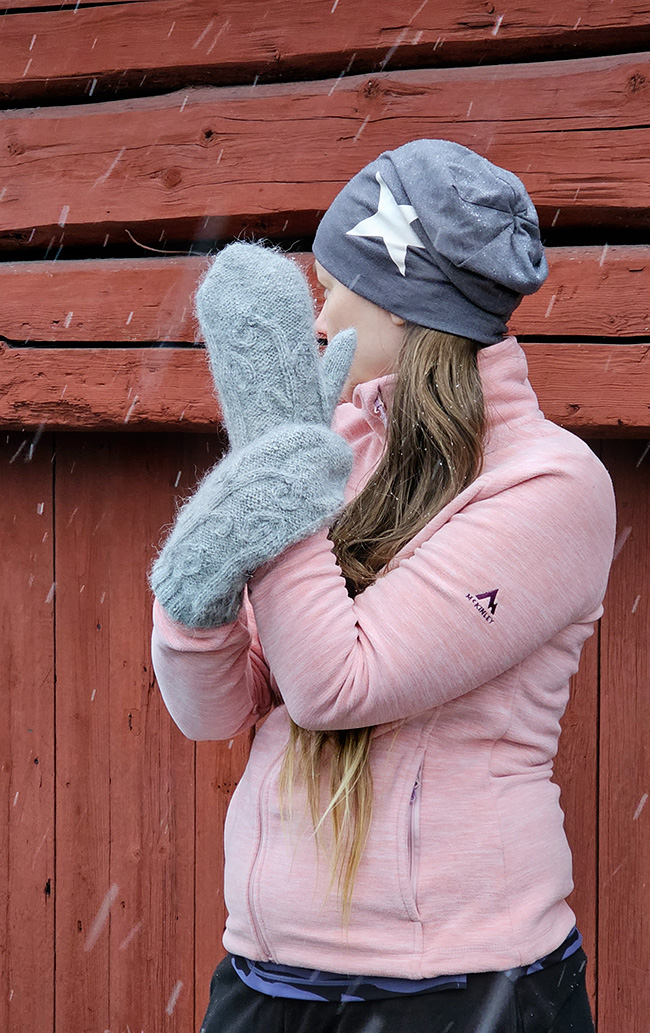
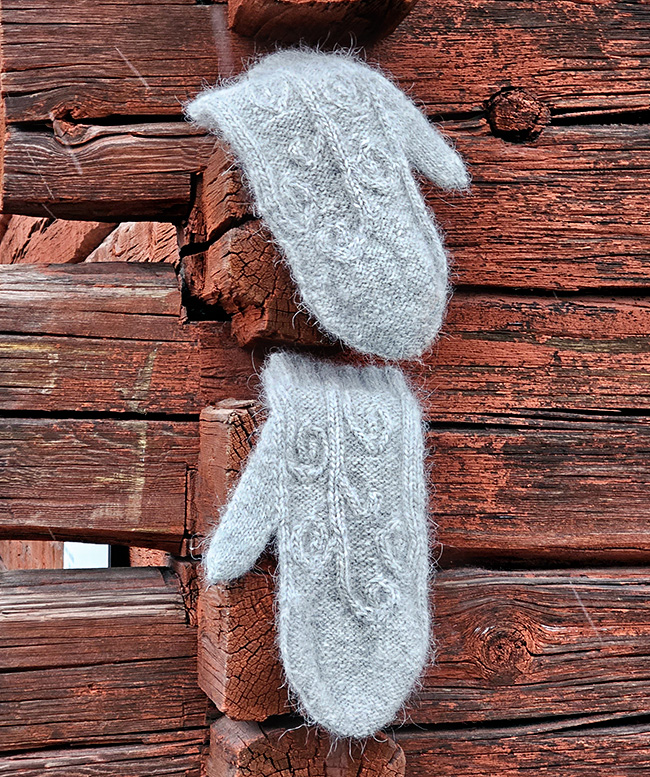
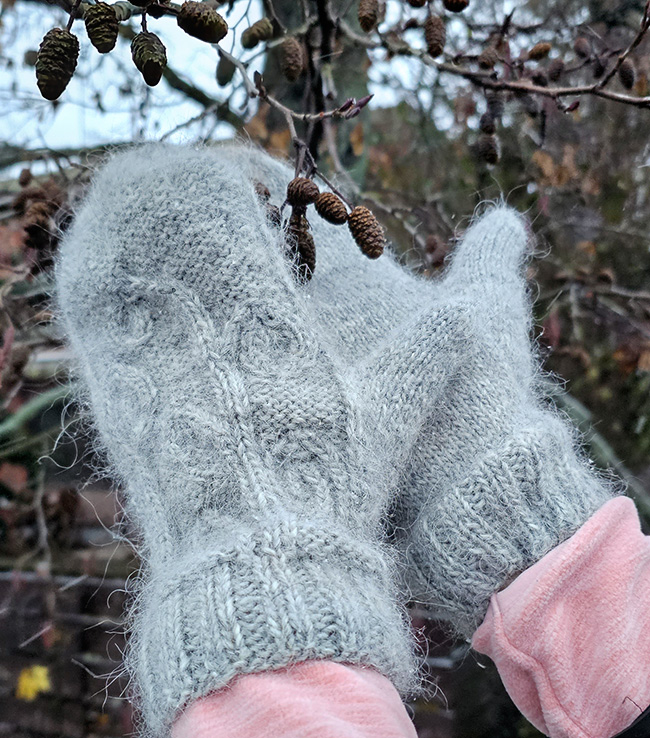
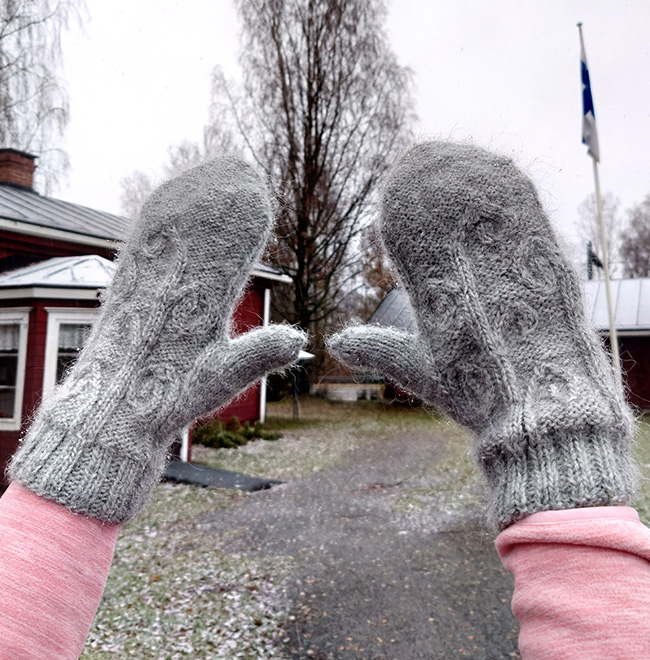
In the north, where I live, the fall comes early, and the frost bites and lays all the flowers to winter rest. The frostbitten flora is beautiful in its own way, and I have been found, several times to admiring and photographing this beauty. The fluffiness of this yarn creates a realistic looking frost on the cable flowers.
 model + photos: Annina
SIZE
Adult S[M, L]
FINISHED MEASUREMENTS
Hand circumference: 8.75[9.5, 10.25] inches/ 22.5[24.5, 26] cm
Hand length, measured from the end of ribbing to the top of fingers: 7.75[8.25, 8.75] inches/ 20[21, 22.5] cm, adjustable to fit
MATERIALS
Yarn
![]() Novita Natural Collection Islandic Wool [100% wool; 98yd/90m per 1.76 oz/50 g skein]; color: 45 Clay; 2[2, 3] skeins
Novita Natural Collection Islandic Wool [100% wool; 98yd/90m per 1.76 oz/50 g skein]; color: 45 Clay; 2[2, 3] skeins
Yarn Characteristics
![]() The sample shown uses an Aran-weight 100% wool single-ply yarn that is fluffy and warm. Choose a singles yarn with a loose twist for more halo; a plied yarn for less halo. Light colored, solid and semisolid yarns are best to show the cables.
The sample shown uses an Aran-weight 100% wool single-ply yarn that is fluffy and warm. Choose a singles yarn with a loose twist for more halo; a plied yarn for less halo. Light colored, solid and semisolid yarns are best to show the cables.
Recommended needle size
[always use a needle size that gives you the gauge listed below - every knitter's gauge is unique]
![]() 1 set US 2.5/3mm needles for small circumference in the round
1 set US 2.5/3mm needles for small circumference in the round
Note: these needles are smaller than you would normally use for this yarn to ensure a dense and windproof fabric
Notions
![]() stitch marker
stitch marker
![]() cable needle
cable needle
![]() yarn needle
yarn needle
![]() stitch holders or
stitch holders or
![]() scrap yarn to hold stitches for the thumb
scrap yarn to hold stitches for the thumb
GAUGE
23 sts/32 rounds = 4 inches/10 cm in stockinette stitch in the round
Note: The recommended needle size for this yarn is US 7-8/4.5-5 mm resulting in a gauge of 18 sts/24 rows.
PATTERN NOTES
[Knitty's list of standard abbreviations and techniques can be found here.]
Construction method: The mittens are worked cuff up with a gusset thumb.
Choose a size approximately .5-1 inch/1-2.5cm larger around than your actual hand.
Dec 5 to 1: Sl 3 sts p-wise. *Lift the second st on the right needle over the first st (this is the middle stitch of the 5) and let it drop off the needle. Return the middle st back to left-hand needle and lift the second st on left-hand needle over the middle st and let it drop of the needle. Slip the middle st back to right-hand needle and rep from * one more time. Purl the remaining st tbl. 4 sts decreased.
Inc 1 to 3: With yarn in back, insert the right-hand needle between the next 2 sts. Wrap yarn around your needle as if to knit, draw up a stitch, leaving it on your right-hand needle. With yarn in back, slip the central stitch to the right-hand needle. Insert the left-hand needle into the stitch you just drew up, wrap your yarn around your left-hand needle and draw up another st and place that onto your right-hand needle; 2 sts increased.
Inc 1 to 5: *With yarn in back, insert the right-hand needle between the next 2 sts. Wrap yarn around your needle and draw up a stitch, leaving it on your right-hand needle. With yarn in back, slip the central stitch to the right-hand needle. Insert the left-hand needle into the stitch you just drew up, wrap your yarn around your left-hand needle and draw up another sts and leave that st on your left-hand needle. Slip the middle sts back to left-hand needle.
Rep from * one more time, leaving the sts on the right-hand needle. 4 sts increased.
Central double decrease purled: Slip 1 st knitwise, slip 1 st purlwise, lift the second st on RH needle over the first one, let it fall off the needle and return the remaining st back to LH needle. Lift the second st on LH needle over the first one, let it fall off the needle. Purl 1 tbl. 2 sts decreased.
1/1 LPT: Slip next stitch to cable needle and place at front of work, p1, then k1 tbl from cable needle.
1/1 RPT: Slip next stitch to cable needle and place at back of work, k1 tbl, then p1 from cable needle.
1/2 LPT: Slip next stitch to cable needle and place at front of work, p2, then k1 tbl from cable needle.
1/2 RPT: Slip next 2 stitches to cable needle and place at back of work, k1 tbl, then p2 from cable needle.
2/1 LPC: Slip next 2 stitches to cable needle and place at front of work, p1, then k2 from cable needle.
2/1 RPC: Slip next stitch to cable needle and place at back of work, k2, then p1 from cable needle.
2/2 LPC: Slip next 2 stitches to cable needle and place at front of work, p2, then k2 from cable needle.
2/2 RPC: Slip next 2 stitches to cable needle and place at back of work, k2, then p2 from cable needle.
CHARTS
DIRECTIONS
CUFF
Using your preferred stretchy method, CO 52[56, 60] sts. Distribute across needles as you prefer and join for working in the round. Note or mark start of round.
Ribbing round: [K2, p2] around.
Work ribbing as set for 16[18, 20] rounds.
Hand
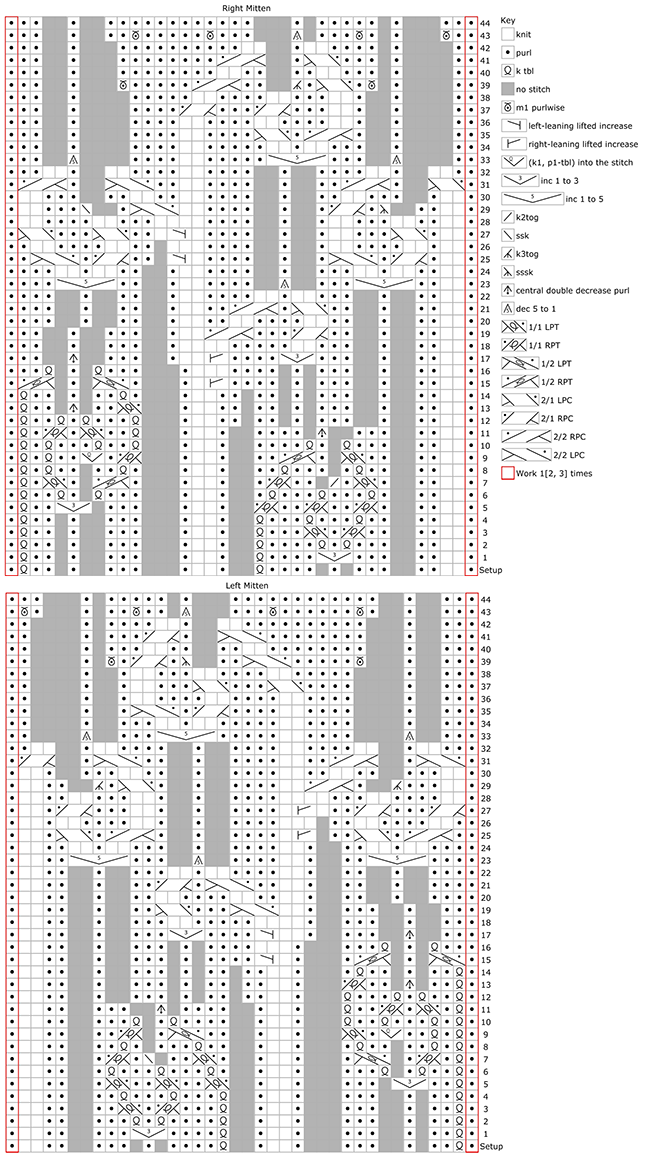
Note: There are two charts, one for right hand, one for left. Work one mitten with each chart. Stitch counts change in the charted area – it starts and ends with 26[28, 30] sts.
Pattern Transition Rounds 1-4: Work Setup row of chart across 26[28, 30] sts, k to end of round.
Pattern Round: Work row 1 of chart as set, k to end.
Gusset, right hand:
Gusset setup round, right hand only: Work chart as set, k1, pm, k1, LLI, k1, RLI, pm, k to end. 4 sts between markers for thumb.
Rounds 2-3: Work chart as set, k to end.
Round 4: Work chart as set, k1, sm, k1, LLI, k to 1 before m, RLI, k1, sm, k to end. 2 sts increased between markers for thumb.
Repeat Rounds 2-4 6[7, 8] more times. 18[20, 22] sts between markers for the thumb.
Repeat Rounds 2-3 one more time.
Next round, separate thumb sts: Work chart as set, k2, slip the next 16[18, 20] sts onto a needle holder, remove m, k to end.
Gusset, left hand:
Gusset setup round, left hand only: Work chart as set, k1 to last 3 sts, pm, k1, LLI, k1, RLI, pm, k1.4 sts between markers for thumb
Rounds 2-3: Work chart as set, k to end.
Round 4: Work chart as set. k to m, k1, LLI, k to 1 before m, RLI, k1, sm, k1. 2 sts increased between markers for thumb.
Repeat Rounds 2-4 6[7, 8] more times. 18[20, 22] sts between markers for the thumb.
Repeat Rounds 2-3 one more time.
Next round, separate thumb sts: Work chart as set, k to m, k1, slip the next 16[18, 20] sts onto a needle holder, remove m, k to end.
Upper hand
Upper hand round: Work next row of chart as set, k to end.
Work as set until you have completed the chart.
Next round: P 26[28, 32] , k to end.
Repeat this round until the mitten reaches the tip of your pinky finger, 5.25[5, 5.75] inches / 14.5[14, 15.5] cm measured from the end of the rib, or if you are adjusting length, about 2[2.75, 2.75] inches/ 5[7, 7] cm short of desired finished length.
Top
Setup round, sizes S and L only: (P2tog, p11[-, 13]) twice, (k2tog, k11[-, 13]) twice. 48[-, 56] sts.
ALL SIZES:
Work 1[2, 1] round(s) even in pattern.
Sizes M[L] only:
Next round, decrease: (P2tog, p5) 4 times, (k2tog, k5) 4 times. 48 sts.
Work 5 rounds even in pattern.
All sizes:
Next round, decrease: (P2tog, p4) 4 times, (k2tog, k4) 4 times. 40 sts.
Work 4 rounds even in pattern.
Next round, decrease: (P2tog, p3) 4 times, (k2tog, k3) 4 times. 32 sts.
Work 3 rounds even in pattern.
Next round, decrease: (P2tog, p2) 4 times, (k2tog, k2) 4 times. 24 sts.
Work 2 rounds even in pattern.
Next round, decrease: (P2tog, p1) 4 times, (k2tog, k1) 4 times. 16 sts.
Work 1 round even in pattern.
Final decrease: (P2tog) 4 times, (k2tog) 4 times. 8 sts.
Cut yarn and pull it through the remaining sts.
Thumb
Return the 16[18, 20] held to needles, distribute them as you prefer and join for working in the round.
Setup round 1: With RS facing, rejoin yarn at start of thumb sts, knit thumb gusset stitches, and pick up and knit 1 st in the gap. 17[19, 21] sts.
Join to work in the round.
Setup round 2: K to last 2 sts, ssk. 16[18, 20] sts.
Knit all rounds until thumb is almost as long as your actual thumb, or approximately 2[2.25, 2.5] inches/ 5[6, 6.5] cm.
Decrease round 1: (K2tog, k 3[4, 5] ) twice, k2tog, k to end. 13[15, 17] sts.
Decrease round 2: (K2tog, k 2[3, 4] ) twice, k2tog, k to end. 10[12, 14] sts.
Decrease round 3: (K2tog, k 1[2, 3] ) twice, k2tog, k to end. 7[9, 11] sts.
Decrease round 4: (K2tog, k 0[1, 2] ) twice, k2tog, k to end. 4[6, 8] sts.
Size S stop here.
Decrease round 5: (K2tog, k -[0, 1] ) twice, k2tog, k to end. -[3, 5] sts.
Cut yarn and pull it through the remaining sts.
FINISHING
Weave in ends, using the tail to close up any holes that remain at the base of the thumb.
To block, soak the mittens in lukewarm water and dry flat.
ABOUT THE DESIGNER
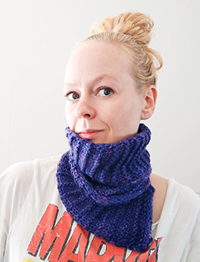 The Artesanitarium is a magical kingdom full of imagination, inspiration and twisted beauty. It is run by Annina the Queen of Cables. She has over 150 designs under her belt, and more are coming. She gets inspired by fantasy, sci-fi, architecture, and mythology. Her designs always have some kind of extra twist in them.
The Artesanitarium is located in the snowy parts of Northern Europe so most of the designs are for what some call "heavier yarn" but in the Artesanitarium, it’s just "yarn". The Queen wants to enable everyone to knit beautiful feminine things, regardless of the thickness of the yarn or needles.
Find her on artesanitarium.com, Ravelry or Instagram.
Pattern & images © 2023 Artesanitarium Designs


