


Wiseknit™: A column that teaches you how to do things you'll find in knitting instructions
INTRODUCTION
Wiseknit™: Practical Knitting Wisdom
by Kate Atherley
One of the wonderful things about knitting is that there are so many different solutions to every problem, so many possible answers to every question. This column aims to expand your knitting knowledge and toolkit with practical solutions and answers to your technical knitting questions and conundrums.
Tubular cast on, Tubular bind off
Editor's note: Starting with this issue, based on reader feedback, we're now presenting tutorials in both video and photo format, with text explanations of each step. You'll find the photos after each video as you work down the tutorial.
The Tubular methods for casting on and binding off are revered: the end results are magically stretchy, and they’re very nice to look at. The edges they make are very subtle, creating an almost edgeless-edge, and they look very much like the ones you see in machine-knit fabrics.
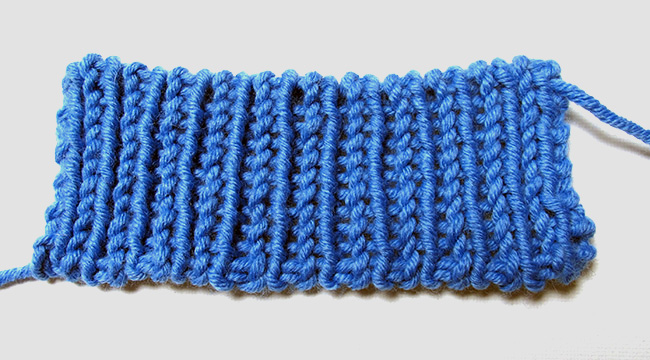
tubular cast on (bottom) and tubular bind off (top) edges
But they’re also a bit complicated.
A big part of the reason is that there’s more than one way to do them. It’s a bit like the provisional cast on: the techniques differ wildly, so wildly that they don’t seem interchangeable.
The other reason things get a bit challenging is that in their standard form, they’re intended only for use with (k1, p1) ribbing. Some of the instructions and techniques you see layer in extra steps to adjust them for other ribbing repeats, which adds to the difficulty.
This column is all about the core methods.
Casting On
There are several ways to achieve this edge.There are some that use waste yarn to set up the stitches. These are good, but fiddly – and require waste yarn.
My preferred method skips a lot of that; you just cast on with the working yarn. I treat it as an interesting variation of the Long Tail method. It’s worth going back to review that, since we’ll be using both the knit and purl stitches.
Note, however, that this can make the edge looser, so it needs to be worked with smaller needles than you’ll use for the project. I tend to go down at least 2 or 3 sizes.
Set yourself up as if you’re doing the Long Tail cast on, with the slingshot hold. Keep the tension on the strands throughout:
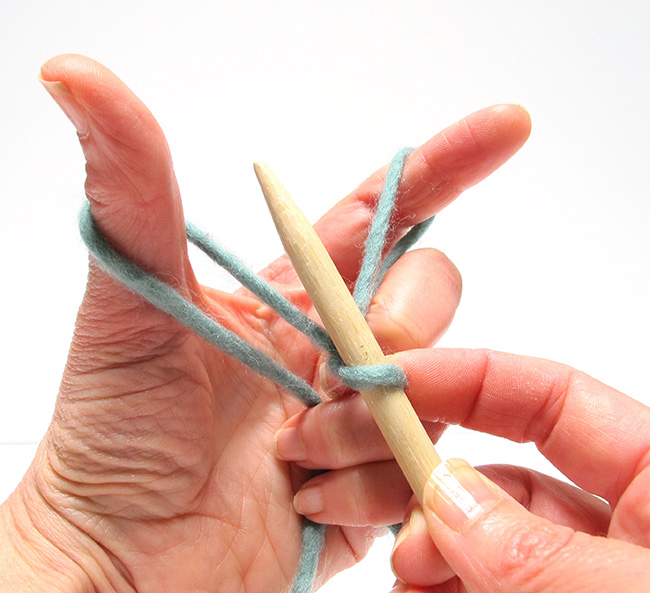
Yes, I do start the long tail cast on with a slip knot. It makes the edge much more even, especially if you’re working in the round. And for the tubular cast on, it’s crucial.
The difference between this and the standard Long Tail method is that instead of working over the “far” strand, you work under the “near” one.
The slip knot will be count as your first stitch, a knit. The next stitch, therefore, needs to be a purl. Watch it in action below:
To make a purl:
And in step-by-step photos:
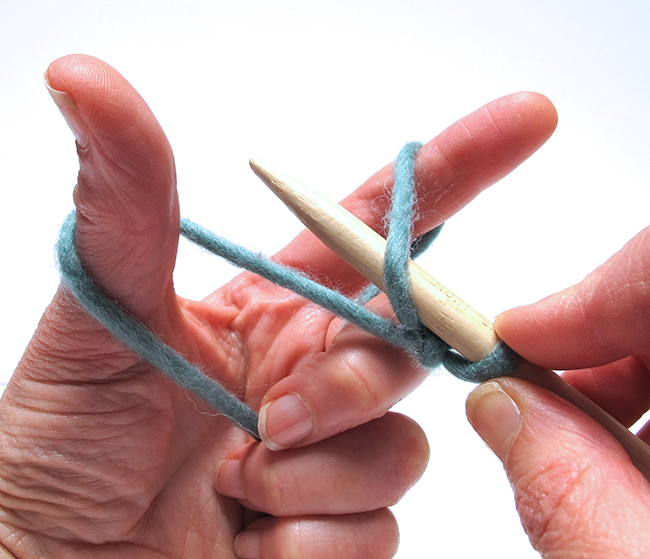
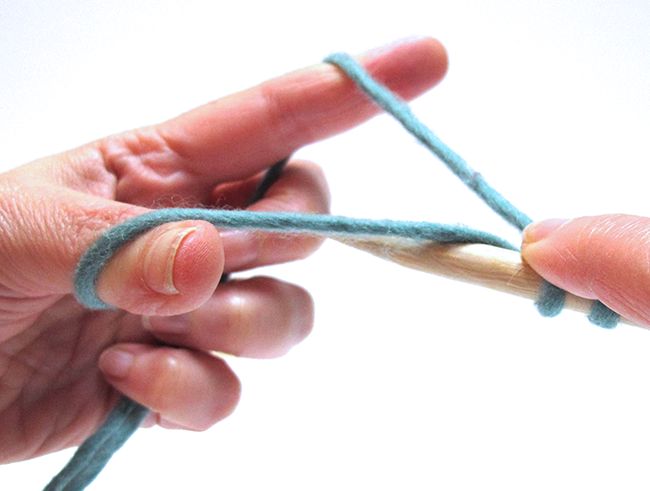
Step 1: Take the needle tip from left to right, over the right-hand strand (the finger strand) to catch it so it’s draped over your needle from left to right.
Step 2: Continue moving the needle tip to the left, under the thumb strand, so it is also draped over the needle from left to right.
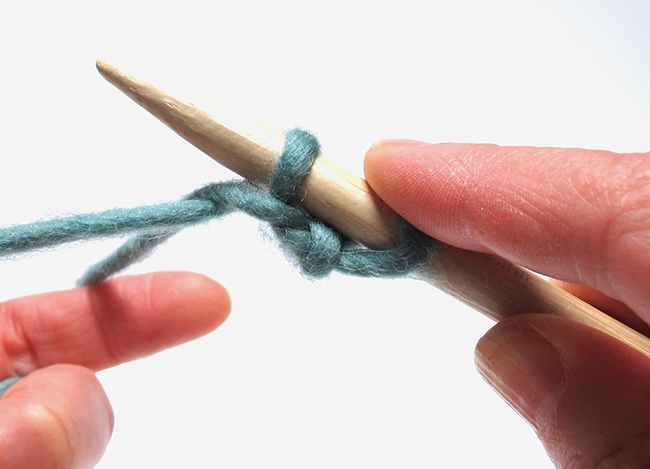
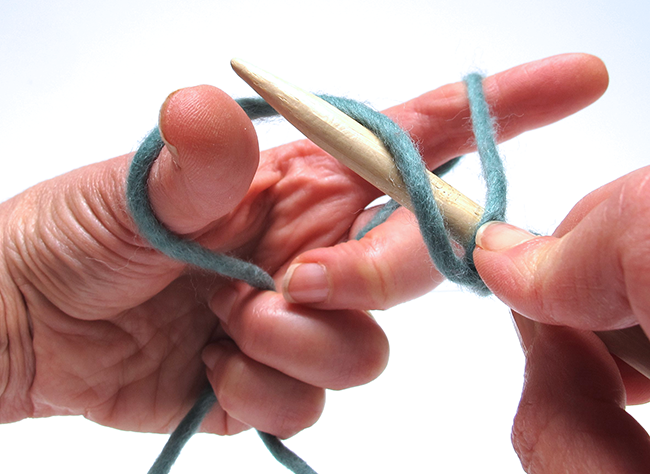
Step 3: Bring the needle tip up a bit so that the thumb strand travels with you, and swing the needle back to the right, under the finger strand.
Let the twist where the two strands cross sit at the bottom of the needle, and use your right index finger to hold the stitches in place. It’s important to keep the stitches under a bit of tension. You don’t want them to twist or slip around the needle.
To make a knit:
And in step-by-step photos:
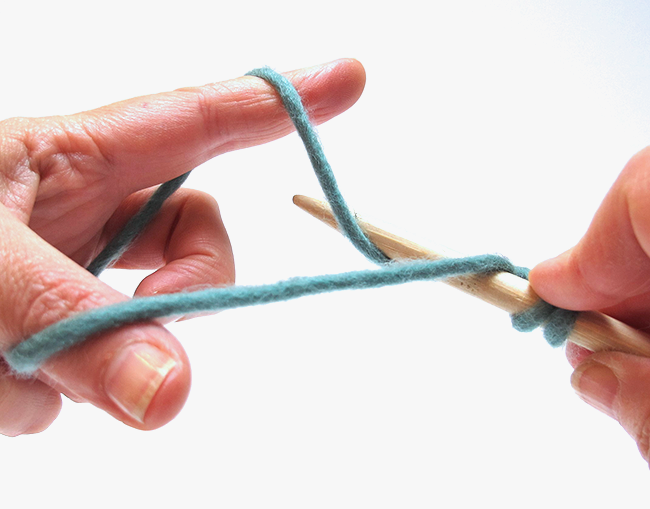
Step 2: Swing the needle tip over the finger strand from left to right, and scoop it up.
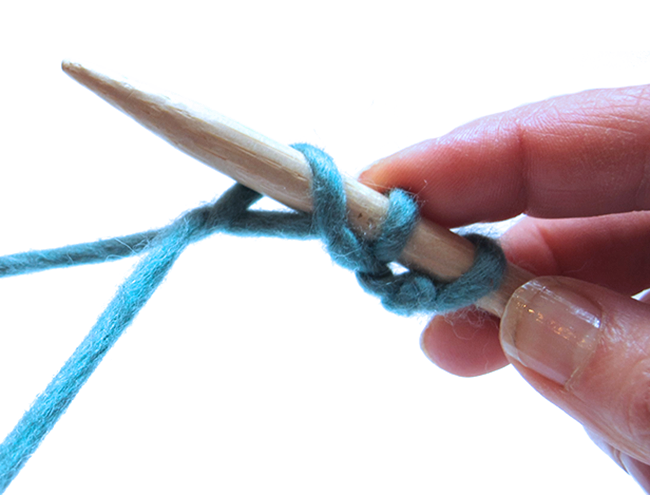
Once again, let the twist where the two strands cross sit at the bottom of the needle, and use your right index finger to hold the stitches in place.
Repeat, alternating purl and knit stitches, until you have the number you need, ending with a purl stitch.
Turn your work, holding the yarns in place.
Work two foundation rows, as follows:
Row 1 (RS): Twist the two yarns around each other, and knit the first stitch; *slip 1 purlwise wyif, k1; repeat from * to last st, slip 1 purlwise wyif. Turn.
Row 2 (WS): *K1, slip 1 purlwise wyif; repeat from * to end.
And then you’re ready to go.
Whether working flat or in the round, change to your working needle size and begin, working (k1, p1) ribbing across. If working in the round, make the join after this first round of ribbing.
Binding Off
This way of working the Tubular bind off for (k1, p1) ribbing is a sewn method, requiring a yarn needle. Cut the yarn, leaving a tail about 4 times the width of the row and thread your yarn needle.If you’re familiar with grafting, you can do it this way:
Divide the stitches across two knitting needles held parallel, slipping the knit stitches on the one at the front, and the purl stitches onto the other, held at the back.
Then graft them together, using the standard stockinette stitch graft.
But you can actually do the graft without having to move the stitches onto separate needles, and here’s how:
Make sure that the first stitch you are to work is a knit. Thread the yarn onto your yarn needle, and work into the stitches as follows:
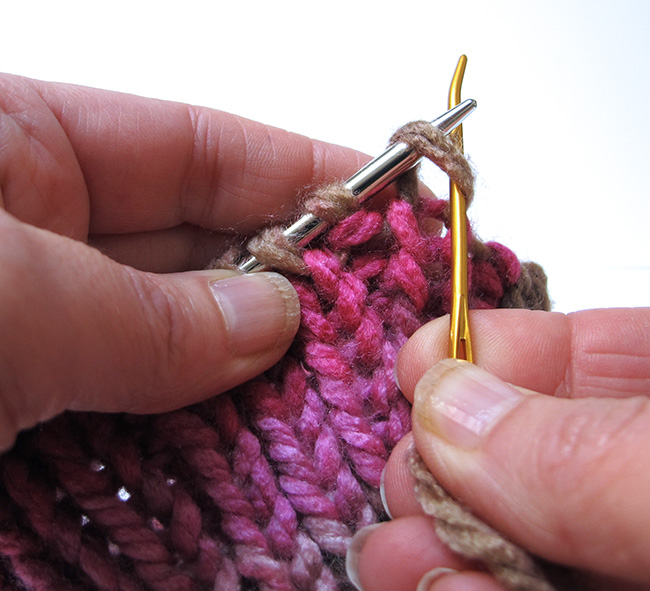
Step 1: Put the tip of the yarn needle into the first stitch (a knit), as if to knit (from left to right), pull the yarn through and let that stitch slip off the knitting needle.
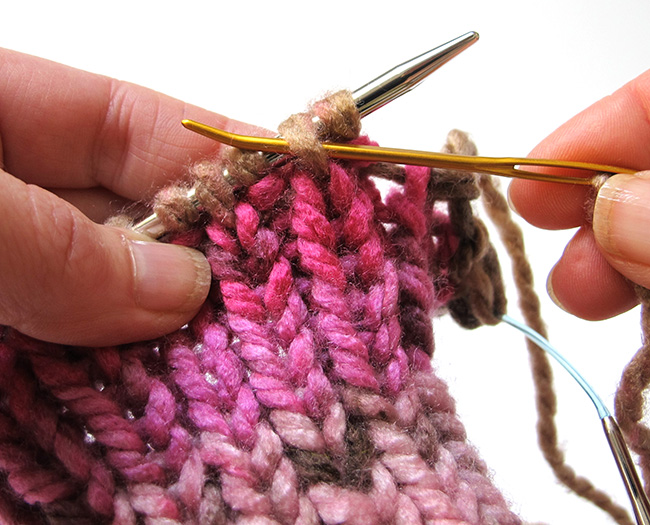
Step 2: Put the tip of the yarn needle into the next knit stitch (not the next stitch, but two over), as if to purl (from right to left), and pull the yarn through. This stitch stays on the knitting needle.

Step 3: Put the tip of the yarn needle into the first stitch on the needle (a purl), as if to purl (from right to left), and let that stitch slip off the knitting needle.
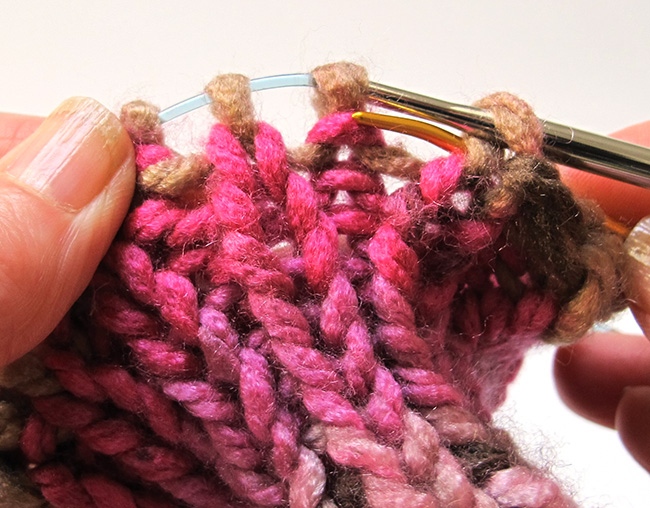
Step 4: Put the tip of the yarn needle into the next purl stitch (not the next stitch, but two over), knitwise (from left to right), coming from the back. This stitch stays on the knitting needle.
Repeat Steps 1-4, gently adjusting the tension of your yarn until only two stitches remain. Work Steps 1 and 3 only, to finish. If there’s excess yarn, cut it to leave about a 4 inch/10 cm tail. If you’re working in the round, use the tail to close up the gap between the start and end of the round.
ABOUT THE AUTHOR
 Kate Atherley is Knitty's Managing Technical Editor and a knitting author and teacher. She’s also the co-founder and publisher of Digits & Threads, an independent, member-supported online magazine about Canadian fibre- and textile arts, crafts and industry. The combination of her university degree in mathematics, professional experience in software development and usability, and training in garment and fashion design give her a unique perspective.
You can see more of her work at kateatherley.com, and on Ravelry.
Pattern & images © 2022 Kate Atherley.